Payment methods
In the Gambio Admin of your shop, under Modules > Payment methods, various payment methods and interface modules for payment service providers are available to you.
The Payment methods area is divided into Gambio Payment Hub and Other. Under Gambio Payment Hub the Hub-based payment modules are displayed, under Other the modules provided by the shop itself.
Note
For the interface modules of the payment service providers you need an account with the respective payment service provider.
Gambio Payment Hub
The Gambio Payment Hub provides various payment methods via a shop-internal interface to a server. The payment modules are provided and maintained at a central location. In this way, the most up-to-date modules can always be used without the shop itself having to be updated.
Hub registration
To use the Gambio Payment Hub, the shop must be registered with the Hub. You can carry out the registration in the Gambio Admin under Gambio Hub > Account.
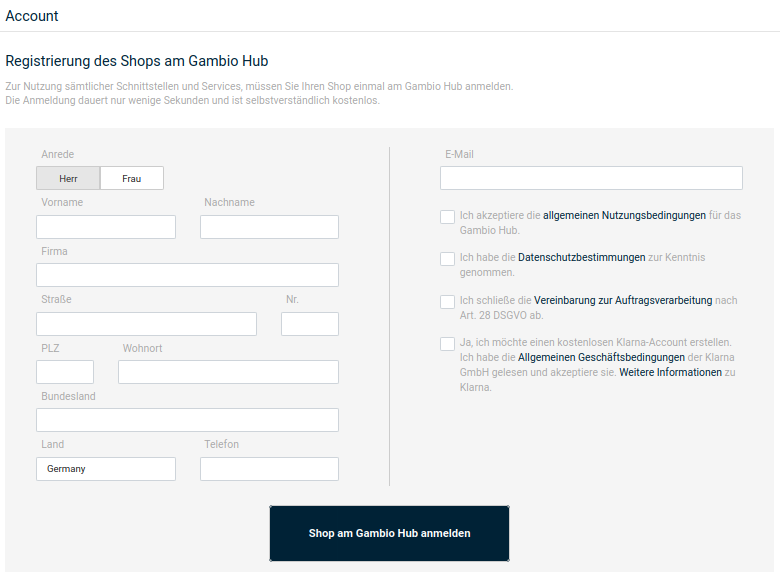
Installing and setting up modules
To use a payment method, move the mouse pointer into the respective row and click on the Install button. The module is installed and you are taken directly to the setup form of the respective module. From the overview, this can be opened with a click on the pencil icon.
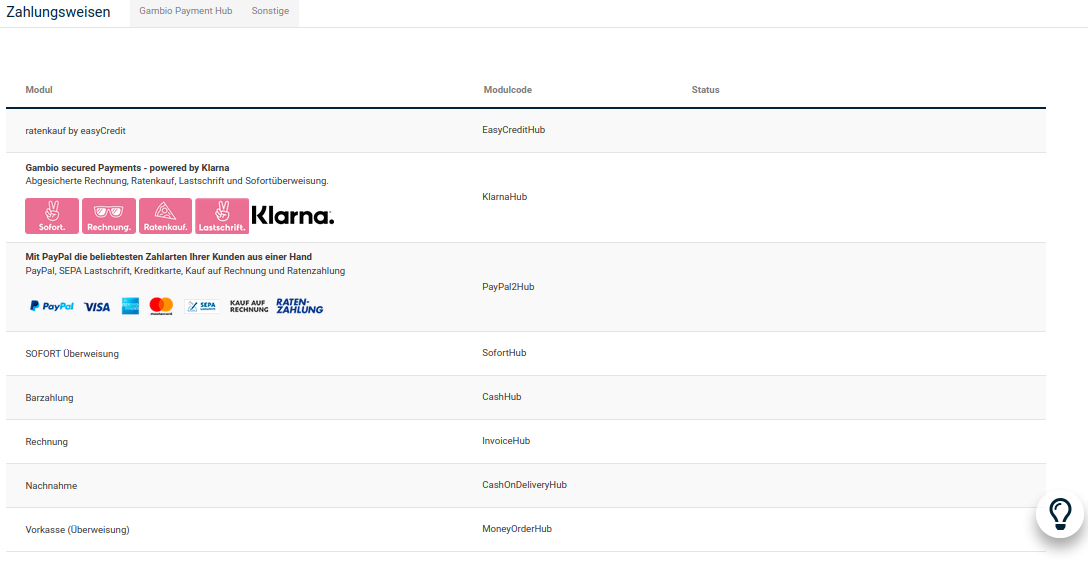
Note
If no registration with the Gambio Hub has been carried out yet, the registration page is displayed at this point.
SOFORT Überweisung (SofortHub)
Install the SOFORT Überweisung module to enable payments via SOFORT Überweisung in the shop.
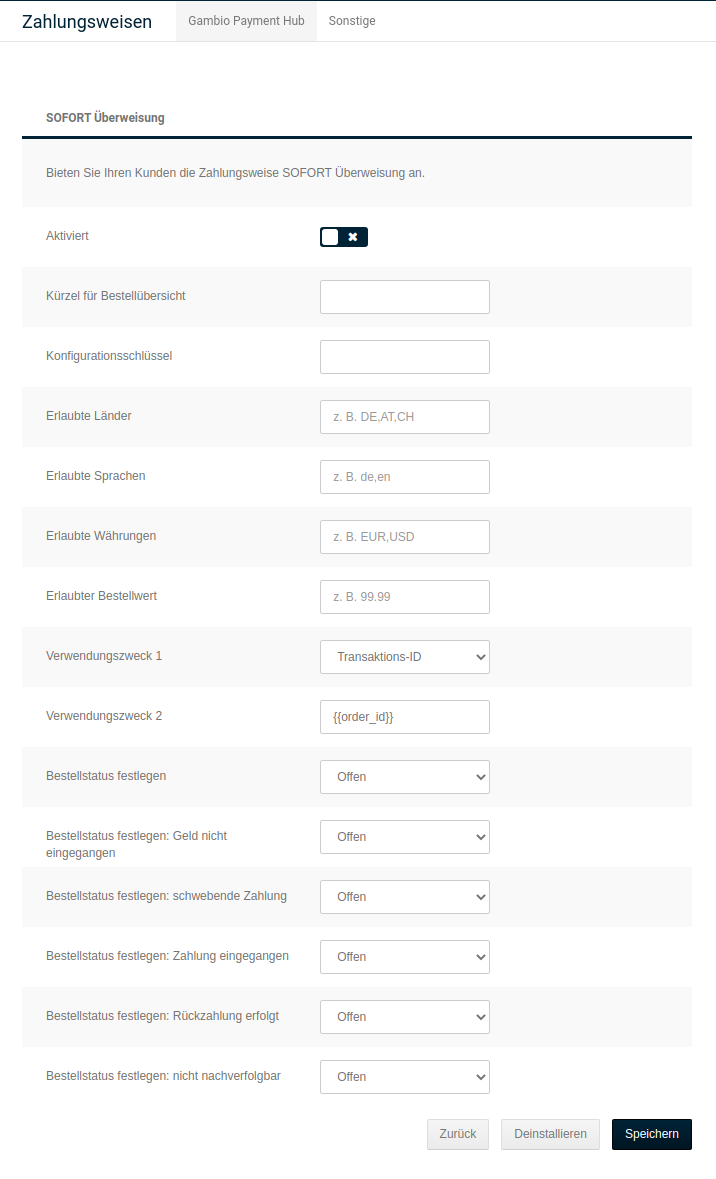
The following settings are available:
| Field name | Description |
|---|---|
| Activated | Set the checkmark to display the module during checkout |
| Abbreviation for order overview | Abbreviation in the Payment column under Orders > Orders |
| Allowed countries | Allow orders for these countries, specified as a two-digit ISO code, separated by commas (e.g. DE,AT,CH) |
| Allowed languages | orders can only be placed in these languages, comma-separated language codes (e.g. de,en) |
| Allowed currencies | orders can only be placed in these currencies, separated by commas (e.g. EUR,USD) |
| Allowed order value | Maximum order value. Orders above this amount are not allowed. |
| Configuration key | Configuration key from your project settings on SOFORT.com |
| Set order status | Set orders placed with this module to this status |
| Set order status: money not received | Set orders without receipt of payment to this status |
| Set order status: pending payment | Set orders with a pending payment status to this status |
| Set order status: payment received | Set orders to this status upon receipt of payment |
| Set order status: refund completed | Set orders to this status upon refund |
| Set order status: not traceable | Set orders to this status if the payment history cannot be traced (due to the lack of a merchant account with Deutsche Handelsbank). |
| Payment reference 1 | Content of the first line of the payment reference |
| Payment reference 2 | Content of the second line of the payment reference of the bank transfer. |
Possible placeholders for Payment reference 2:
- {{order_id}}
- {{order_date}}
- {{customer_id}}
- {{customer_name}}
- {{customer_company}}
- {{transaction_id}}
| Field name | Description |
|---|---|
| Buyer protection activated | outdated function, must be deactivated |
Attention
The SOFORT Überweisung buyer protection is no longer available on the part of SOFORT. The checkmark must not be set, otherwise errors will occur in the communication with SOFORT.
The setting will be removed in an upcoming version.
Confirm the settings you have made with a click on Save. Via Back you can leave the setup form without applying the changes. Via Uninstall you can uninstall the payment method.
Note
If you no longer want to offer a payment method, it can also be removed from the checkout by removing the Activated checkmark.
Cash payment (CashHub)
Install the Cash payment module to enable cash payments upon self-collection in the shop.
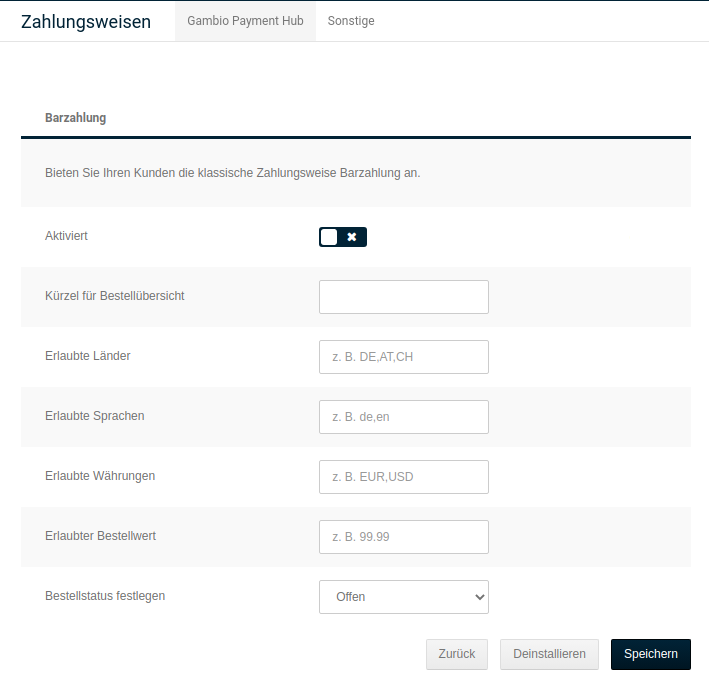
The following settings are available:
| Field name | Description |
|---|---|
| Activated | Set the checkmark to display the module during checkout |
| Abbreviation for order overview | Abbreviation in the Payment column under Orders > Orders |
| Allowed countries | Allow orders for these countries, specified as a two-digit ISO code, separated by commas (e.g. DE,AT,CH) |
| Allowed languages | orders can only be placed in these languages, comma-separated language codes (e.g. de,en) |
| Allowed currencies | orders can only be placed in these currencies, separated by commas (e.g. EUR,USD) |
| Allowed order value | Allowed order value |
| Set order status | Set orders placed with this module to this status |
Confirm the settings you have made with a click on Save. Via Back you can leave the setup form without applying the changes. Via Uninstall you can uninstall the payment method.
Attention
The payment method is only available in the checkout if Self-collection has been installed as a shipping method and selected by the customer.
Note
If you no longer want to offer a payment method, it can also be removed from the checkout by removing the Activated checkmark.
Invoice (InvoiceHub)
Install the Invoice module to enable payments by invoice in the shop.
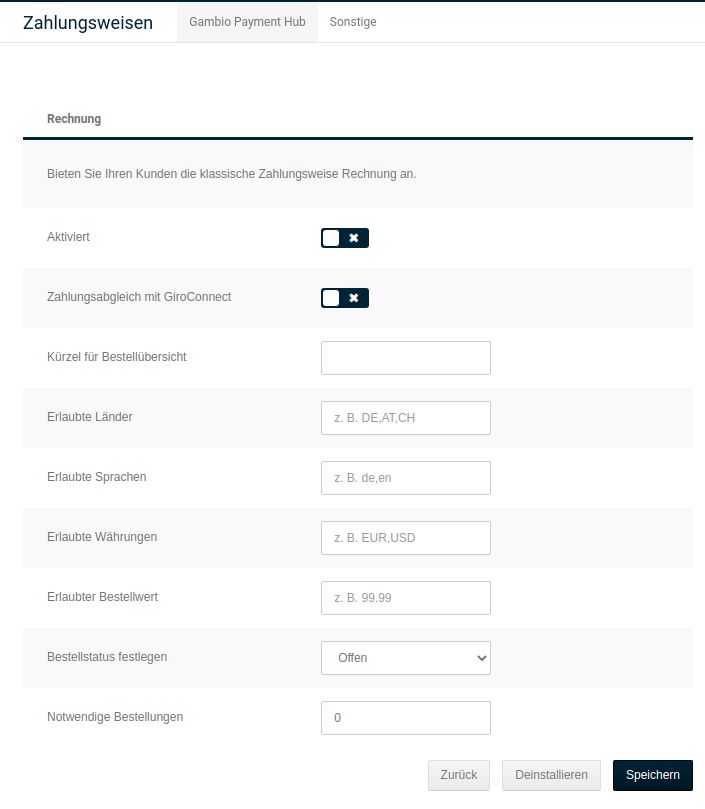
The following settings are available:
| Field name | Description |
|---|---|
| Activated | Set the checkmark to display the module during checkout |
| Payment reconciliation with GiroConnect | Here you can activate or deactivate payment reconciliation via GiroConnect |
| Abbreviation for order overview | Abbreviation in the Payment column under Orders > Orders |
| Allowed countries | Allow orders for these countries, specified as a two-digit ISO code, separated by commas (e.g. DE,AT,CH) |
| Allowed languages | orders can only be placed in these languages, comma-separated language codes (e.g. de,en) |
| Allowed currencies | orders can only be placed in these currencies, separated by commas (e.g. EUR,USD) |
| Allowed order value | Allowed order value |
| Set order status | Set orders placed with this module to this status |
Confirm the settings you have made with a click on Save. Via Back you can leave the setup form without applying the changes. Via Uninstall you can uninstall the payment method.
Note
If you no longer want to offer a payment method, it can also be removed from the checkout by removing the Activated checkmark.
Cash on delivery (CashOnDeliveryHub)
Install the Cash on delivery module to enable payments by cash on delivery in the shop.
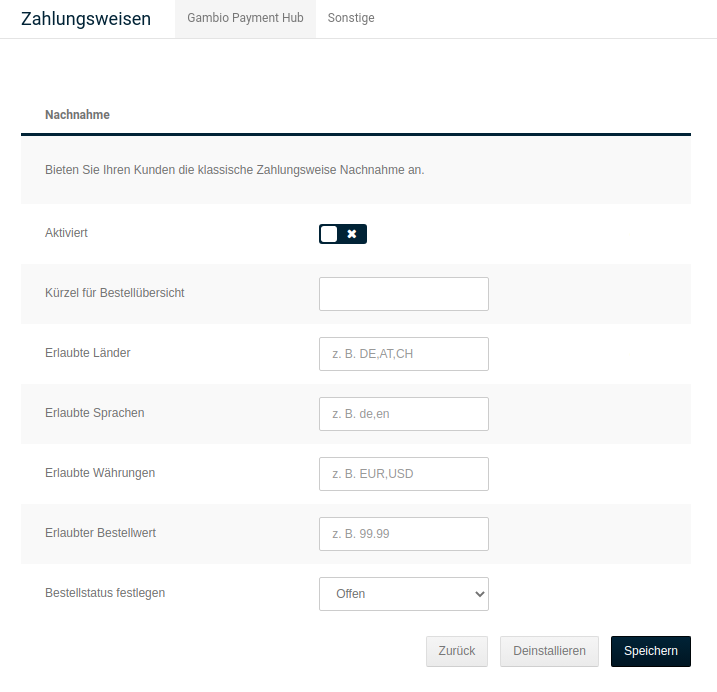
The following settings are available:
| Field name | Description |
|---|---|
| Activated | Set the checkmark to display the module during checkout |
| Abbreviation for order overview | Abbreviation in the Payment column under Orders > Orders |
| Allowed countries | Allow orders for these countries, specified as a two-digit ISO code, separated by commas (e.g. DE,AT,CH) |
| Allowed languages | orders can only be placed in these languages, comma-separated language codes (e.g. de,en) |
| Allowed currencies | orders can only be placed in these currencies, separated by commas (e.g. EUR,USD) |
| Allowed order value | Allowed maximum order value |
| Set order status | Set orders placed with this module to this status |
Confirm the settings you have made with a click on Save. Via Back you can leave the setup form without applying the changes. Via Uninstall you can uninstall the payment method.
Note
If you no longer want to offer a payment method, it can also be removed from the checkout by removing the Activated checkmark.
Prepayment (bank transfer) (MoneyOrderHub)
Install the Prepayment (bank transfer) module to enable payments by prepayment in the shop.
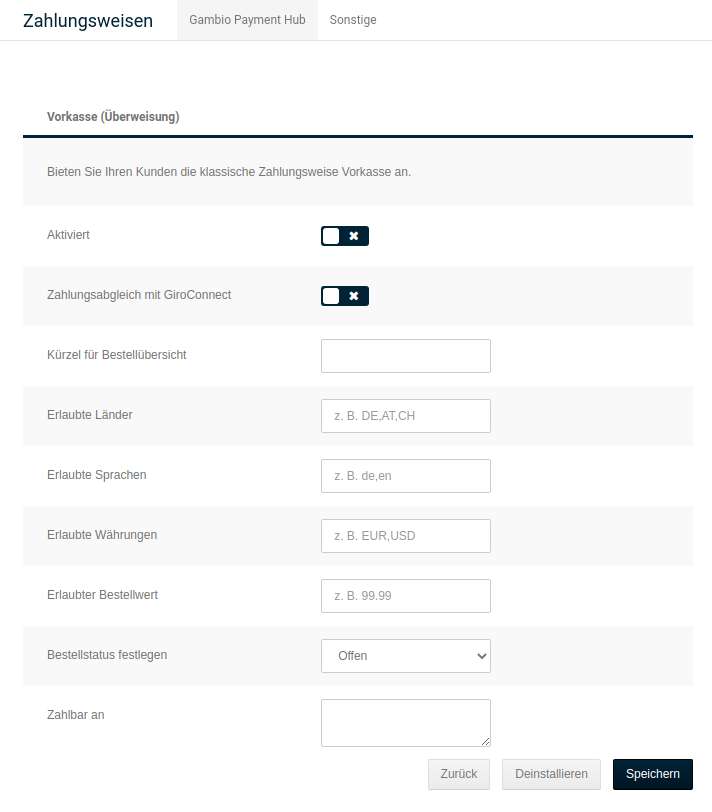
The following settings are available:
| Field name | Description |
|---|---|
| Activated | Set the checkmark to display the module during checkout |
| Payment reconciliation with GiroConnect | Set the checkmark to activate payment reconciliation with GiroConnect |
| Abbreviation for order overview | Abbreviation in the Payment column under Orders > Orders |
| Allowed countries | Allow orders for these countries, specified as a two-digit ISO code, separated by commas (e.g. DE,AT,CH) |
| Allowed languages | orders can only be placed in these languages, comma-separated language codes (e.g. de,en) |
| Allowed currencies | orders can only be placed in these currencies, separated by commas (e.g. EUR,USD) |
| Allowed order value | Allowed order value |
| Set order status | Set orders placed with this module to this status |
| Payable to | To whom should payments be made? |
Confirm the settings you have made with a click on Save. Via Back you can leave the setup form without applying the changes. Via Uninstall you can uninstall the payment method.
Note
If you no longer want to offer a payment method, it can also be removed from the checkout by removing the Activated checkmark.
GiroConnect
Introduction
GiroConnect is an extension for the Prepayment module (MoneyOrderHub). With GiroConnect, orders received via the prepayment module can be automatically reconciled with the corresponding incoming payments on the bank account based on amount, name and order number, and the order status can be changed automatically.
Installation
GiroConnect is activated via the Prepayment (MoneyOrderHub) and Invoice (InvoiceHub) modules of the Gambio Payment Hub. The modules can be installed in the Gambio Admin under Modules > Payment methods in the Gambio Payment Hub tab. Please note that GiroConnect is only available in shops with a current Hub-Connector. The Hub-Connector can be updated under Toolbox > AutoUpdater or via the menu item Gambio Store in the Gambio Admin.

Click on the Install button to carry out the installation of the module.
Registration and configuration
After activating GiroConnect, the registration procedure can be started.
Your data
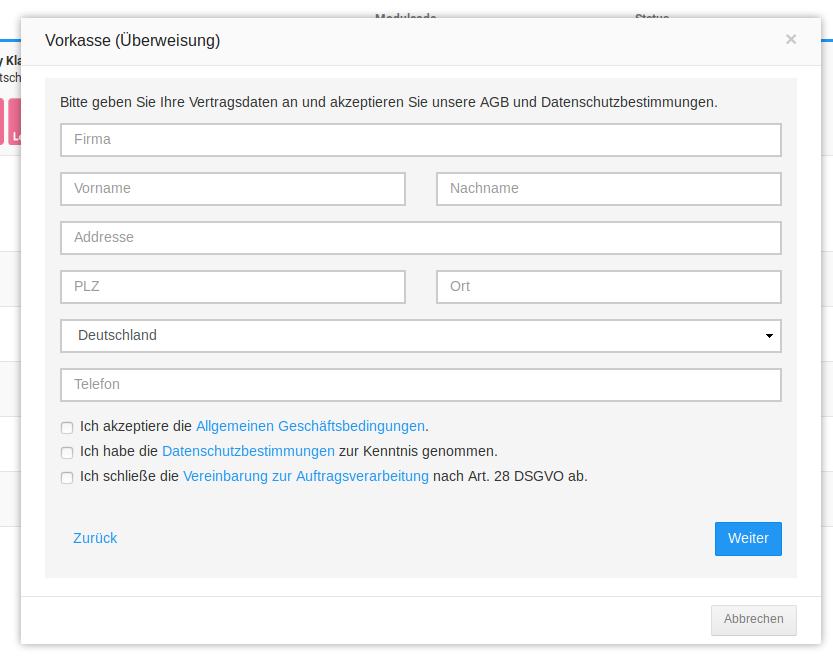
First, the address data of the shop operator is requested. Fill in the fields as indicated and set the checkmarks in each of the three boxes at the bottom of the form to confirm the respective statement. By clicking on the blue link you can display the associated document.
Confirm by clicking on Next. Via Cancel you can leave the registration process again. With Back you get to the previous step in each case.
Shop
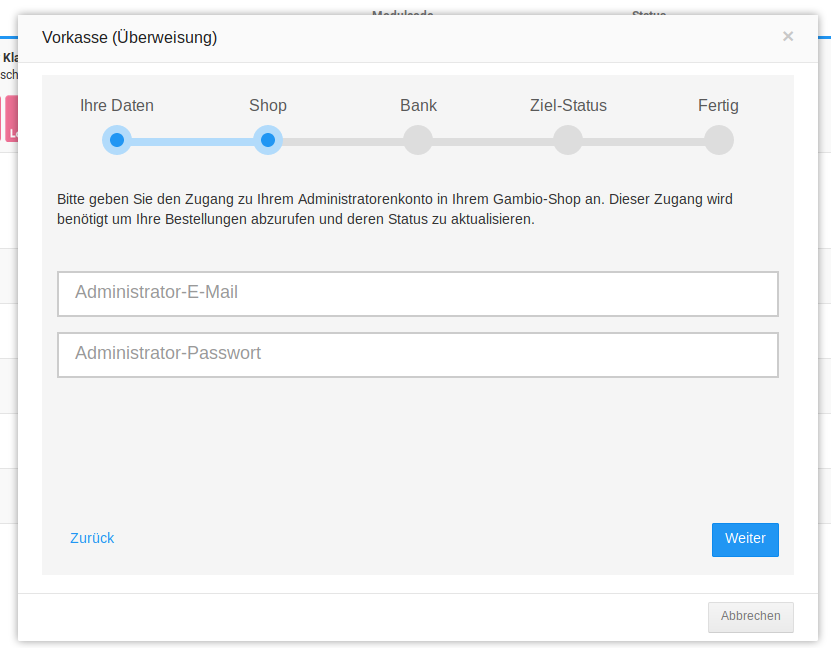
Now the login of the administrator account of the Gambio shop must be specified. This data is required so that the GiroConnect service can read the shop's order data and update the order status. Enter the e-mail address used for the admin account and the associated password before confirming via Next.
Bank
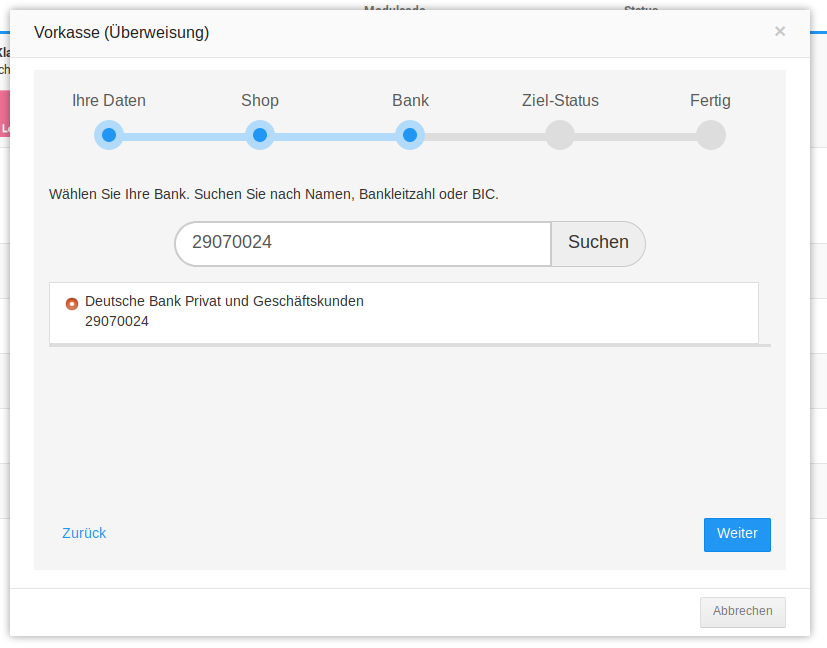
In this tab, the bank can be selected. You can search by name, bank code or BIC. The bank is then listed below the search field.
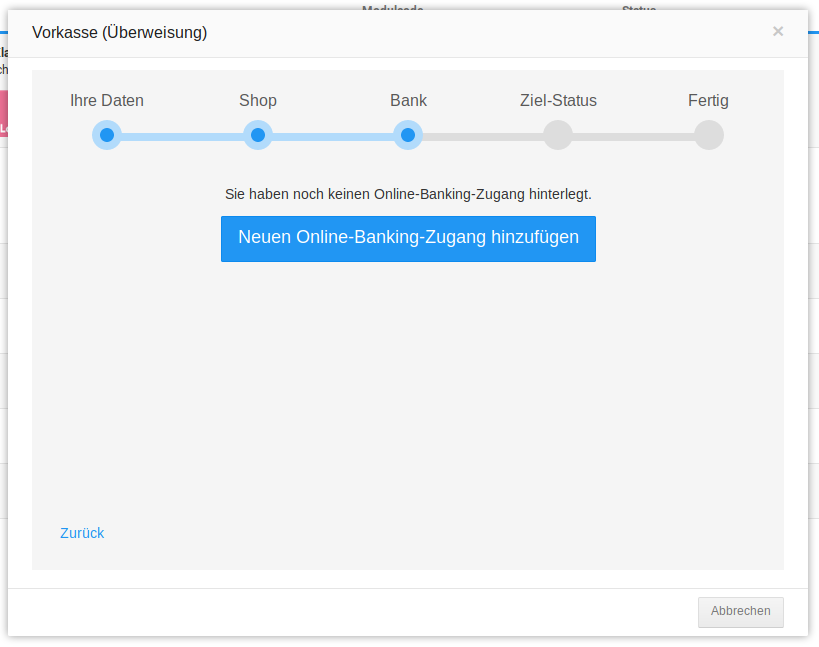
Then the bank account is stored. First click on Add new online banking access and then on Open form.
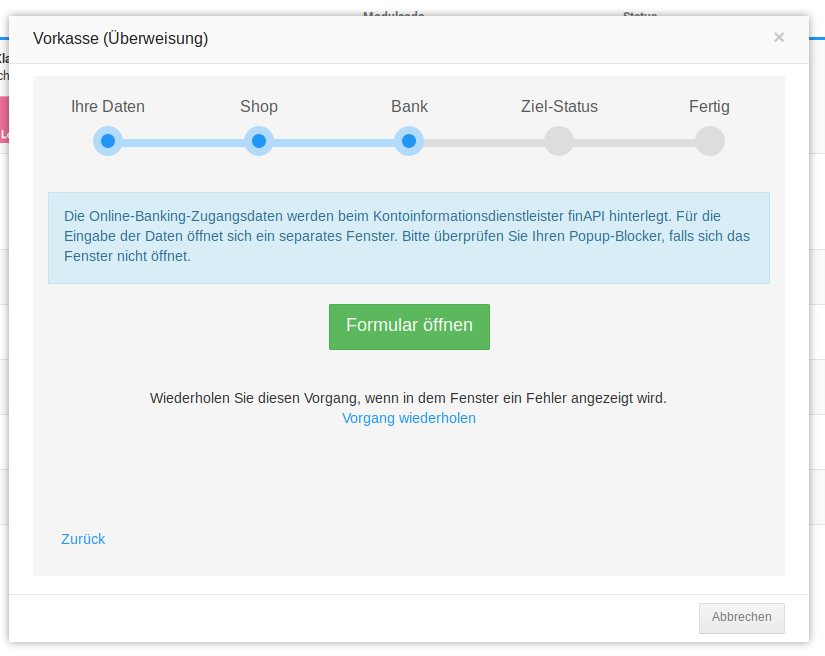
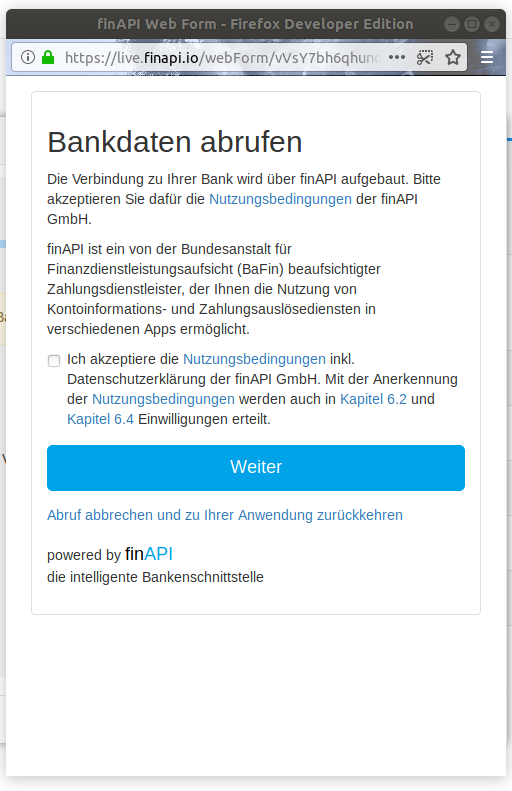
A new window opens through which the bank data can be retrieved. In the first step, the terms of use are accepted.
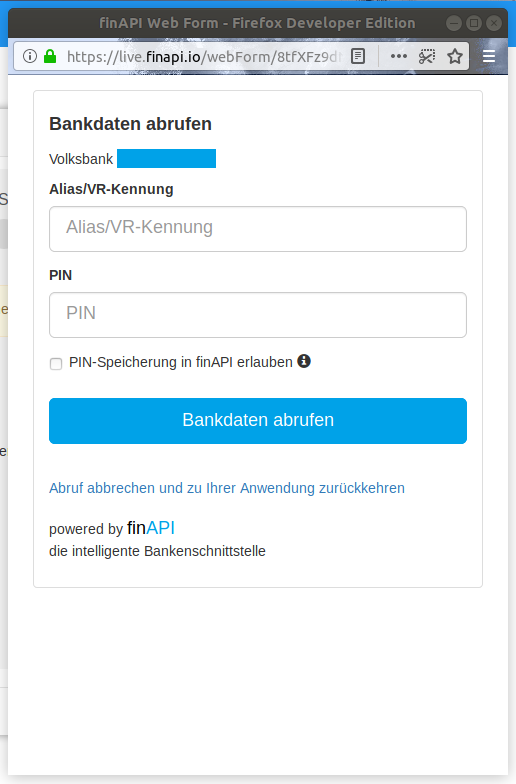
Then enter the access data, which can differ in type (account number/user) depending on the bank.
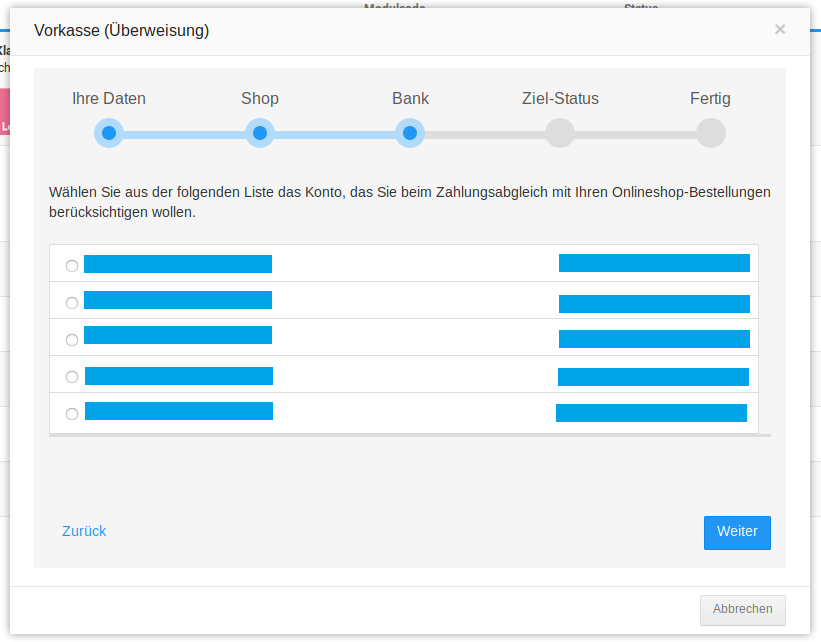
The window closes again and you return to the registration window, in which the successful entry of the bank details is confirmed. Clicking on Next takes you to the selection of the account.
Target status
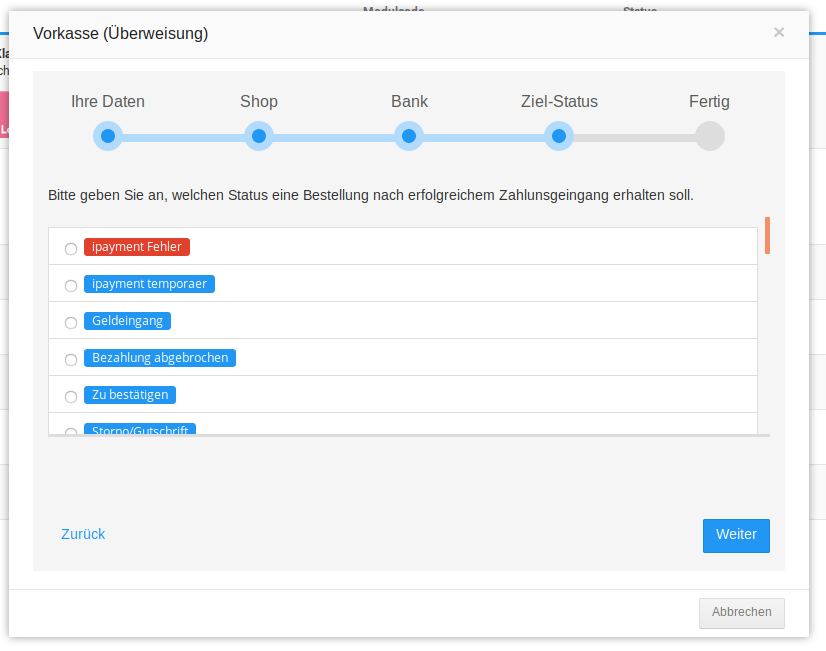
The target status area is used to define which order status should be set when a payment has been received. Any order status available in the shop can be selected. If required, you can also create your own status for this in advance.
Completion

After completing the configuration, the payment modules Prepayment (bank transfer) and Invoice are marked with the icon for GiroConnect.
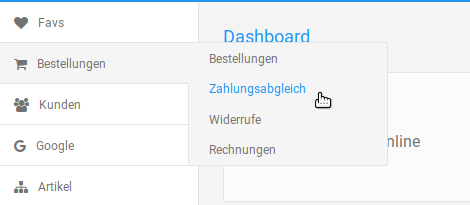
The entry Payment reconciliation is now available in the Orders menu of the Gambio Admin.
Payment reconciliation
When calling up the menu item Orders > Payment reconciliation, the data is updated first; under certain circumstances, the PIN/password for the stored bank account is requested again. If there are no payments and prepayment orders yet, the page contains only help texts.
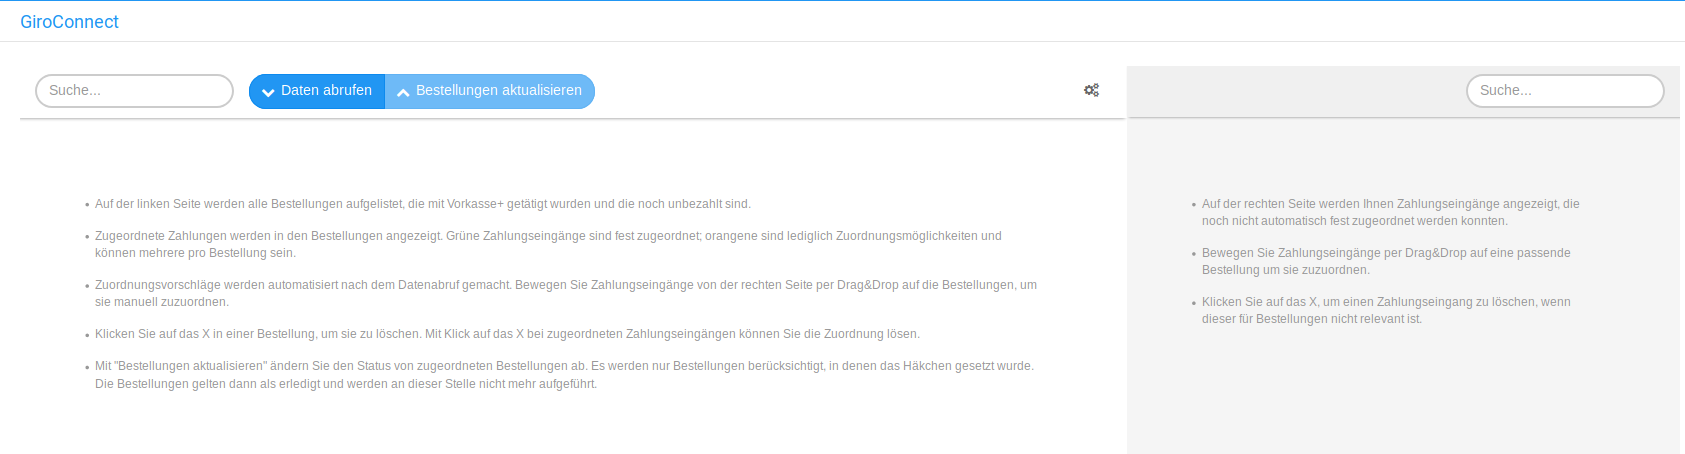
Left side
- On the left side, all orders that were placed with GiroConnect and that are still unpaid are listed.
- Assigned payments are displayed in the orders. Green incoming payments are firmly assigned; orange ones are merely assignment possibilities and there can be several per order.
- Assignment suggestions are made automatically after the data retrieval. Move incoming payments from the right side onto the orders via drag & drop to assign them manually.
- Click on the X in an order to delete it. By clicking on the X next to assigned incoming payments, you can undo the assignment.
- With "Update orders" you change the status of assigned orders. Only orders in which the checkmark has been set are taken into account. The orders are then considered completed and are no longer listed at this point.
Right side
- On the right side, you are shown incoming payments that could not yet be automatically and firmly assigned.
- Move incoming payments via drag & drop onto a matching order to assign them.
- Click on the X to delete an incoming payment if it is not relevant for orders.
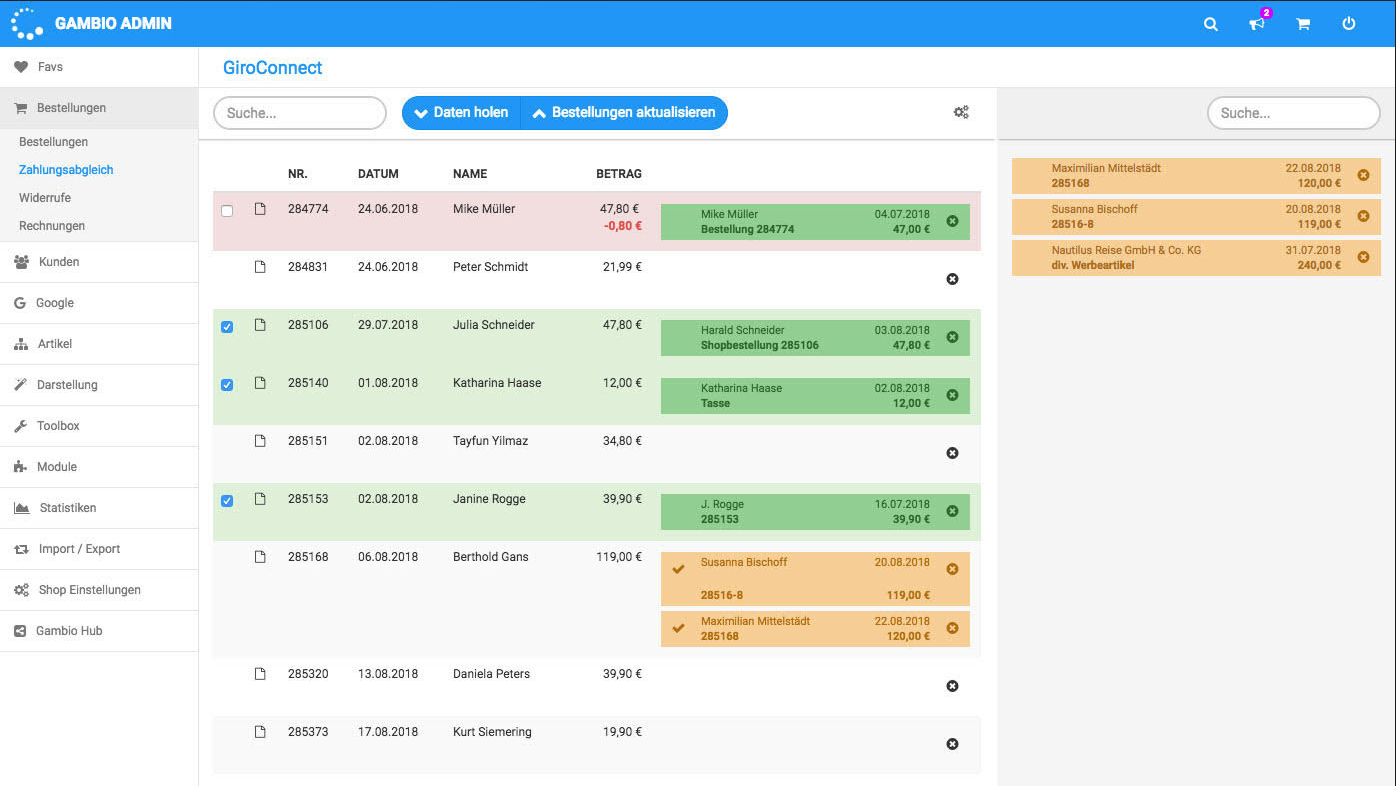
- Order no. 284774, highlighted in red: the payment is highlighted in green, so it has been assigned. You can see that the order value was 47.80 euros, but only 47 euros were paid. There is therefore an underpayment of 0.80 euros, which is also shown there.
- Order no. 285106, highlighted in green: The payment could be assigned without any problems and matches the order data in all details - name, order number and amount.
- Order no. 285168, highlighted in orange: For the order of Mr. Gans, two payments come into consideration, for which the order number and the amount are not identical, but similar. The shop operator can now drag the correct payment from the right column onto the order on the left to assign one of the payments to the order.
- Order no. 285320, not highlighted in color: for this order there are no suggested incoming payments yet.
Further settings
Once GiroConnect has been set up, you will find an additional tab there, Further settings, which in turn is divided into 6 tabs.
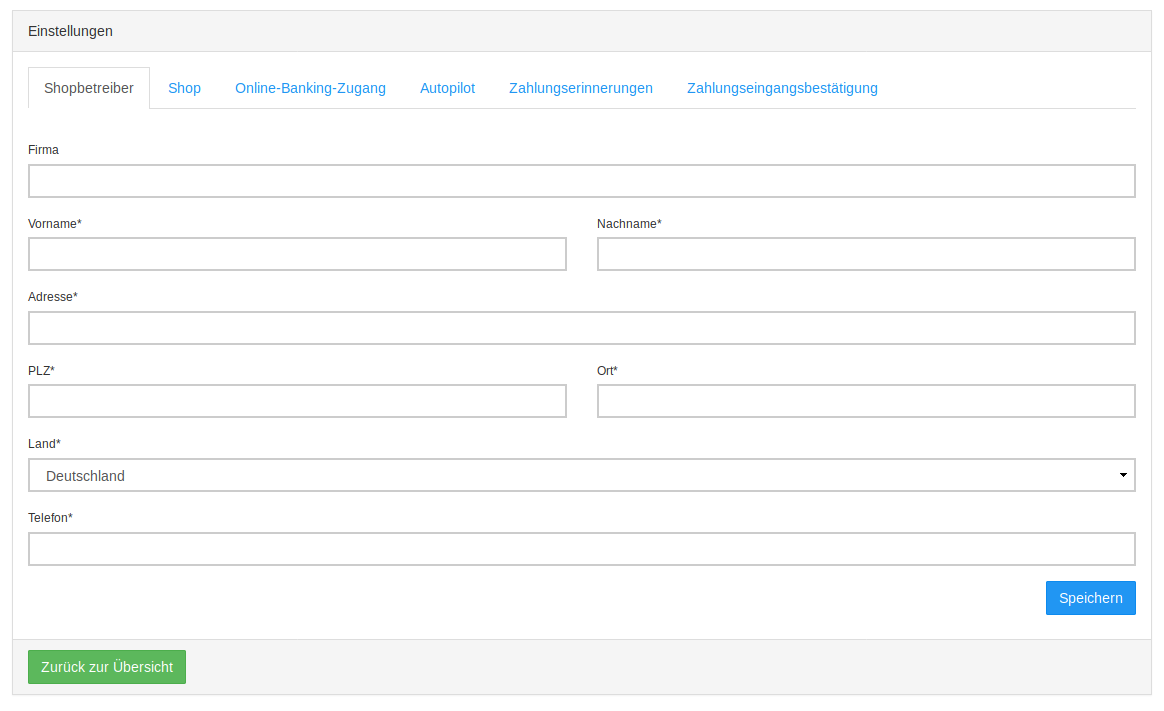
In the Shop operator tab, the address data can be changed retrospectively and corrected if necessary.
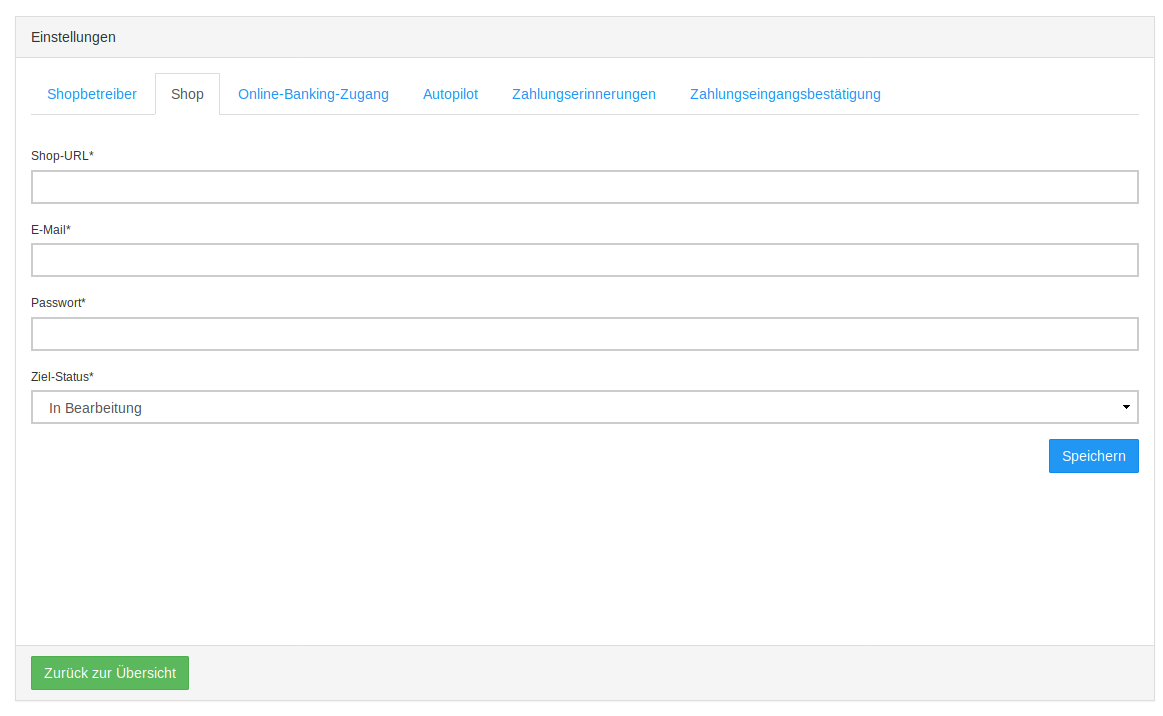
In the Shop tab, the login data can be changed if a different administrator account is to be used for the reconciliation. A change of the shop URL (e.g. after domain changes) or of the desired target status for reconciled orders is also possible.
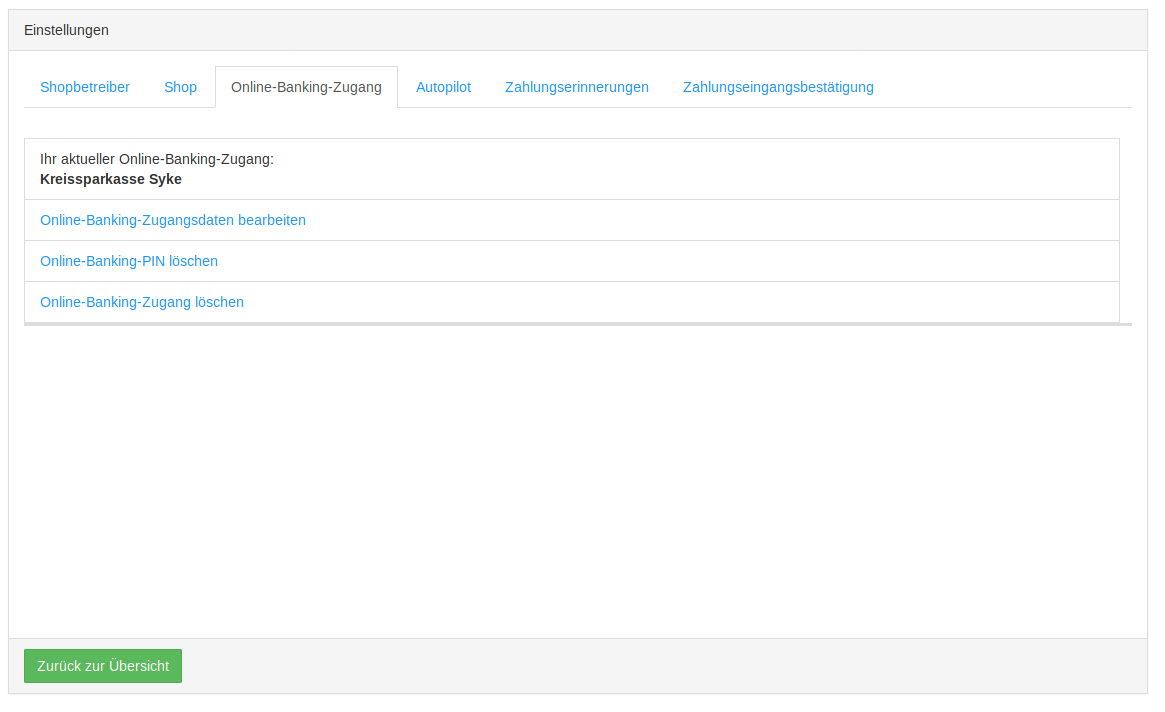
In the event of an account change, the data can be edited or PIN and access can be deleted in the Online banking access tab.
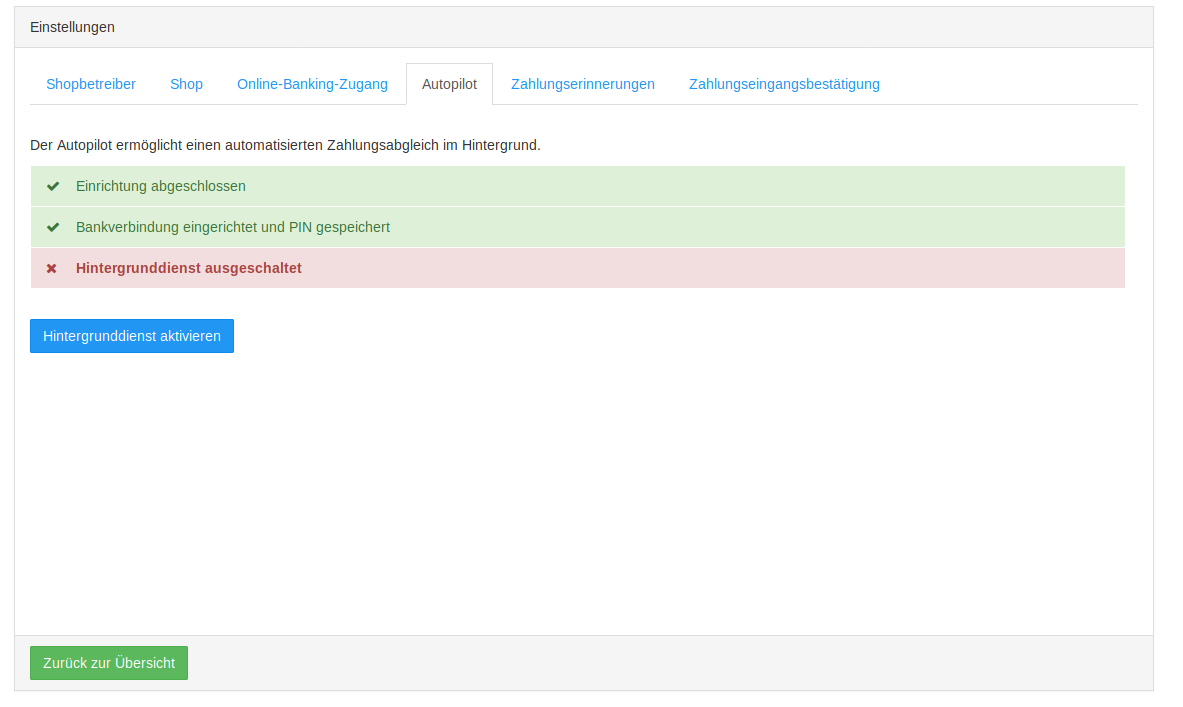
The Autopilot is responsible for the automated payment reconciliation. When the autopilot is activated, the payments can be completely assigned to an order if the data is sufficient for an unambiguous assignment. This background service is off by default and must therefore first be started via the Activate background service button.
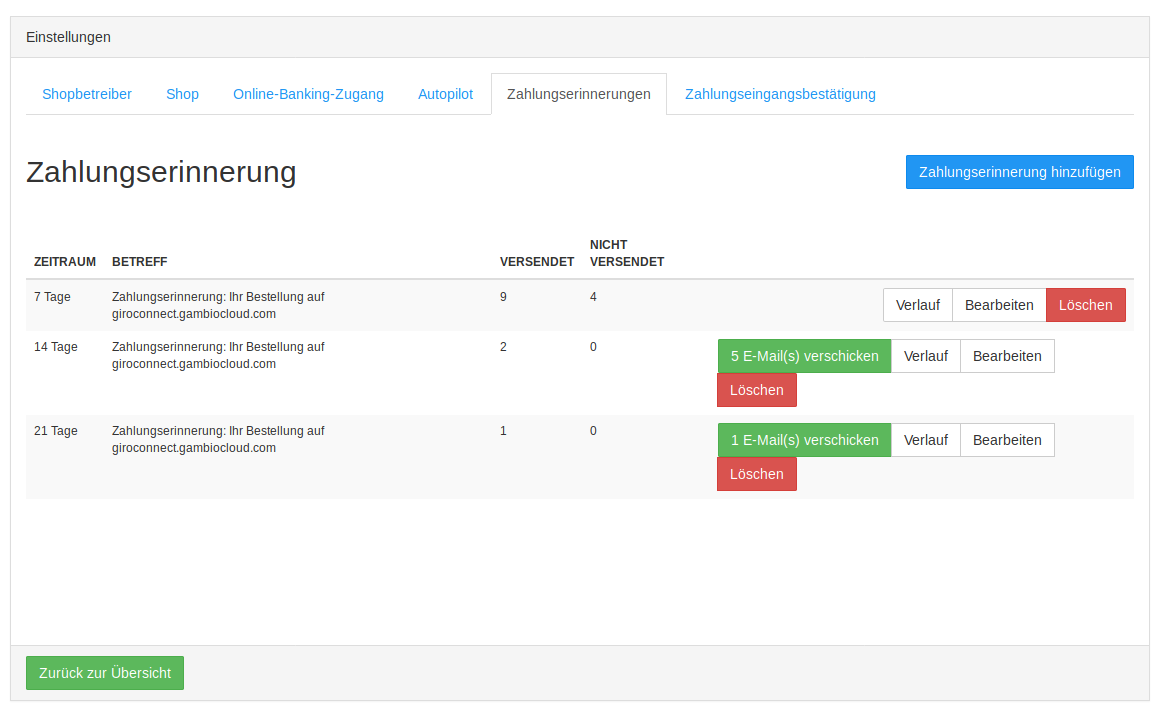
Templates for payment reminders can be set up, which can be sent manually or automatically to customers in default. In this overview, the created templates are listed and the number of open and sent mails is stated. Further templates can also be created via the Add payment reminder button.
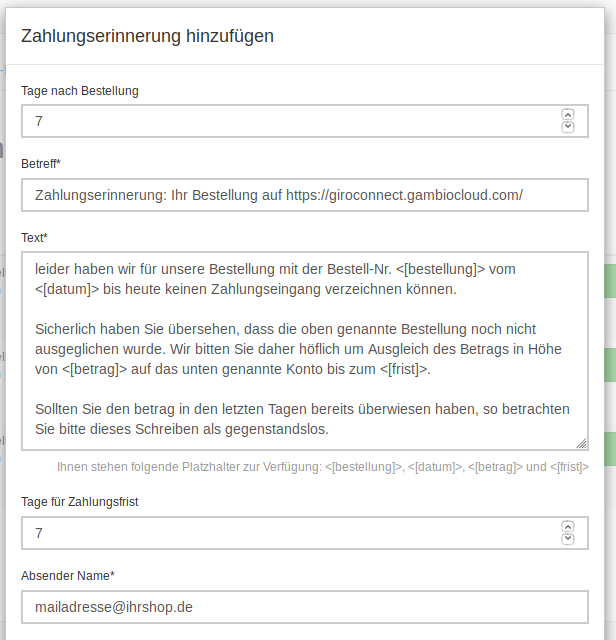
When creating or changing a template, a new window opens containing the standard text for payment reminders. This can be adapted as desired. The placeholders <[bestellung]> (order number), <[datum]> (order date), <[betrag]> (payment amount) and <[frist]> (payment deadline) are available. The subject can also be changed freely. Under Days for payment deadline you can set how many days after receipt of the order a mail should be sent. Under Send automatically you can select whether the mails should be sent automatically. If a selection is to be made before sending, this option must not be selected.
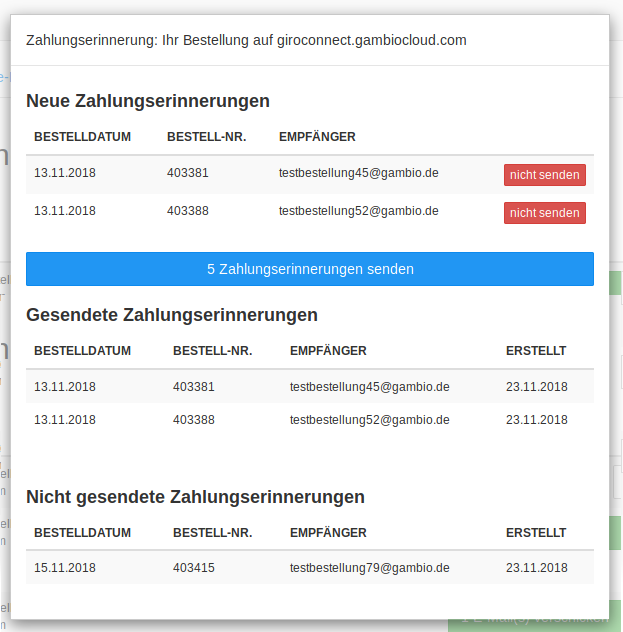
The history of the payment reminders lists which payment reminders have not yet been executed, which have been sent and which have been excluded from sending.
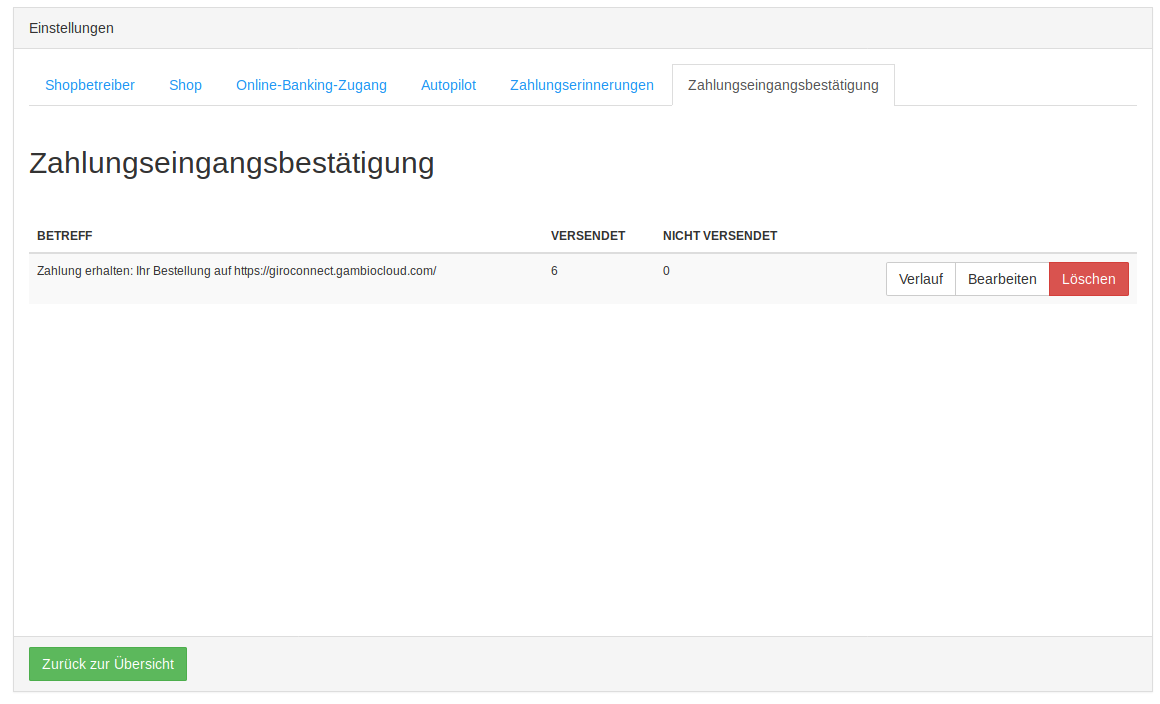
Payment receipt confirmations can be sent automatically to the customer. Just as with the payment reminders, there is an overview with the number of open and sent mails, and the templates can be adapted.
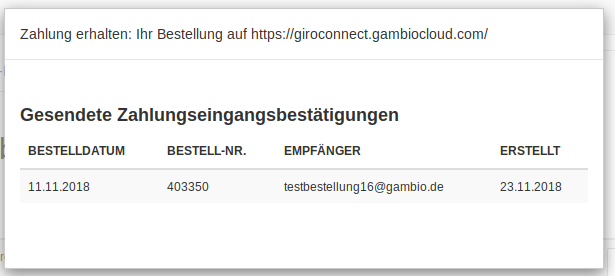
When clicking on History, a list of the mails opens.
PayPal Checkout
Scope of services
In addition to classic PayPal payment types including PayPal, direct debit, credit/debit card, purchase on invoice (if available to you) and Pay Later, the PayPal2Hub module also enables the use of many local payment methods via PayPal such as Sofort, GiroPay, iDeal or EPS.
Requirements for using the new complete solution PayPal Checkout
The requirement is the use of the Paypal2Hub module, a shop version from v3.13.x and the use of the latest version of the Hub-Connector, but at least version 1.21.x.
How do I determine which version my Hub-Connector has?
You can see which version you have installed in the Gambio Store in the Installed packages and updates tab.
Updating the Hub-Connector
Note
Cloud shops already have the latest version of the Hub-Connector and can skip this point.
- Log in to the Gambio Admin of your shop.
- Now call up the item Gambio Store -> Modules at the bottom left of the menu, or App-Store -> Modules in older shop versions
- Then install the Gambio Hub package and also run the Gambio Updater if an update or an installation is offered to you. If you already have the latest connector version, you do not need to do anything here.
Necessary steps for using the current PayPal payment methods
If the PayPal2Hub module is already being used without the new payment methods
- In the Gambio Admin, call up the menu item Modules > Payment methods.
- A notice window with the status information opens automatically.
- Confirm the privacy policy and click on PayPal Login. Then follow the further steps as described in the chapter Initial setup.
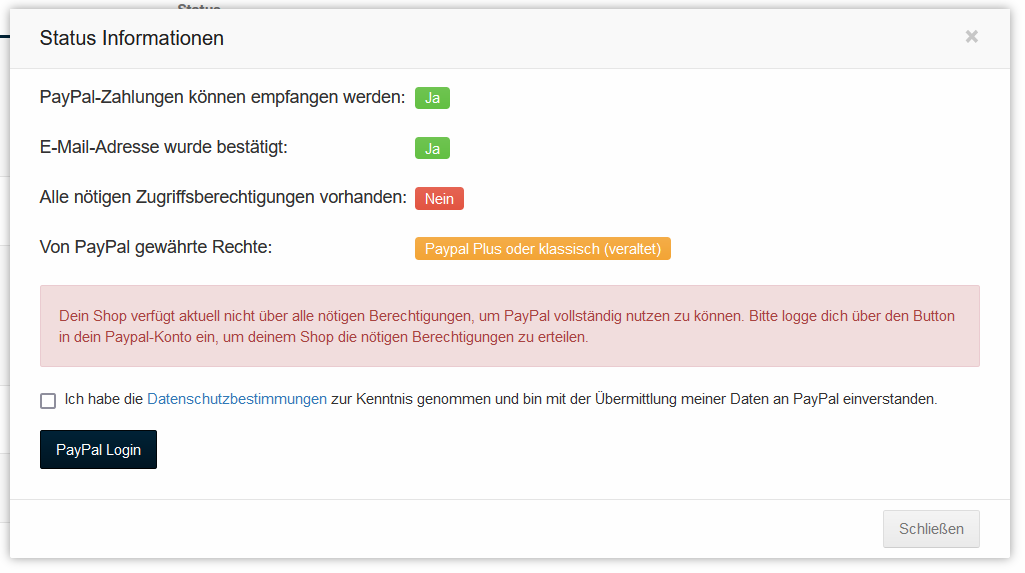
If you have already closed the notice window, you can call it up again by clicking on the info icon to the left of the status notice Data synchronization required:

If the PayPal & PayPal PLUS module (paypal3) is being used
- In the Gambio Admin, call up the item Modules > Payment methods > Other and uninstall the now outdated module PayPal & PayPal PLUS module (paypal3)
- Now switch back to the Gambio Payment Hub tab and continue with the chapter Installation.
If the PayPalHub module is being used
- In the Gambio Admin, call up the item Modules > Payment methods and uninstall the outdated module PayPalHub.
- Now install the PayPal2Hub module and continue with the chapter Installation.
Installation
The payment method can be installed under Modules > Payment methods in the Gambio Payment Hub tab. To do this, select the entry With PayPal, your customers' most popular payment types from a single source (PayPal2Hub) by moving the mouse pointer over it and click on the Install button. The initial setup dialog opens.
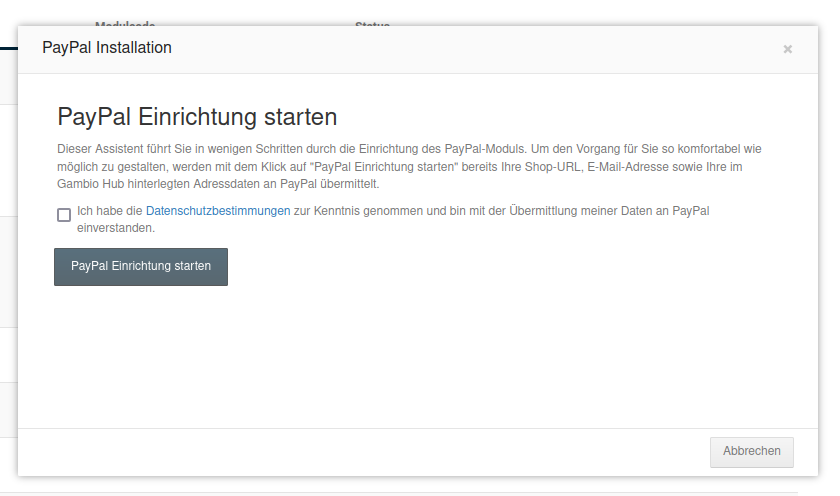
Initial setup
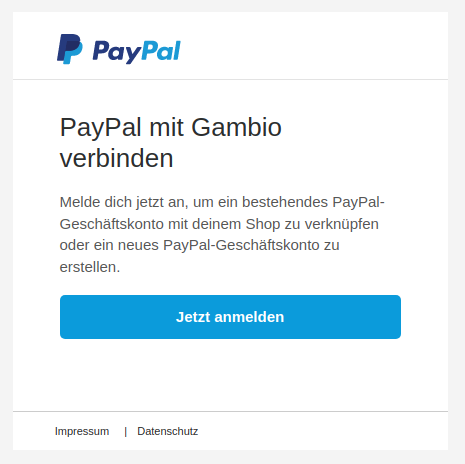
Via the initial setup dialog, the shop is linked with your PayPal account. First click on the Log in now button.
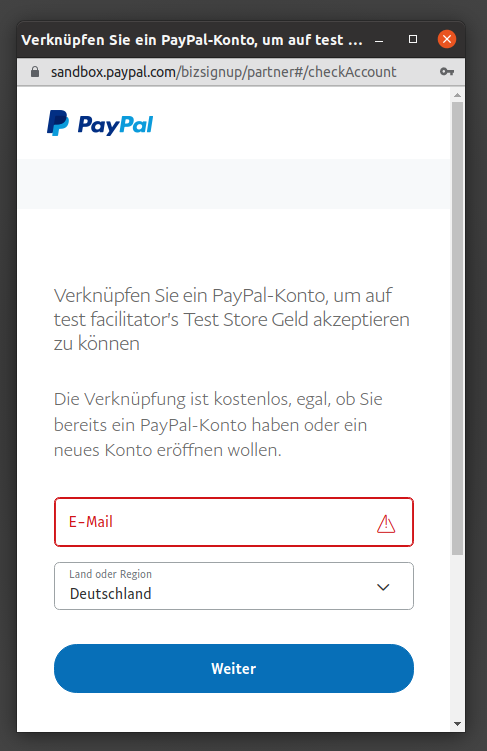
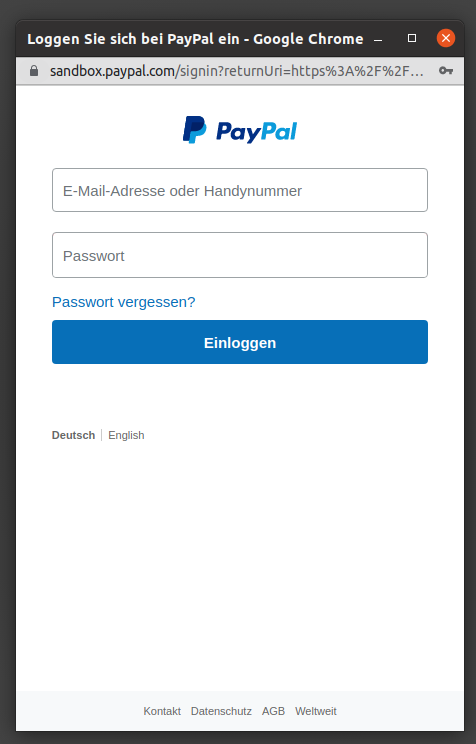
You are taken to the First steps dialog. Enter your e-mail address here and select the country in which the shop is based. Depending on whether a PayPal business account already exists with this address, you will be forwarded to the login accordingly.
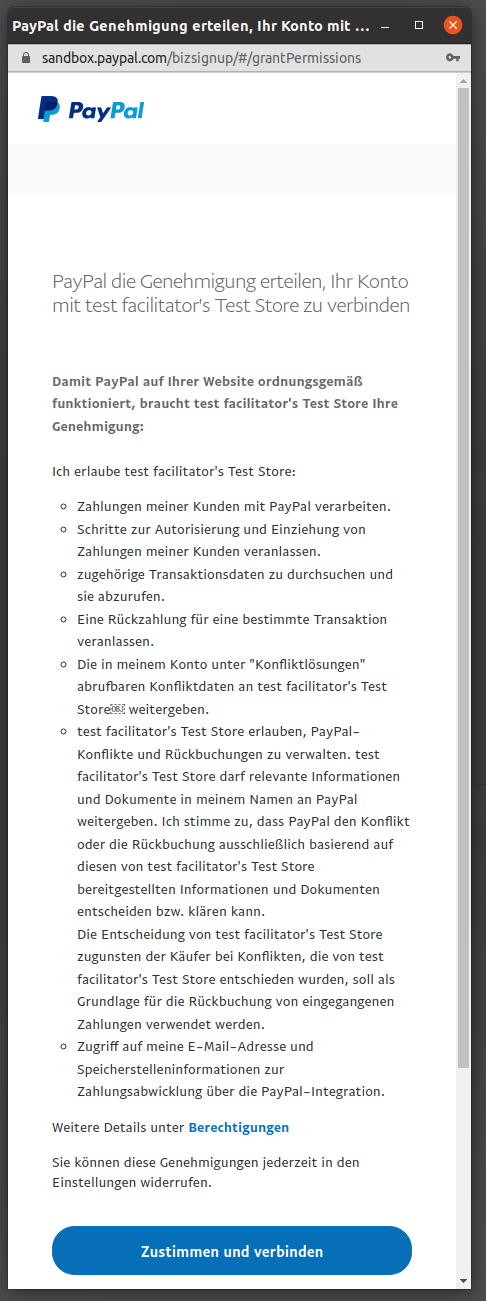
You will now be asked to grant PayPal the permission to connect your PayPal account with your shop. The text is very long, scroll all the way down and click on Agree and connect.
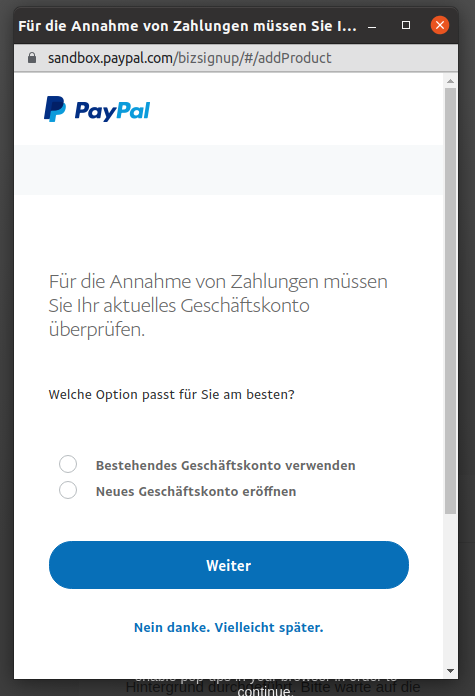
Now choose whether you want to link an existing business account or set up a new business account for this.
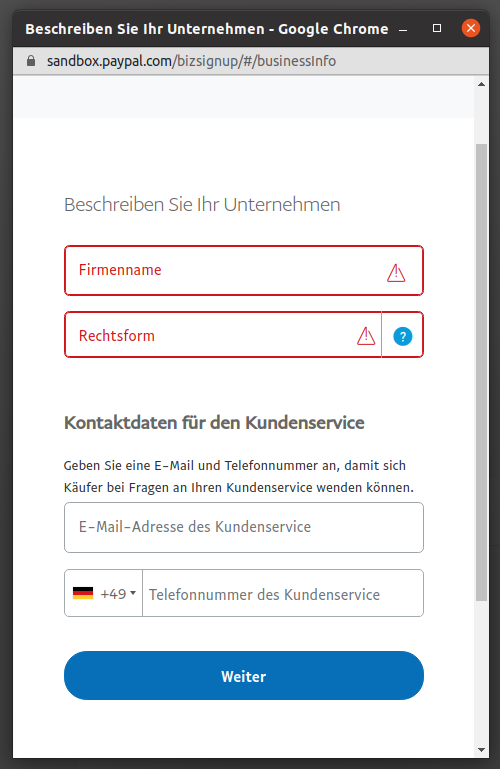
Several forms follow in which you must describe your company:
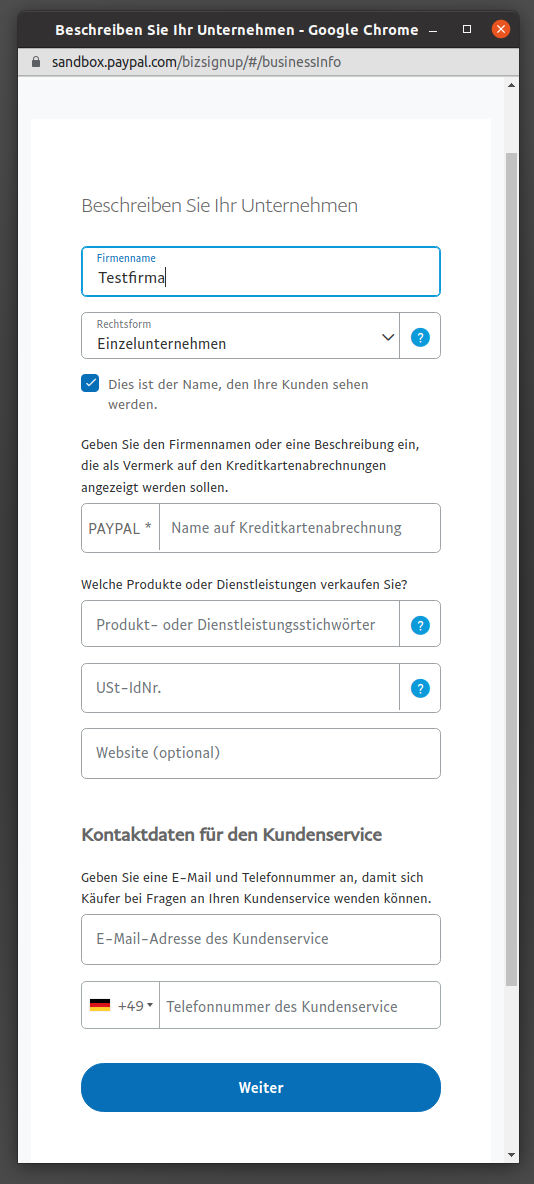
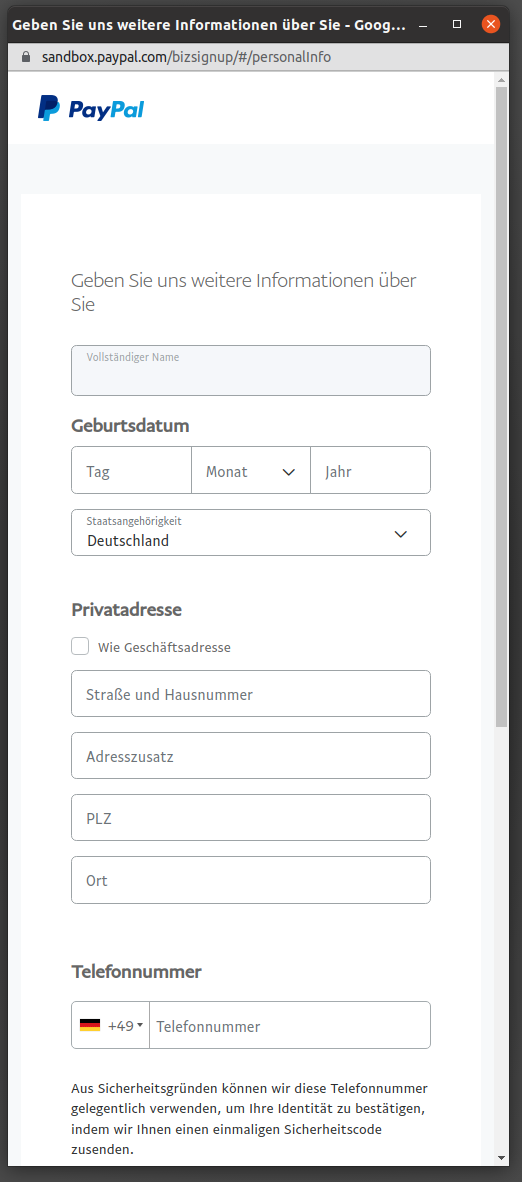
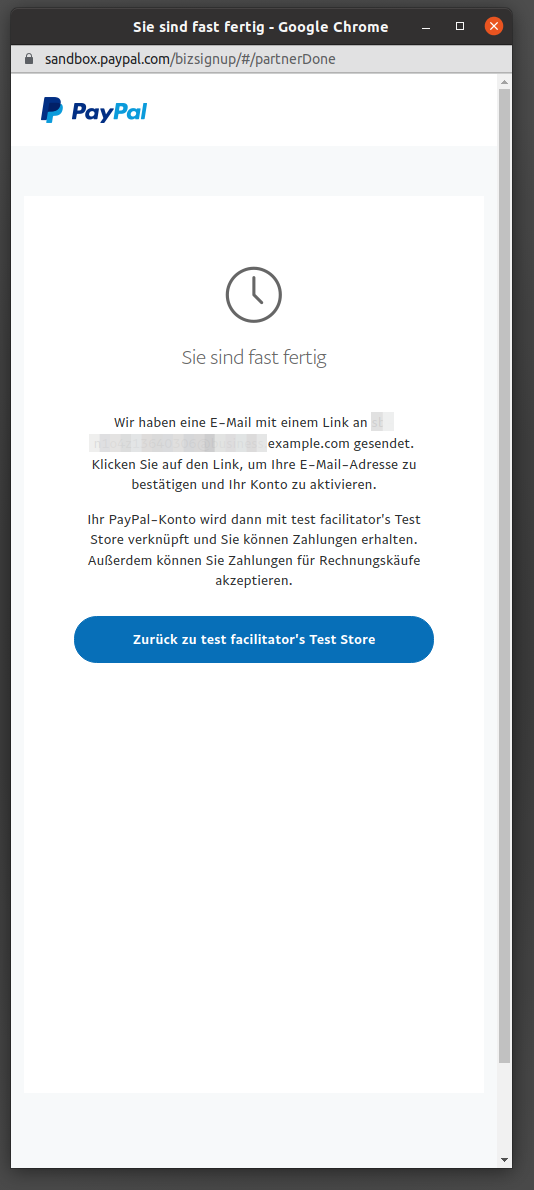
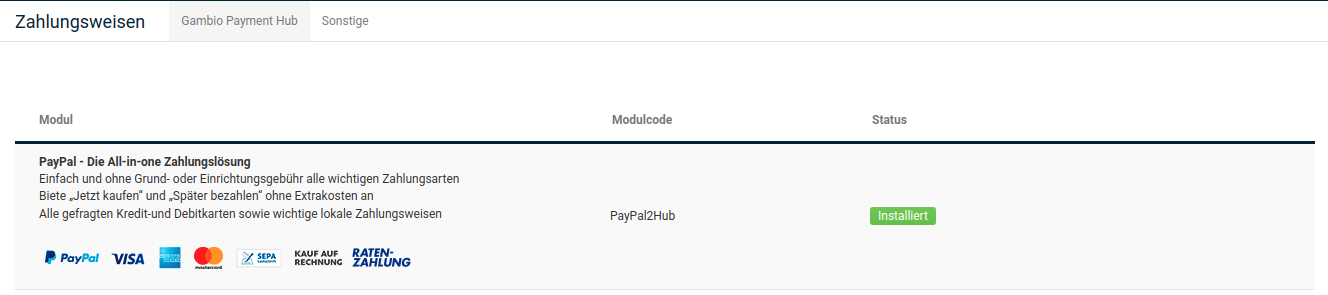
You are now guided back into the shop, the registration process is finished. If you already had an active PayPal merchant account beforehand, the module status changes to Installed. New merchants may have to take further steps for activation, but can always view the current status and the necessary steps in the status window behind the small i.
Note
Please note that the dialogs may differ slightly from those shown. PayPal's merchant registration is constantly being optimized and adapted, so that deviations may occur; these are no cause for concern.
Further settings
General settings
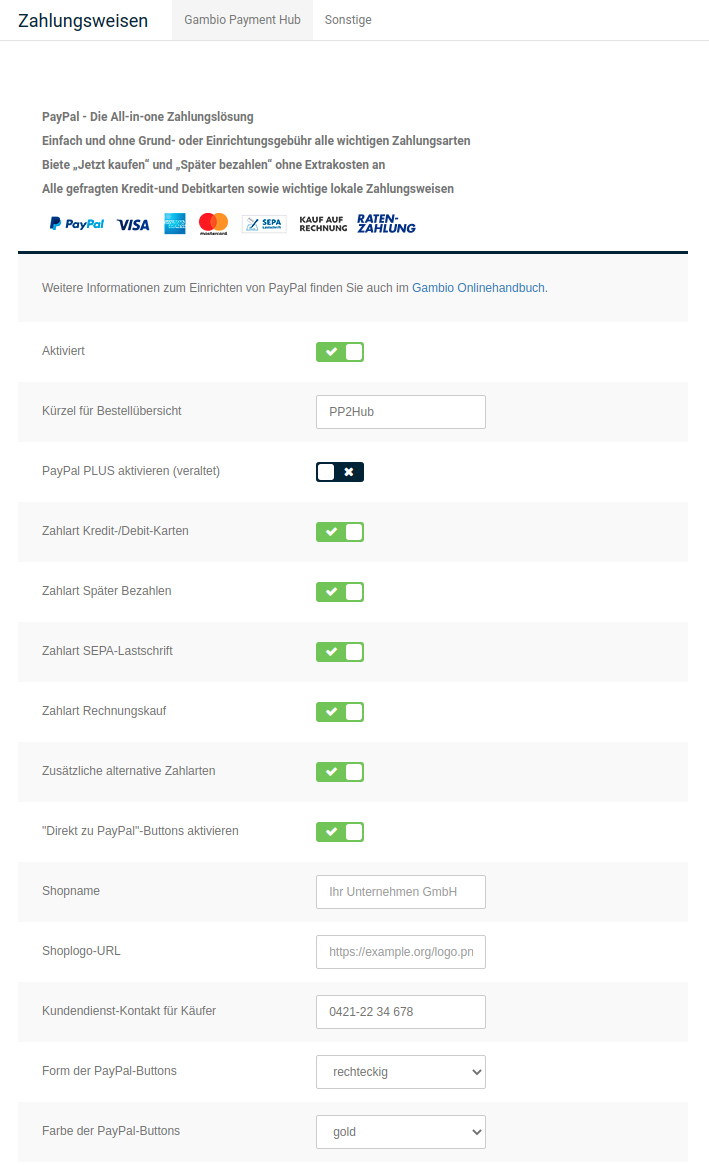
| Field name | Description |
|---|---|
| Activated | Indicates whether the payment module is activated |
| Abbreviation for order overview | Here you can specify how the payment method should be named in the order overview. |
| Activate PayPal PLUS (outdated) | If an activation for PayPal PLUS exists, the PLUS payment methods can be activated via this. If the current PayPal Checkout payment methods are to be used, the PLUS option must be deactivated. |
| Payment type credit/debit cards | Show credit/debit card payment type. |
| Payment type Pay Later | Show the Pay Later payment types, incl. installment payment and payment after 30 days. |
| Payment type SEPA | Shows the SEPA direct debit payment type. |
| Payment type purchase on invoice | Show the option for payment on invoice (PayPal cooperation with Ratepay). |
| Additional alternative payment types | Show customers further payment options typical for their country, such as Sofort, Giropay, iDEAL, etc. |
| Customer service contact | Store your contact details here, for example telephone number and e-mail address, at which your customers can reach you. |
| Activate Direct to PayPal buttons | The Direct to PayPal buttons can be activated via this. The positions at which these buttons should be displayed can be defined in more detail in the expert mode. If the Pay Later payment method is activated, a second button appears for this. |
| Shop name | The name of the shop that should be displayed on the PayPal pages. |
| Shop logo URL | Web address (https://...) to your shop logo that should be displayed on the PayPal pages. |
| Shape of the PayPal buttons | Determine the shape of your Direct to PayPal buttons to match your shop. Rectangular and rounded are available for selection here. |
| Color of the PayPal buttons | Determine the color of your Direct to PayPal buttons to match your shop. Gold, silver, blue and black are available for selection. |
Attention
The Customer service contact entry is a mandatory entry for the purchase on invoice payment type. This field must be filled in so that purchase on invoice is displayed in the checkout.
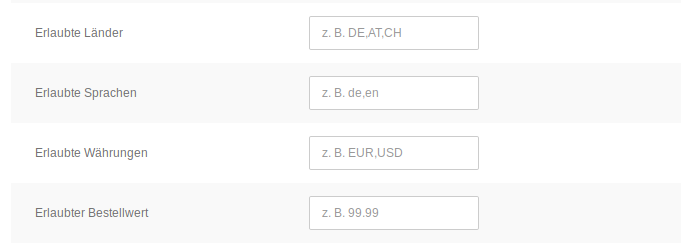
| Field name | Description |
|---|---|
| Allowed countries | Here, the use of the module can be restricted to certain countries by specifying country codes according to ISO2 (e.g. DE,AT,CH). If the field remains empty, there is no restriction. |
| Allowed languages | Here, the use of the module can be restricted to certain languages by specifying language codes (e.g. de,en). If the field remains empty, there is no restriction. |
| Allowed currencies | Restriction to certain currencies (e.g. EUR,USD). If the field remains empty, there is no restriction. |
| Allowed order value | Maximum order value up to which the module may be used. From the amount entered there, the module is hidden in the checkout. |
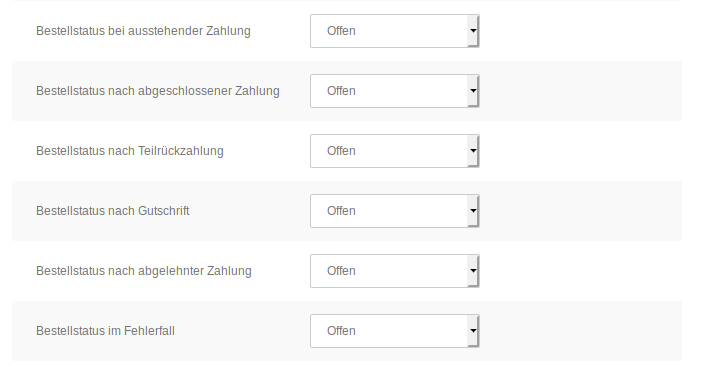
In addition, depending on the state of the payment of an order, you can set which order status should be assigned for it.
Notice banner PayPal installment payment and payment after 30 days
If you use the current PayPal2Hub payment module, a simple integration of PayPal's dynamic banners is already prepared without manual work and can be configured as shown in the figure below.
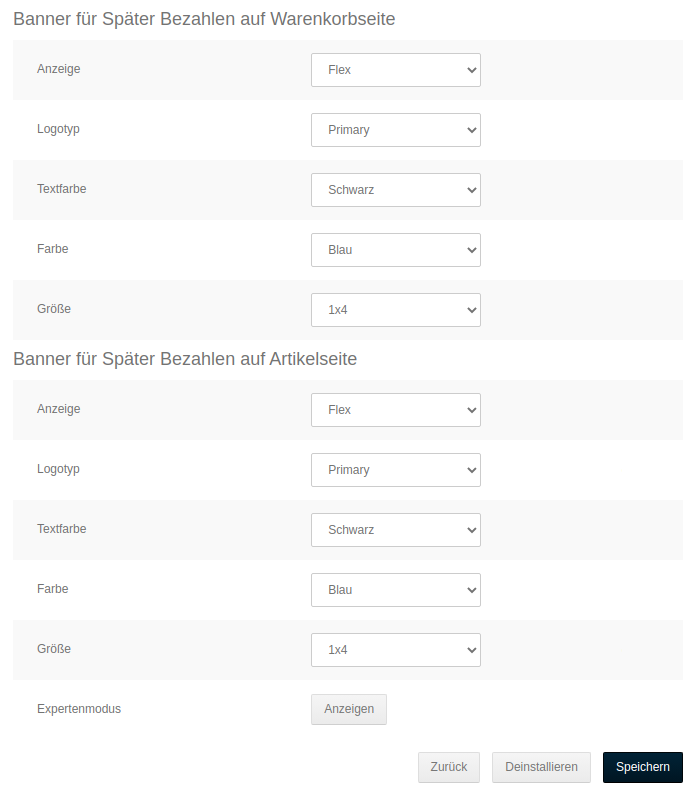
The following settings are available:
| Field name | Description |
|---|---|
| Display | Activation of the banners and selection from layout options between the compact Text layout and the more elaborate, graphical Flex layout |
| Logo type | which type of logo should be displayed in the banner? |
| Text color | Text color in the banner |
| Color | Background color of the banner |
| Size | Size and layout of the banner |
At the very bottom is the button for the expert mode, via which further settings are possible. To do this, click on Show.

Via the Back button you can cancel the editing without saving the changes to the settings. With a click on Save they are applied. With a click on Uninstall the module can be uninstalled.
Expert mode
More extensive settings are possible via the expert mode.
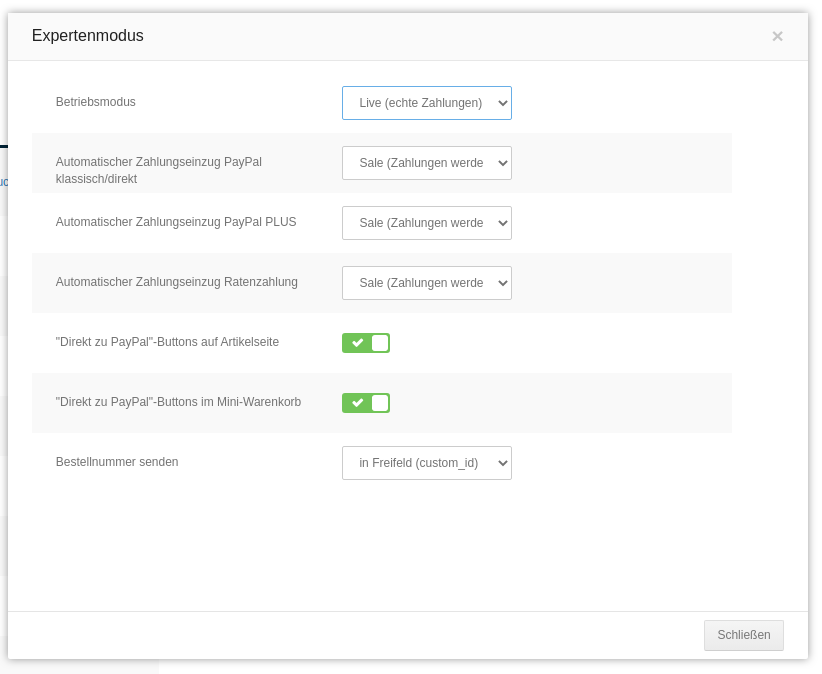
| Field name | Description |
|---|---|
| Automatic payment collection PayPal classic/direct | Determines whether payments for Direct to PayPal and PayPal classic transactions should be collected from the customer immediately or only reserved. |
| Automatic payment collection PayPal PLUS | Determines whether payments when using the PLUS payment methods should be collected from the customer immediately or only reserved. |
| Direct to PayPal buttons on the product page | Shows the Direct to PayPal button on the product page. |
Attention
The Direct to PayPal buttons are only visible on the product details page for products without properties, attributes and GX-Customizer.
| Field name | Description |
|---|---|
| Direct to PayPal buttons in the mini shopping cart | Additionally shows the Direct to PayPal button in the mini shopping cart. |
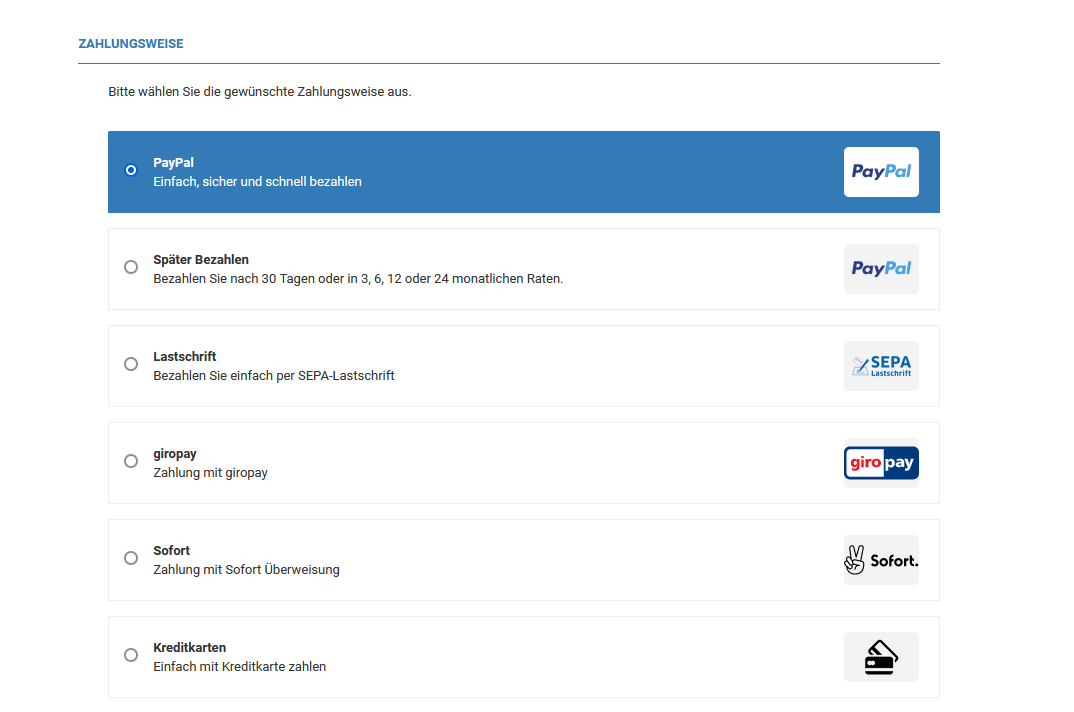
Display in the checkout
This is what the payment methods look like when using PayPal Checkout in the checkout of the shop (example):
Post-processing / refund
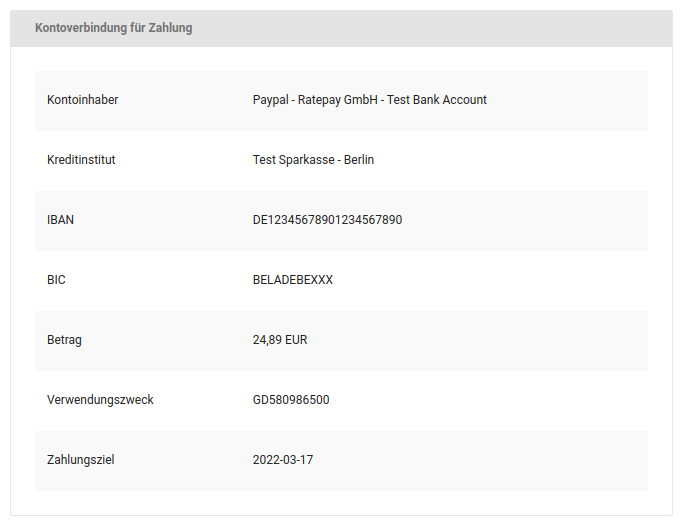
In the order details there are various blocks with information on PayPal orders. If the customer has chosen payment on invoice or installment purchase, the bank details to which the customer must transfer the money are displayed in the block Bank details for payment. This information is displayed to the customer both at the end of the checkout and printed on the invoice.
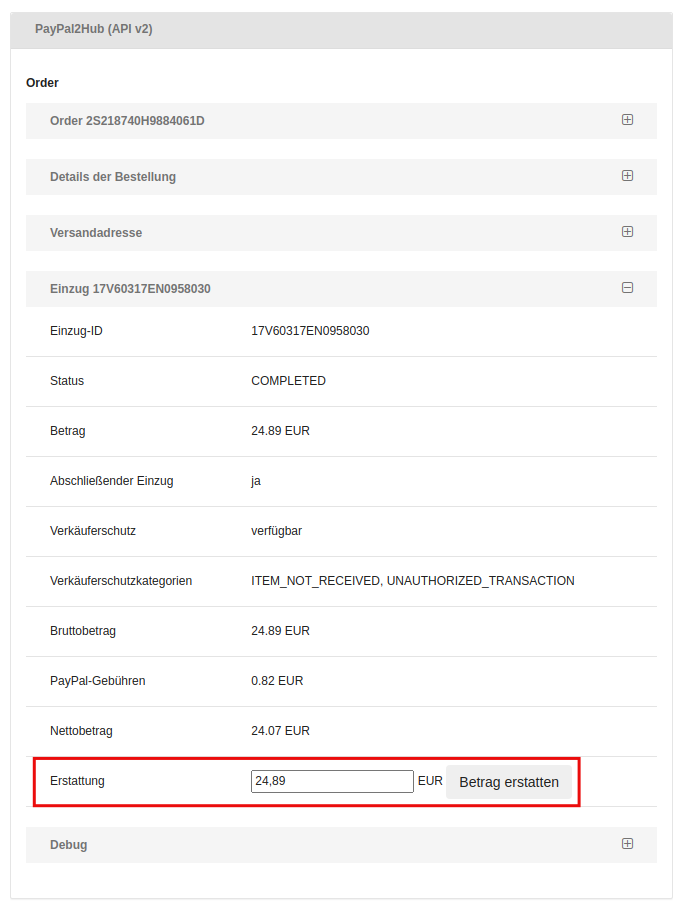
In the block PayPal2Hub (API v2) there is detailed information on the transaction and also a possibility to refund the amounts in full or in part to the customer.
Gambio secured Payments - powered by Klarna
Via the module Gambio secured Payments - powered by Klarna, secured payments are possible. The payment methods direct debit, invoice, installment purchase and Sofortüberweisung are available here.
Possibly necessary updates
To use the Klarna payment modules, a current version of the Gambio Hub Connector is required. It should therefore definitely be kept up to date via the Gambio Store (entry Gambio Store in the menu of the Gambio Admin).
In older shop versions you can retroactively install the AutoUpdater. To do this, download the corresponding package via the following link:
https://www.gambio.de/mTbX2
Even if you do not have an active customer account with Gambio, you will gladly be helped with questions or problems with the update; as a Gambio customer, write a support ticket via the Gambio customer portal or, if no customer account exists, an e-mail with your request to info@gambio.de
Gambio Hub registration
If you are not yet registered with the Gambio Hub, now carry out the registration in the backend of your Gambio shop. To do this, click on the menu item Gambio Hub in the left menu of the admin area of your shop. The registration takes place quickly and easily from within the shop and is effective immediately.
The use of the Gambio Hub is permanently free of charge and also possible for shop operators without an active customer account with Gambio. Upon successful registration, the Gambio Hub badge in the footer bar of the shop lights up green.
Should you have questions about or problems with this step, the Gambio support will also gladly help you here; use the contact options described in the previous step to get in touch with Gambio.
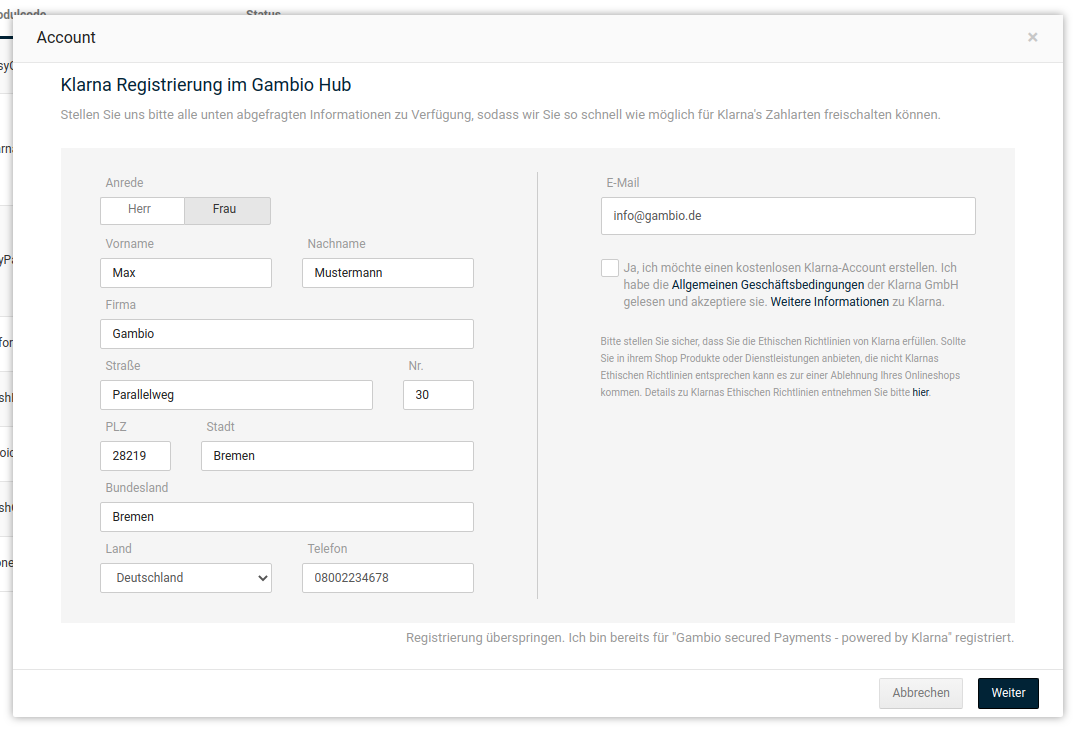
The registration with Klarna can be carried out together with the Hub registration. To do this, simply set the checkmark at Yes, I want to create a free Klarna account. This setting is optional.
Note
Via the links in the second paragraph of the checkbox you can display Klarna's General Terms and Conditions and call up Further information.
Note
The registration with Klarna can also be carried out later from the area Modules > Payment methods > Gambio Payment Hub.
Klarna registration / onboarding
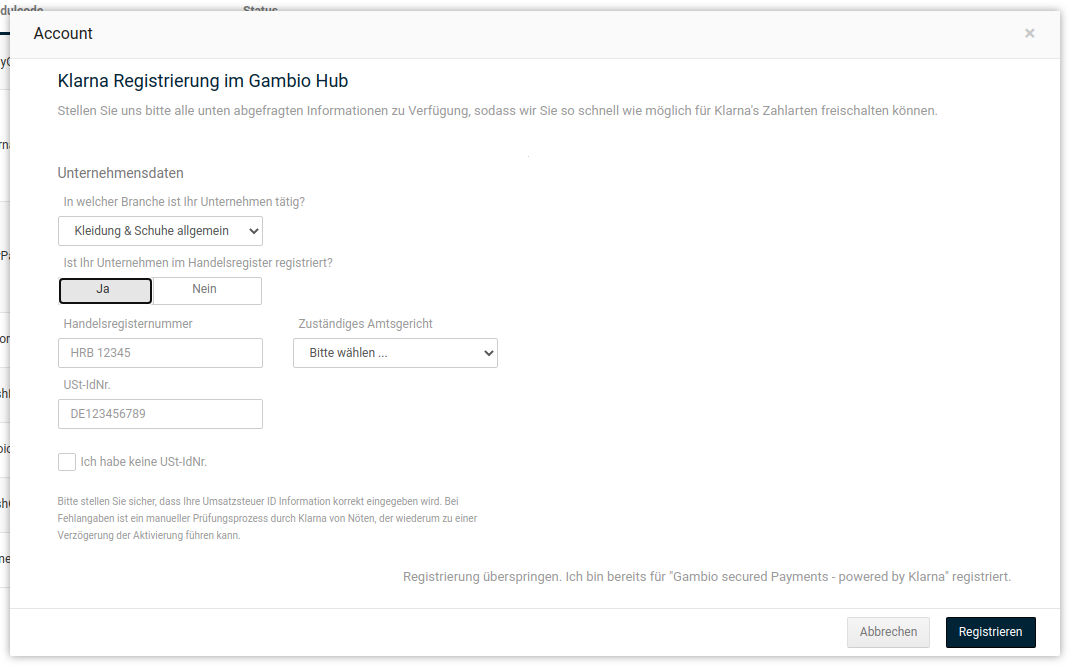
The first step of the Klarna registration consists of specifying your company. To do this, first select your industry; the rest of the form is displayed step by step.
Note
Unfortunately, Klarna's service is currently not available for the tobacco industry.
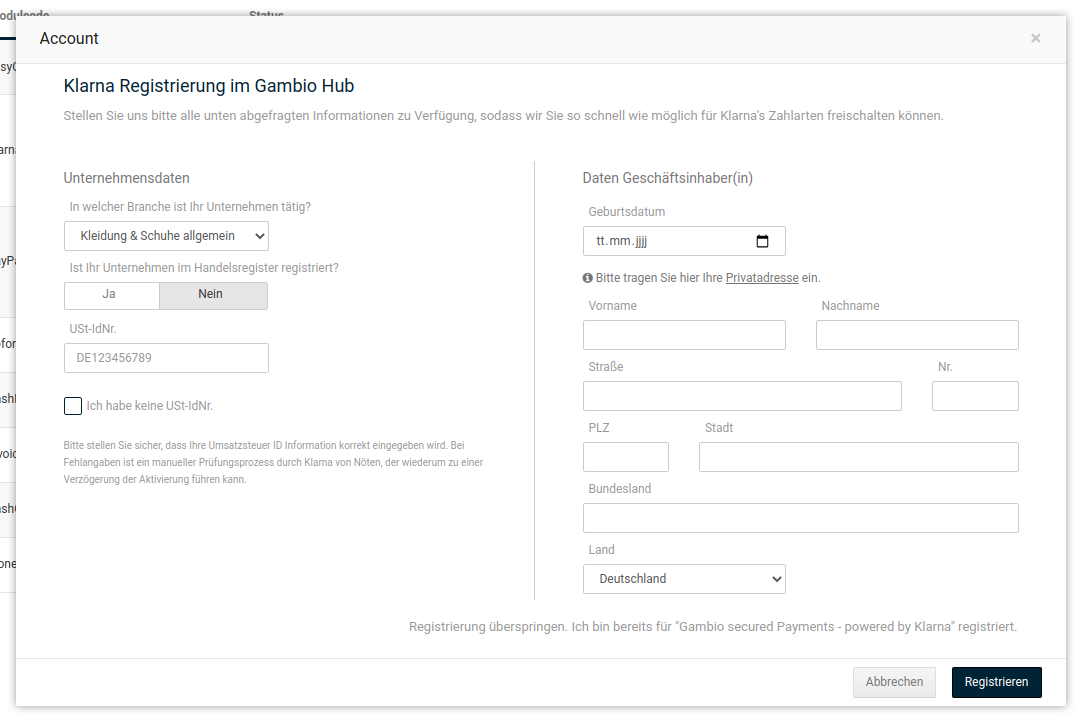
Please select whether your company is listed in the commercial register. If this is not the case, the input form is adapted accordingly so that the private address of the owner can be specified.
Attention
The private address is explicitly intended here. Please do not enter the address of your business premises!
Fill in the fields as indicated. Confirm the entries with a click on Register. Via Cancel you can leave the form without transmitting the data to Klarna.
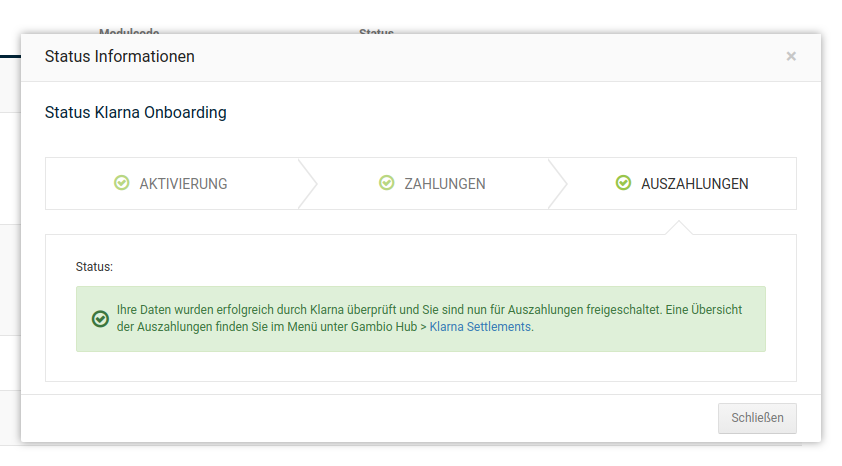
The onboarding consists of three sections:
- Activation
- Payments
- Payouts
The activation is completed with the Klarna registration.
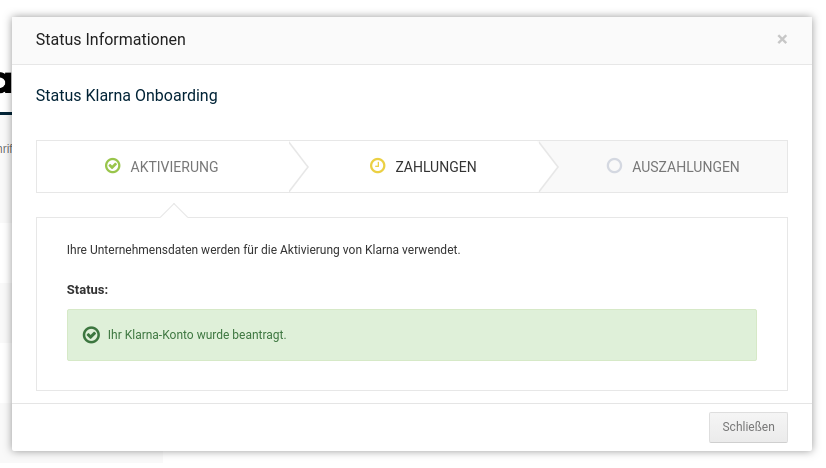
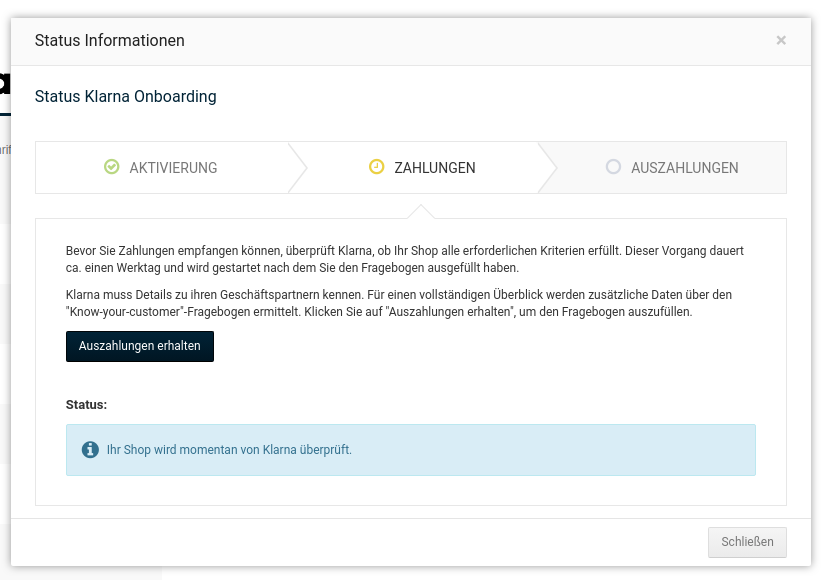
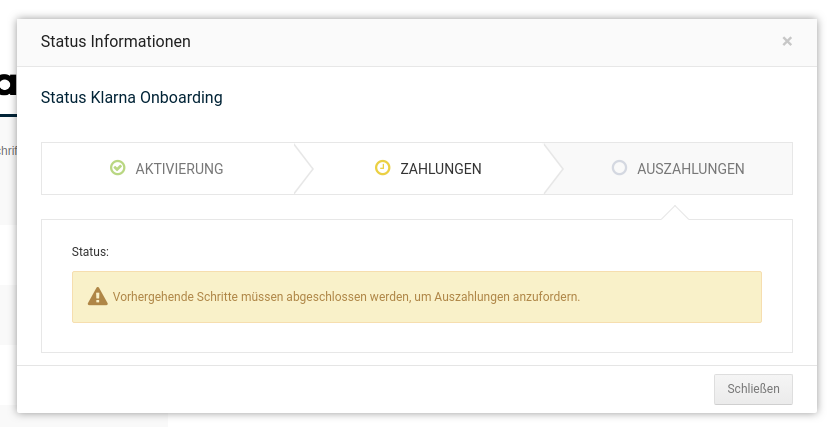
In the Payments section, the shop is checked by Klarna; this may take a while. After the successful check, payments via Klarna can be carried out in the shop.
Attention
At this point of the onboarding, no payouts to the shop operator take place yet. Only payments from customers are accepted and held by Klarna.
To request payouts from Klarna, the so-called Know-your-customer questionnaire must be filled in. To do this, click on Receive payouts.
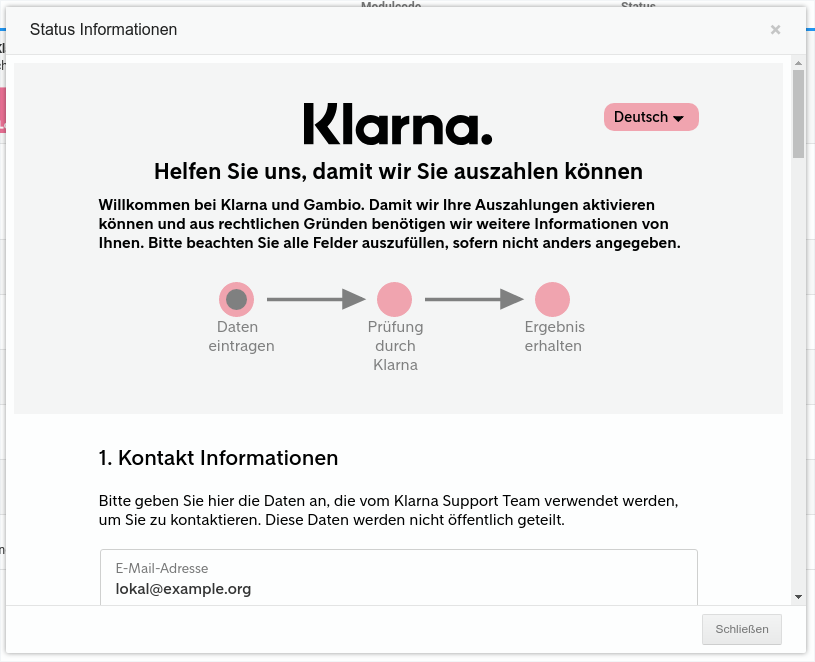
As soon as the review of the questionnaire is completed, you are successfully registered with Klarna.
Note
The final check by Klarna only takes place after the first live orders from regular customers. Only then is the onboarding completed.
Until the onboarding is completed, the Klarna module is marked with a yellow status symbol that, depending on the status of the onboarding, is titled Activation expected or Installed.
Only when the symbol is displayed in green do payouts from Klarna take place.
Installation
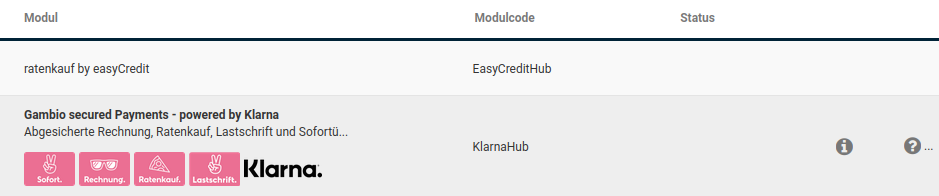
The module can be installed in the Gambio Admin under Modules > Payment methods > Gambio Payment Hub. To do this, move your mouse pointer over the entry; the Install button is displayed.
Configuration
The configuration page of the module can then be opened via the pencil icon. To do this, go to Modules > Payment methods > Gambio Payment Hub and move the mouse pointer over the entry Gambio secured Payments - powered by Klarna until the pencil icon is displayed, and click on it.
Activate the module with the corresponding option at the very top.
Attention
The verification of the registration by Klarna can only take place if the module is active and in live operation. The shop must not be in maintenance mode or switched offline.
The following areas are available in the settings:
General configuration
| Option | Explanation |
|---|---|
| Activated | Set this checkmark to activate the module. |
| Allowed countries | Enter here the ISO codes of the countries for which the Klarna module should be available. Multiple countries must be specified comma-separated, in capital letters and without spaces, e.g.: DE,AT. After the registration with Klarna, the Klarna payment methods are available to customers from Germany and Austria. Further countries can be activated via the Klarna support. |
| Allowed languages | Specify here in which language the module should be displayed. By default, only German and English are available here. The languages are also specified comma-separated and without spaces, but in lowercase letters, e.g.: de,en |
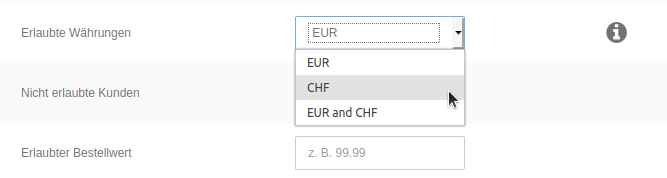
| Allowed currencies | Payments via Klarna are executed in this currency. Currently, only payments in EUR and CHF are possible. |
| Option | Explanation |
|---|---|
| Not allowed customers | You can exclude certain customers from ordering via the Klarna module here by storing the e-mail addresses of the customer accounts comma-separated and without spaces, e.g.: max@example.org,gina@example.org. These customers can then not order via this Klarna module. |
| Allowed order value | The maximum allowed order value, to be specified with a period as decimal separator. An entry like 99.99 is sufficient; a currency does not need to be specified. |
| Allowed minimum order value | Minimum order value; if the field is left empty, the minimum is not restricted. |
| Order status: new order | Select here the order status that new orders should receive. The status Shipped is preset here. If the shipping notification takes place via connected software such as an ERP system, this status should be kept. |
| Order status: shipped order | Here you select the order status at which Klarna should automatically be notified that the order has been shipped. |
| Operating mode | The modes Live for productive operation and Playground for test operation are available. For test operation, unlike before, no separate data is required; neither for the shop operator nor for the buyer. However, if a bank code is required for a test order, the bank code 888 888 88 (test orders DE) or 0000 (test orders AT) must be used. |
Note
Choose between live and test operation (Playground operation). Use the Playground operation exclusively for test orders and then switch the module back to live operation to rule out customers ordering via it in Playground operation.
| Option | Explanation |
|---|---|
| Integration of the legal texts | Controls for which initial situation legal texts should be transferred into the shop: |
| Sales to Germany and Austria | |
| Sales to Germany | |
| Sales to Austria | |
| independent integration (texts are not transferred automatically) |
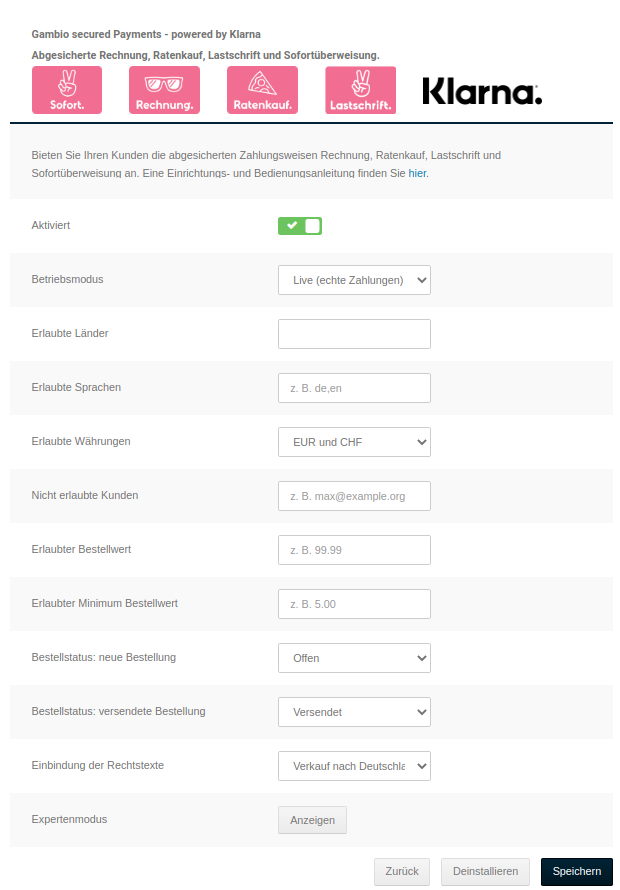
Via the Expert mode button you get to the further settings for payment methods and design.
Expert mode
Klarna payment methods
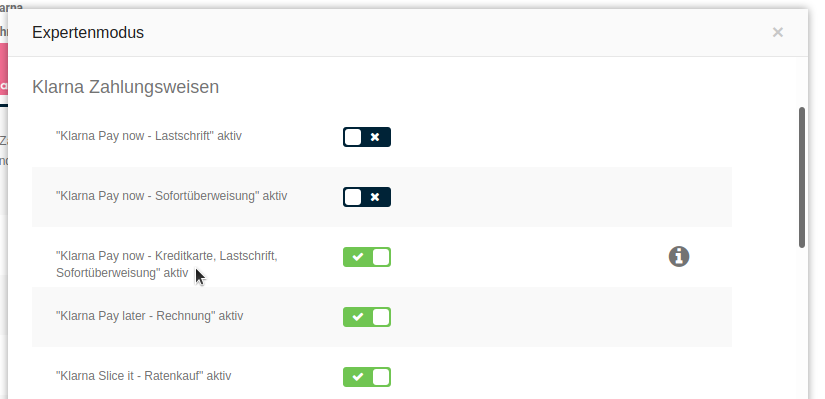
Here you can select the desired Klarna payment methods. Available for selection here are:
- Klarna Pay now - direct debit
- Klarna Pay now - Sofortüberweisung
- Klarna Pay now - credit card, direct debit, Sofortüberweisung
- Klarna Pay later - invoice
- Klarna Slice it - installment purchase
Note
Activating Klarna Pay now - credit card, direct debit, Sofortüberweisung deactivates the separately switchable payment methods Klarna Pay now - direct debit and Klarna Pay now - Sofortüberweisung, as these are already included there.
An activation by Klarna is required for offering credit card payments.
In addition, you can activate the debug logging. In live operation, this should only be activated for error analysis. Please note that this log is required for the review should problems occur. These logs can then be found in the shop under Toolbox > Show logs.
Finally, you can activate the Automatic status update. Via this, order status changes are synchronized with Klarna if they take place via external software or modules. This way it is no longer necessary to report this to Klarna retrospectively via the form in the shop.
Note
Please note that the Automatic status update is not yet supported by all programs or interfaces. However, modules such as DHL Geschäftskundenversand, Hermes or Shipcloud already offer this.
Klarna color settings
You can make various color settings here. Click on the box to the right behind the color to select a different color and apply it. The color picker may look different depending on the browser. The screenshots were created in test operation, so the Testdrive label can be seen here. In live operation, this label will not be visible.
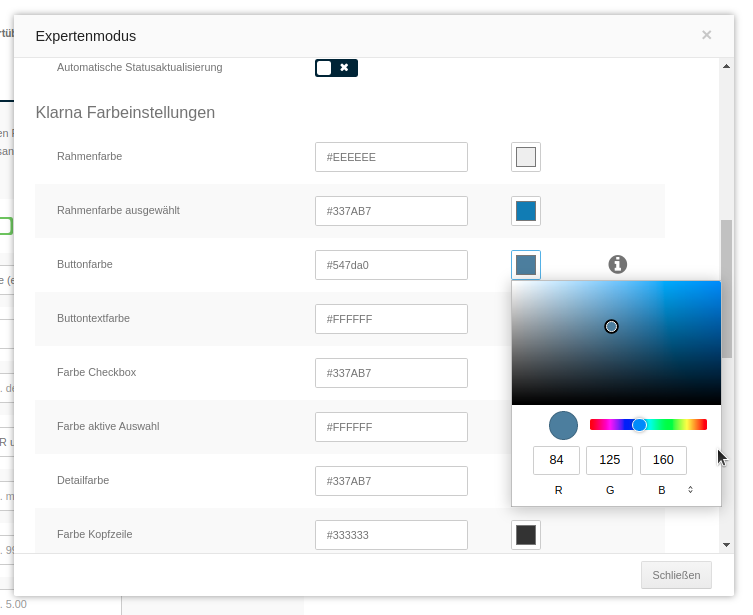
If your color settings are not applied directly in the shop, go to the shopping cart, click on the refresh icon behind the order quantity and then continue in the checkout to the payment methods page. Now the change should have been applied.
Note
The colors from the active style of the Honeygrid theme are loaded and preset in this way. If no active style is available, standard colors from the module are used.
| Option | Explanation | Figure |
|---|---|---|
| Border color | This refers to the border around the non-selected installment options for Klarna installment purchase (shown in red). | 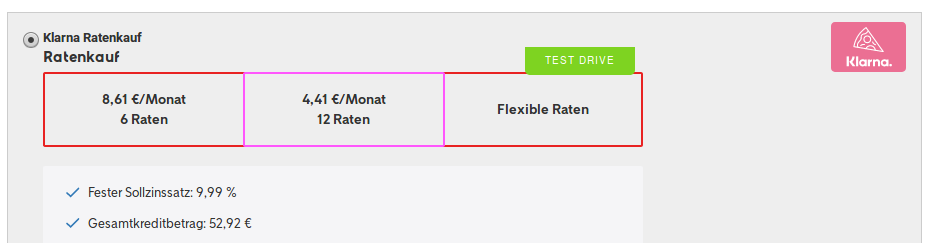 |
| Border color selected | This refers to the border around the selected installment option for Klarna installment purchase (shown in pink). | |
| Button color | This option currently has no influence on the display. | |
| Button text color | This option currently has no influence on the display. | |
| Color checkbox | Background of the selected radio button for Klarna invoice (shown in orange) | 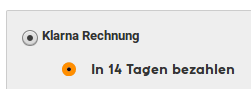 |
| Color active selection | Content of the selected radio button for Klarna invoice (the black filling in the orange circle) | |
| Detail color | Changes the color of the bullet points in front of the payment details (list points/checkmarks, shown in red) The change affects all Klarna payment methods. | 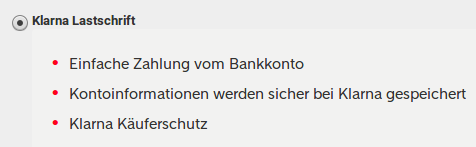 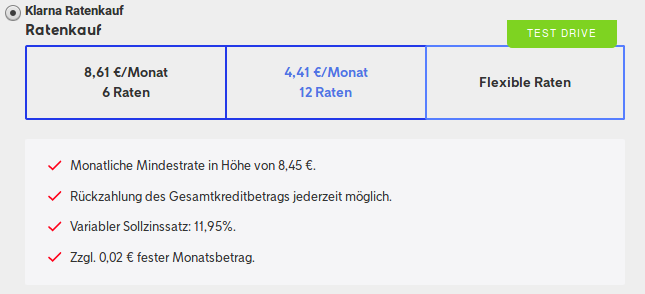 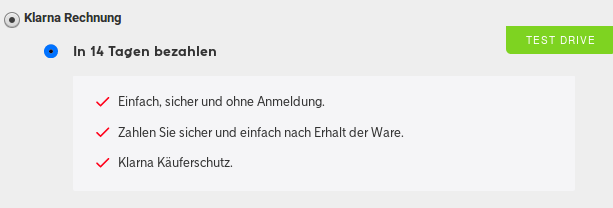 |
| Color header | Sets the color of the header, which currently only exists in the installment purchase payment method. (shown in red). | 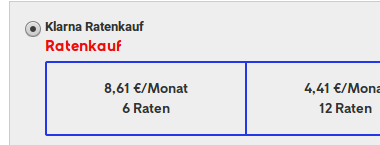 |
| Link color | Sets the color for the link Further information (shown in red). However, the other links are not affected by this. | 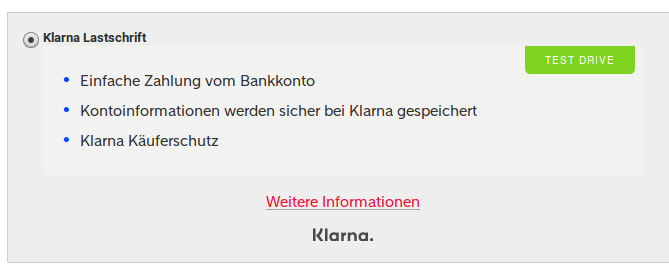 |
| Text color | This setting changes the color of most texts in the Klarna payment methods, such as the titles of the payment options and the content of the lists of conditions shown in red). | 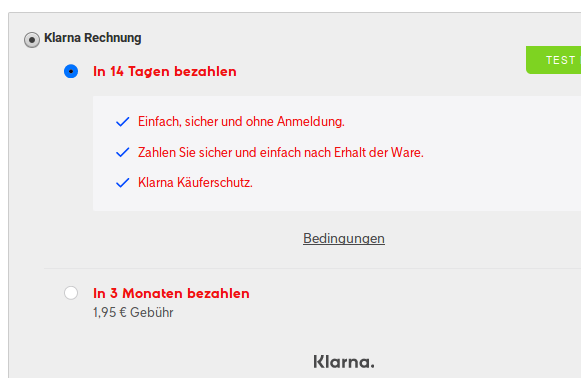 |
| Secondary text color | Changes the color of the secondary texts such as the contract terms and the interest rate (shown in red). |   |
| Border radius | Sets how round the corners of the selection box for Klarna installment purchase should be. In the figure you can see very nicely how strongly the corners are rounded. | 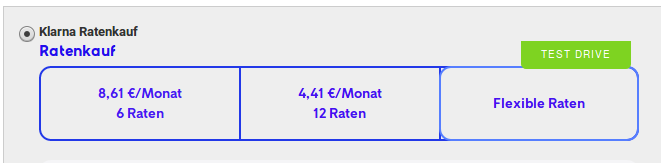 |
| Reset button | With this button you can reset the settings to the default values. For this, however, a style must be activated in the Honeygrid theme. |
Klarna logos
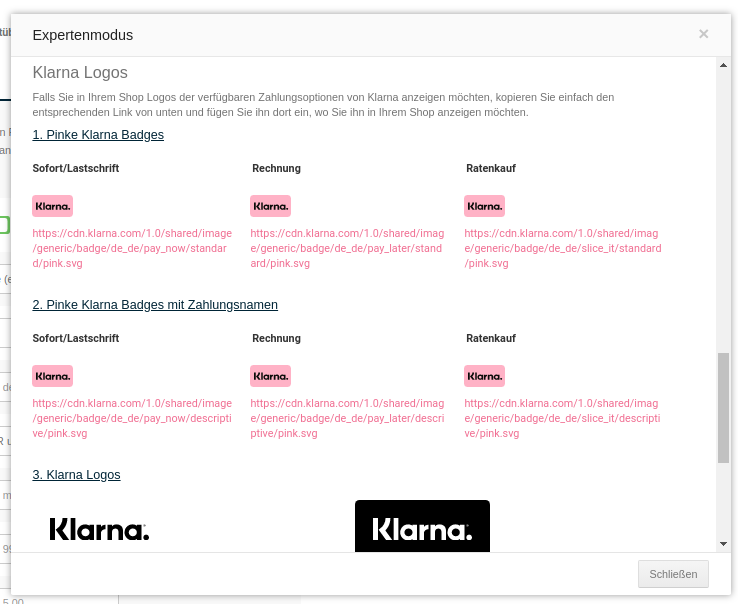
In the Klarna logos area of the expert settings, a selection of logos and badges is available to you. These can, for example, be integrated into a content, such as one of the footer columns. To use the logo, please copy the logo link displayed below the corresponding image.
Abbreviations for the order overview
For the display in the order overview, a separate abbreviation can be assigned for each payment method.
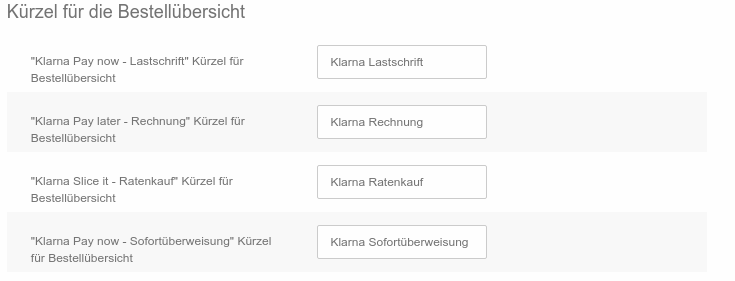
Order flow in the shop
Display of the modules in the checkout
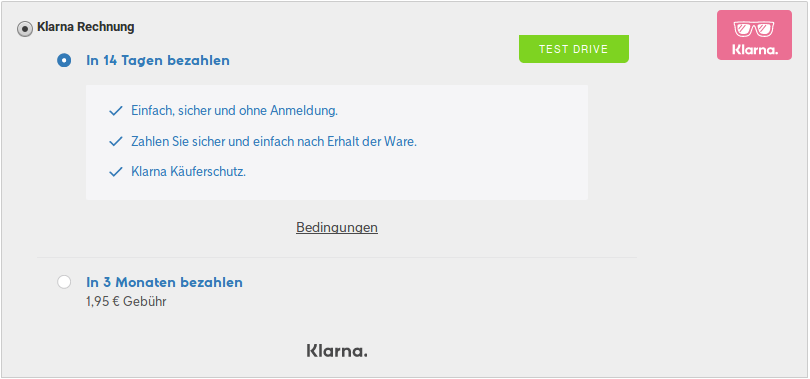
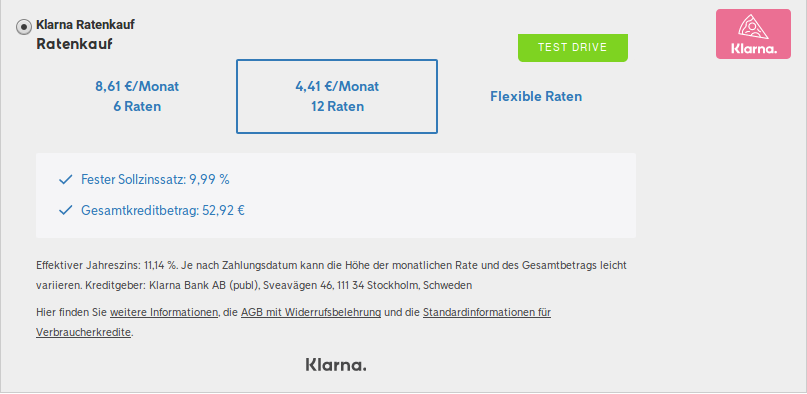
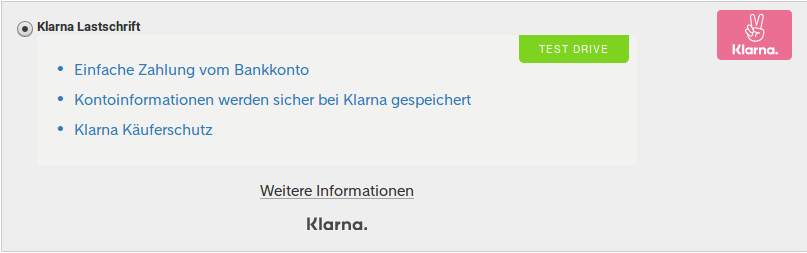
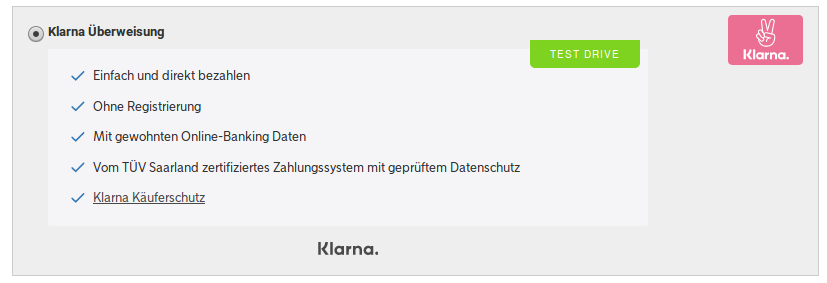
Order path
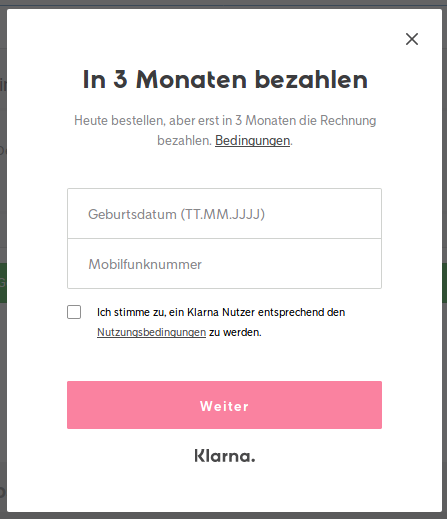
After selecting a Klarna payment method, the customer must first enter their date of birth and mobile phone number; the order process is then continued. The query only appears if this data has not yet been recorded in the shop. It is important that the customer agrees to the terms of use.
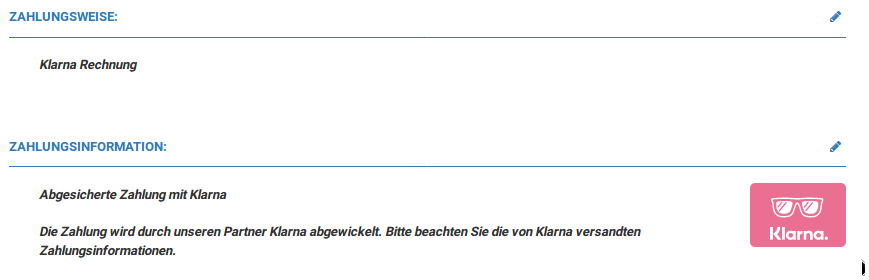
On the last page of the order, the selected payment method is listed once again and can be changed again by the customer in case of doubt
Processing of the order
Viewing orders
You will find completed orders in the normal order overview in the Gambio Admin under Orders > Orders. You can view them just like other orders.

Editing orders
Currently, only the products can be edited in orders via Klarna. The shipping costs can be changed if you finish editing the products without setting the checkmark at Finish post-processing and recalculate order when saving. A popup then appears in which the shipping costs can be adjusted. In the same way, gift vouchers and discount coupons can also be added to the order, provided the voucher system is active in the shop.
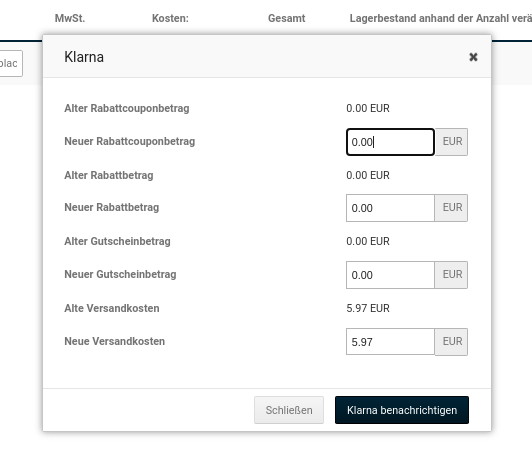
For all changes, however, it applies that these are only possible if the order value is not increased as a result. The total may only remain the same or be reduced through the editing.
If the editing only takes place after the confirmation by Klarna, a refund is automatically initiated. If the amount of the order is reduced, this is noted as a refund in the Klarna log data of the order. The log data is therefore the first place that should be checked if a problem has occurred.
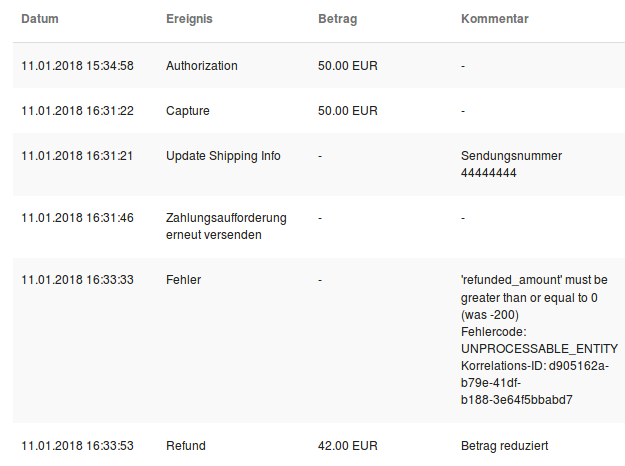
Below we explain some log entries that you might find in the log data. Please note that these are only examples and make no claim to completeness.
| Event | Explanation |
|---|---|
| Authorize | Log data directly after receipt of the order. The order was created at Klarna. |
| Capture | The order was recorded as shipped at Klarna. |
| Update Shipping Info | A tracking number was added. However, an added tracking number is only visible in the log data once the capture has taken place. |
| Resend payment request | The payment request can be sent to the customer again. |
| Error | In our example, we revised the order and already triggered a recalculation before saving the new amounts. As a result, the refund total was 0, which led to the message. |
| Refund | We reduced the amount of the test order, which is noted as a refund or write-off refund. |
Attention
When editing, note that after applying your changes, the checkmark at Finish post-processing and recalculate order must be set and then Close must be clicked so that the order values can be correctly recalculated and the changed totals can be transmitted to Klarna!
Invoicing
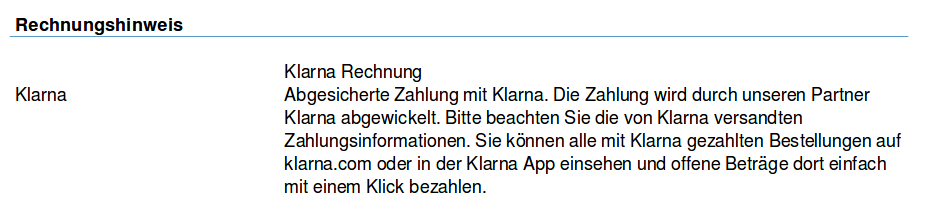
Invoicing can take place normally via the shop. The created invoices contain a corresponding notice that additionally informs the customer that the payment is to be made to Klarna. To prevent misunderstandings, the merchant's bank details are automatically hidden for Klarna payments.
Reporting shipment
The shipment can be reported to Klarna via an order status change. To do this, select the item Change order status in the order overview or on the order details page. Select the status that you specified in the configuration as the desired order status for shipped orders and you will receive an additional selection field Notify Klarna. To report the shipment to Klarna, the checkmark must be set here.
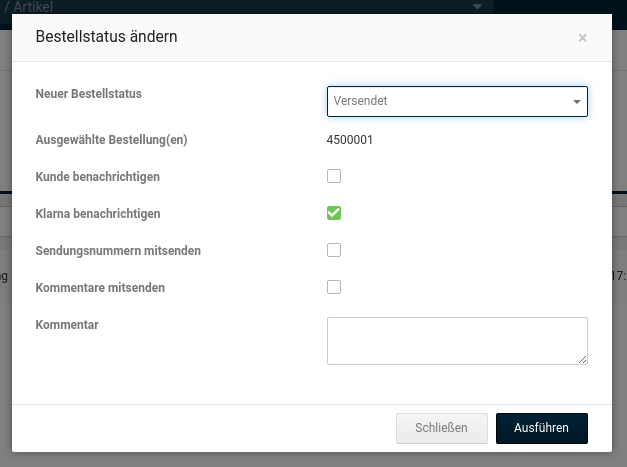
Note
Note that the shipping notification must as a rule take place within the so-called authorization period (28 days) after the order. Without a shipping notification, no payment request is sent to the customer and no money is paid out to the merchant.
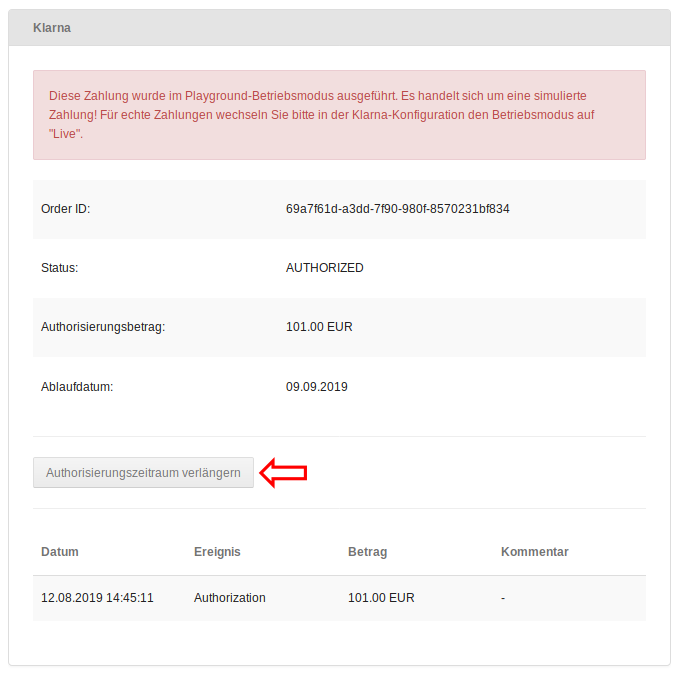
Via the Extend authorization period button, a later date for the authorization can be requested if required. The period is extended to 28 days after the request (click on the button).
Attention
If the Automatic status update has not been activated in the expert settings, the shipment must imperatively be reported via the function in the shop. If the status change is made in another way, no shipping notification is sent to Klarna and thus no payout takes place!
Sending the tracking number to Klarna
If the tracking number is also to be transmitted to Klarna, you can enter it in the order and then select Notify Klarna. The tracking number is then also transmitted to Klarna with the shipping notification. Klarna thus has the possibility to help solve the problem in the case of outstanding or missing shipments.
Note
Storing the tracking number alone does not constitute a shipping notification. In the previous section Reporting shipment you will find the necessary steps to notify Klarna.
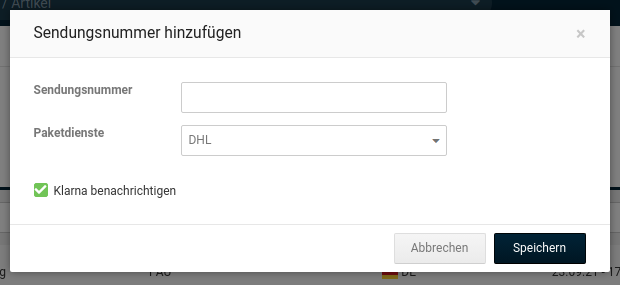
Canceling an order
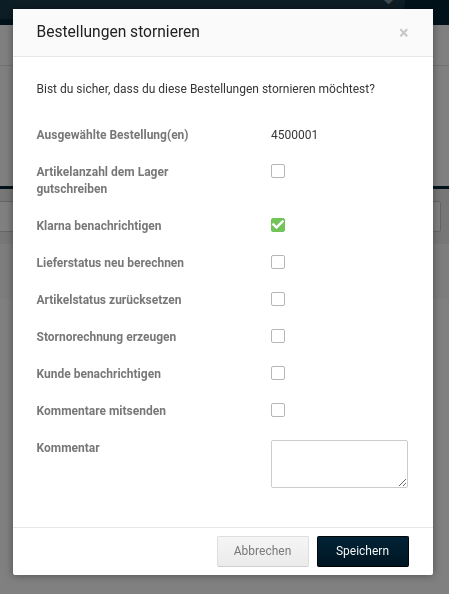
When canceling a Klarna order, you can also proceed exactly as you are used to. Select Cancel, set the checkmark at Notify Klarna and continue as usual. If the order is canceled after the shipping notification, a refund is also initiated here; otherwise a normal cancellation takes place.
Klarna Settlements
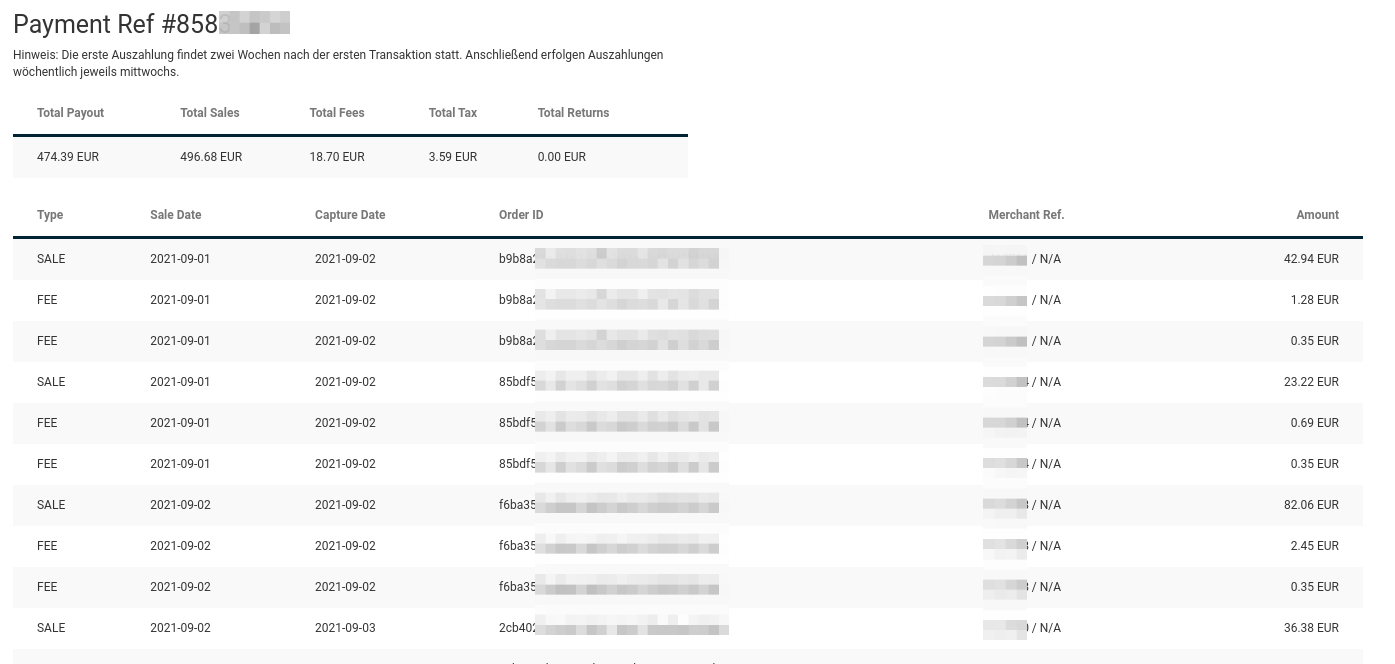
Under Gambio Hub > Klarna Settlements, payouts made by Klarna to the shop operator can be viewed. Via this, the fees, collections and refunds per order can then be checked.
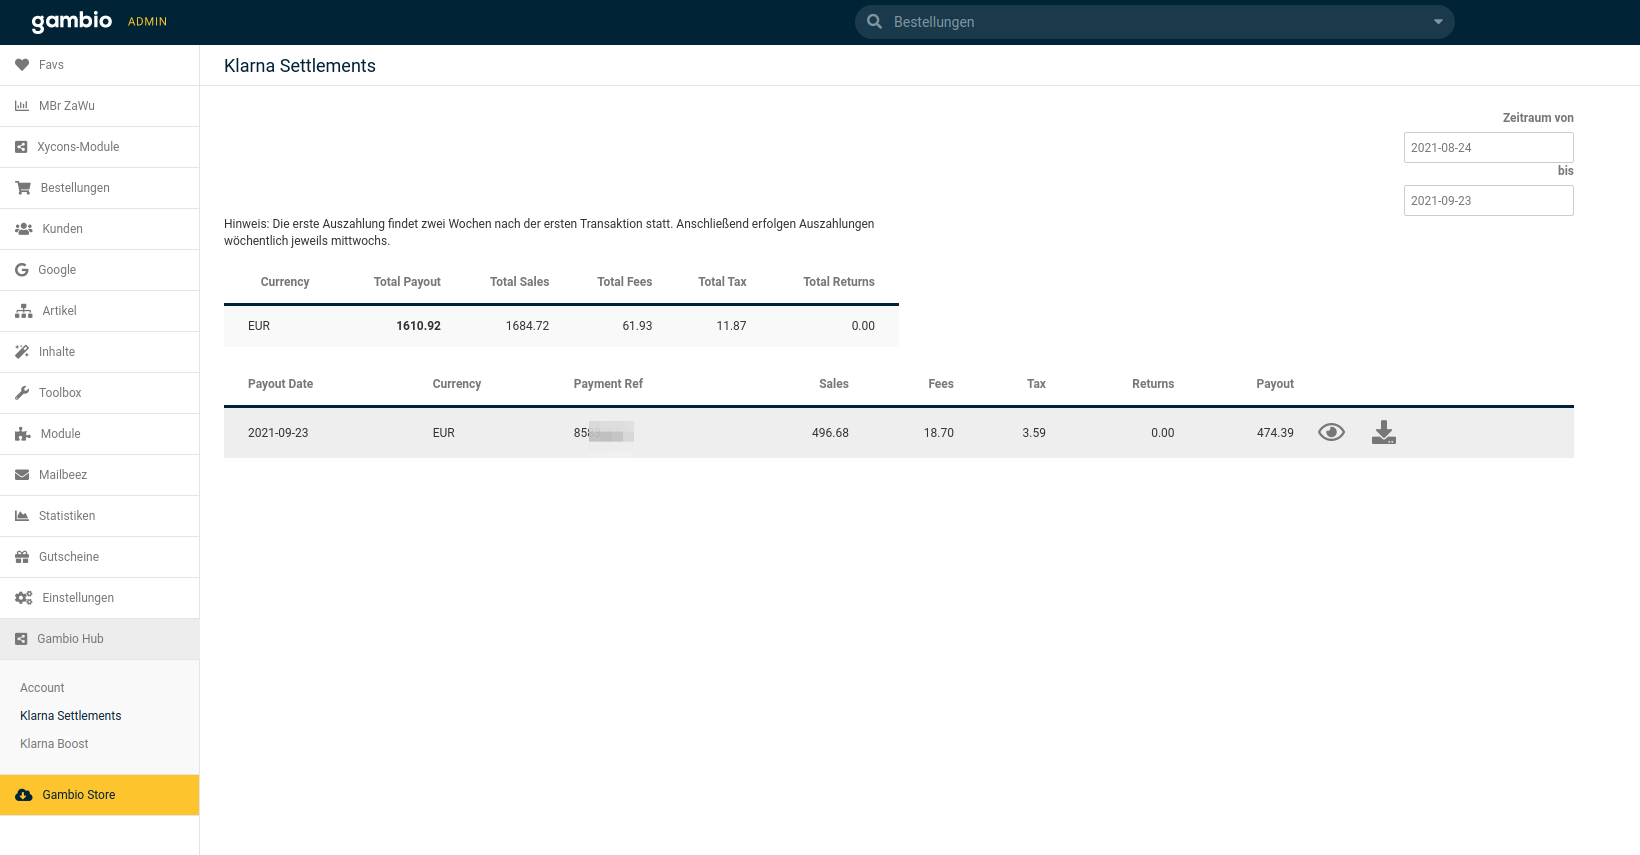
Via the settings at the top left, the period for which the settlements should be output can be defined. With a click on the Payment Ref, further details on the respective payment can be called up.
Function tests
Preparatory steps
To check the function of the module, open the configuration page of the module and switch the operating mode to Playground. In this mode, no real payments are carried out, but merely simulated.
Checking the function
Create a new order with Klarna as the payment method by logging into your shop as a test customer and selecting one of your new payment methods in the checkout.
Make sure to use a private customer, i.e. without trader status and with an empty company/company name field, as the payment methods would otherwise not be visible.
Now set the order status of the order to shipped, so that the order is reported to Klarna and the follow-up processes (invoicing and payout) can be triggered.
Now cancel the order.
If all these steps run without errors, the integration of the payment module in your shop is successfully completed.
If you have questions or problems in these steps, please contact Klarna via the known contact options to clarify the open points.
easyCredit
Availability
The easyCredit module is included in the scope of the shop software.
Installation
The module can be installed, after updating the Hub-Connector via the Gambio Store, under Modules > Payment methods. To do this, select the module entry from the list and click on Install.
Configuration
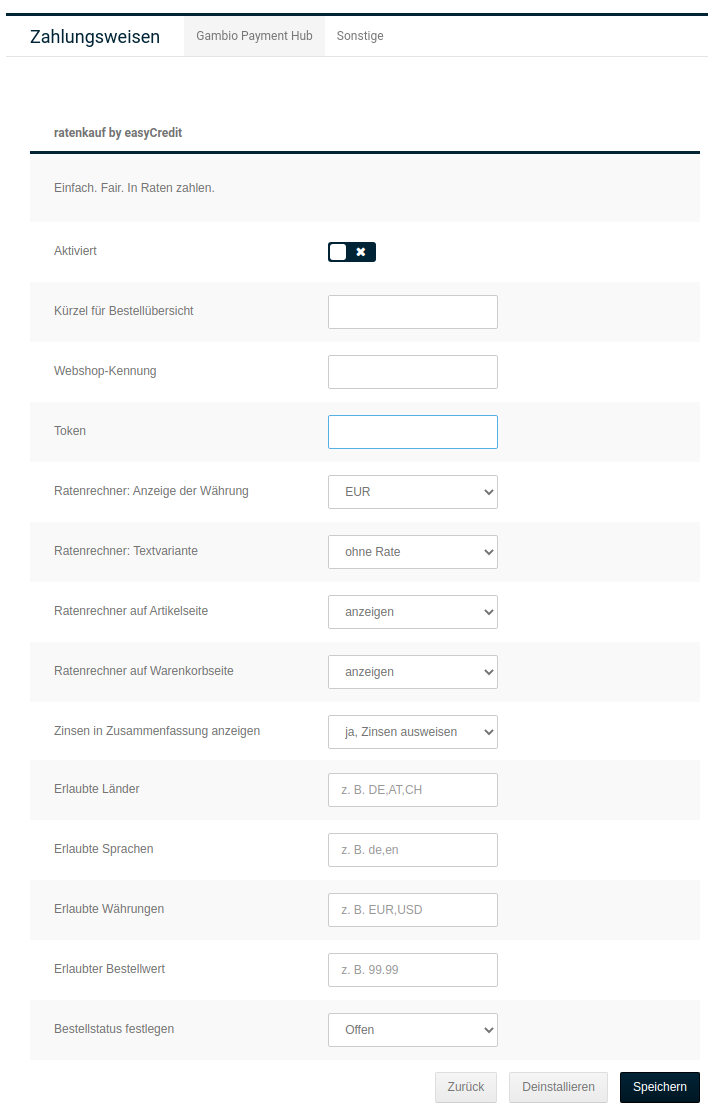
The following settings are available on the configuration page:
| Field name | Description |
|---|---|
| Activated | If the checkmark is set, the module is used in the checkout. |
| Abbreviation for order overview | Here an abbreviation can be specified, which is displayed in the listing in the order overview to identify orders via this module. |
| Webshop identifier | You receive the identifier from easyCredit. |
Note on the webshop identifier
The identifier has the format 1.de.1111.1, which breaks down as follows:- 1st position = Here there is a 1 or a 2 - 2nd position = Here there is a language or country code, e.g. de - 3rd position = Consists of a 4-digit, purely numeric character sequence - 4th position = Consists of a single digit
| Field name | Description |
|---|---|
| Token | You receive the token from easyCredit; it consists of a 16-digit sequence of lowercase and uppercase letters as well as digits. |
| Installment calculator: display of the currency | This setting no longer has any function. |
| Installment calculator: text variant | This setting no longer has any function. |
| Installment calculator on the product page | Here you can choose whether the installment calculator should be linked on the product page. |
| Installment calculator in the shopping cart | Here you can choose whether the installment calculator should be linked in the shopping cart. |
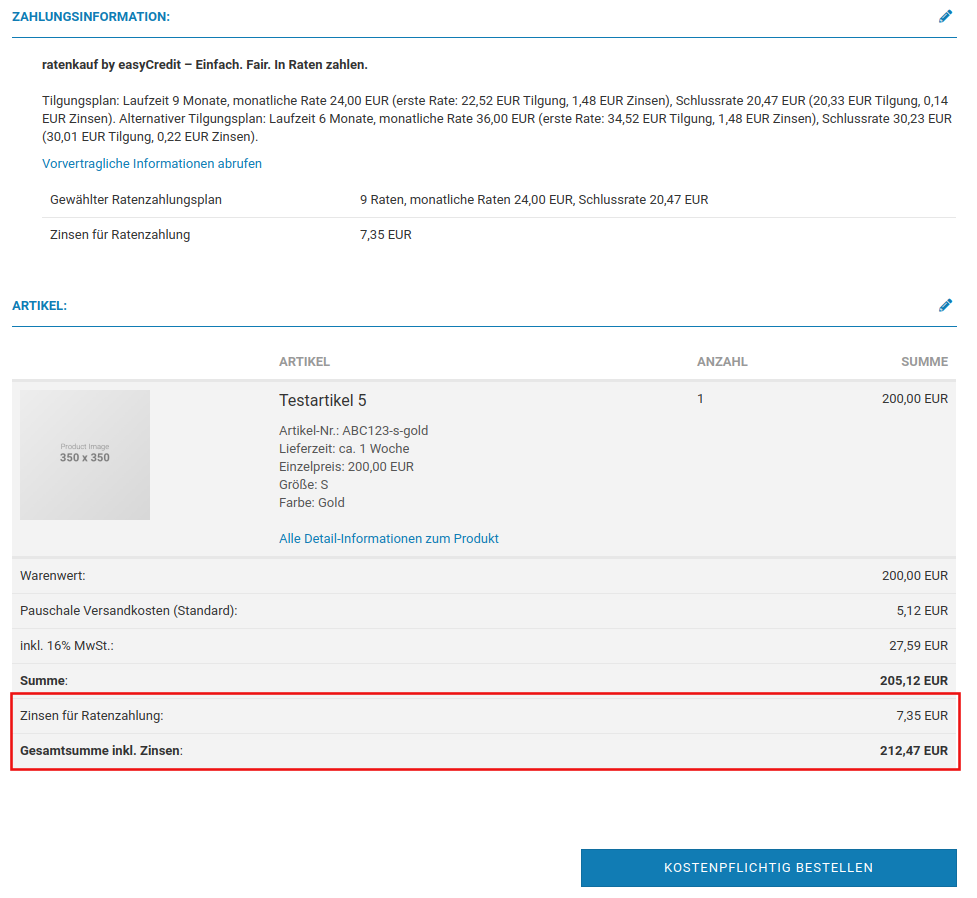
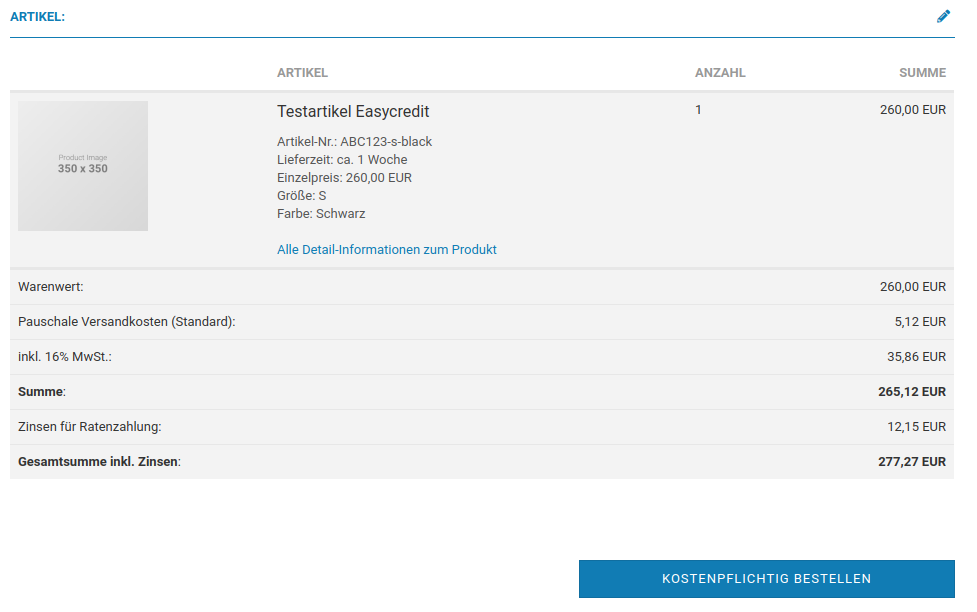
| Show interest in summary | Here you can choose whether the interest should be shown on the last page of the order. In the figure you can see part of the last order page; in the upper area the selected payment method is displayed, and at the bottom in the totals block, when this function is activated, the interest as well as the total sum including interest are additionally shown. We have outlined the inserted information in red in the figure for clarification. |
| Allowed countries | Here the country code according to ISO2 can be stored, i.e. in capital letters and without spaces, e.g. DE,AT,CH |
| Allowed languages | Here the allowed language can be defined, also according to ISO2, but here in lowercase letters, e.g. de,en |
| Allowed currencies | If multiple currencies are offered in the shop, you can select here which ones may be used, e.g. EUR,USD |
| Allowed order value | Allows setting a maximum order value. The installment purchase via easyCredit is only possible from a goods value of 200 to 10,000 euros; it therefore makes little sense to enter an amount lower than 200 euros. |
| Set order status | Here the order status can be selected that incoming orders via the easyCredit module should receive. |
Note
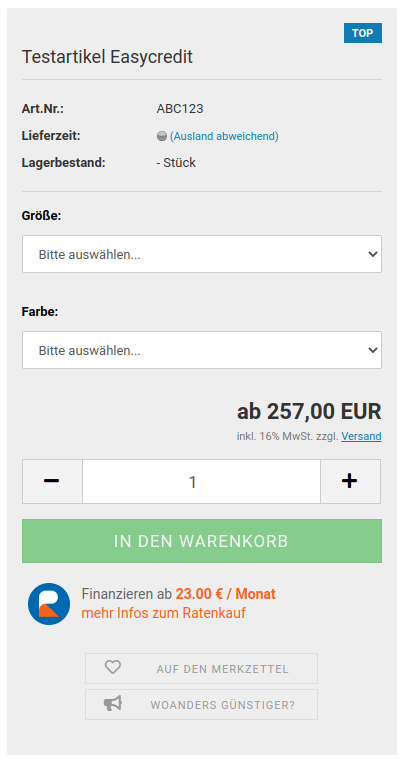
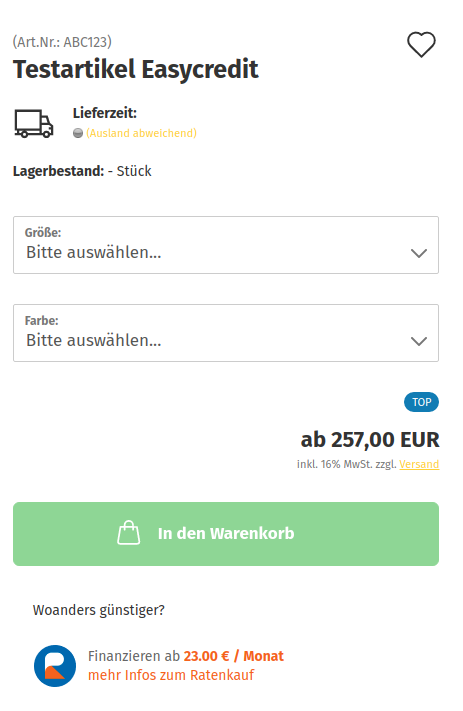
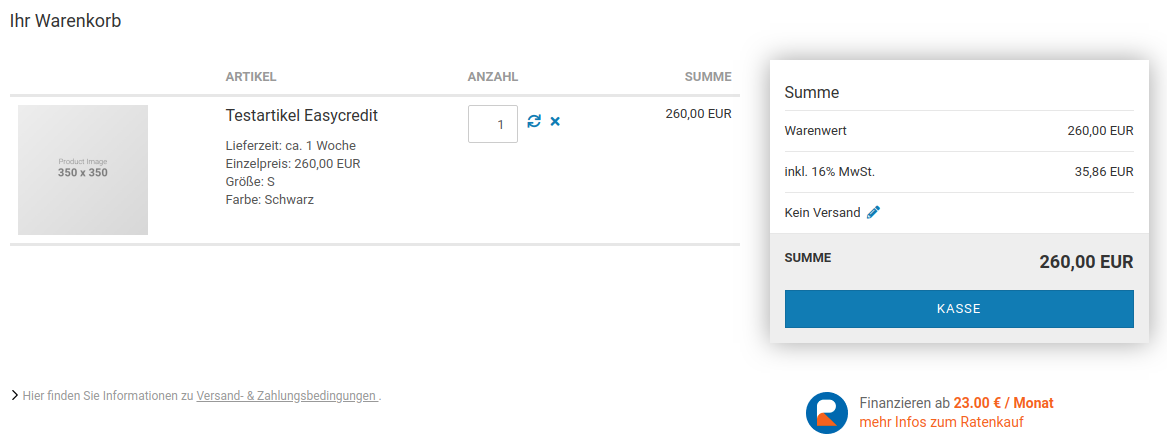
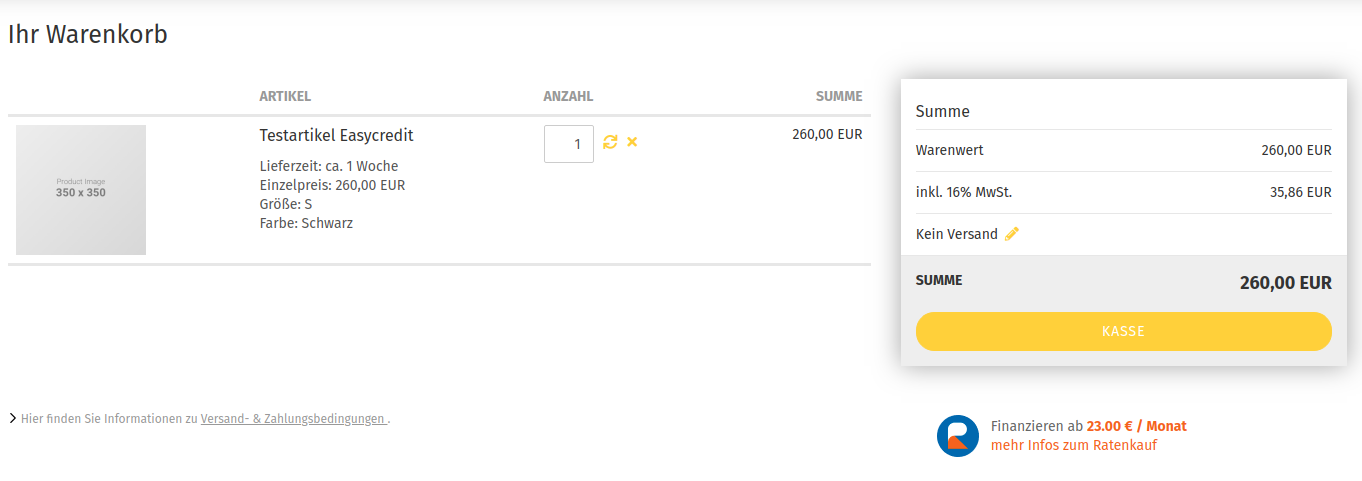
Widget refers to the display for easyCredit in the product or shopping cart.
Display in the shop
Display of the widget in the price box on the product details page
Display of the widget in the shopping cart
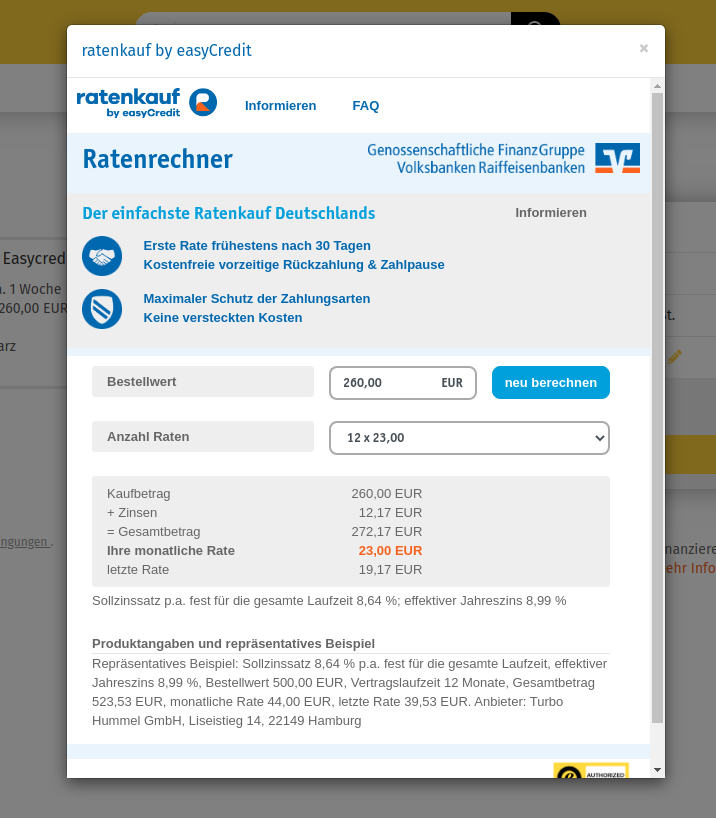
Display of the installment calculator
If you click on the link in the widget, the installment calculator opens.
Flow in the checkout
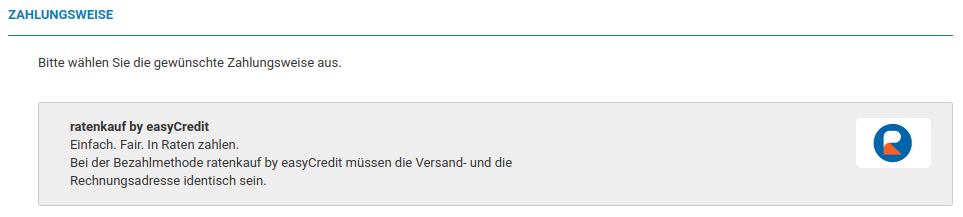
Display of the module before the check by easyCredit
Attention
Shipping and billing address must be identical! If different addresses are used, easyCredit cannot be selected; you receive this display:
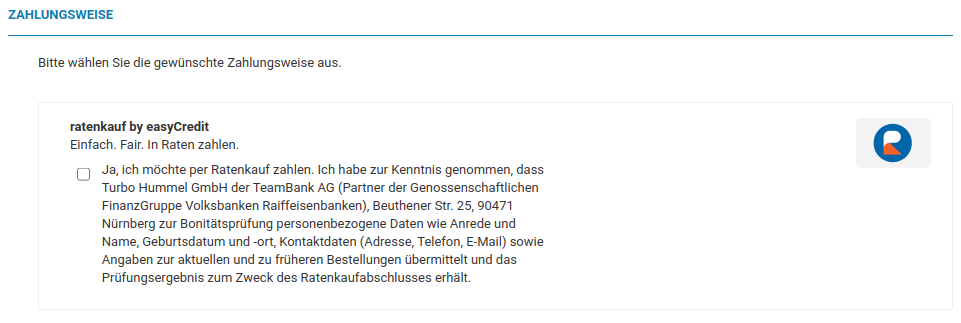
Going through the easyCredit inquiry form
A check is carried out by easyCredit as to whether installment payment is possible.
Note
The screenshots contain a notice about test operation. This is not present in live operation.
| Step | Display |
|---|---|
| Installment overview | 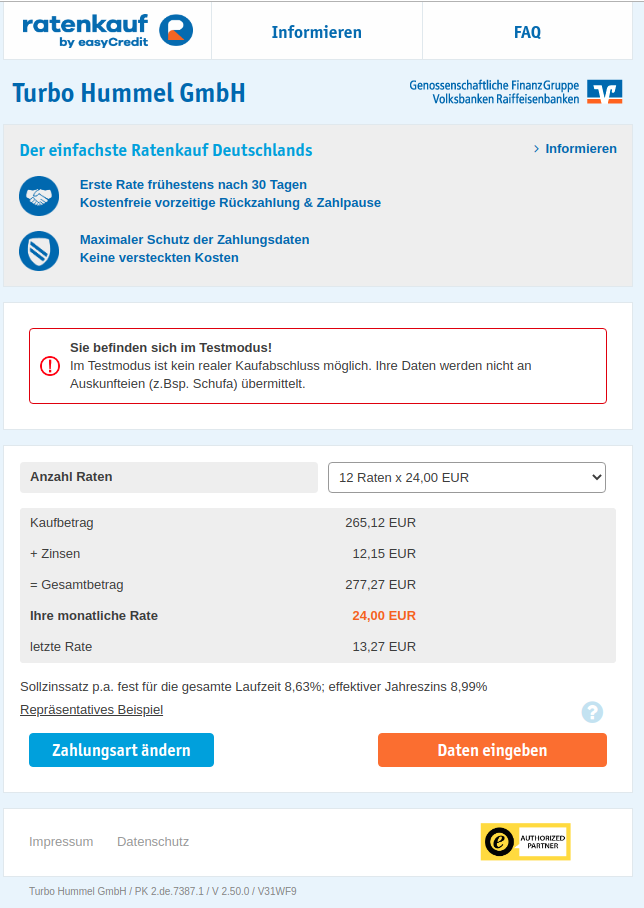 |
| Data entry | 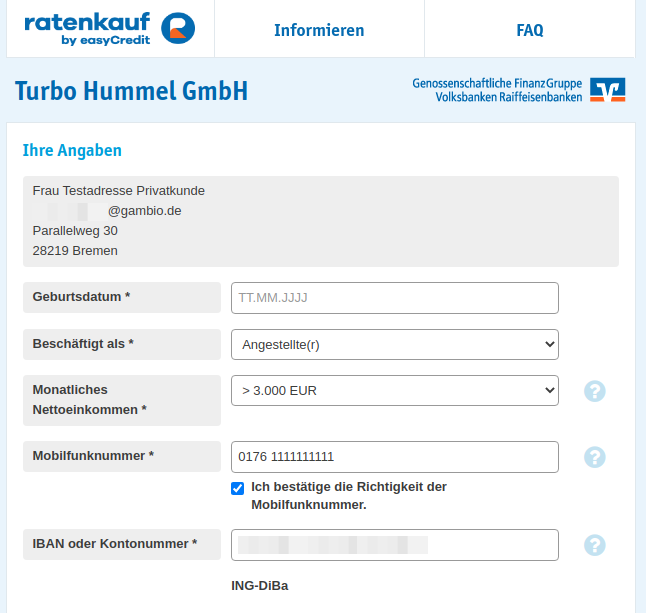 |
| Consents | 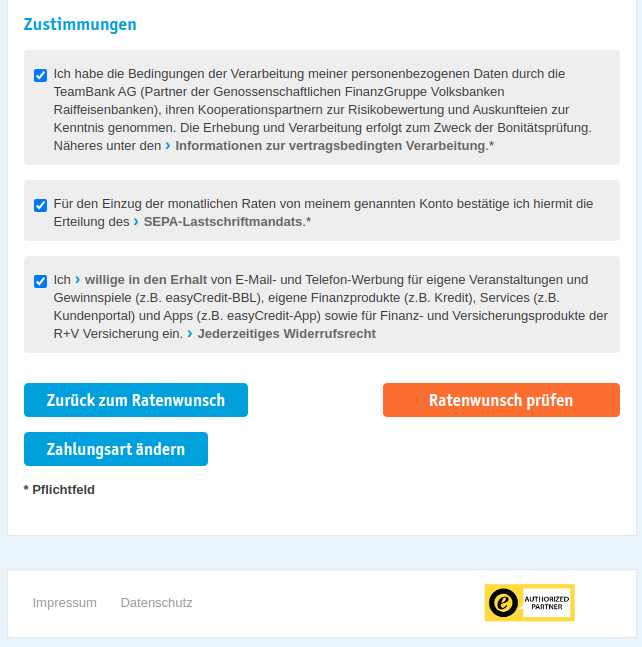 |
| After positive check | 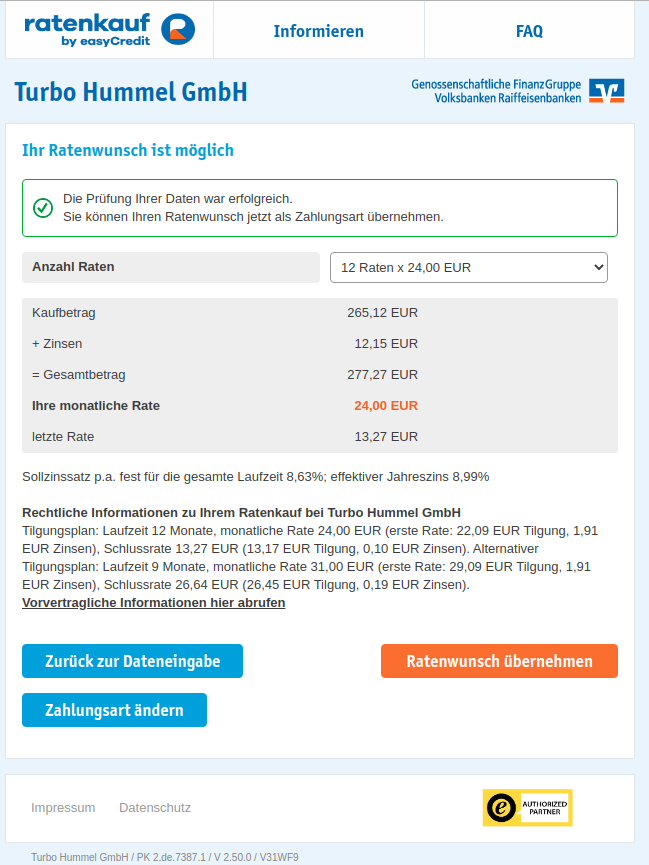 |
Display of the module after positive check
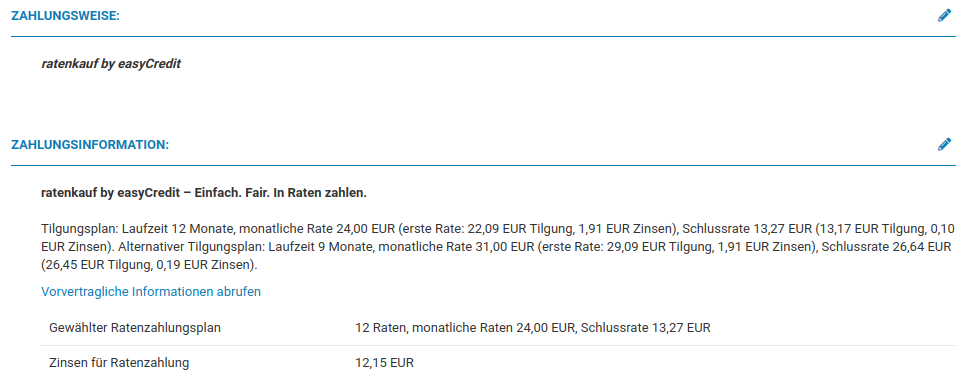
Totals block with interest for the installment payment
Further handling of the order
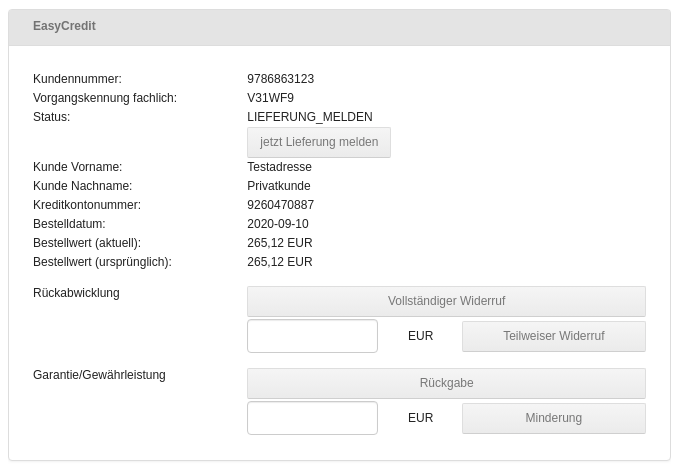
In the order details of the easyCredit order there is now a block with payment information. Via this, the delivery or also returns and complete withdrawals can be transmitted to easyCredit.
Note
An easyCredit order cannot be edited retrospectively and the values in it changed!
Information from the payment service provider
Information page of the provider: https://www.easycredit-ratenkauf.de/gambio-aktion
Others
Under Modules > Payment methods > Others payment modules are provided that do not require a connection to the Gambio Hub.
Prepayment
With payment by prepayment, your bank details and a payment request are transmitted to your customer in the order confirmation after they have placed the order. With this payment method, the goods are usually shipped after the amount has been credited to your account.
- Under Modules > Payment methods > Others select the module Prepayment/Bank transfer
- In the right column, click Install
- In the right column, click Edit
- Configure the module using the table Configuration of the payment method Prepayment
- Click Update to apply the changes to the configuration
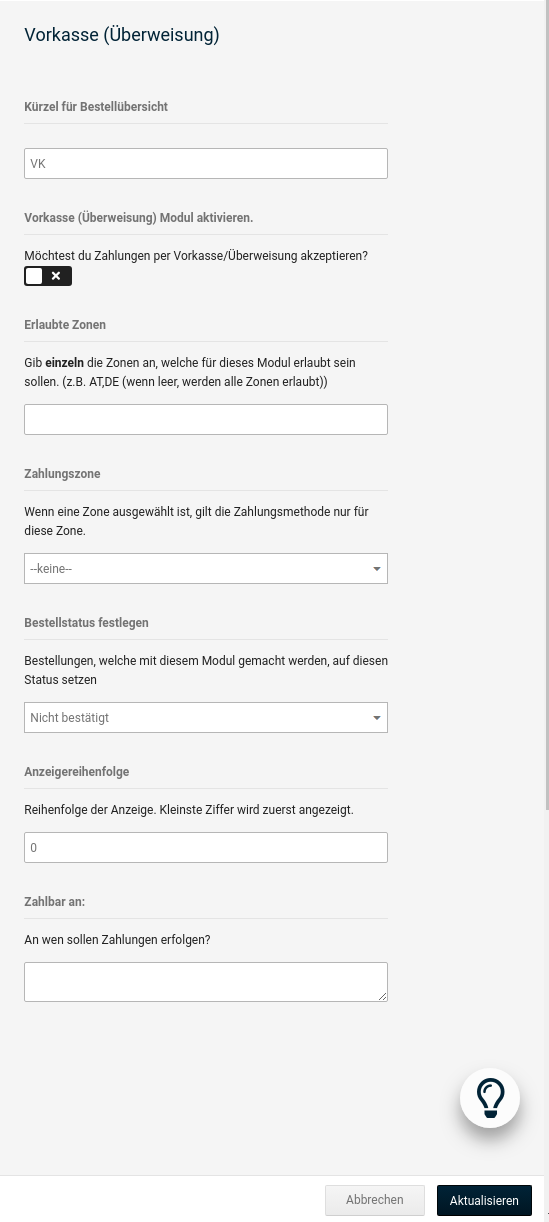
| Field name | Description |
|---|---|
| Abbreviation for order overview | Here you can enter the abbreviation under which orders with this payment method should be displayed in the order overview |
| Activate Prepayment/Bank transfer module | If ✔, the customer can select the payment method during the order process [✔] |
| Allowed zones | comma-separated list of two-digit ISO codes for countries from which the payment method may be used (all countries if no entry) |
| Payment zone | Tax zone from which the payment method may be used (overrides Allowed zones) [--none--] |
| Set order status | Order status assigned to an order with this payment method upon receipt [Default] |
| Display order | Order in which installed payment modules are displayed during the order process (the higher the number, the further down the module is displayed); unique value per module [0] |
| Payable to | Bank details to which the transfer is to be directed |
Note
The payment module Prepayment is primarily intended for payments from the country from which you operate your shop. If you also want to offer payment by prepayment internationally, additionally use the module EU-Standard Bank Transfer.
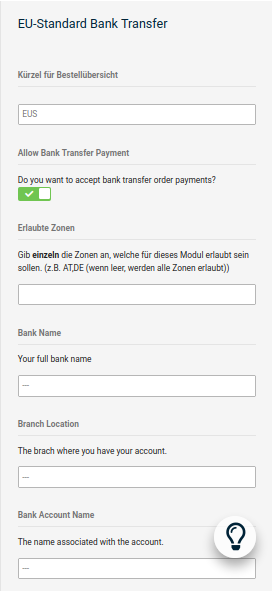
| Field name | Description |
|---|---|
| Allow Bank Transfer Payment | If ✔, the customer can select the payment method during the order process [✔] |
| Allowed zones | comma-separated list of two-digit ISO codes for countries from which the payment method may be used (all countries if no entry) |
| Bank Name | Name of the bank [---] |
| Bank Location | Location of the bank [---] |
| Bank Account name | Name of the account holder [---] |
| Bank Account No. | Account number [---] |
| Bank Account IBAN | IBAN account number [---] |
| Bank BIC | International bank identifier [---] |
| Bank Sort Code | Bank sort code [---] |
| Module Sort order of display (Display order) | Order in which installed payment modules are displayed during the order process (the higher the number, the further down the module is displayed); unique value per module [0] |
Invoice
With payment by invoice, you enclose an invoice with the delivered goods stating the payment term and bank details. With this payment method, the customer first receives the goods and then makes the payment.
- Under Modules > Payment methods > Others select the module Invoice
- In the right column, click Install
- In the right column, click Edit
- Configure the module using the table Configuration of the payment method Invoice
- Click Update to apply the changes to the configuration
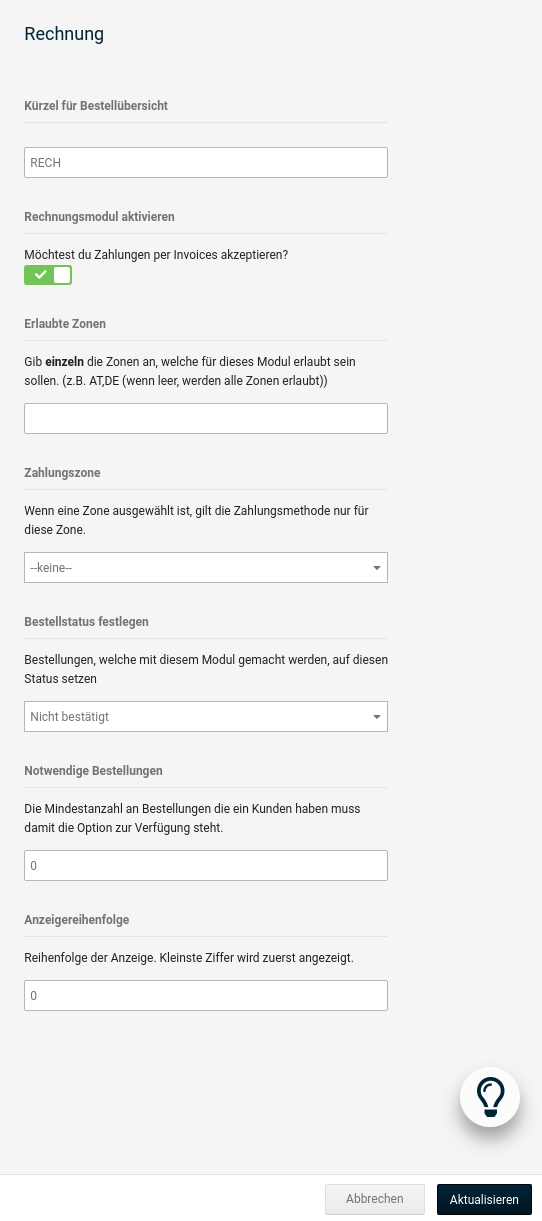
| Field name | Description |
|---|---|
| Abbreviation for order overview | Abbreviation displayed for the payment method in the order overview |
| Activate Invoice module | If ✔, the customer can select the payment method during the order process [✔] |
| Allowed zones | comma-separated list of two-digit ISO codes for countries from which the payment method may be used (all countries if no entry) |
| Payment zone | Tax zone from which the payment method may be used (overrides Allowed zones) [--none--] |
| Set order status | Order status assigned to an order with this payment method upon receipt [Default] |
| Required orders | Number of required orders before customers may select the payment method during the order process |
| Display order | Order in which installed payment modules are displayed during the order process (the higher the number, the further down the module is displayed); unique value per module [0] |
Note
Payment by invoice is a frequently used payment method when shipping to public authorities or to merchants. How to restrict payment by invoice to certain customer groups is explained in the chapter Customer groups.
Cash on delivery
With payment by cash on delivery, the customer pays for the goods directly upon delivery to the delivering postal carrier. After delivery has taken place, you receive the invoice amount paid by the customer to the deliverer from the delivering company.
- Under Modules > Payment methods > Others select the module Cash on delivery
- In the right column, click Install
- In the right column, click Edit
- Configure the module using the table Configuration of the payment method Cash on delivery
- Click Update to apply the changes to the configuration
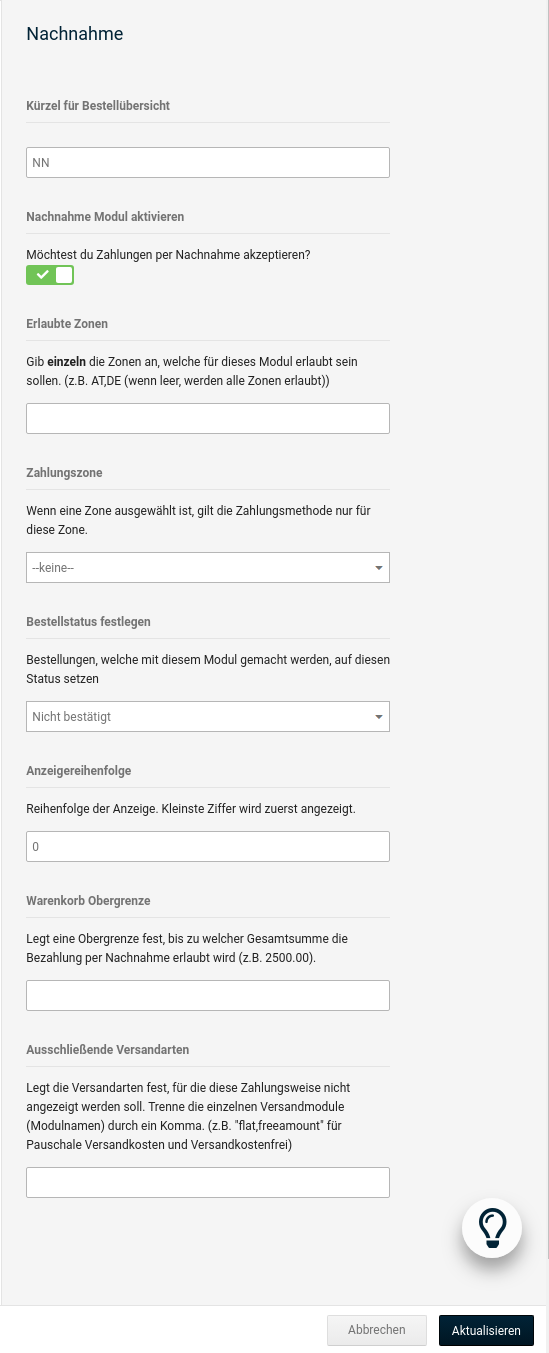
| Field name | Description |
|---|---|
| Abbreviation for order overview | Abbreviation displayed for the payment method in the order overview |
| Activate Cash on delivery module | If ✔, the customer can select the payment method during the order process [✔] |
| Allowed zones | comma-separated list of two-digit ISO codes for countries from which the payment method may be used (all countries if no entry) |
| Payment zone | Tax zone from which the payment method may be used (overrides Allowed zones) [--none--] |
| Set order status | Order status assigned to an order with this payment method upon receipt [Default] |
| Display order | Display order, order in which installed payment modules are displayed during the order process (the higher the number, the further down the module is displayed); unique value per module [0] |
| Shopping cart upper limit | Maximum order amount up to which cash on delivery can be ordered |
| Excluding shipping methods | Determines for which shipping methods cash on delivery is not available |
Note
For payment by cash on delivery, a handling fee is usually charged by the delivering company. How to charge the cash-on-delivery fee to your customer is explained in the chapter Summary > Fees.
SEPA direct debit scheme
With the payment method SEPA direct debit scheme, your customer transmits their bank details to you when submitting the order, together with the consent that you debit the due invoice amount from their bank account.
- Under Modules > Payment methods > Others select the module SEPA direct debit scheme
- In the right column, click Install
- In the right column, click Edit
- Configure the module using the table Configuration of the payment method SEPA direct debit scheme
- Click Update to apply the changes to the configuration
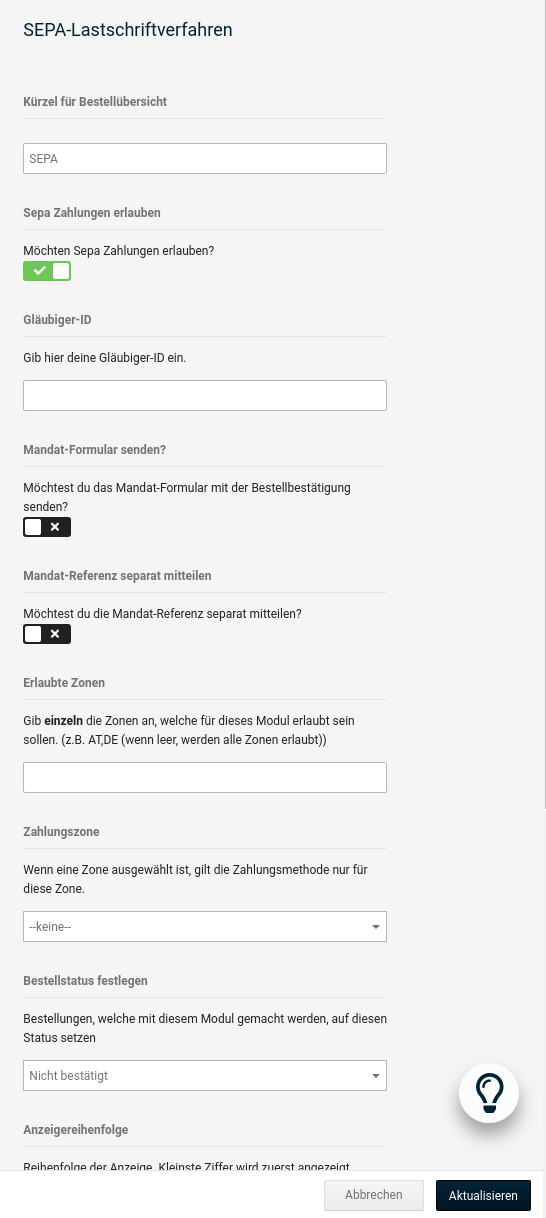
Attention
In order to submit direct debits to your bank, a special account is required at most banks. Whether you can submit direct debit orders can be found out directly from your bank.
| Field name | Description |
|---|---|
| Abbreviation for order overview | Abbreviation displayed for the payment method in the order overview |
| Allow SEPA payments | If ✔, the customer can select the payment method during the order process [✔] |
| Creditor ID | Enter your creditor ID in this field |
| Send mandate form? | If ✔, the mandate form is sent together with the order confirmation [✖] |
| Communicate mandate reference separately | If ✔, the associated reference is not entered in the SEPA mandate but is replaced by the note WILL BE COMMUNICATED SEPARATELY. [✖] |
| Allowed zones | comma-separated list of two-digit ISO codes for countries from which the payment method may be used (all countries if no entry) |
| Payment zone | Tax zone from which the payment method may be used (overrides Allowed zones) [--none--] |
| Set order status | Order status assigned to an order with this payment method upon receipt [Default] |
| Display order | Order in which installed payment modules are displayed during the order process (the higher the number, the further down the module is displayed); unique value per module [0] |
| Check bank details? | If ✔, the bank details entered by the customer during the order process are checked [✔] |
| Use database search for the bank sort code? | If ✔, the bank sort code can be searched using the bank name [✔] |
| Allow fax confirmation | If ✔, the customer is asked to fill out the fax confirmation and send it to you [✖] |
| Required orders | Number of required orders before customers may select the payment method during the order process |
Note
Your customer must explicitly consent to their bank account being debited by you. Whether submitting the order with the bank details is sufficient as consent, please ask your legal advisor. In case of doubt, activate the additional fax confirmation.
Cash payment on collection
The payment method Cash payment can only be selected in the shop area in combination with the shipping method Self-collection. With the payment method Cash payment, the customer pays for the goods in cash upon collection from your warehouse or your branch.
- Under Modules > Payment methods > Others select the module Cash payment in the drop-down menu More payment methods > Classic payment methods
- In the right column, click Install
- In the right column, click Edit
- Configure the module using the table Configuration of the payment method Cash payment
- Click Update to apply the changes to the configuration
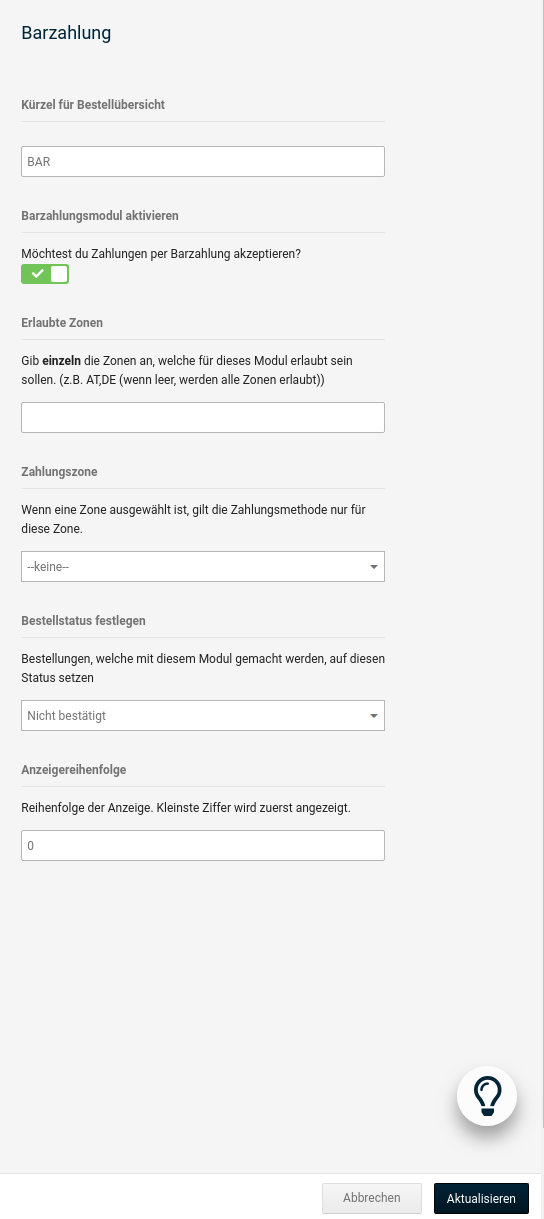
| Field name | Description |
|---|---|
| Abbreviation for order overview | Abbreviation in the Payment column under Orders > Orders |
| Activate Cash payment module | If ✔, the customer can select the payment method during the order process [✔] |
| Allowed zones | comma-separated list of two-digit ISO codes for countries from which the payment method may be used (all countries if no entry) |
| Payment zone | Tax zone from which the payment method may be used (overrides Allowed zones) [--none--] |
| Set order status | Order status assigned to an order with this payment method upon receipt [Default] |
| Display order | Order in which installed payment modules are displayed during the order process (the higher the number, the further down the module is displayed); unique value per module [0] |
PayPal and PayPal Plus
In shops from version series 2.4 onwards, the module PayPal and PayPal Plus (paypal3) is included by default. Via this, not only the PayPal-side REST (REpresentational State Transfer) interface can be used, but also the new PayPal Plus features.
Installing the module for use in the shop

To install PayPal as a payment method, call up the menu item Modules > Payment methods > Others in the administration area of the shop. Highlight the module so that it is highlighted in blue and then click the Install button.
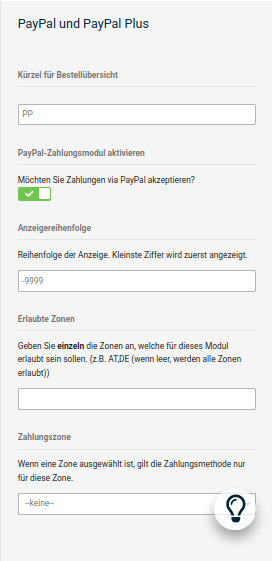
| Field name | Description |
|---|---|
| Abbreviation for order overview | Abbreviation for the payment method in the order overview |
| Activate PayPal payment module | With this setting the module can be deactivated or activated. If for a certain reason you temporarily do not want to offer PayPal, the module should be deactivated via this setting instead of uninstalling it. |
| Display order | Order in which the payment method is displayed, is set to -9999 by default (recommended setting). |
| Allowed zones | Abbreviations of the countries for which PayPal payments are to be offered. The entry is made comma-separated without spaces, e.g.: DE,AT,CH |
| Payment zone | Alternatively, a selection of the relevant tax zone can be made via this. Since the allowed zones and the payment zone can contradict each other (e.g. CH in allowed zones, but tax zone Germany), only one should be filled in. |
Attention
Should errors occur after installing the module under Modules > Payment methods > Others, please clear all caches of the shop once. This can be done under Toolbox > Cache.
Obtaining access data at PayPal
Attention
At this point we assume that you have already registered for a merchant account at PayPal. If this is not the case, this must be done before the following steps.
Attention
When using PayPal and PayPal Plus v3.x, your previous access data for preceding PayPal modules cannot be transferred; a new access must be generated.
Log in with your login access data at https://developer.paypal.com.
Scroll down to REST API apps and create a new app there via the Create App button. You can freely assign the name now requested for the app; it serves your own identification in case several shops, etc. are to be connected to the PayPal account. Under Sandbox Developer Account you select the sandbox account you created in the previous step. If this selection remains empty, the sandbox account does not meet all requirements.
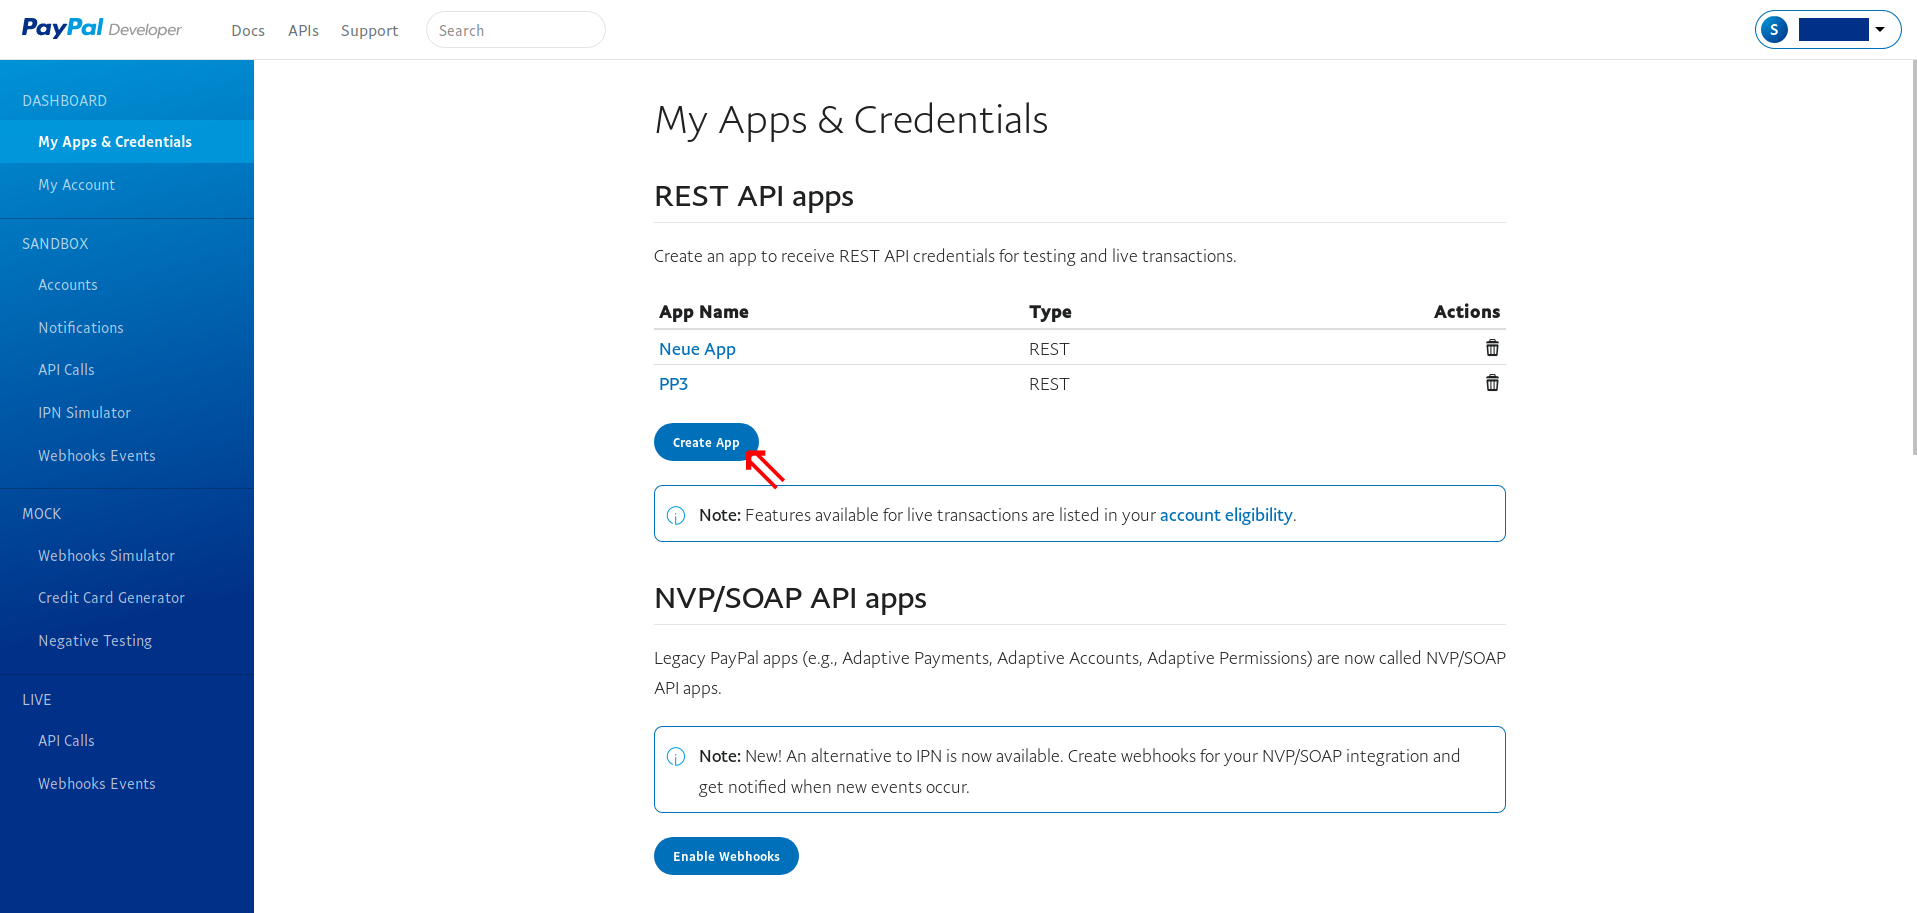
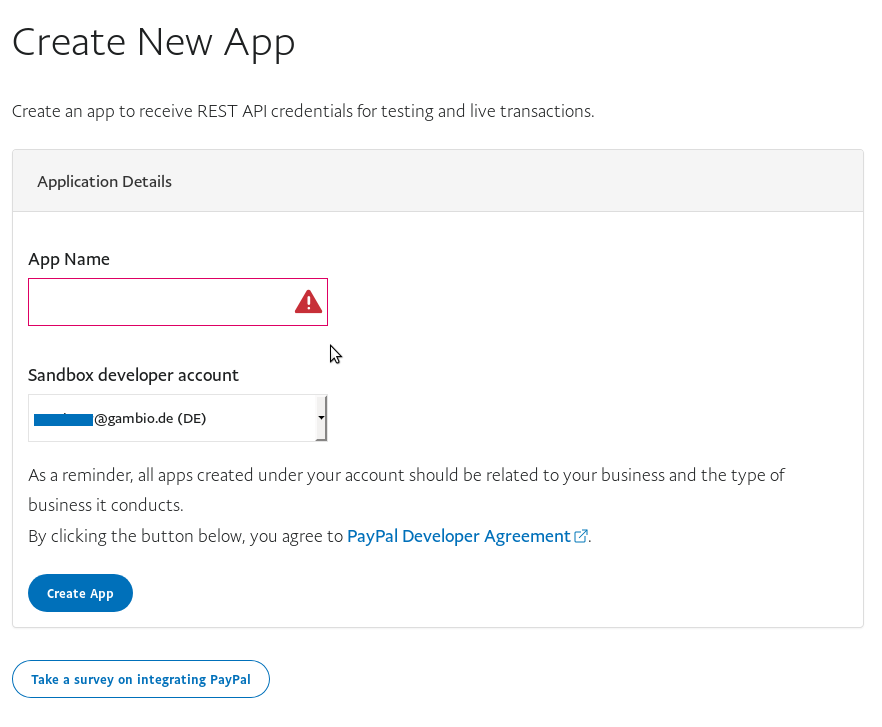
This is usually the case if you had already created a sandbox account in your account and therefore skipped the previous step. In this case, please still create a new sandbox account to fix the problem.
After clicking Create App you are shown the access data for the Sandbox mode. Via the live button at the top right, you can switch the display to the display of the access data for productive operation.
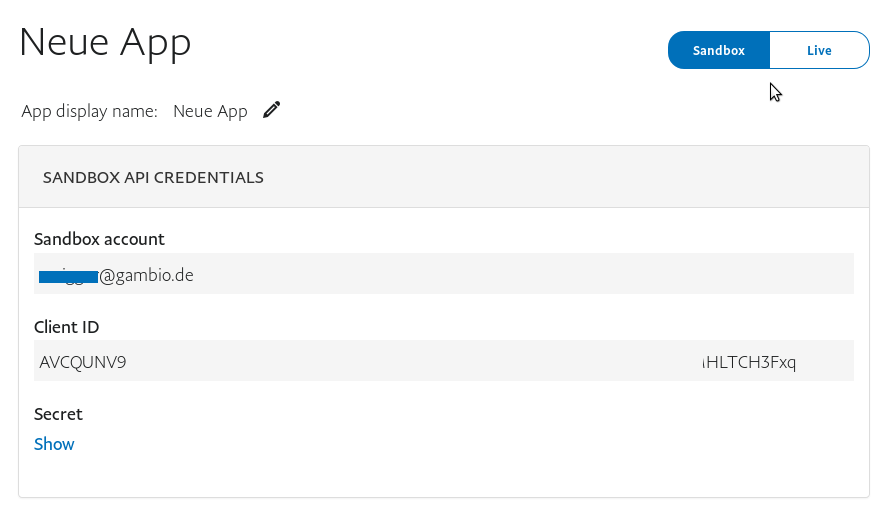
Danger
The secret may not be displayed directly; click show here.
Please copy these (Client ID and Secret) into the access data fields of the PayPal module.
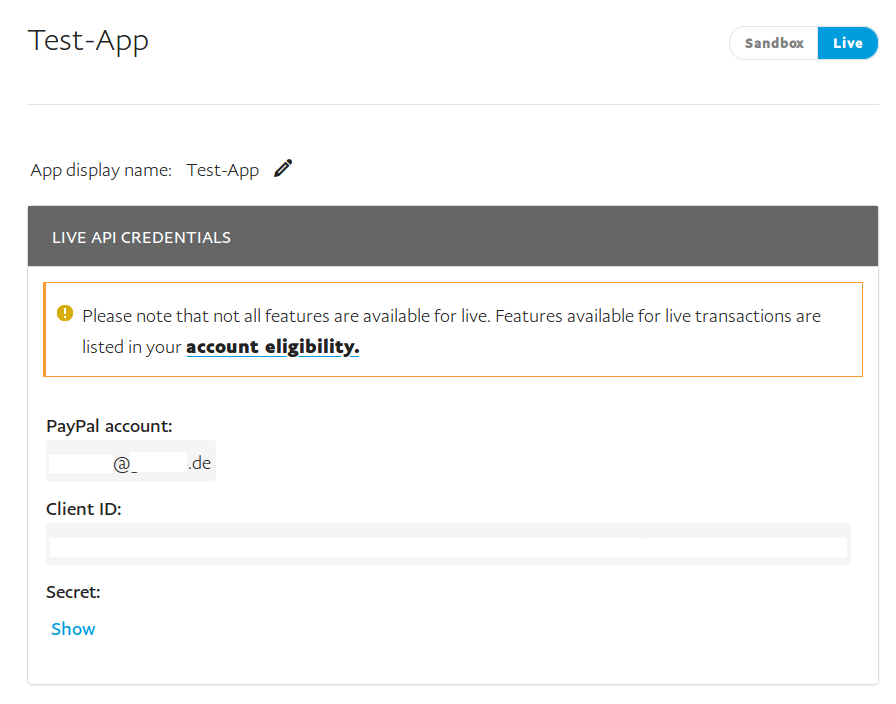
Requested fields for Return URL, etc. can be ignored. They are not relevant for the function of the module. The App feature options can be left at default values.
Configuration
The configuration of PayPal can be carried out under Modules > Payment methods > Others, after PayPal and PayPal Plus (paypal3) has been selected there. To do this, click Configuration. The tabs General and Expert settings are available. Click the respective tab to open it.
General
PayPal 3 is preconfigured as far as possible. For the initial setup, the entry of the access data is first necessary:
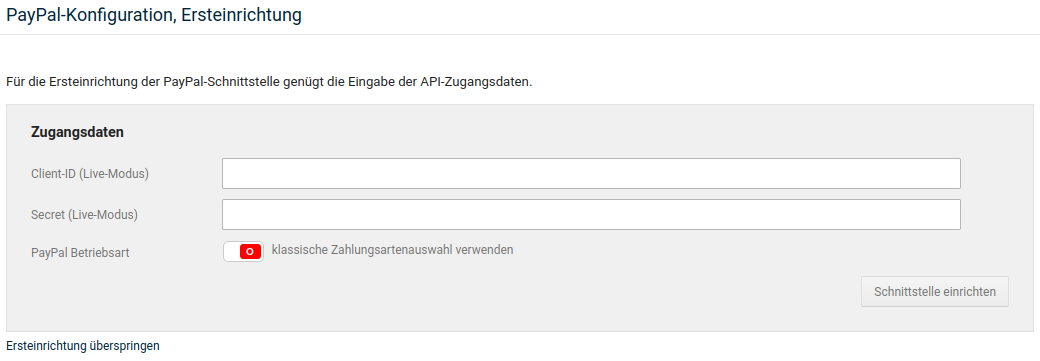
Attention
For the use of PayPal and PayPal Plus v3.x, new access data for the so-called REST interface are required. Your previous access data can not be used further! (cf. chapter Obtaining access data at PayPal)
Enter your PayPal access data and select the operating mode of the interface. By default, the Classic mode is activated, in which the payment method behaves for customers as you are used to from previous PayPal modules. In PLUS mode, the selection of the payment type moves from the PayPal website into the payment selection of the shop. Click Set up interface to carry out the initial setup.
Attention
To operate the interface in PLUS mode, you must have an approval from PayPal. If you switch the interface into PLUS mode but do not have an approval, then, depending on the status of your merchant account at PayPal, an incomplete selection of PayPal payment methods or an error message is displayed instead of the PayPal payment methods. After activating PLUS mode, for your own safety you should carry out a test order and check whether the payment methods are displayed correctly and as desired. If you do not yet have an approval, you can apply for it here at PayPal: https://www.paypal.com/de/webapps/mpp/paypal-plus
Expert settings
Order status changes after actions
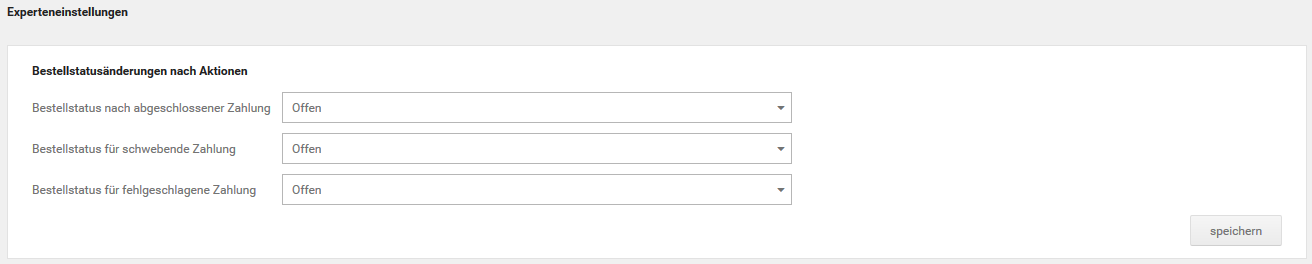
Via the area Order status changes after actions, the respective order status after a
- completed payment
- pending payment
- failed payment
can be defined. To do this, select the respective status via the drop-down menu and click Save.
Presentation in the shop

Via the settings under Presentation in the shop, details about the presentation of PayPal can be made.
Here the use of the ECS (Express Checkout Shortcut, 'Direct to PayPal') buttons for the shopping cart and the product detail page can be switched on or off. Via these buttons, a shortened order process is possible. In addition, the presentation of the buttons can be changed via the Button style.
Make the desired settings and confirm them by clicking Save.
Other settings

If the payment module is used in Classic mode, the following settings are possible for the payment operations:
- Sale - In this mode the payment is debited immediately and credited to your merchant account
-
Authorization - This mode first reserves the invoice amount, but the debit must be triggered manually afterwards.
This is useful, for example, if you sell goods with longer delivery times and the amount is to be debited from the customer only at the time of delivery.
-
Order - corresponds to Authorization operation, except for the point that the payment amount is not firmly reserved for the customer. The amount is only firmly reserved and debited in a subsequent step.
Note
When using PayPal Plus as the operating mode, Sale is always used.
Via Allow login via ECS it can be defined what happens when a customer returns to the shop after an ECS payment ("Direct to PayPal"). If the customer is not logged into the shop but has a customer account in the shop (identified by the email address), the customer must, as a rule, enter their shop password. If this option is set active, the password is not requested in the shop, and the customer is logged directly into the shop customer account.
In addition, there is the setting Only allow payment methods with immediate availability of funds. Here it can be selected whether delayed payments (e.g. invoice) are allowed. The restriction to physical products is also possible with the selection Allow delayed payments (except download products).
Furthermore, it can be defined whether self-collection by the customer is allowed for PayPal orders. When choosing the setting, pay particular attention to the possible implications with regard to PayPal buyer protection.
Make the respective settings and confirm them by clicking Save.
Developer tools
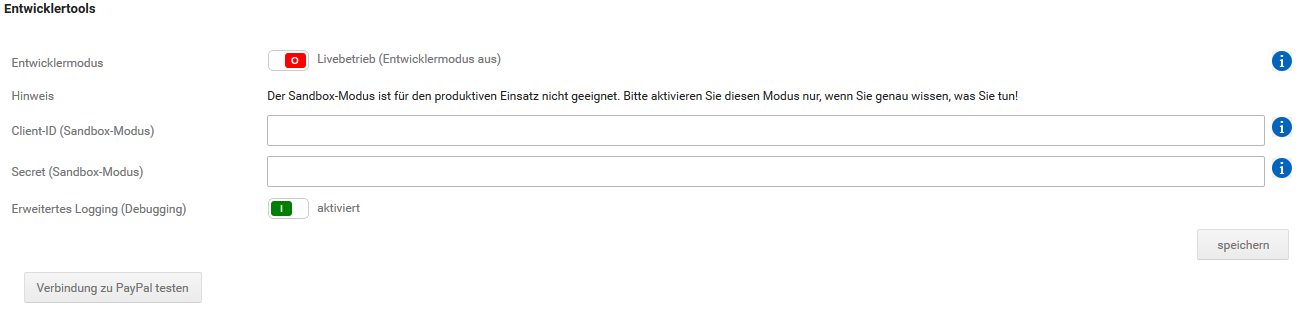
Attention
The options on this page serve for troubleshooting and test purposes. All options on this page should be deactivated in live operation.
Via the developer tools, the Sandbox mode can be activated to put PayPal from live operation into test mode, and the necessary access data for its use can be entered. In addition, an extended logging can be activated, whose information is useful in the event of an error during troubleshooting. Via the button Test connection to PayPal, the connection to the PayPal servers can be checked. The test is a general technical connection check that does not take access data into account and thus provides no indications of its correctness.
Make the desired settings here and confirm them by clicking Save.
Automatic status updates of payments (PayPal parameters)
Via the automatic status update, an automated check is carried out for orders whose payment is pending, and the order status in the shop is updated.
This requires the setup of a so-called webhook for your PayPal account, via which the automatic check is triggered. For this it is imperative that your shop is equipped with a valid SSL certificate and is reachable via SSL.
During the initial setup of the module, an attempt is made to set up the automatic status updates automatically; this can be checked on this page. If the setup was not successful, a renewed attempt can be made via the button Set up notifications. Via the delete buttons in the ID field of the lower table, endpoints stored at PayPal (as far as already existing) can be deleted for cleanup purposes.
If no SSL is available, a so-called cronjob can alternatively be set up at your hosting provider, which checks the status of every open PayPal order and updates it in case of changes. Use the lower URL in the area Automatic status updates of payments (PayPal parameters) as a template to set this up.
Presentation on the PayPal payment page (PayPal parameters)
Via this sub-item, the graphical presentation of the PayPal payment page can be adjusted. The initial setup of the module thereby generates a functioning configuration; if this fails, a warning notice is displayed at the top of the page. Click Create new presentation profile or delete to manage presentation profiles. When editing the profile, the settings
- Name
- Landing page type
- Brand name
- Logo URL
- Localization of the payment pages
are possible.
Use the buttons use[xx] to link a presentation profile with a shop language.
Note
For error-free operation, a presentation profile must be linked with each language activated in the shop. So that the PayPal payment options are always displayed for customers in the correct language, it is recommended to create a separate profile for each language activated in the shop and to configure it appropriately.
Pay via Amazon (amazonadvpay)
The module Pay via Amazon uses the interface Amazon Advanced Payments for payment processing.
Attention
A Checkout by Amazon account can by default not be used for Pay via Amazon. Please contact Amazon here to be able to use your merchant account for Advanced Payments in the future.
Note
We recommend using this module together with the Single Sign-On for Amazon, as the so-called session handling is then more reliable.
Installation
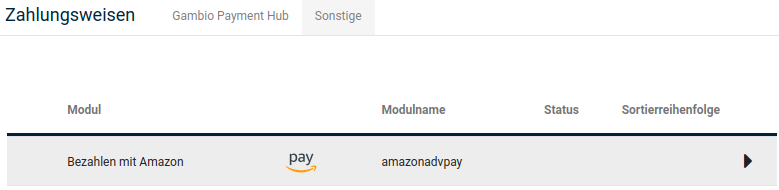
Pay with Amazon can be installed under Modules > Payment methods > Others. To do this, select the shown module entry and click Install in the right column. The module can then be edited or configured.
Editing
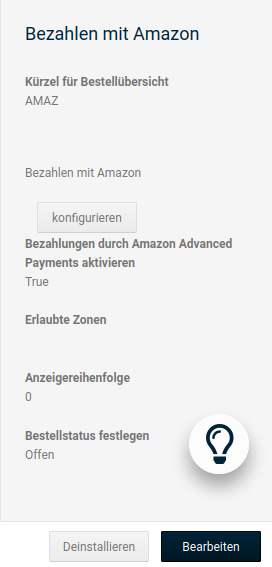
| Field name | Description |
|---|---|
| Abbreviation for order overview | Abbreviation for the payment method that is displayed in the order overview |
| Activate payments via Amazon Advanced Payments | Activate/deactivate module |
| Allowed zones | The module can be restricted here to certain countries. If the display should only take place in Germany, the entry 'DE' (without quotation marks) is sufficient. |
| Display order | Number for the display order in the listing of payment methods during the order process |
| Set order status | Orders with the payment method Pay via Amazon receive this order status |
Configuration
Once the module has been installed, the configuration page of the module can be called up via the configure button.
Access data
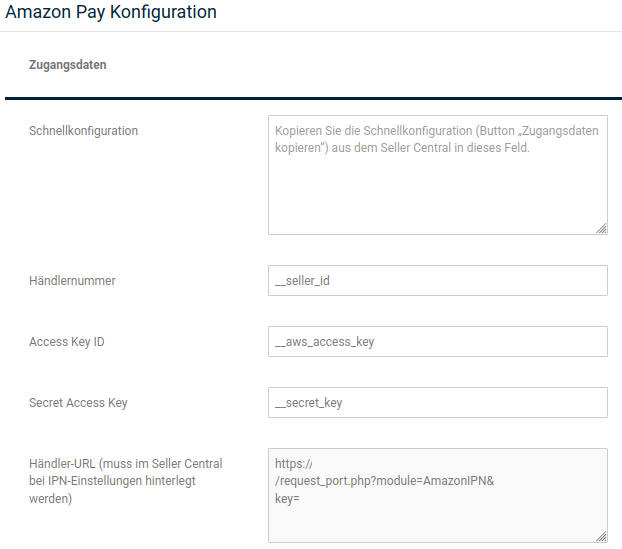
| Field name | Description |
|---|---|
| Merchant number | 13-digit combination of capital letters and numbers. You receive this from Amazon. |
| Access Key ID | 20-digit combination of capital letters and numbers. You receive this from Amazon. |
| Secret Access Key | 40-digit combination of upper and lower case letters, special characters and numbers. You receive this from Amazon. |
| Merchant URL | This URL should be stored in the Amazon Seller Central so that the automatic transfer of data from Amazon into the shop is ensured (invoice data, status). |
Appearance
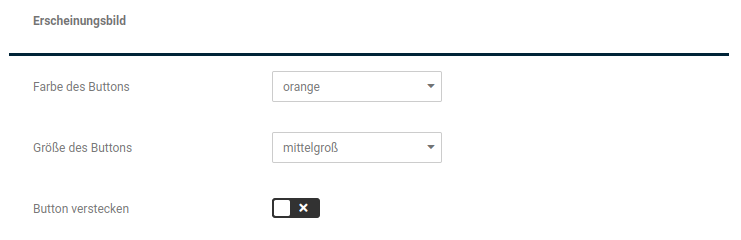
| Field name | Description |
|---|---|
| Color of the button | You can choose between the button colors Orange and Beige. |
| Size of the button | Medium, large and extra large are available for selection. |
| Hidden button | Switch the display of the button on or off. |
Settings
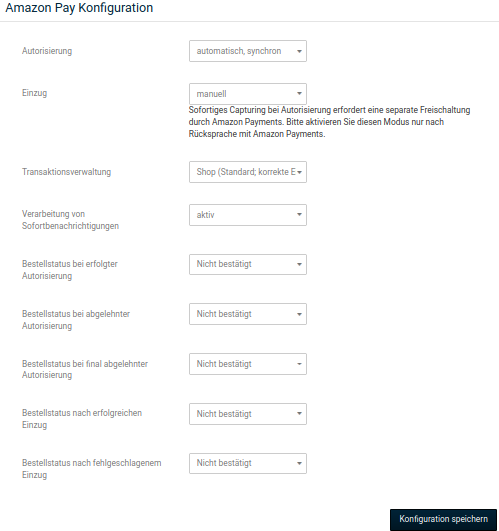
| Field name | Description |
|---|---|
| Operating mode | switch between Sandbox and live operation (productive). The Sandbox mode should not be used when the shop is online. |
| Location | Location of the shop |
| Authorization | The authorization of the payments can take place automatically synchronous (default), automatically asynchronous or manually. The authorization can happen directly in the course of the order or later manually. |
| manual: only in special cases, should generally be avoided | |
| synchronous: immediate assurance that the authorization is valid | |
| asynchronous: order completion without delay, authorization takes place if applicable later or not at all |
| Field name | Description |
|---|---|
| Collection | can take place manually or immediately upon authorization. Amazon Payments recommends immediate collection for the standard case. |
| Transaction management | can be switched between Shop (default) and external ERP system. With the setting external ERP system, tasks downstream of the order are not handled by the shop but by an ERP system. For this, an APA-compatible ERP system must be available. |
| Processing of instant notifications | Allows the use of IPN (Instant Payment Notification) messages via Amazon's interface of the same name. This setting should as a rule be activated to enable status updates without the Update data button. This requires an up-to-date SSL certificate and the storage of the merchant URL in the Seller Central. |
| Order status upon successful authorization | Default: Payment authorized (Amazon) |
| Order status upon rejected authorization | Default: Authorization rejected (Amazon) |
| Order status upon finally rejected authorization | Default: finally rejected (Amazon) |
| Order status after successful collection | Default: Amount collected (Amazon) |
| Order status after failed collection | Default: Collection failed (Amazon) |
Use default order statuses
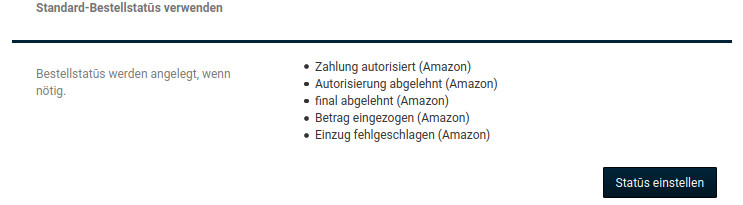
If the order statuses mentioned above do not yet exist in the shop, they can be created via this. However, the use is optional.
Check connection
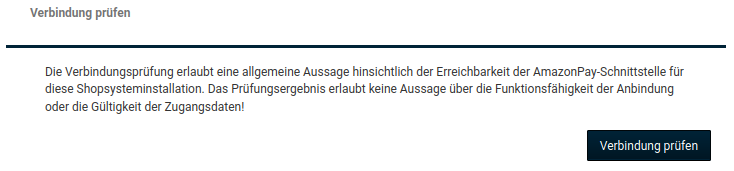
Via this it can be checked whether Amazon is reachable. However, this does not say anything about whether the configuration was carried out correctly. If you press the button, you receive a feedback like this at the top of the page:

Presentation during the order process
Attention
The payment process via Amazon can only be initiated from the shopping cart. If instead the payment method is selected manually via the order process, the customer is directed back to the shopping cart, where they must press the Amazon button.
Shopping cart
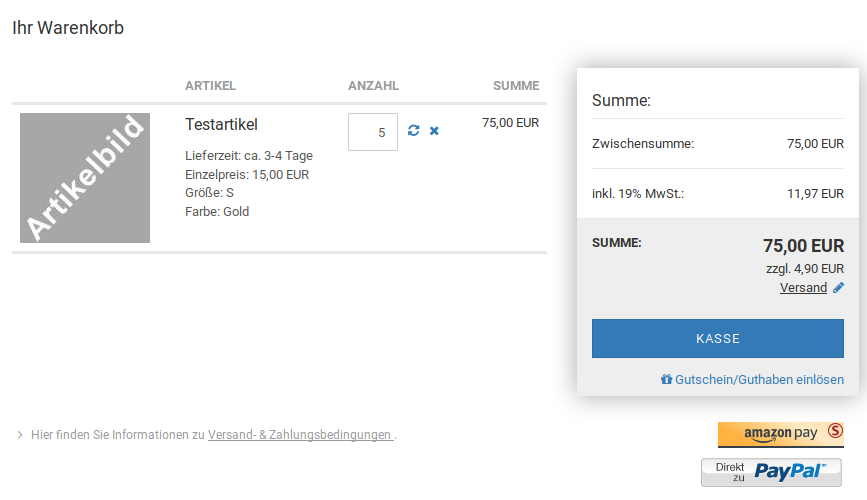
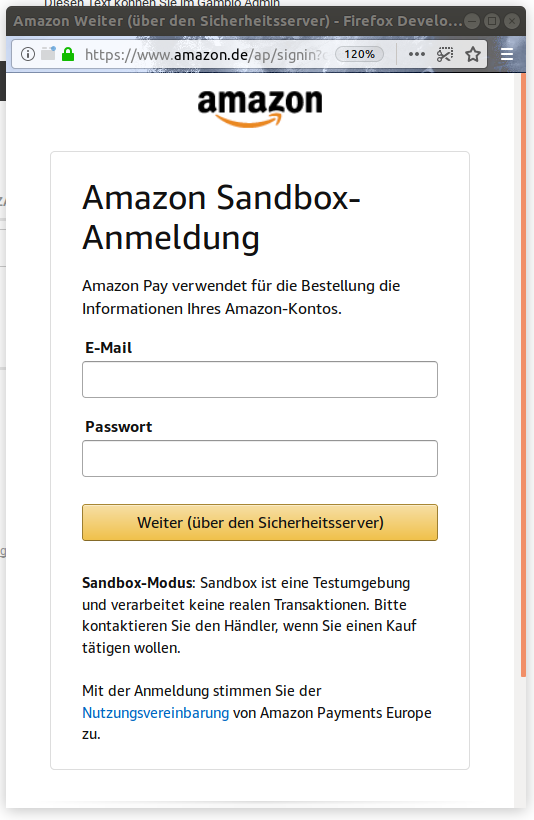
Here the order process with AmazonPay begins via the button of the same name. The red S on the button is due to the Sandbox operation. Clicking the button opens Amazon's login window.
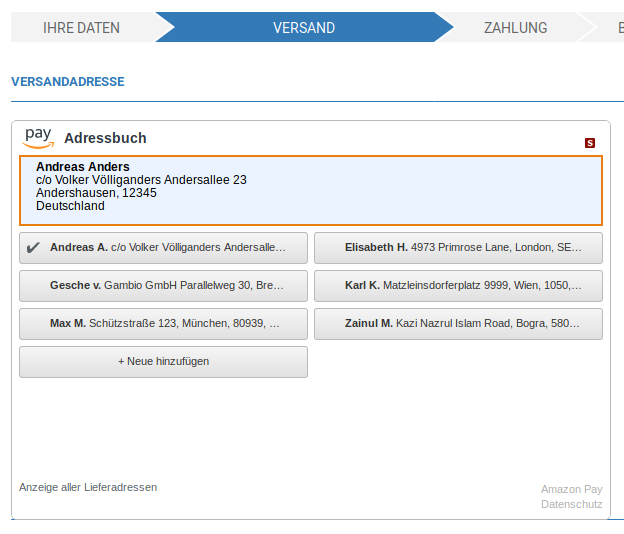
Shipping method selection
The customer selects the desired delivery address from their Amazon address book here. This block is displayed above the selectable shipping methods.
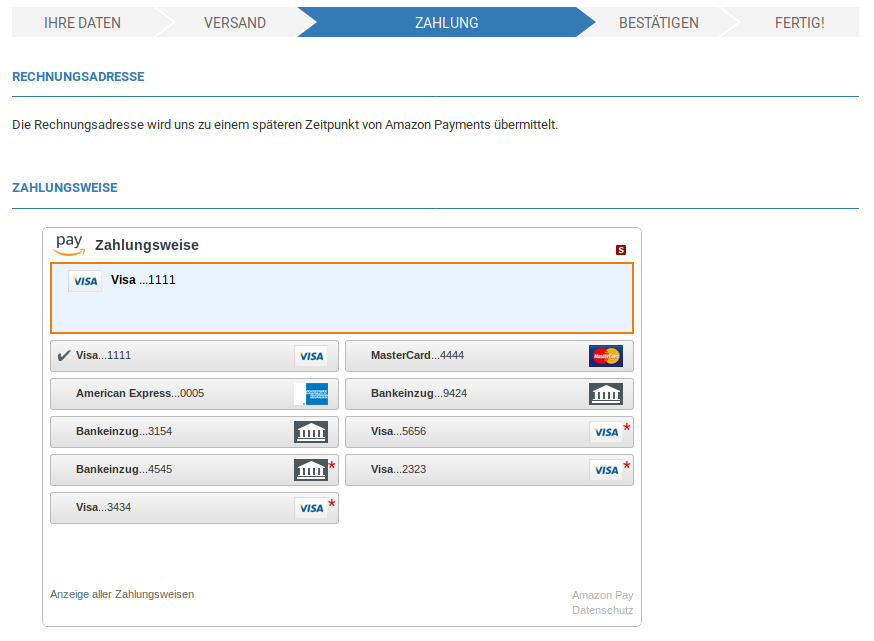
Payment method selection
Subsequently, a selection can be made from the payment methods stored at Amazon. Below this is the usual section with the legal texts.
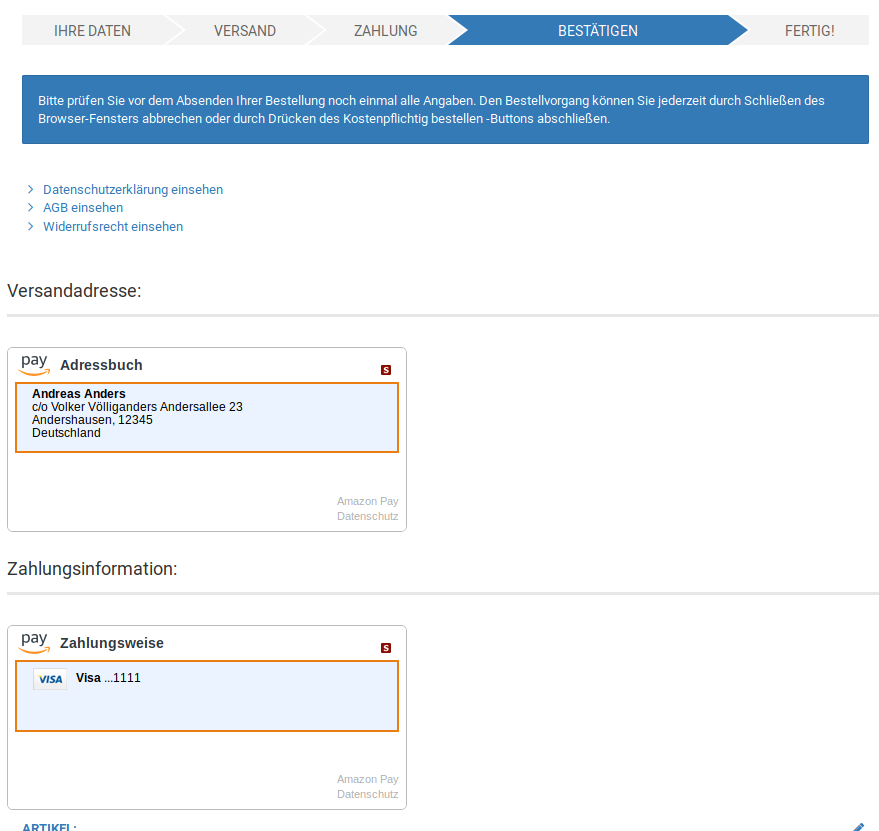
Summary
On the last page of the order, the information is summarized as usual, the address data and, below it, the products are listed. Here the order can be completed by clicking order with obligation to pay.
Handling of the orders
For orders with the payment method Pay via Amazon there is an additional section in the order details, via which various functions can be triggered:
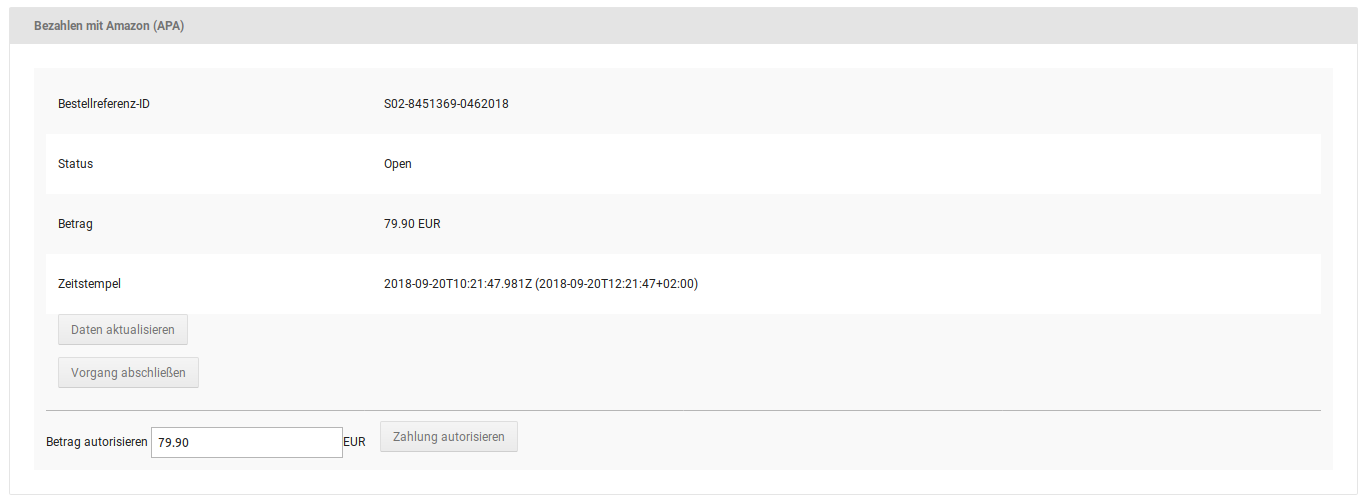
Update data
Via this function, the invoice data can be updated. A manual update can be useful if your shop is not SSL-encrypted or the merchant URL was not stored in the Seller Central and therefore no automatic transfer of address data, amounts or order status can take place.
For orders with Pay via Amazon as the payment method, Will be transferred later is always shown first in the invoice address. This changes as soon as Amazon has agreed to process the payment. This usually takes place a few minutes after the order. If the data does not change automatically for the reasons mentioned above, it can be updated manually via this.
Complete process
The process can be reported as completed. After that, no further authorizations, collections etc. can be carried out. Completing the process is optional.
Authorize payment
The payment is normally authorized automatically; this only needs to be done manually in exceptional cases.
Payone
Payone is one of the largest payment service providers in Germany and also offers services such as risk management and receivables processing up to debt collection procedures.
Note
This payment method is only available in self-hosted shops.
Installation
The Payone payment methods can be installed under Modules > Payment methods > Others. To do this, first click the entry PAYONE behind the plus sign; the list of available Payone modules is expanded. Select the respective module entries that correspond to the payment methods you want to offer and use the Install button. Via Uninstall, the respective payment method can be removed from the order process again.
Attention
Only payment methods whose modules have been installed here are displayed during the order process.
After a module is installed, the scope of application can be configured via Edit.
| Field name | Description |
|---|---|
| Abbreviation for order overview | Abbreviation displayed in the order overview in the Payment column. |
| Activate module | If the check mark is set, the module is used during the order process. |
| Allowed zones | Here the countries are specified for which the module should be displayed. The entry is made by comma-separated country codes, e.g. DE,AT,CH |
| Payment zone | The payment zone can additionally be limited here to the Tax zone EU, Tax zone non-EU or B2B. These settings can collide with the allowed zones, so only one of the two should be set. |
| Order of display | Determines the position of the module in the order of the payment modules during the order process. Care must be taken that the settings in the module match the settings in the Payone configuration. |
Via the Advanced configuration, the items Payone API log and Payone configuration can be called up.
Configuration
Configuration of the order statuses
Here the order statuses can be configured.
Global parameters
Here the login data for Payone are stored.
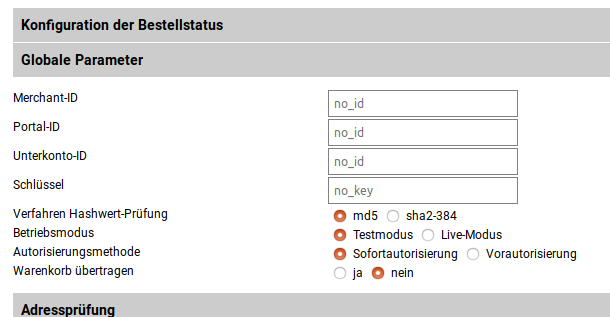
| Field name | Description |
|---|---|
| Merchant ID | ID of the account to be used (assigned by Payone) |
| Portal ID | ID of the payment portal to be used (you create it yourself in the Merchant Interface) |
| SubAccount ID | ID of the SubAccount to be used (assigned by Payone). Several SubAccounts can be operated, e.g. if you operate several shops or if the funds of the payment methods offered in the shop via Payone should flow to different accounts. |
| Key | Key of the payment portal to be used (assigned by Payone). There is one key per portal ID. |
| Hash value check method | Here you can choose between the hashing methods md5 and Sha2-384. This setting depends on your settings at Payone. |
| Operating mode | Live mode: payments are executed on the Payone platform; Test mode: payments are only simulated in the Payone test environment |
| Authorization method | Immediate authorization: The amount is collected immediately; Pre-authorization: the amount is only reserved first. Pre-authorization is chosen, for example, if the availability of the goods is to be checked before receipt of payment. |
| Transfer shopping cart | If the shopping cart is transferred, you can later read in the payment data which products were purchased. If this is activated, each individual item can be recalculated by the payment service provider. This setting must be activated for payment by invoice. |
Attention
Due to various roundings, problems may occur here under certain circumstances. Unless you offer payment by invoice via Payone, we recommend deactivating the setting Transfer shopping cart.
Address check
The address check serves to verify the entered addresses in the checkout.
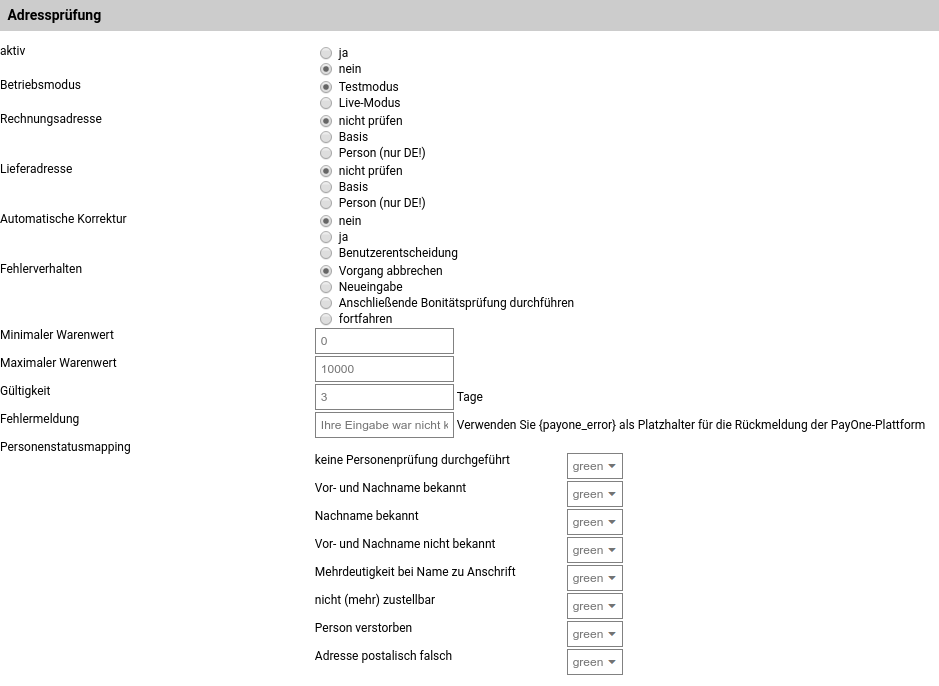
| Field name | Description |
|---|---|
| Active | Activates the address check in the shop. It should be noted here that the address check was initially only available if this function was booked separately. Since 2016, however, it is included in the standard scope of newly concluded contracts. |
| Operating mode | Here it is defined how the address check is used. Live: payments are executed on the Payone platform; Test: payments are only simulated in the Payone test environment |
| Invoice address | Possible selections are do not check, Basic and Person (only possible in Germany) |
| Delivery address | Possible selections are do not check, Basic and Person (only possible in Germany) |
| Automatic correction | If a correction is offered in the result of the address check (secstatus=20), should the correction of the data then be carried out? Possible selections here are Yes, No and User decision (user can correct their address or agree to the correction. A subsequent address check should then no longer be carried out.) |
| Error behavior | In the event that an error is detected in the address, it is possible to proceed in different ways. Options here are: Re-entry of the address that led to the error, Carry out subsequent credit check, continue |
| Minimum goods value | Shopping cart value from which the address check is carried out. |
| Maximum goods value | Shopping cart value up to which the address check is carried out. |
| Validity | Duration of the validity of the result in days |
| Error message | Message displayed to the customer in the checkout if incorrect data was entered. A variable must exist that can be replaced by the feedback of the Payone platform. |
| Person status mapping | Depending on the result of the address check at the detail depth Person, a traffic light value (green, yellow, red) can be assigned to the result. As a consequence, this has the effect that certain payment types are later not available for selection to the customer. |
Credit check
The credit check is intended to serve the selection of the offered payment types. It is to be carried out in the checkout process after the address check (as a follow-up action) or independently.
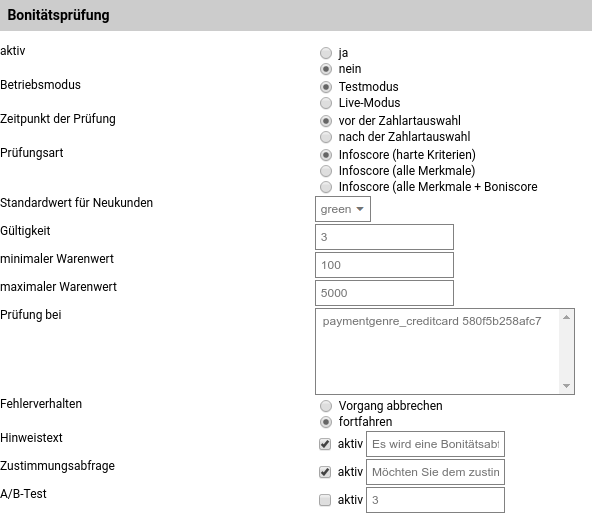
| Field name | Description |
|---|---|
| Active | Activates the credit check in the shop |
| Operating mode | Here it is defined how the credit check is used. Live: payments are executed on the Payone platform; Test: payments are only simulated in the Payone test environment |
| Time of the check | The check can be carried out before the payment type selection or after the payment type selection. |
| Type of check | The type of check can be carried out according to Infoscore (hard criteria), Infoscore (all characteristics) and Infoscore (all characteristics + Boniscore). |
| Default value for new customers | The assigned traffic light value for new customers when no credit check is carried out. |
| Validity | Validity of the result of the credit inquiry in days. A renewed check within this period may not be carried out. |
| Minimum goods value | Shopping cart value from which the credit check is carried out. |
| Maximum goods value | Shopping cart value up to which the credit check is carried out. |
| Check for | Payment method for which the check should be carried out |
| Error message | Multiple selection of all payment types for which a credit check should be carried out. This only takes effect when selecting After payment type selection |
| Error behavior | Here it must be chosen whether the order process should be aborted or continued in case of an error. |
| Note text | Text displayed when a credit check is carried out. |
| Consent inquiry | Text of a consent inquiry to the buyer. The buyer must confirm this in the checkout. The options Yes or No are available for selection. |
| A/B test | If activated, only every nth credit check is carried out, according to the value to be configured. |
According to our latest information, the module PROTECT must be booked at Payone if the credit check is to be carried out. Otherwise this function is not available.
The definition of which payment types are offered in the checkout can be set in the respective payment type. This should be a value in the range of 0-1000 (0= poor creditworthiness, 1000= best creditworthiness). If no Boniscore determination takes place, the traffic light values are converted into the corresponding scorevalue.
This is determined as follows:
| Traffic light value (score) | Creditworthiness index (scorevalue) |
|---|---|
| Green | 500 |
| Yellow | 300 |
| Red | 100 |
Configuration of the payment types
Here the activated payment types can be configured that were previously created via Add payment type. The six basic types of payment modules are described here; since all additionally added payment methods correspond to one of these types, not every eventuality is addressed here. Payone supports various payment methods; for further details please contact Payone for advice.
It must be noted that for each payment method there is also a module to be found under Modules > Payment methods that must be installed. If this does not happen, the payment method is not displayed during the order process and cannot be used.
Credit cards (paymentgenre_creditcard)
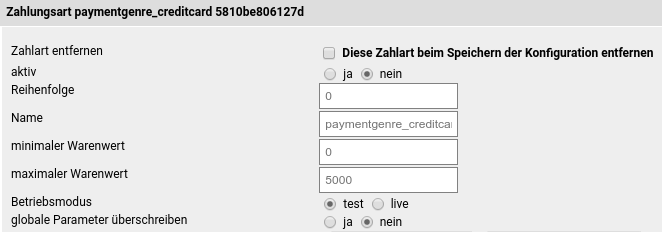
| Field name | Description |
|---|---|
| Remove payment type | Removes the payment type from the listing under Configuration of the payment methods. |
| active | Activates or deactivates the payment method |
| Order | Determines the order of the module in the payment method overview during the order process. This entry must match the entries in the module itself that were made under Modules > Payment methods. |
| Name | Determines the name of the payment module that it should bear during the order process and in the Gambio Admin. By default, a name such as paymentgenre_creditcard 5810c291d056e is pre-entered. |
| minimum goods value | Determines the minimum order value from which the module is displayed. |
| maximum goods value | Determines the maximum order sum that may be paid via the module. |
| Operating mode | Determines whether the module should be operated in test or live mode. |
| override global parameters | If login data other than that under Global parameters should be used, the item can be set to Yes and overwritten with other login data. |
| Field name | Description |
|---|---|
| Active countries | The individual countries can be activated or deactivated by setting or removing the associated check marks respectively. Via Activate all countries or Deactivate all countries, the selection can be set accordingly for all countries. Only countries are displayed that are activated under Settings / Languages, countries, taxes / Countries after calling up the page. |
| Permitted traffic light values | Here you can determine which traffic light values are permitted. If a customer has a traffic light value that does not correspond to the ones set here, payment via this module is not possible. The traffic light values are explained in more detail in the section Credit check. |
| Field name | Description |
|---|---|
| Query card verification number | Determines whether the card verification number should be queried during the order process |
| Field configuration | Here you can influence the appearance of the fields for the queried credit card data. |
| Type | The type should not be changed, as this field determines what type of data should be queried. The card number consists only of numbers, but the content of the field is transferred like a text field. The verification number corresponds to a password and should therefore also be treated as such. For the validity month and year, on the other hand, it makes the most sense to query the data via a dropdown, instead of selecting e.g. Text there, which would give the customer the option of typing in the validity date themselves. |
| No. of characters | The possible number of characters that can be entered via this field. |
| Max. characters | The number of characters that the entry may have at most. A card number with more than 20 characters is not correct, so more characters are not allowed. |
| iFrame | The iFrame has standard sizes that are automatically entered with the selection of Standard. If you switch this item to Custom, you can enter your own dimensions. |
| Width & Height | These dimensions are pre-filled but can be defined yourself when selecting iFrame custom. |
| Style | The appearance is also pre-created by default. If you select custom here, you can specify your own CSS styles. |
| CSS | If you select Custom as the style, you can store your own CSS styles here. |
Here you can select which credit cards should be accepted. The names of the credit cards during the order process can be changed if needed.
Online transfers (paymentgenre_onlinetransfer)
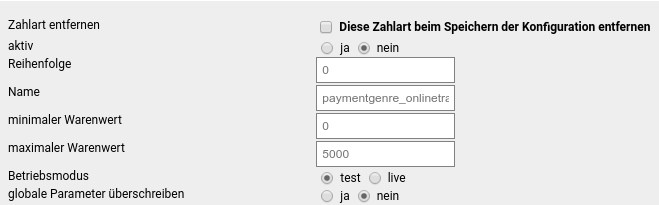
| Field name | Description |
|---|---|
| Remove payment type | Removes the payment type from the listing under Configuration of the payment methods. |
| active | Activates or deactivates the payment method |
| Order | Determines the order of the module in the payment method overview during the order process. This entry must match the entries in the module itself that were made under Modules > Payment methods. |
| Name | Determines the name of the payment module that it should bear during the order process and in the Gambio Admin. A name such as paymentgenre_onlinetransfer 5810c291d056e is usually pre-entered here. |
| minimum goods value | Determines the minimum order value from which the module is displayed. |
| maximum goods value | Determines the maximum order sum that may be paid via the module. |
| Operating mode | Selection of whether the module should be operated in test or live mode. |
| override global parameters | If login data other than that under Global parameters should be used, the item can be set to Yes and overwritten with other login data. |
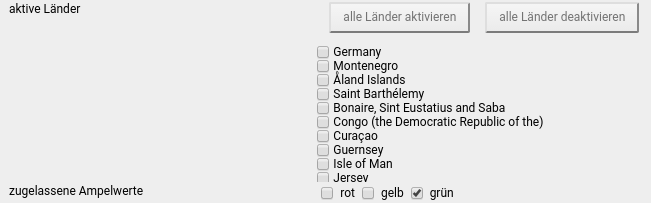
| Field name | Description |
|---|---|
| Active countries | The individual countries can be activated or deactivated by setting or removing the associated check marks respectively. Via Activate all countries or Deactivate all countries, the selection can be set accordingly for all countries. Only countries are displayed that are activated under Settings / Languages, countries, taxes / Countries after calling up the page. |
| Permitted traffic light values | Here you can determine which traffic light values are permitted. If a customer has a traffic light value that does not correspond to the ones set here, payment via this module is not possible. The traffic light values are explained in more detail in the section Credit check. |
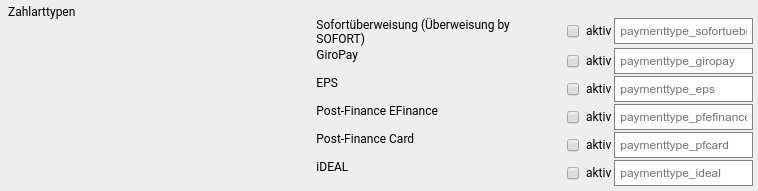
Here you can select which payment types should be accepted. The names of the accepted types of online transfer during the order process can be changed if needed.
e-Wallet (paymentgenre_ewallet)
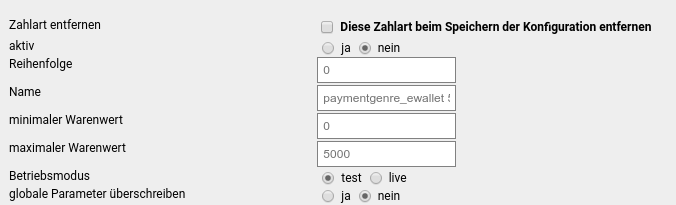
| Field name | Description |
|---|---|
| Remove payment type | Removes the payment type from the listing under Configuration of the payment methods. |
| active | Activates or deactivates the payment method |
| Order | Determines the order of the module in the payment method overview during the order process. This entry must match the entries in the module itself that were made under Modules > Payment methods. |
| Name | Determines the name of the payment module that it should bear during the order process and in the Gambio Admin. A name such as paymentgenre_ewallet 5810c291d056e is usually pre-entered here. |
| minimum goods value | Determines the minimum order value from which the module is displayed. |
| maximum goods value | Determines the maximum order sum that may be paid via the module. |
| Operating mode | Selection of whether the module should be operated in test or live mode. |
| override global parameters | If login data other than that under Global parameters should be used, the item can be set to Yes and overwritten with other login data. |
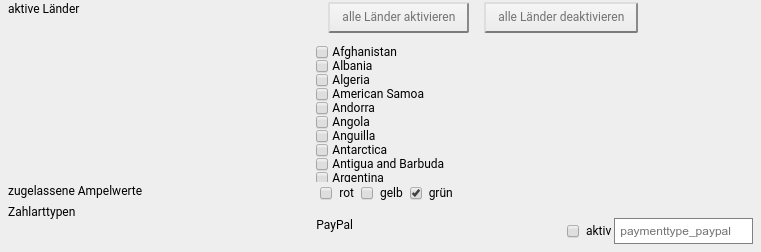
| Field name | Description |
|---|---|
| Active countries | The individual countries can be activated or deactivated by setting or removing the associated check marks respectively. Via Activate all countries or Deactivate all countries, the selection can be set accordingly for all countries. Only countries are displayed that are activated under Settings / Languages, countries, taxes / Countries after calling up the page. |
| Permitted traffic light values | Here you can determine which traffic light values are permitted. If a customer has a traffic light value that does not correspond to the ones set here, payment via this module is not possible. The traffic light values are explained in more detail in the section Credit check. |
| Payment type types | As payment type type, only PayPal is possible. The name of the payment method can be changed manually. |
Account-based payment methods (paymentgenre_accountbased)
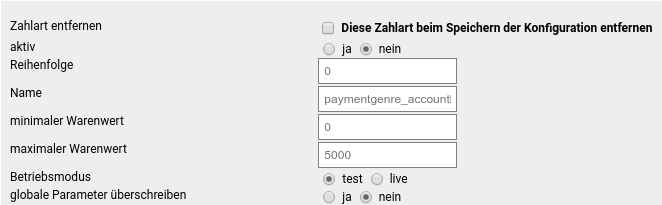
| Field name | Description |
|---|---|
| Remove payment type | Removes the payment type from the listing under Configuration of the payment methods. |
| active | Activates or deactivates the payment method |
| Order | Determines the order of the module in the payment method overview during the order process. This entry must match the entries in the module itself that were made under Modules > Payment methods. |
| Name | Determines the name of the payment module that it should bear during the order process and in the Gambio Admin. A name such as paymentgenre_accountbased 5810c291d056e is usually pre-entered here. |
| minimum goods value | Determines the minimum order value from which the module is displayed. |
| maximum goods value | Determines the maximum order sum that may be paid via the module. |
| Operating mode | Selection of whether the module should be operated in test or live mode. |
| override global parameters | If login data other than that under Global parameters should be used, the item can be set to Yes and overwritten with other login data. |
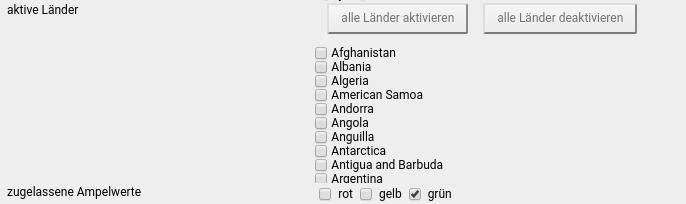
| Field name | Description |
|---|---|
| Active countries | The individual countries can be activated or deactivated by setting or removing the associated check marks respectively. Via Activate all countries or Deactivate all countries, the selection can be set accordingly for all countries. Only countries are displayed that are activated under Settings / Languages, countries, taxes / Countries after calling up the page. |
| Permitted traffic light values | Here you can determine which traffic light values are permitted. If a customer has a traffic light value that does not correspond to the ones set here, payment via this module is not possible. The traffic light values are explained in more detail in the section Credit check. |

| Field name | Description |
|---|---|
| Check account data | Determines whether, and according to which data, the account data should be checked. Basic is a conventional check for plausibility and validity of the bank details, while a check according to POS blocklist provides for a comparison against blocklists. These blocklists contain information on open receivables from retail. |
| Account countries for SEPA direct debit | Here the countries can be selected in which SEPA should be offered. |
| Additional fields account/bank sort code | Should additional fields for account number and bank sort code be displayed (yes/no)? |
| Activate mandate granting | The mandate can be granted automatically. A check of the bank details always takes place here, but a check according to POS blocklist is then no longer possible. |
| Download mandate as PDF | Determines whether the mandate should still be available for download as a PDF after the order. |

As payment type types, only directly account-related payment types are available for selection here.
Financing/Installment purchase (paymentgenre_installment)
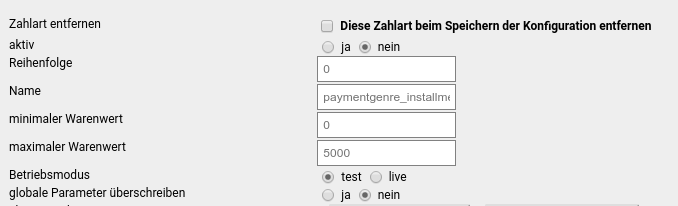
| Field name | Description |
|---|---|
| Remove payment type | Removes the payment type from the listing under Configuration of the payment methods. |
| active | Activates or deactivates the payment method |
| Order | Determines the order of the module in the payment method overview during the order process. This entry must match the entries in the module itself that were made under Modules > Payment methods. |
| Name | Determines the name of the payment module that it should bear during the order process and in the Gambio Admin. A name such as paymentgenre_installment 5810c291d056e is usually pre-entered. |
| minimum goods value | Determines the minimum order value from which the module is displayed. |
| maximum goods value | Determines the maximum order sum that may be paid via the module. |
| Operating mode | Selection of whether the module should be operated in test or live mode. |
| override global parameters | If login data other than that under Global parameters should be used, the item can be set to Yes and overwritten with other login data. |
| Field name | Description |
|---|---|
| Active countries | The individual countries can be activated or deactivated by setting or removing the associated check marks respectively. Via Activate all countries or Deactivate all countries, the selection can be set accordingly for all countries. Only countries are displayed that are activated under Settings / Languages, countries, taxes / Countries after calling up the page. |
| Permitted traffic light values | Here you can determine which traffic light values are permitted. If a customer has a traffic light value that does not correspond to the ones set here, payment via this module is not possible. The traffic light values are explained in more detail in the section Credit check. |
| Payment type types | With this payment method, installment payment is only possible via CommerzFinanz. |
Invoice/Refactoring (paymentgenre_safeinv)
| Field name | Description |
|---|---|
| Remove payment type | Removes the payment type from the listing under Configuration of the payment methods. |
| active | Activates or deactivates the payment method |
| Order | Determines the order of the module in the payment method overview during the order process. This entry must match the entries in the module itself that were made under Modules > Payment methods. |
| Name | Determines the name of the payment module that it should bear during the order process in the Gambio Admin. A name such as paymentgenre_safeinv 5810c291d056e is usually pre-entered. |
| minimum goods value | Determines the minimum order value from which the module is displayed. |
| maximum goods value | Determines the maximum order sum that may be paid via the module. |
| Operating mode | Selection of whether the module should be operated in test or live mode. |
| override global parameters | If login data other than that under Global parameters should be used, the item can be set to Yes and overwritten with other login data. |
| Field name | Description |
|---|---|
| Active countries | The individual countries can be activated or deactivated by setting or removing the associated check marks respectively. Via Activate all countries or Deactivate all countries, the selection can be set accordingly for all countries. Only countries are displayed that are activated under Settings / Languages, countries, taxes / Countries after calling up the page. |
| Permitted traffic light values | Here you can determine which traffic light values are permitted. If a customer has a traffic light value that does not correspond to the ones set here, payment via this module is not possible. The traffic light values are explained in more detail in the section Credit check. |
| Field name | Description |
|---|---|
| Payolution: B2B trade allowed | Determines whether commercial customers may also pay via this. |
| Payolution: Company name | The company name of the shop operator |
| Payolution: Account holder | You receive the details on the bank account from Payone |
| Payolution: Credit institution | You receive the details on the bank account from Payone |
| Payolution: IBAN | You receive the details on the bank account from Payone |
| Payolution: BIC | You receive the details on the bank account from Payone |
| Payolution: Payment term (days) | The setting Payment term is only used if no term is specified by Payolution itself. The due date is then calculated from the order date and the stored payment term. |
| Payment type types | Available payment types here are Billsafe and Payolution. |
Add payment type
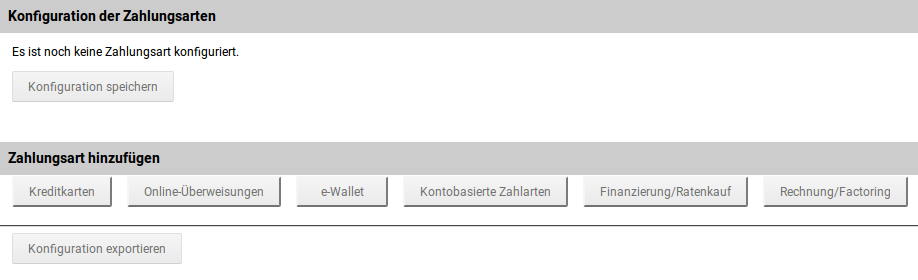
The display shown in the screenshot occurs when no payment type has been created yet. This is done via Add payment type. You can choose from the following payment types:
| Payment type | Payment method |
|---|---|
| Credit cards (creditcard) | American Express, Carte Bleue, Diners Club, Discover, JCB, Maestro, Mastercard, Visa |
| Online transfers (onlinetransfer) | EPS, GiroPay, iDEAL, Post-Finance Card, Post-Finance EFinance, Sofortüberweisung |
| e-Wallet (ewallet) | PayPal |
| Account-based payment methods (accountbased) | Cash on delivery, Direct debit, Invoice, Prepayment |
| Financing/Installment purchase (installment) | CommerzFinanz |
| Invoice/Refactoring (safeinv) | BillSAFE, Payolution Invoice |
Export configuration
The configuration can be exported via the button Export configuration. In this way, the module configuration can be sent to Payone support in case problems have occurred.
Payone API Log

Here, a list of all completed transactions can be retrieved for the desired period. The entry Details refers to a detailed log in which the payment data transmitted to Payone are listed.
TransactionStatus URL
It is necessary to enter the TransactionStatus URL in the customer account at Payone. This is http://www.your-shop.tld/payone_txstatus.php (whereby your-shop must be replaced by the corresponding part of your actual domain).
iPayment
Note
This payment method is only available in self-hosted shops.
Under the item iPayment, two payment modules are available in the shop:
- 1&1 ipayment credit cards (ipayment_cc)
- 1&1 ipayment direct debit (ipayment_elv)
These are developed and supported by 1&1. Under
https://www.ionos.de/eshop-loesungen/ipayment
you will find further information and contact details.
Installation
Both modules can be installed under Modules > Payment methods > Others.
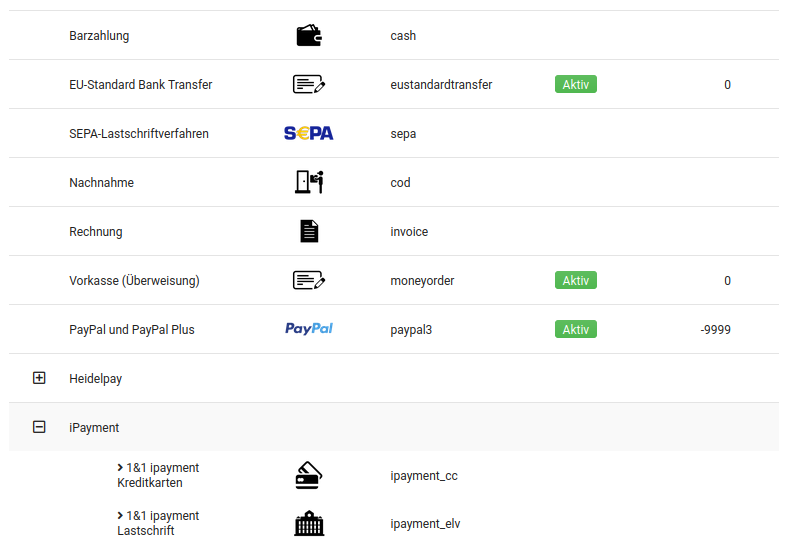
To do this, first click the entry iPayment to expand it. Then select the desired module and use the Install button in the lower right corner of the screen.
Configuration
After the respective module has been installed and selected under Modules > Payment methods > Others > iPayment, it can be set up by clicking Edit. The configuration for both payment methods is largely identical:
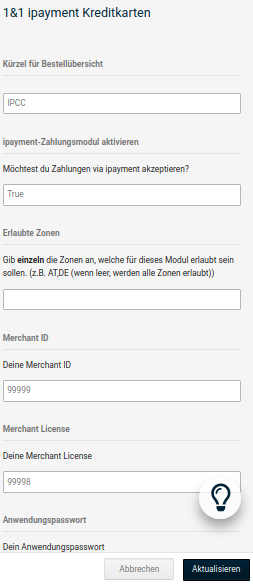
| Field name | Description |
|---|---|
| Abbreviation for order overview | Display in the Payment column of the order overview |
| Activate ipayment payment module | Here the module is activated during the order process |
| Allowed zones | Here the countries are specified for which the module should be displayed. The entry is made by comma-separated country codes, e.g. DE,AT,CH |
| Merchant ID | You receive the merchant ID, also called Merchant ID, from 1&1 |
| Merchant License | The Merchant License is also assigned by 1&1 |
| Application password, Admin action password, Security key | These entries function as passwords. The Security key must also be stored in the iPayment customer account |
| Transaction mode | Mode auth: immediate payment Mode preauth: delayed payment processing |
| Payment zone | The payment zone can additionally be limited here to the tax zone EU, tax zone non-EU or B2B. These settings can collide with the allowed zones, so only one of the two should be set |
| Set temporary order status | Order status to be assigned before the payment is carried out |
| Set order status | Order status assigned after a successful payment |
| Set error status | Order status assigned in case of a faulty order |
| Display order | Determines the position of the module in the order of the payment modules during the order process |
| Activated credit card types | Contains a listing of the activated credit cards (comma-separated, no spaces). Possible values are: |
| master | |
| visa | |
| amex | |
| diners | |
| jcb | |
| solo | |
| discover | |
| maestro |
Heidelpay
Note
This payment method is only available in self-hosted shops.
Under the item Heidelpay, various payment modules of the provider Heidelpay are available in the area Modules > Payment methods > Others. These are delivered in the basic scope of the shop system, but development and support are provided by Heidelpay. For questions about functions and conditions, please therefore contact our colleagues at Heidelpay at https://www.heidelpay.com/de/support/
Installation
Open the entry Heidelpay under Modules > Payment methods > Others by clicking on it. Then select the desired payment method and install the module by clicking the Install button in the lower right corner of the screen.
The following payment methods are available:
- Credit card (hpcc)
- Debit card (hpdc)
- Direct debit (hpdd)
- Insured direct debit (hpddpg)
- Giropay (hpgp)
- IDeal (hpidl)
- Prepayment (hppp)
- PayPal (hppay)
- Sofortueberweisung (hpsu)
- Purchase on invoice (hpbs)
- Invoice (hpiv)
- Insured invoice purchase (hpivpg)
- PostFinance (hppf)
- MangirKart (hpmk)
Configuration of the sandbox
In order to be able to test the Heidelpay modules in a sandbox environment, a sandbox environment must first be created and configured. To do this, select any Heidelpay module and then click the Configure Heidelpay button. This redirects you to a new page on which you can make necessary settings for the data exchange between the shop and Heidelpay. If the modules are to be used live, real access data for Heidelpay are necessary. Otherwise, the sandbox can be configured without further ado by clicking the Restore demo access data button at the bottom of the configuration page.
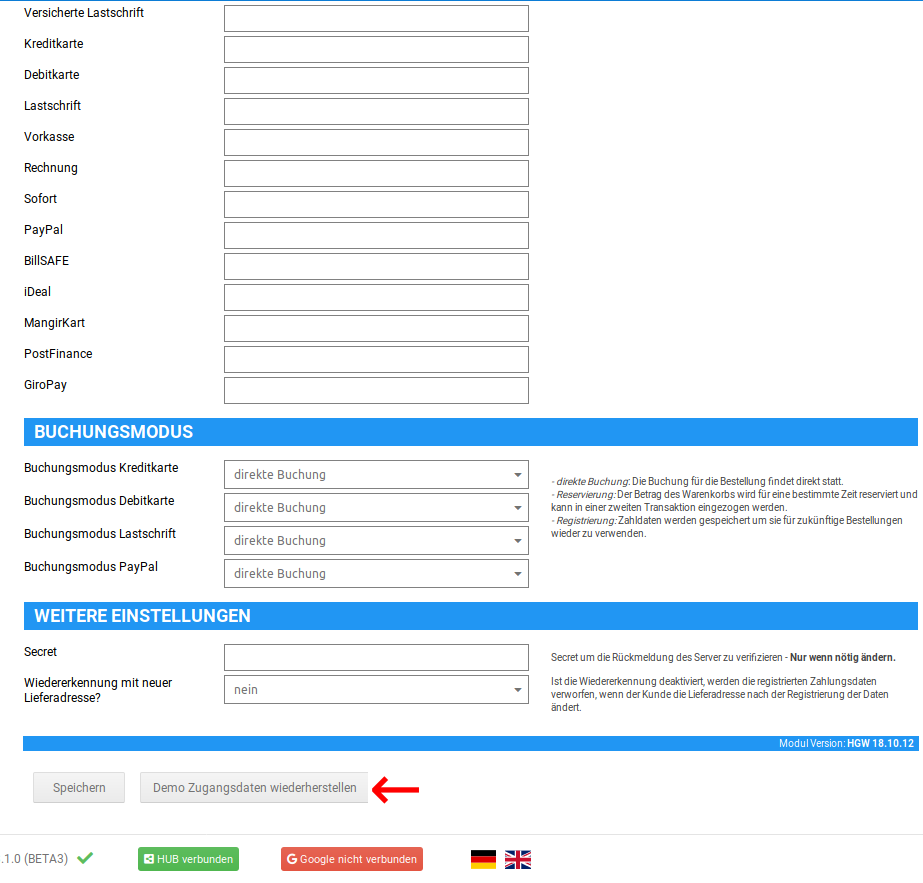
Setting up a payment module in the sandbox
In order to test a payment module in the sandbox, further settings are still necessary in the respective module to be tested. To do this, select any Heidelpay module and then click the Edit button if the module is already installed. If this is not the case, it is first necessary to install the selected module.
Here a test account must now still be assigned, for which the email address of a shop account is used. Only accounts with the specified email addresses are authorized to carry out tests with the modules. If a different email address is used, an error occurs that is displayed on the checkout page.
Attention
Depending on the selected payment module, various test accounts/test data are necessary so that a test order can be carried out successfully.