Google Services
Via the module Google Services the shop can be linked directly with Google Shopping. In addition, the evaluation of your Google Ads campaigns is possible.
Registration
To use the Google Services, the link with a Google AdWords account is necessary. To do this, select any menu item in the area Google or click on the red notice at the bottom edge of the Gambio Admin: Google not connected.
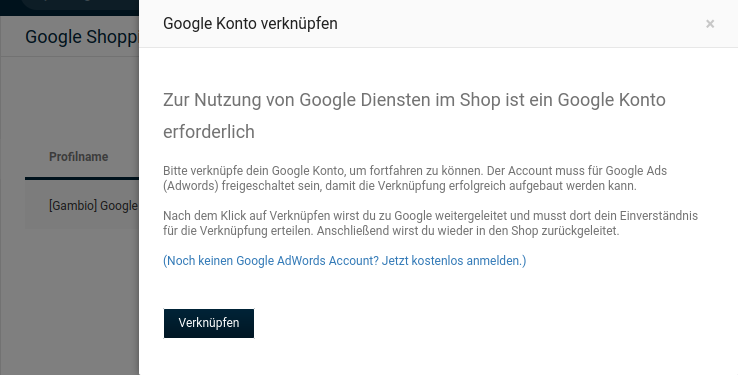
Click on the button Link and you will be redirected directly to the login page.
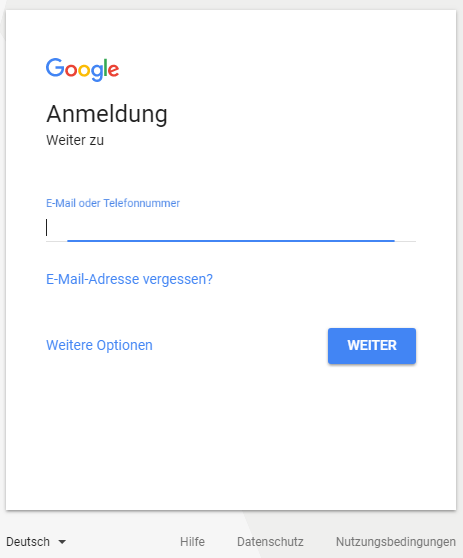
Enter your access data here.
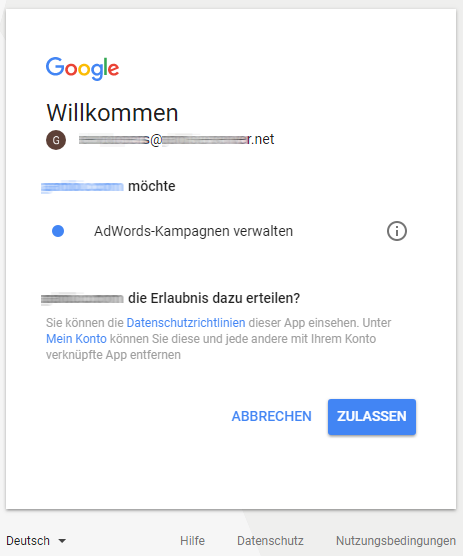
After logging in, you will be asked in a dialog to confirm access to the management of AdWords campaigns. Click here on Allow.
Google Shopping
Via Google > Google Shopping you can create Google Shopping profiles and manage them.
Note
If you have so far used export profiles under Products > Import/Export for your exports to Google Shopping, these are not adopted for the Google Services module.
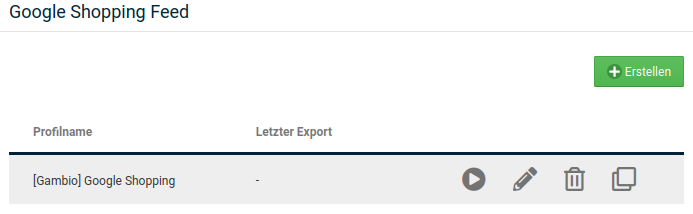
Via the button Create a new export profile can be created.
Move the mouse pointer into the row of a created export profile to display the possible actions. These are listed at the right end of the row as icons:

The possible actions, for already created profiles, are from left to right:
- download: downloads the file to your computer; for this an export must have been carried out beforehand
- export: carries out an export to Google Shopping
- edit: calls up the settings for an export profile
- delete: deletes a created export profile
- duplicate: copies an existing export profile
Settings
When you create or edit an export profile, you reach the tab Settings, which we explain below. Default assignments of a field are given in square brackets [ ].
General settings
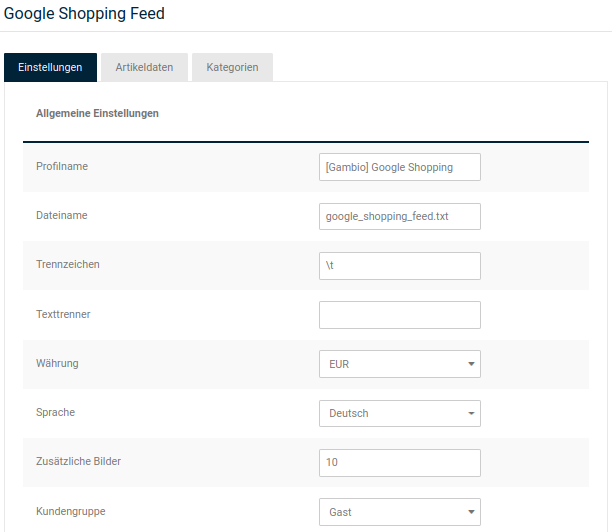
| Field name | Description |
|---|---|
| Profile name | Name of the export profile |
| File name | File name of the export file |
| Separator | Control character for separating the columns [\t] |
| Text delimiter | Control character for marking contents [] |
| Currency | Currency in which prices are exported [EUR] |
| Language | The product name and the product description(s) are exported in this language [German] |
| Additional images | Maximum number of entries for the column Additional images [10] |
| Customer group | The prices for this customer group are exported [Guest] |
| Campaign | Campaign that is to be used for the export [no campaign] |
| Free shipping from | Value of goods from which free shipping takes place [0] |
| Minimum stock | Minimum stock level for an export of the product [0] |
| Export attributes | If the setting is set, attributes are taken into account during the export. Each option value (selection for an attribute) is exported as a separate product [x] |
| Export properties | If the setting is set, properties are taken into account during the export. Each combination (selection of all properties of a product) is exported as a separate product [x] |
| Prefer property image | If the setting is set, the combination image of the respective combination is exported instead of the product image, provided one is available [x] |
Settings for the automatic export
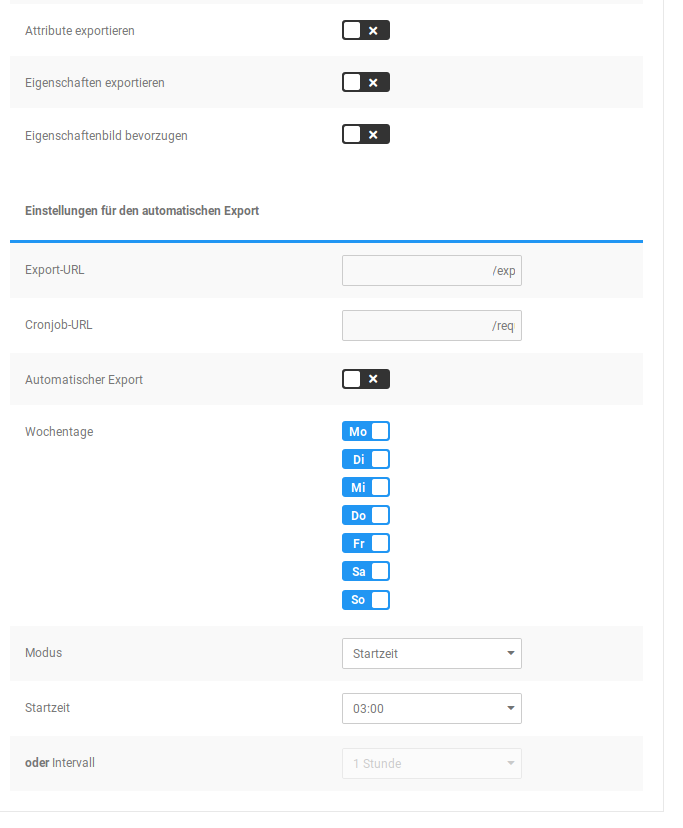
| Field name | Description |
|---|---|
| Export URL | URL of the export file |
| Cronjob URL | URL for calling up the automatic export, must be entered with the hoster or cronjob provider |
| Automatic export | If the setting is set, the export profile is taken into account for the automatic export [x]ATTENTION: so that the export is carried out automatically, a cronjob must be set up with your hosting provider |
| Weekdays | The automatic export is carried out on the activated weekdays (highlighted in blue) [Mon, Tue, Wed, Thu, Fri, Sat, Sun] |
| Mode | Determines whether the automatic export is carried out at a specific start time or in a regular interval [Start time] |
| Start time | Time at which the automatic export is started [03:00] NOTE: if Interval is selected as the mode, the setting is grayed out |
| or Interval | Interval in which the automatic export is carried out [1 hour] NOTE: if Start time is selected as the mode, the setting is grayed out |
Confirm the changes made with a click on Save. Via Cancel you leave the settings of the profile without saving the changes.
Note on automatic, time-controlled exports
So that - independently of manual exports by click - exports can take place automatically, a so-called cronjob must be set up. For this, a URL is stored with your hoster, which is called up regularly by it. When the URL is called up, the shop checks which actions are to be carried out for the current point in time and then carries these out.
The setup at the hoster itself is specific to it and can therefore not be explained in general. Your hoster will be happy to answer questions about this. Please note that often a command must be entered before the URL such as wget or curl; please observe here the help of your respective hoster.
Some hosters do not support cronjobs; in this case you can nevertheless make use of the automatic export via special providers for cronjobs.
Note also that the cronjob must be set up for a regular call of 1x per minute. Depending on the size, the export can take place in several work steps, so that with only a single execution of a cronjob at the export time possibly no complete export is generated. Do not fear an overload here due to the frequent call of the cronjob URL; if there are no tasks to be processed, the call of the shop ends immediately.
Product data
Via the tab Product data the columns of the export profile are listed. By setting or removing the checkmark next to the column name, it can be determined whether a column is to be exported.
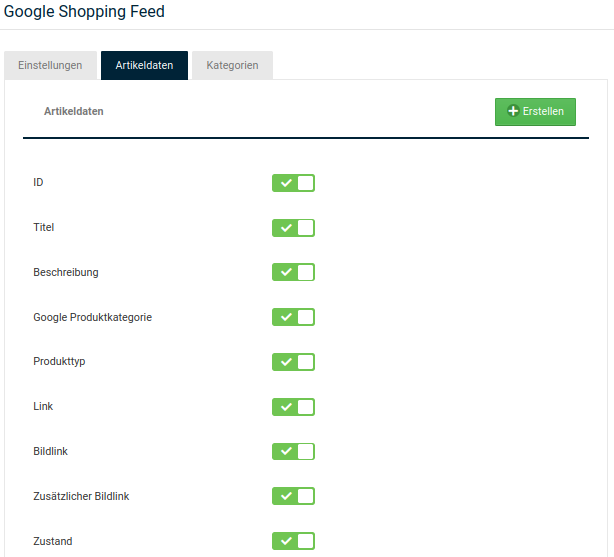
If the mouse pointer is moved over a column entry, the possible actions for this are displayed:

These are from left to right:
- edit
- delete
- move
The actions edit and delete can be triggered via a mouse click. To move a column, click on the arrow symbol and hold down the mouse button. Then drag the mouse up or down to change the position of the column.
Adding / editing a column
Click on Create to add a new column. Click on the pencil icon of a column to edit it.
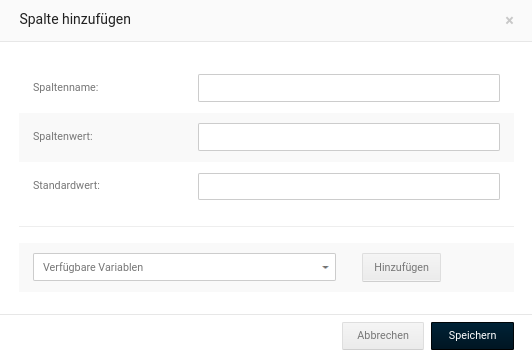
In the window that now opens, the Column name, Column value as well as a Default value can be defined. The column value is defined by means of a variable, which is entered into the field Column value via a variable name in curly brackets.
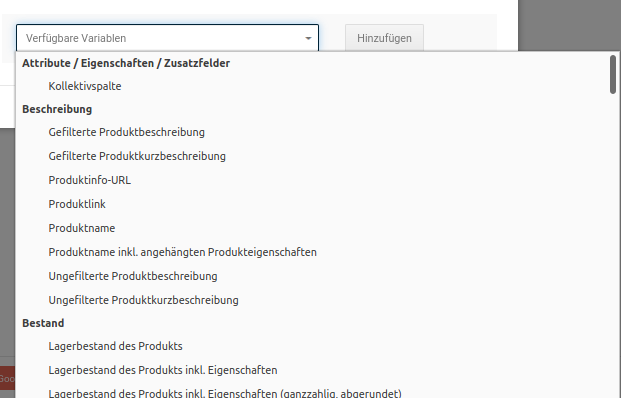
However, the entry does not have to be made by hand. Click on the downward-pointing triangle to display a list of the possible values for the export. Click on an entry to receive a precise description of its purpose. When you are sure that you want to use the selected variable, click on Add.
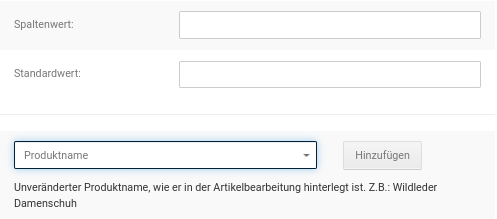
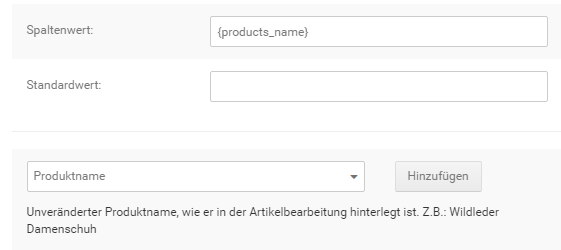
Via a click on Save the column is created or the change to an existing column is saved. Via Cancel you return to the overview without creating a column or without saving the changes.
Categories
Via the tab Categories the categories from which products are exported can be selected.
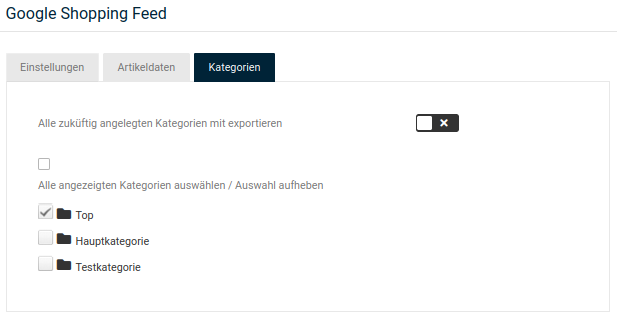
Set the checkmark for Select all displayed categories / cancel selection to select or deselect all categories at the same time.
If the checkmark for Also export all categories created in the future is set, newly created categories are automatically added for the export.
Google Ads

Under Google > Google Ads the Google Ads campaigns can be evaluated. Via the dropdown at the top right the period for the evaluation can be defined. Via a click on the column heading the listing can be sorted by the respective column.
The following columns are available:
- Status
- Campaign
- Budget (per day)
- Clicks
- Impressions - AdWord was displayed but not clicked
- CTR - Click Through Rate, ratio of impressions to clicks
- CPC Ø - Costs per Click, average costs per click
- Costs
Conversion Tracking

Without further configuration, only the note is output here that a conversion action still has to be created in Google Ads.
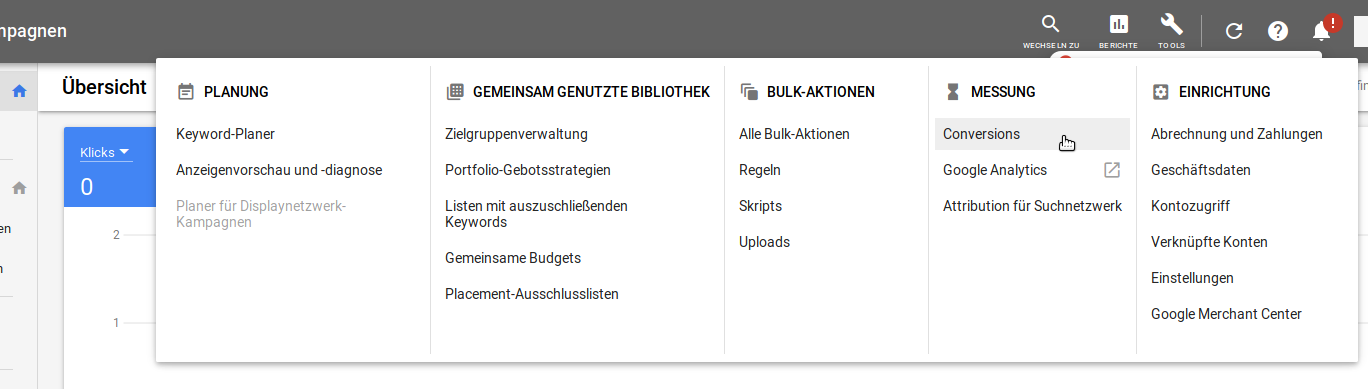
To do this, log in to your Google Ads account at https://ads.google.com/ and select under Tools the menu item Measurement > Conversions.
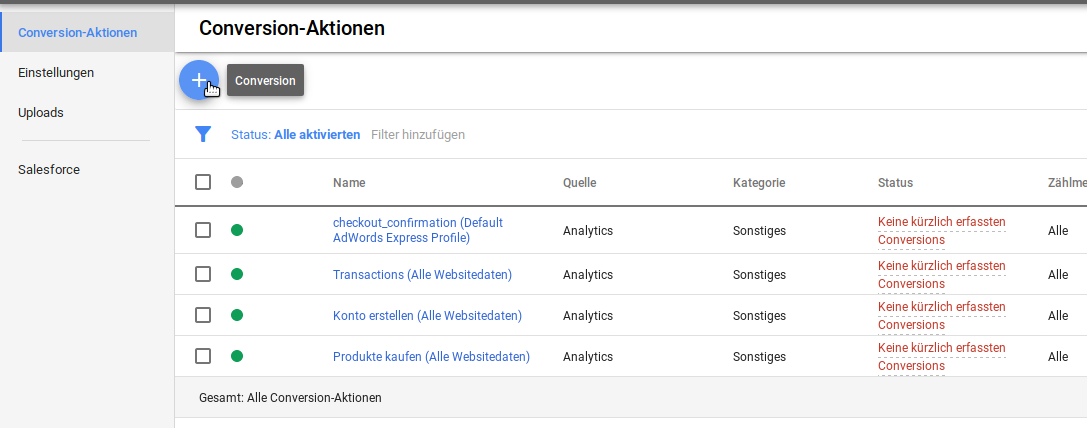
Add a new action via the plus symbol at the top left. In the list, actions already created in Analytics are listed.
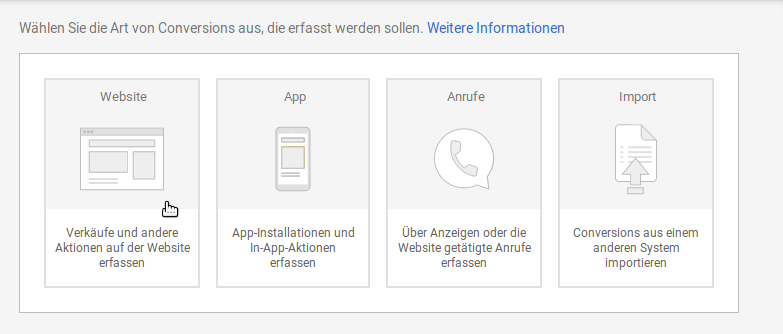
Select as the Type of action the entry Website. The name of the action can be assigned freely. Please select Purchase/Sale as the Category.
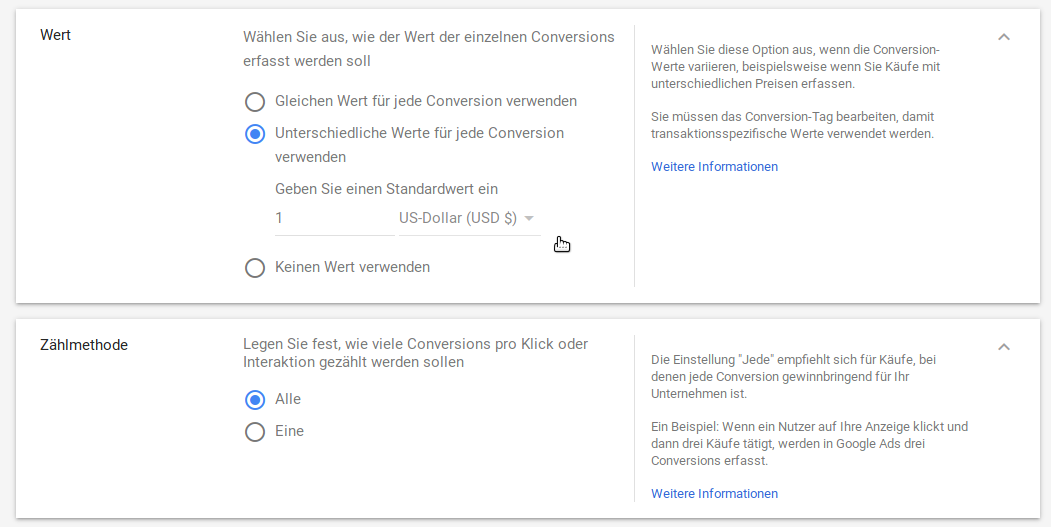
Select under Value the entry different values. The default value can be left unchanged at 1; the shop replaces this by means of the actually occurring values. Set the Counting method to All.
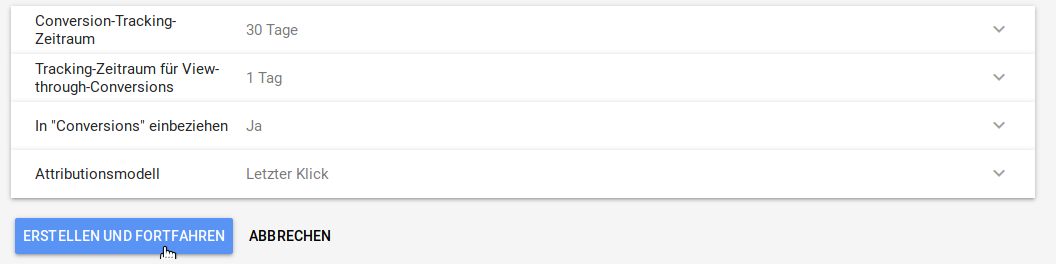
Then click on Create and continue.
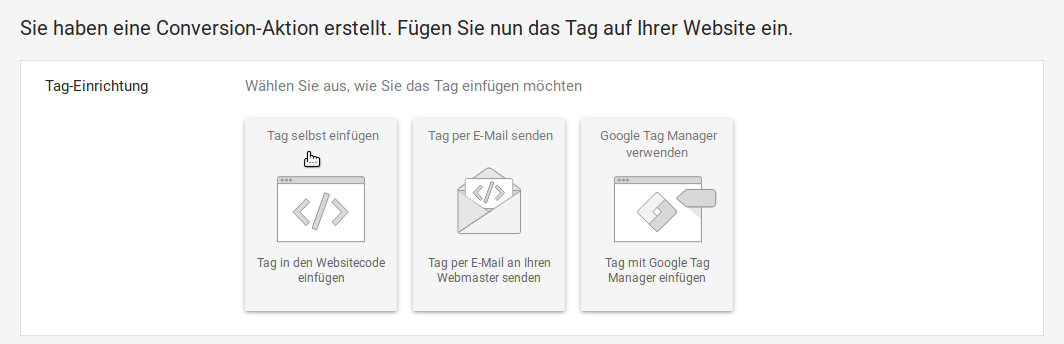
The shop takes over the insertion of the tag into the website code. So click here on Insert tag yourself.
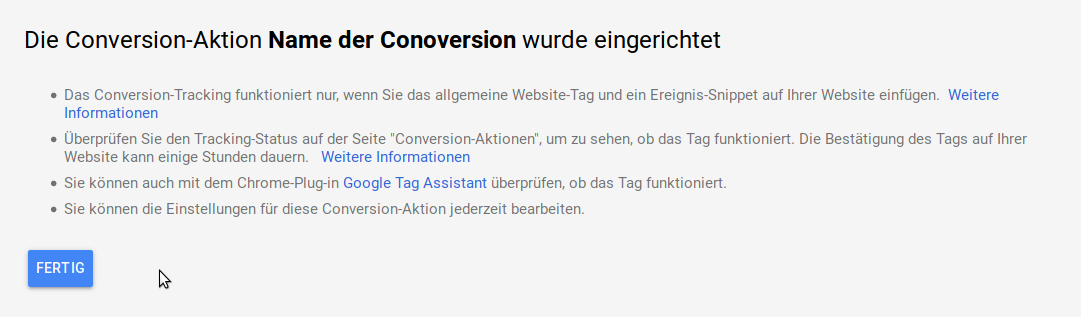
Confirm the display that now follows with a click on Done. The created action is now listed in the list.
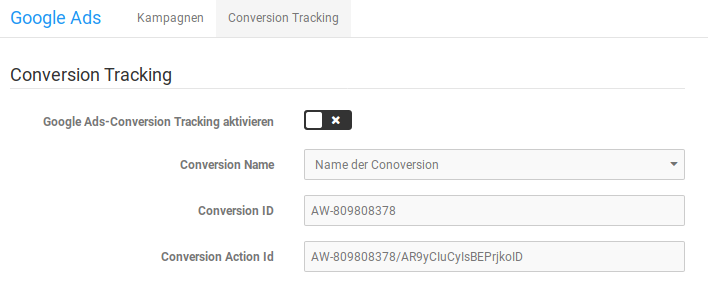
Under the tab Conversion Tracking you will now find further information and can activate the conversion tracking.
Google Analytics
Note
If Google Analytics has not yet been used, the request is made on the part of Google to activate the E-commerce tracking. This setting can be found in your Google Analytics account under the menu item Administration. Subsequently, the user account and property must be selected, then you can activate the item E-commerce settings in the third column and there select Enable E-commerce.
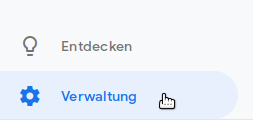
First call up your Google Analytics account at https://analytics.google.com/ and go to Administration at the bottom left.
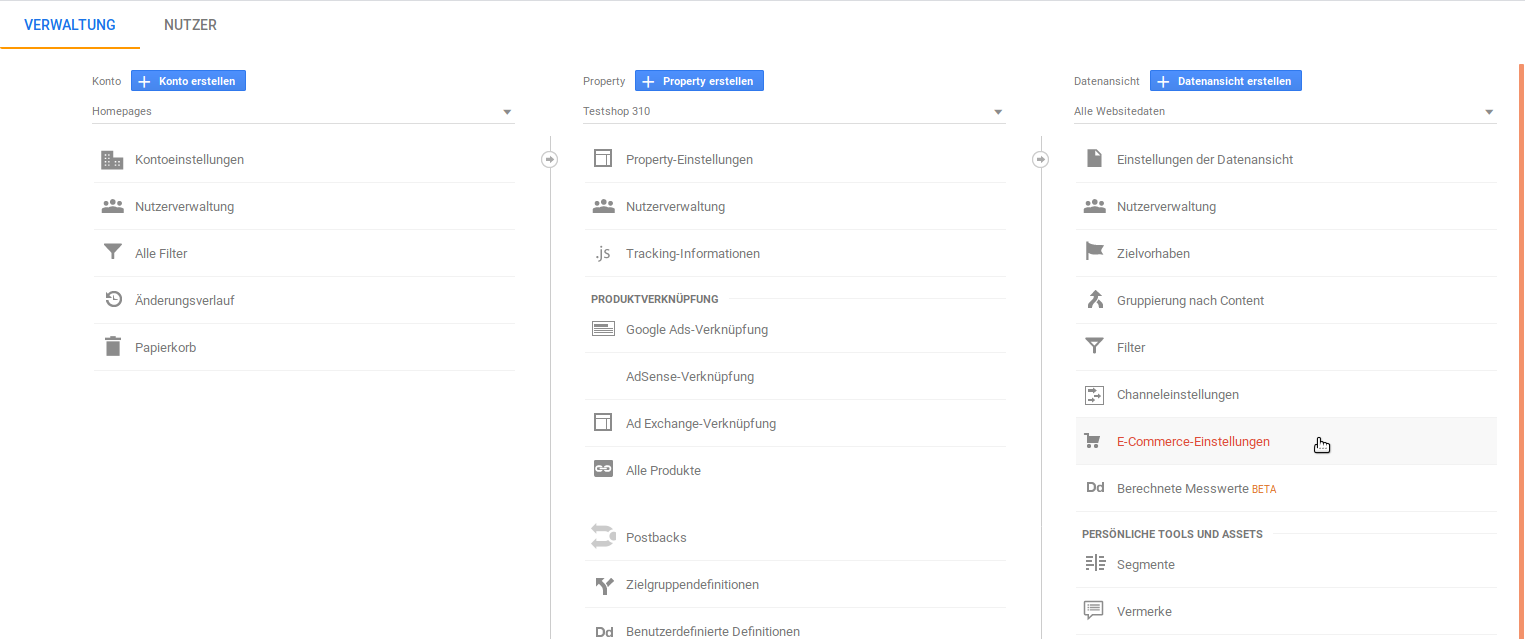
Select in the third column the E-commerce settings.
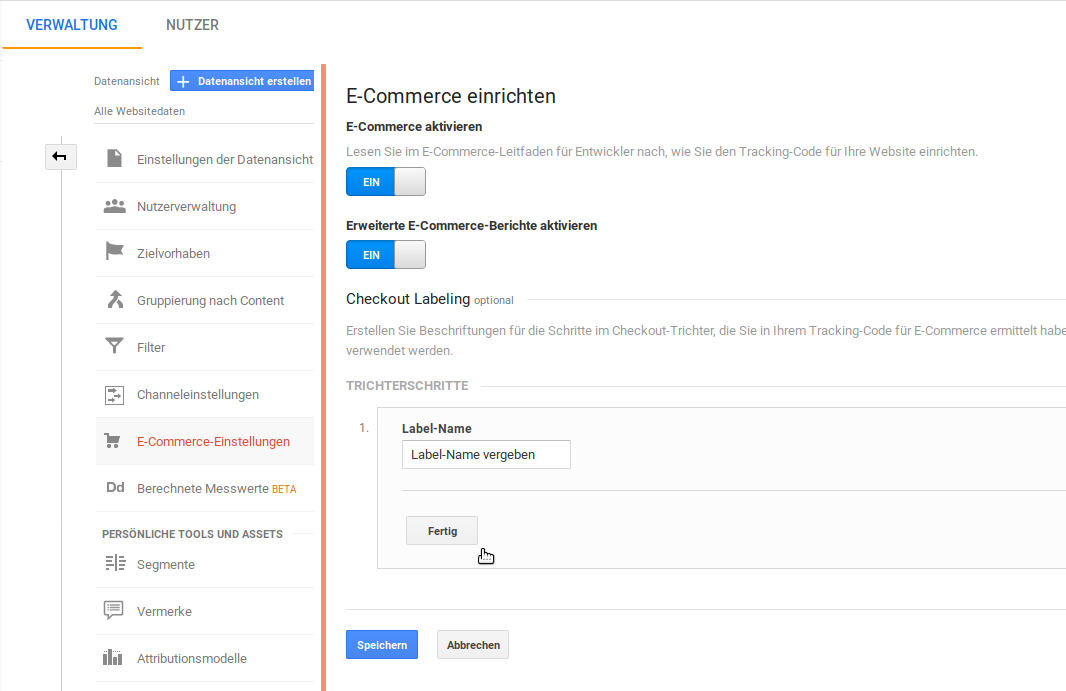
Activate there the e-commerce tracking as well as the enhanced reports; for the latter a Label name must be assigned. Confirm the settings with a click on Save so that the data can be tracked.
Please note that this data is only visible in Analytics with a time delay.
Captured data and selection of the source
Here all data that has been tracked by Google Analytics is output. In the upper menu bar it can be selected which data is to be displayed. Selection by property (domain), type of data and period is possible.

The values captured for the property are output in the boxes.
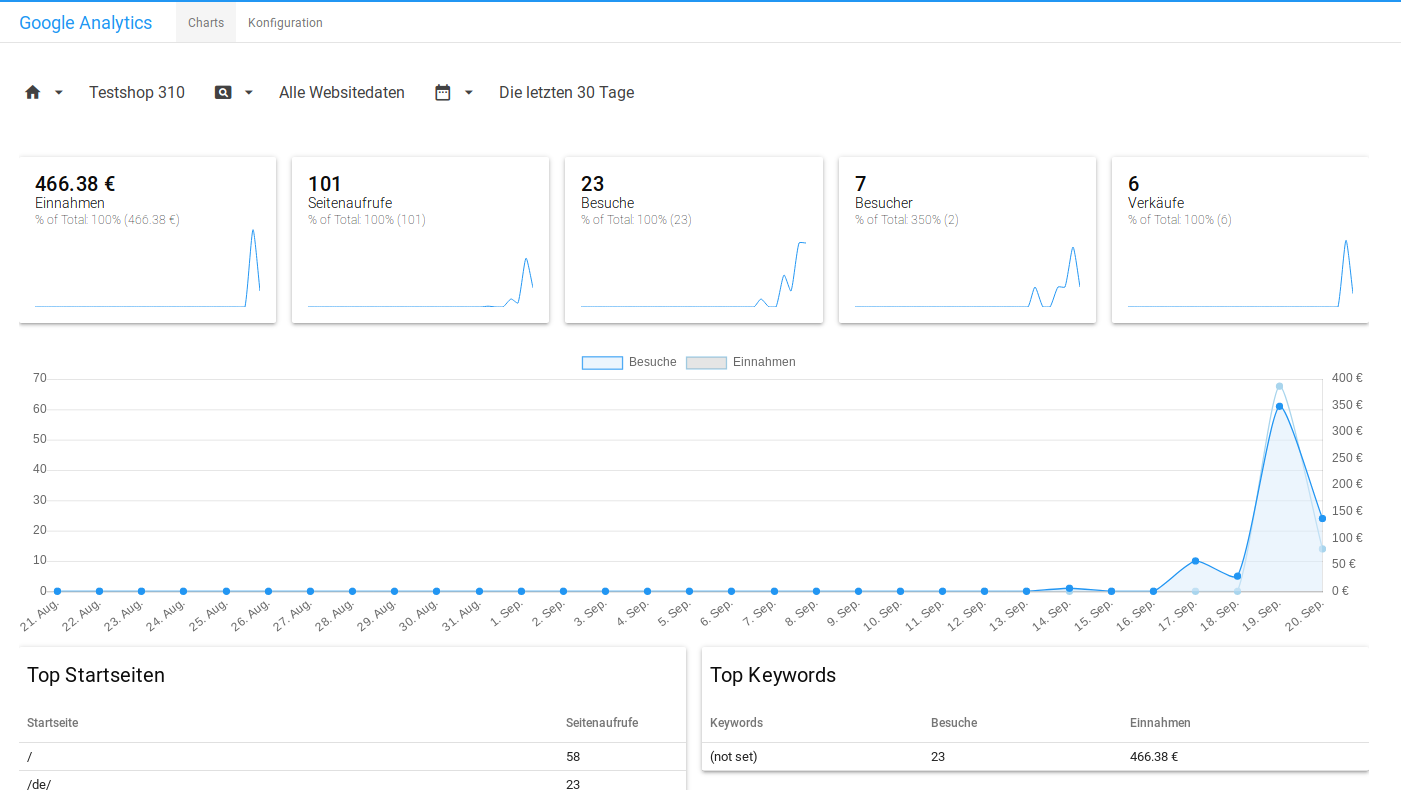
Configuration
Before data can be captured, the module must be set up in the tab Configuration.
Main settings
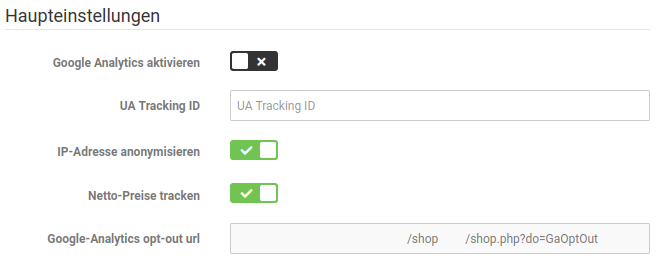
| Field name | Description |
|---|---|
| Track net prices | Selection whether Analytics should capture net or gross prices. |
| Anonymize IP address | Selection whether the IP addresses of the visitors should be anonymized. The recommended setting is ✔. |
| Enable Google Analytics | Here the tracking by Google Analytics can be activated or deactivated. |
| UA Tracking Code | Your UA ID, which is created when creating a property at Google Analytics. This ID can be looked up in Google Analytics in the property settings. |
| Google Analytics opt-out URL | Via the link output here, visitors of the shop can achieve that their data is not captured by Google Analytics. This link is required when the opt-out option has to be specified manually. |
Tracking options
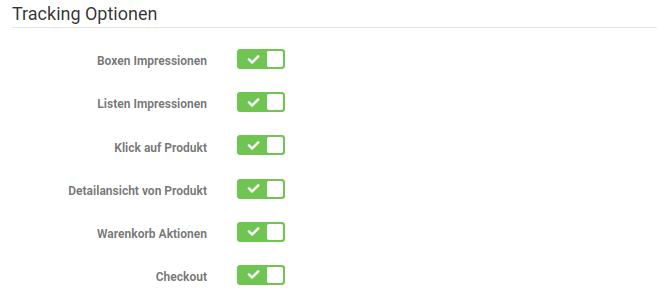
| Field name | Description |
|---|---|
| Box impressions | Should views of the boxes Bestsellers, Offers and What's new be tracked? |
| List impressions | Should views of the lists Bestsellers, Offers, What's new, Coming soon and Recommendations be tracked? |
| Click on product | If active, the click on the product is tracked |
| Detail view of product | Tracks the views of the product pages. Interesting for direct calls in comparison to the number of clicks on product |
| Shopping cart actions | Tracks the shopping cart actions |
| Checkout | Tracks the course of the checkout, so it can be followed on which page the customers drop out most frequently. |
Box names
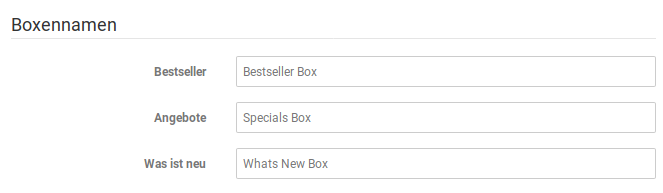
Via these input fields the box names can be changed. This simplifies the assignment of the values if one has renamed these boxes in the shop.
List names
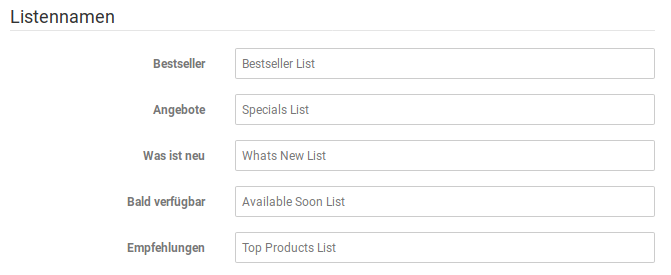
Here too a change of the designations is possible, here those of the listed lists.
Advanced settings

While the script code is prepared in live operation to such an extent that ad blockers can as a rule not block it, this is not the case with the developer mode activated. The unchanged script code enables tests, e.g. with the Google Tag Manager, but at the same time also leads to the code being able to be blocked by ad blockers. The developer mode should therefore only be activated when a more precise analysis is pending that serves the further development of the module.
Attention
In normal operation the developer mode should absolutely be deactivated!