Content Manager
In the Content section of the Gambio Admin you will find the entry Content Manager, where you can create information pages for your shop and edit existing information pages. The Content Manager is divided into three sections, which can be selected by clicking on the respective tab:
- Pages
- Elements
- Product content
Pages
The content created here represents standalone pages that can be accessed on their own. The shop comes with a whole selection of predefined pages that have their own purpose, e.g. Terms & Conditions, Legal notice, Right of withdrawal & model withdrawal form and the like.
Attention
The text entered in the content Right of withdrawal & model withdrawal form must not be modified, as individual elements for the withdrawal instructions are merged via this content (see chapter Elements, Consumer Rights Directive).
Actions for a content
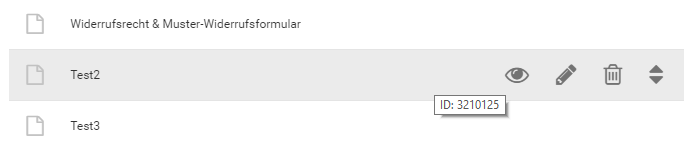
To display the possible actions for a content, first move the mouse pointer into the respective row of the content. Several icons are displayed; from left to right these are: Preview, Edit, Delete, Move. Click the respective icon to perform an action.
Note
For predefined contents, no Delete icon is displayed. These contents cannot be removed because the shop requires them.
Opening the preview
Move the mouse pointer over the eye icon of the desired content and click on it with the left mouse button to open the preview. This way you can view a content without having to open the complete input form (see Editing a content).
Editing a content
Move the mouse pointer over the pencil icon of the desired content and click on it with the left mouse button to edit it. The input form of the content opens, in which you can make the changes (see Input form).
Deleting a content
Move the mouse pointer over the trash can icon of the content to be deleted and click on it with the left mouse button to delete it. A confirmation prompt is displayed, listing the name and ID of the content. If you are sure that the content should be removed, click on Delete. Otherwise, click on Cancel and the dialog will be closed again without the content being deleted.
Moving a content
Move the mouse pointer over the arrow icon of the desired content, click and hold the left mouse button to move it to another area. Drag the content up or down into the desired area and release the left mouse button there. Each area has its own function (see Areas of the Pages section).
Areas of the Pages section
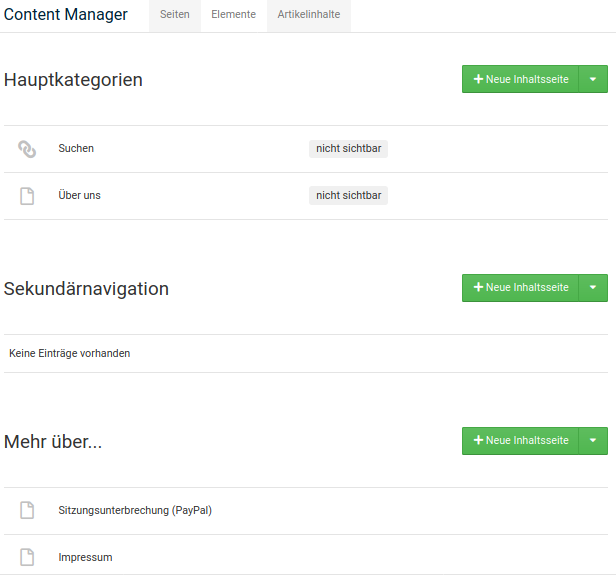
The areas can be used to define in which part of the shop a content is displayed (see chapter Areas of the shop system). The following areas are available for content pages:
- Main categories - the content is displayed as an entry in the horizontal menu bar
- Secondary navigation - the content is displayed as an entry in the secondary navigation
- More about... - the content is displayed as a link in the first column of the footer (More about)
- Information box - the content is displayed as a link in the Information box
- Other pages - the content is not linked automatically
Creating a content
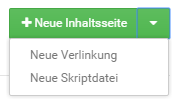
A new content can be created via the green buttons; the content is added to the area next to which the button is displayed (see Areas of the Pages section). Use the dropdown function to select the type of content you want to create. The following selection is available:
- New content page: a normal information page that can contain texts, images, tables and the like
- New link: the content is used as a link to another page. This can be another page of the shop as well as an external website
- New script file: the content contains e.g. an HTML or TXT file, which is used as content
Note
For security reasons, no script files with executable program code can be uploaded via the file manager.
Input form
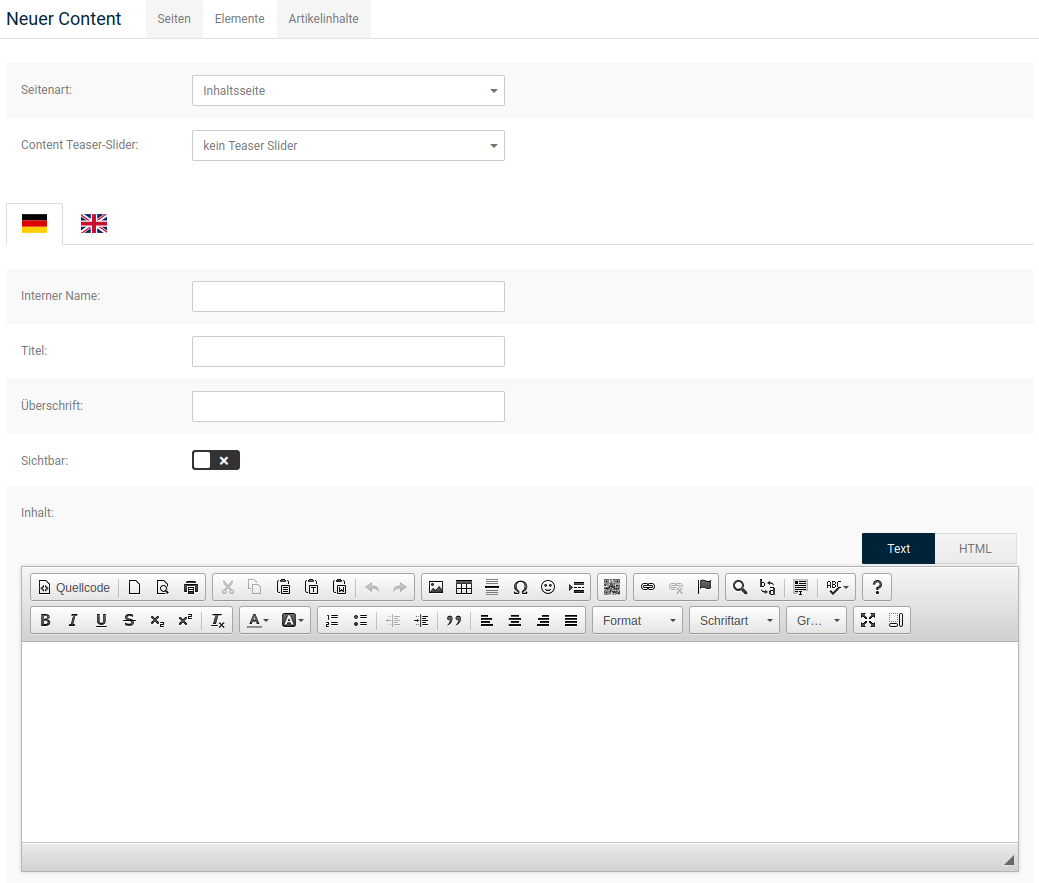
The input form that is displayed when creating or editing a content differs depending on the selected page type. For a content page, the focus is on the input via the CK Editor under Content, while for a link the entered URL is decisive. Below we list the available fields:
Content page
| Field name | Description |
|---|---|
| Page type | Type of content (content page, link, script file) |
| Content teaser slider | Selection for the teaser slider that is displayed on the content page |
| Language selection | click on the respective country flag to edit the content for the desired language |
| Internal name | Name of the page displayed in the Content Manager. Cannot be changed for predefined contents. |
| Name | Name of the page, under this name the content page can be accessed in the shop |
| Heading | Heading of the page, this heading is used in the content |
| visible | if the setting is activated (check mark icon in front of a blue background), the page can be accessed |
| Content | Content of the page, the CK Editor is used for input by default (see chapter CK Editor) |
| As download | File that can be downloaded for this content (for special use cases, e.g. for the right of withdrawal). |
| Meta Title | Meta title of the page, used for display in the browser tab and search engines |
| Meta Keywords | Keywords under which search engines should find this page, entered separated by commas, without spaces |
| Meta Description | free text for describing the page, for use by search engines |
| URL Keywords | Partial URL under which the page can be accessed in the shop, is assigned automatically, must be at least 3 characters long |
| URL Rewrite | Field for entering an alternative URL, see chapter URL Rewrite |
| Include in the sitemap | Should the page be included in the sitemap (for search engines)? |
| Priority in the sitemap | how important is the page in the shop, specified from 0.0 (less important) to 1.0 (very important) |
| Change frequency in the sitemap | Suggestion for search engines at which time interval this page should be checked for updates (desired specification, the actual interval is at the discretion of the search engine operator) |
| Entry in robots. txt (disallow) | should the page be blocked for search engines in the robots file? |
| Image for social media (og:image) | Image for social media, embedded with an Open Graph meta tag |
Link
| Field name | Description |
|---|---|
| Page type | Type of content (content page, link, script file) |
| Language selection | click on the respective country flag to edit the content for the desired language |
| Internal name | Name of the page displayed in the Content Manager. Cannot be changed for predefined contents. |
| Title | Name of the page, this text is used as a link in the shop |
| Link address | URL of the page to be opened; for external pages, the complete URL including the leading http:// or https:// must be specified; for the shop's own pages, specifying the partial URL is sufficient (e.g. /maincategory/subcategory/product.html) |
| visible | if the setting is activated (check mark icon in front of a blue background), the page can be accessed |
| Open in a new window | if the check mark is set, the link is opened in a new tab or new window (depending on the browser setting), useful for external pages |
Note
If a subfolder is part of your shop address, e.g.
www.example.com/shop
the subfolder
/shop/
must also be specified for an internal link.
Script file
| Field name | Description |
|---|---|
| Page type | Type of content (content page, link, script file) |
| Content teaser slider | Selection for the teaser slider that is displayed on the content page |
| Language selection | click on the respective country flag to edit the content for the desired language |
| Internal name: | Name of the page displayed in the Content Manager. Cannot be changed for predefined contents. |
| Title | Name of the page, under this name the content page can be accessed in the shop |
| visible | if the setting is activated (check mark icon in front of a blue background), the page can be accessed |
| Content | Content of the page, in addition to or instead of the script, the CK Editor is used for input by default (see chapter CK Editor) |
| Choose file | opens the file manager, via which the file can be uploaded or selected |
| As download | File that can be downloaded for this content (for special use cases, e.g. for the right of withdrawal). |
| Meta Title | Meta title of the page, used for display in the browser tab and search engines |
| Meta Keywords | Keywords under which search engines should find this page, entered separated by commas, without spaces |
| Meta Description | free text for describing the page, for use by search engines |
| URL Keywords | Partial URL under which the page can be accessed in the shop, is assigned automatically, must be at least 3 characters long |
| URL Rewrite | Field for entering an alternative URL, see chapter URL Rewrite |
| Include in the sitemap | Should the page be included in the sitemap (for search engines)? |
| Priority in the sitemap | how important is the page in the shop, specified from 0.0 (less important) to 1.0 (very important) |
| Change frequency in the sitemap | Suggestion for search engines at which time interval this page should be checked for updates (desired specification, the actual interval is at the discretion of the search engine operator) |
| Entry in robots. txt (disallow) | should the page be blocked for search engines in the robots file? |
| Image for social media (og:image) | Image for social media, embedded with an Open Graph meta tag |
Make the entries as required. Clicking on Save saves the changes and leaves the input form. Via Update, the changes are saved without leaving the input form. With Back you leave the input form; the most recent changes are discarded.
Elements
Elements are components of another page. The pages that use multiple elements include above all the start page of the shop as well as the content Right of withdrawal & model withdrawal form (see chapter Consumer Rights Directive).
Actions for a content
To display the possible actions for a content, first move the mouse pointer into the respective row of the content. Several icons are displayed; from left to right these are: Preview, Edit, Delete. Click the respective icon to perform an action.
Note
For predefined contents, no Delete icon is displayed. These contents cannot be removed because the shop requires them.
Opening the preview
Move the mouse pointer over the eye icon of the desired content and click on it with the left mouse button to open the preview. This way you can view a content without having to open the complete input form (see Editing a content).
Editing a content
Move the mouse pointer over the pencil icon of the desired content and click on it with the left mouse button to edit it. The input form of the content opens, in which you can make the changes (see Input form).
Deleting a content
Move the mouse pointer over the trash can icon of the content to be deleted and click on it with the left mouse button to delete it. A confirmation prompt is displayed, listing the name and ID of the content. If you are sure that the content should be removed, click on Delete. Otherwise, click on Cancel and the dialog will be closed again without the content being deleted.
Areas of the Elements section
The areas can be used to define on which page of the shop a content is displayed. The following pages are available for elements:
- Start page - the content is displayed as part of the start page (see chapter Areas of the shop system)
- Header - the content is used for display in the header (see chapter Areas of the shop system)
- Footer - the content is used for display in the footer (see chapter Areas of the shop system)
- Boxes - the content is displayed as a box in the left column of the shop
- Withdrawal - the content is displayed as part of the page Right of withdrawal & model withdrawal form
- Other - the content is displayed in another place in the shop
Note
By default, the following contents are created in the Other area:
Order summary information - this content is displayed on the last page of the checkout process, at the bottom, next to the buy now button
Data transfer to transport companies - this content is displayed on the Shipping & Payment page in the checkout process
Creating a content
A new content can be created via the green buttons; the content is added to the area next to which the button is displayed (see Areas of the Elements section). Use the dropdown function to select the type of content you want to create. The following selection is available:
- New content page: a normal information page that can contain texts, images, tables and the like
- New script file: the content contains e.g. an HTML or TXT file, which is used as content
Note
For security reasons, no script files with executable program code can be uploaded via the file manager.
Input form
The input form that is displayed when creating or editing a content differs depending on the selected page type. For a content page, the focus is on the input via the CK Editor under Content, while for a link the entered URL is decisive. Below we list all available fields:
Content page
| Field name | Description |
|---|---|
| Page type | Type of content (content page, script file) |
| Language selection | click on the respective country flag to edit the content for the respective language |
| Internal name | Name of the element in the Content Manager |
| Heading | Heading of the element on the page |
| visible | if the setting is activated (check mark icon in front of a blue background), the element is displayed |
| Content | Content of the page, the CK Editor is used for input by default (see chapter CK Editor) |
Script file
| Field name | Description |
|---|---|
| Page type | Type of content (content page, script file) |
| Language selection | click on the respective country flag to edit the content for the respective language |
| Internal name | Name of the element in the Content Manager |
| Heading | Heading of the element on the page |
| visible | if the setting is activated (check mark icon in front of a blue background), the element is displayed |
| Choose file | opens the file manager, via which the file can be uploaded or selected |
Make the entries as required. Clicking on Save saves the changes and leaves the input form. Via Update, the changes are saved without leaving the input form. With Back you leave the input form; the most recent changes are discarded.
Product content
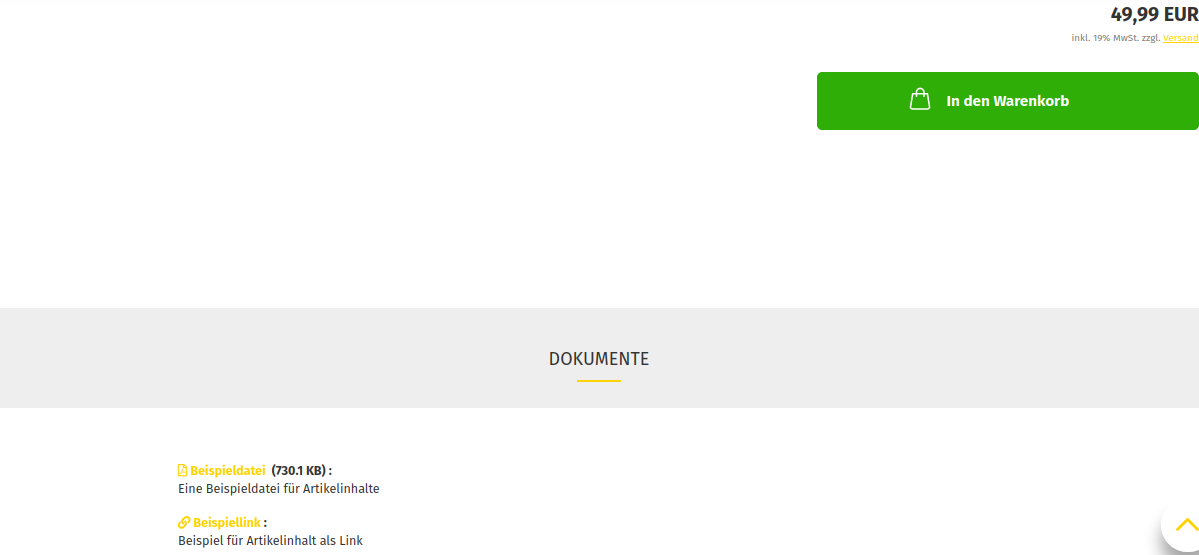
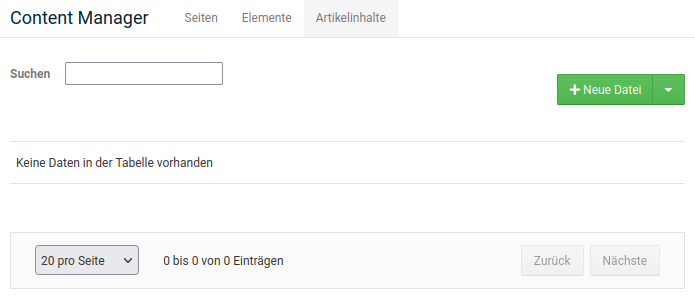
Product content, also called product contents, can be assigned to a product as an additional download. This is suitable, for example, for offering a PDF manual for download with a product.
Note
In contrast to download products, downloading these files is always possible. The product does not need to be ordered for this.
Actions for a product content
To display the possible actions for a product content, first move the mouse pointer into the respective row of the content. Several icons are displayed; from left to right these are: Edit, Delete. Click the respective icon to perform an action.
Editing a content
Move the mouse pointer over the pencil icon of the desired content and click on it with the left mouse button to edit it. The input form of the content opens, in which you can make the changes (see Input form).
Deleting a content
Move the mouse pointer over the trash can icon of the content to be deleted and click on it with the left mouse button to delete it. A confirmation prompt is displayed, listing the name and ID of the content. If you are sure that the content should be removed, click on Delete. Otherwise, click on Cancel and the dialog will be closed again without the content being deleted.
Creating a product content
A new product content can be created via the green button. Use the dropdown function to select the type of content you want to create. The following selection is available:
- New file: the product content contains a file that is stored on the FTP server
- New link: the product content contains a link to the desired target
Note
For security reasons, no script files with executable program code can be uploaded via the file manager.
Input form
File
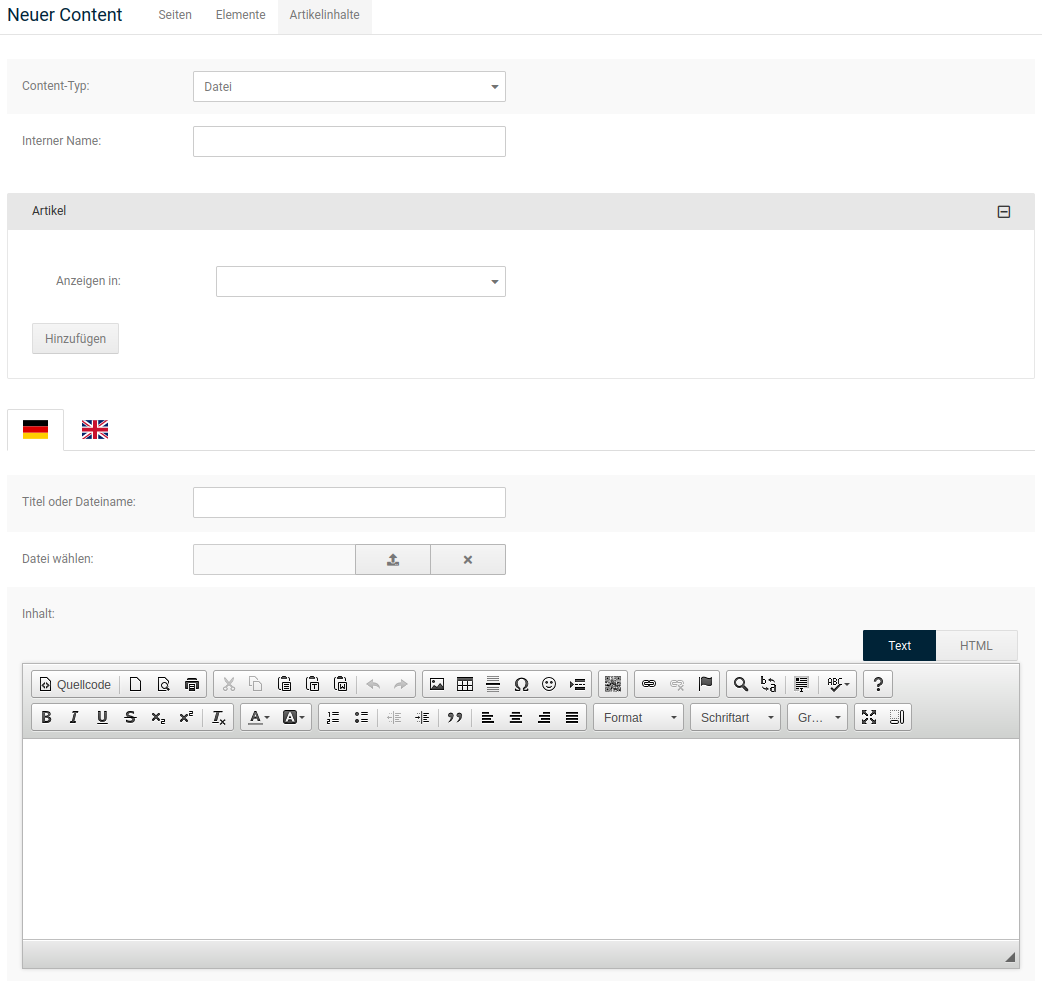
| Field name | Description |
|---|---|
| Content type | Type of product content (file, link) |
| Internal name | Name of the product content in the Content Manager |
| Display in | Selection of the products to which the product content should be assigned |
| Language selection | click on the respective country flag to edit the content for the respective language |
| Title or file name | Text that is displayed as a link to the file in the product |
| Choose file | Opens the file manager to select the file |
| Content | free text for describing the file |
Link
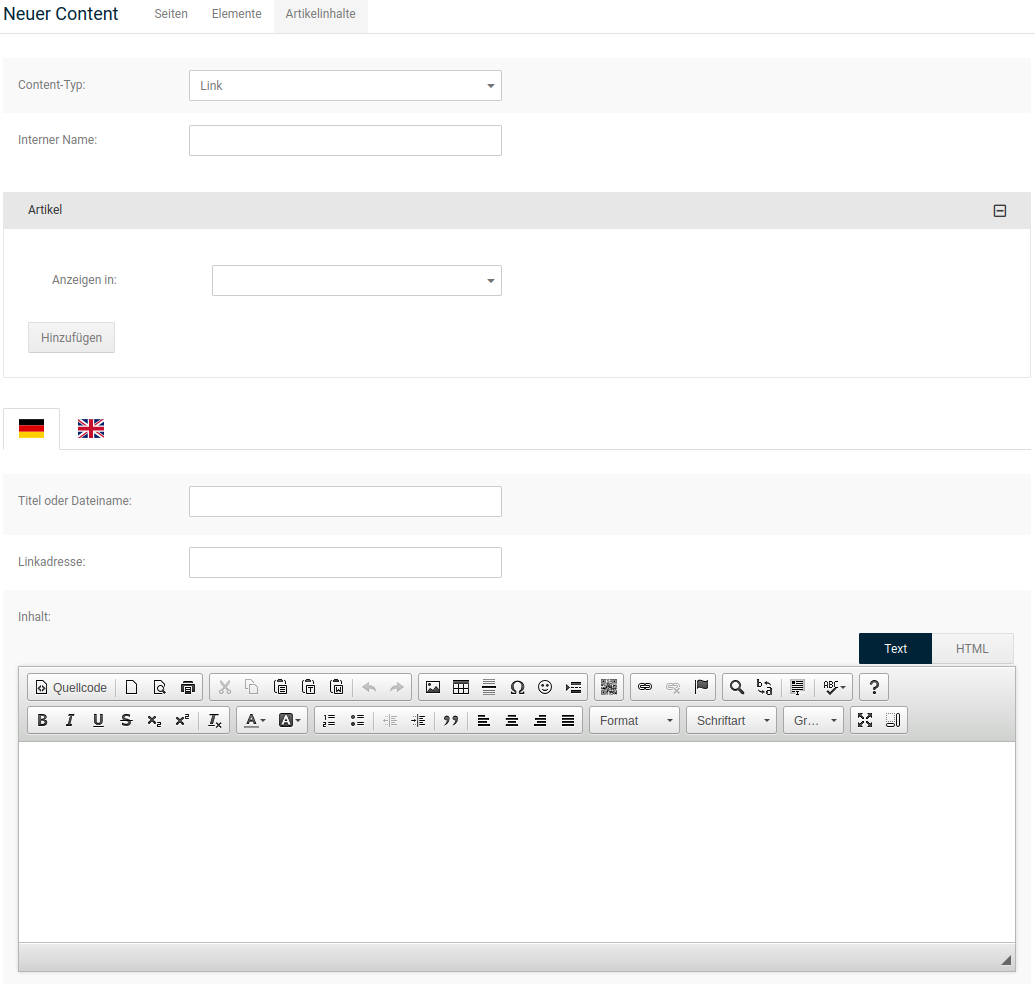
| Field name | Description |
|---|---|
| Content type | Type of product content (file, link) |
| Internal name | Name of the product content in the Content Manager |
| Display in | Selection of the products to which the product content should be assigned |
| Language selection | click on the respective country flag to edit the content for the respective language |
| Title or file name | Text that is displayed as a link to the specified URL in the product |
| Link address | URL to the desired target of the product content |
| Content | free text for describing the linked content |
Select the desired product in the Products area to assign the product content. Via Add, the selection can be extended for another product. By clicking on the trash can icon, a surplus selection can be removed again.
Make the entries as required. Clicking on Save saves the changes and leaves the input form. Via Update, the changes are saved without leaving the input form. With Back you leave the input form; the most recent changes are discarded.