Module Center
The area Modules > Module Center contains a compilation of modules for various purposes, as well as individual sub-functions of the shop, which can be activated or configured here. More detailed information on the individual modules can be found in the assigned subchapters or in the respective module instructions.
Brickfox
Installation
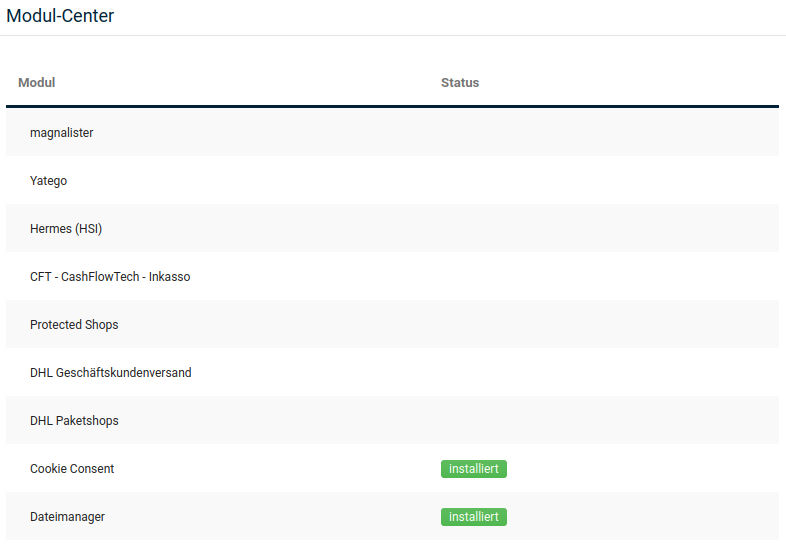
The Brickfox module is a standard component of the shop and can be installed under Modules > Module Center. To do this, select the entry Brickfox in the list and click on Install at the bottom right.
Configuration
After installation, the module can be configured via the Edit button.
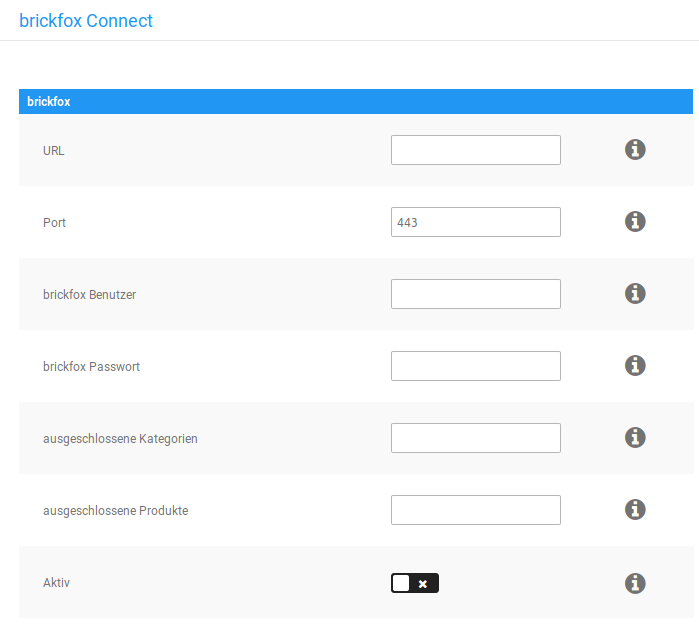
| Field name | Description |
|---|---|
| URL | URL of the brickfox server |
| Port | Port of the brickfox server. The default port here is 443 |
| brickfox user | Brickfox username |
| brickfox password | Brickfox password |
| excluded categories | Categories that should not be captured can be specified here using the category ID. |
| excluded products | Products that should not be captured can be specified here using the product ID. |
| Module active? | Set the check mark ✔ to activate the module. Remove the check mark ✖ to deactivate the module. |
Usage
The module is used directly via Brickfox; only the configuration can be carried out in the shop. For all questions regarding usage, please contact the Brickfox support (https://www.brickfox.de/).
eKomi
Installation
The eKomi module can be installed under Modules > Module Center. To do this, select the entry eKomi and click on Install.
Configuration
After installation, the Edit button is available. This can be used to open the configuration page. The settings are divided into 3 different tabs.
Activation
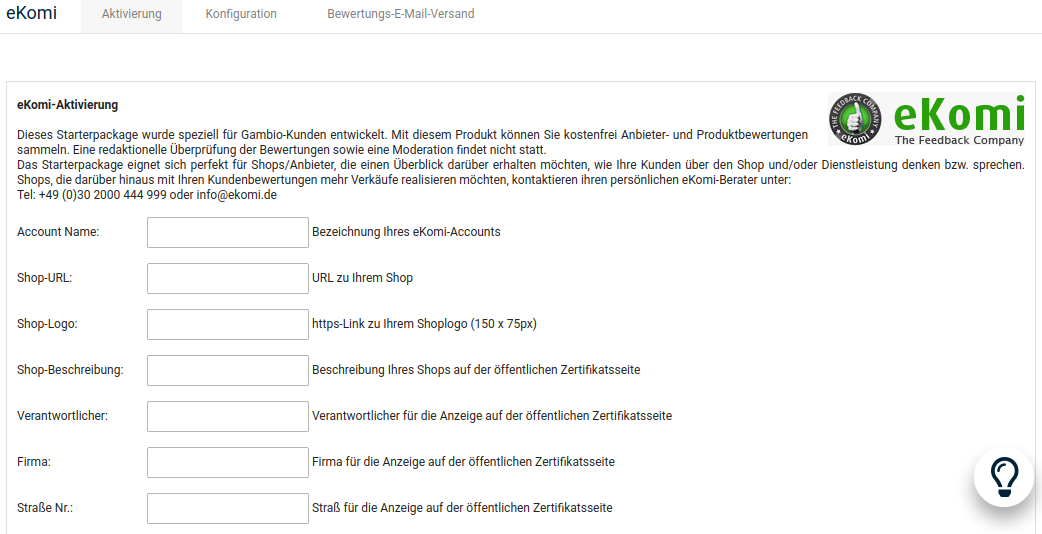
Via this form you can register with eKomi and use the free version. However, this version is limited in its functions; the eKomi widget for the shop, for example, cannot be used here — switching to the paid version would be necessary for that.
Configuration
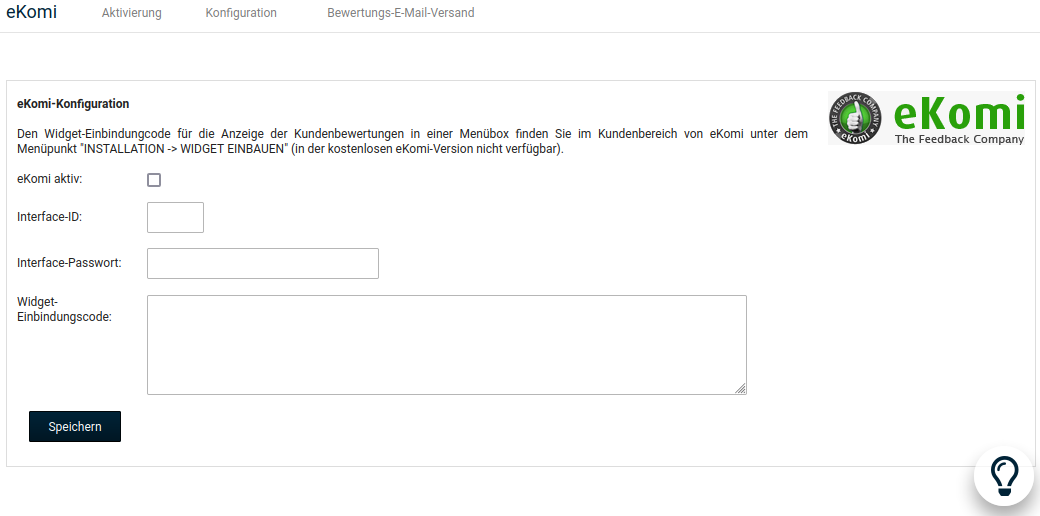
After registering with eKomi, the Interface ID and the Interface password are filled in automatically. In order for the module to be used, the check mark for eKomi active must be set. Using a widget embedding code is only possible with a paid contract with eKomi.
Review email dispatch
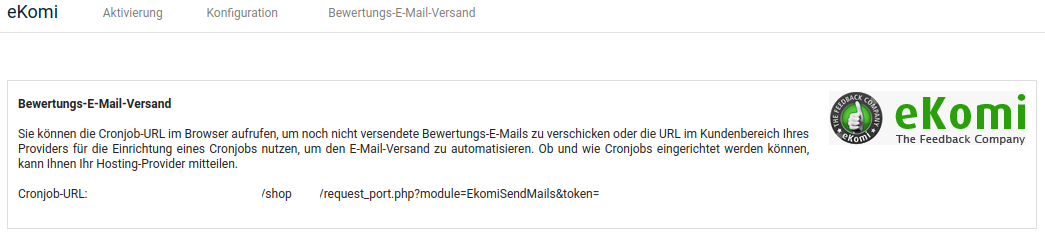
It is possible to trigger the review requests that have not yet been sent via a CronJob. For this purpose, a CronJob URL must be stored with your hosting provider or another corresponding provider and the call must be set up. The necessary CronJob URL is displayed in the shop (redacted in the screenshot).
Usage
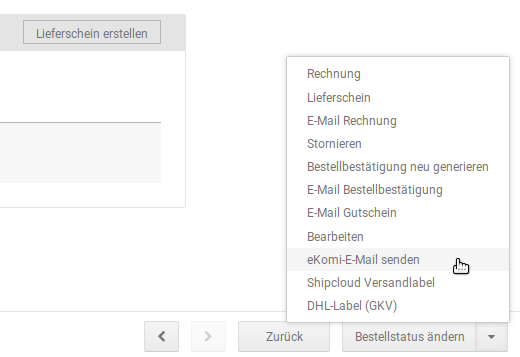
The eKomi module sends the review emails automatically by default. In addition, there is the option Send ekomi email in the order details, via which the dispatch can be triggered.
Review
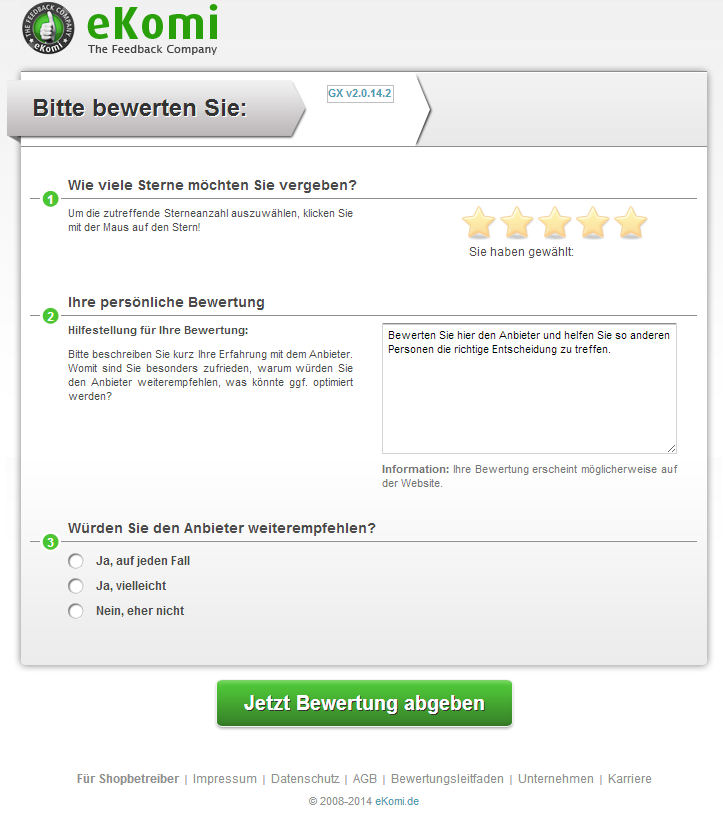
The link in the review email takes the customer to a page where they can rate the shop (not the products).
IT-Recht Kanzlei
Installation
The IT-Recht Kanzlei module can be installed under Modules > Module Center. To do this, select the entry IT-Recht Kanzlei from the list and then click on the Install button in the bottom right corner of the screen. A contract with IT-Recht Kanzlei is required for use.
Configuration
After installation, the module can be configured. To do this, select the entry IT-Recht Kanzlei under Modules > Module Center and click on the Edit button in the bottom right corner of the screen. If no settings have been made yet, an information page appears. Via the button Book now you will be taken directly to the IT-Recht Kanzlei website.
Initial setup
Switch to the Configuration tab to carry out the initial setup and connect your shop with IT-Recht Kanzlei.
Attention
In order for the shop to be successfully connected with IT-Recht Kanzlei, it must be set online under Content > Shop online/offline. Otherwise, a synchronization of the legal texts is not possible and the connection cannot be completed.
API token
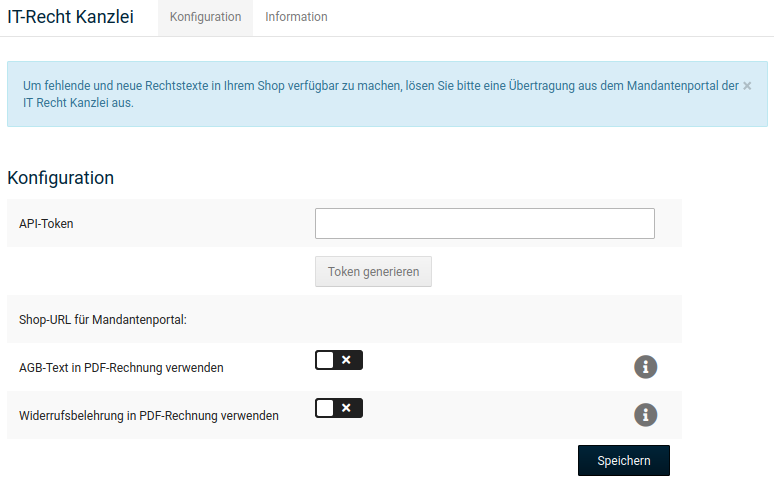
The API token is required to establish the connection between the shop and IT-Recht Kanzlei. The token is created in the shop via the Generate token button and then stored in your customer account at IT-Recht Kanzlei. Proceed as follows:
| Step | Display |
|---|---|
| 1. Click on the link Schnittstellen verwalten (Manage interfaces) in the left sidebar | 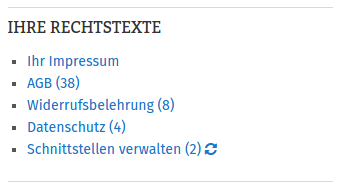 |
| 2. Select Online-Shop-AGB (BASIC) | 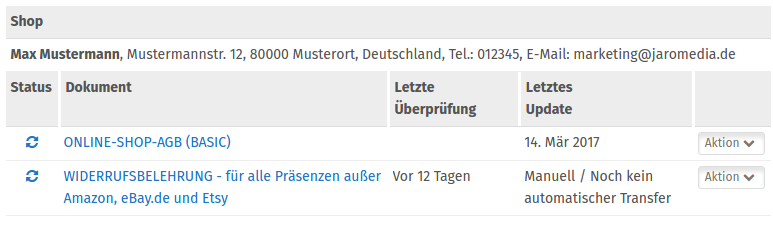 |
| 3. Select Datenschnittstelle (data interface) at IT-Recht | 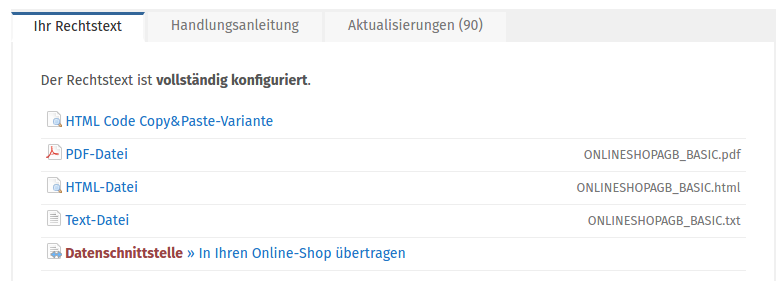 |
A popup now opens, via which the type of shop can be selected and the token can be stored:
| Step | Display |
|---|---|
| 1. Select the shop system | 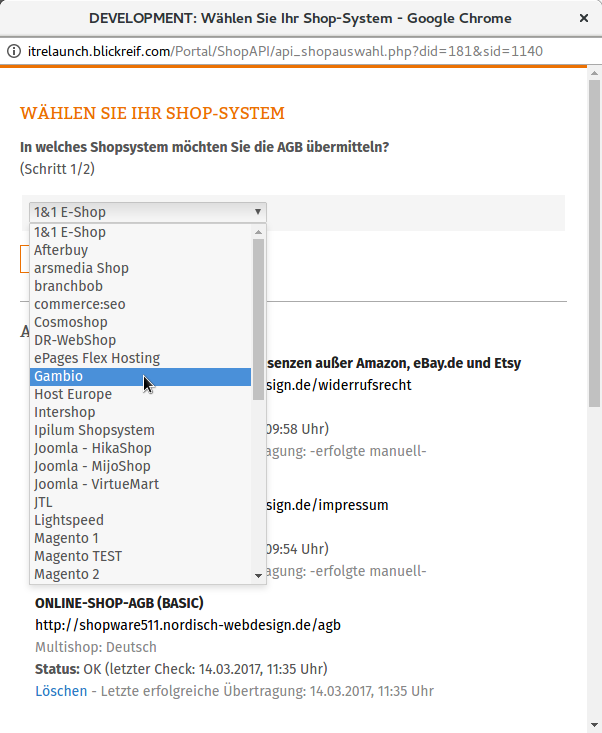 |
| 2. Enter the API token and shop URL | 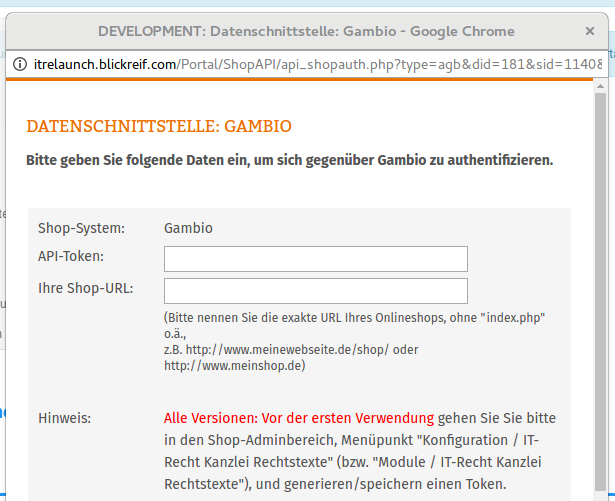 |
| 3. In a second tab of your browser, open the configuration page of the module in the Gambio Admin and click on the button Use in Content Manager under Received texts. | 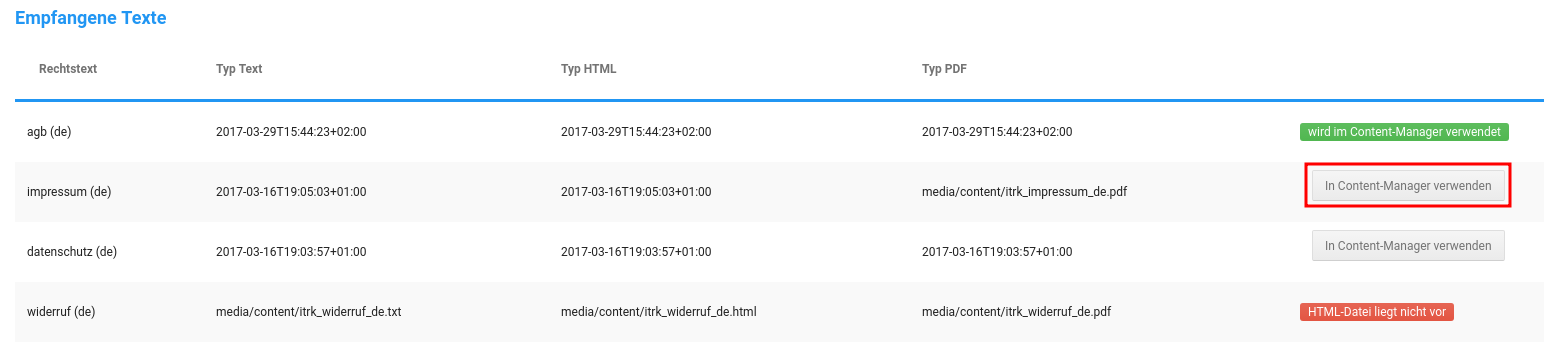 |
| 4. Confirm the details | 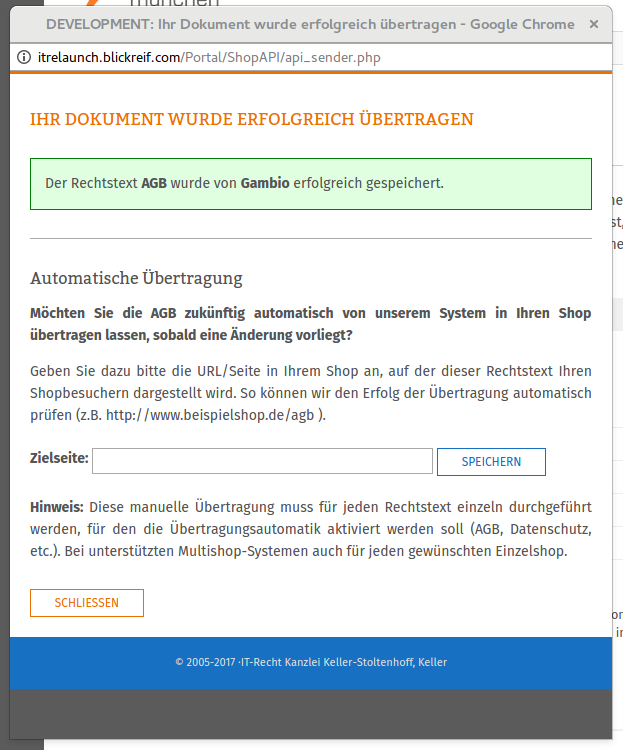 |
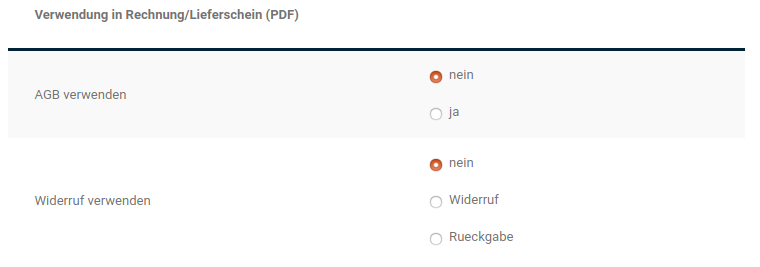
Use terms and conditions text in PDF invoice
If this option is activated, the terms and conditions text is included in the PDF invoice. The text from IT-Recht Kanzlei then replaces the text that may have been stored under Settings / System / Invoice & delivery note in the Content tab for Terms and conditions/Withdrawal.
Use withdrawal notice in PDF invoice
If this option is activated, the withdrawal text is included in the PDF invoice. The text from IT-Recht Kanzlei then replaces the text that may have been stored under Content / System / Invoice & delivery note in the Content tab for Terms and conditions/Withdrawal.
Received texts
Via this section, the legal texts can be transferred into the content pages.
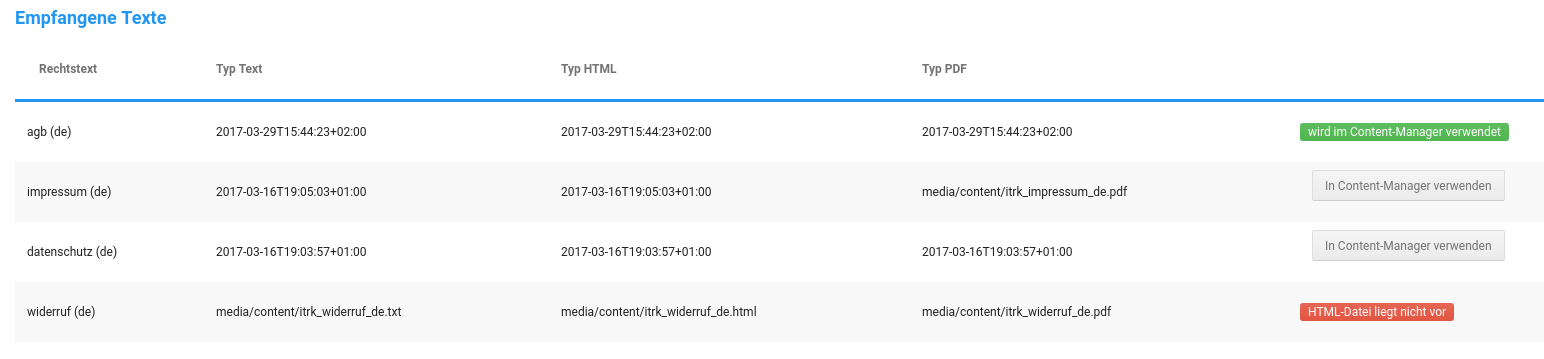
At the end of the line, the corresponding status within the content is listed for the respective legal text:
| Option | Explanation |
|---|---|
| Use in Content Manager | If a text is to be transferred into the content, it is sufficient to click here. It is no longer necessary to edit the content manually and select a file in order to enable the output of the legal texts. |
| is used in Content Manager | This message appears when a text has been successfully stored in the content. |
| HTML file not available | In this case, the API token and the shop URL must be stored again at IT-Recht Kanzlei so that the data can be transmitted once more. |
Afterbuy
Introduction
Purpose
The Afterbuy module is used to connect the shop to Afterbuy. It enables the transfer of orders and the synchronization of products and their stock levels.
Availability and system requirements
The module requires at least PHP 7.4 and is included in the scope of the shop software.
Installation
The Afterbuy module can be installed under Modules > Module Center. To do this, select the entry Afterbuy and click on the Install button in the bottom right corner of the screen.
Configuration
After the Afterbuy module has been installed, it can be configured. To do this, select the entry Afterbuy under Modules > Module Center and click on the Edit button in the bottom right corner of the screen. You will be taken to the configuration page, where the Afterbuy data can be stored. The setting options are divided into the tabs General configuration, Order data export and Product import.

General configuration
Configuration
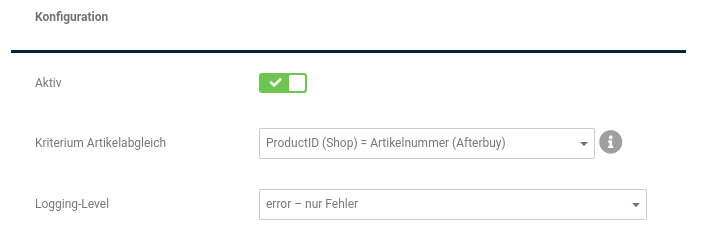
In this section, the module can be activated and it can be defined how identical products in the shop and at Afterbuy are identified. You can also set how precisely logging should be carried out.
It must be noted that the values must be unique. For the item Criterion for product matching, various options are available:
- ProductID (shop) = external product number (Afterbuy)
- ProductID (shop) = product number (Afterbuy)
- Product number (shop) = external product number (Afterbuy)
- Product number (shop) = product number (Afterbuy)
- Product number (shop) = ProductId (Afterbuy)
Access data for Shop API
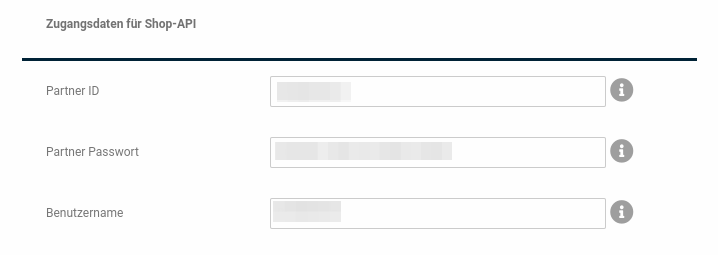
Your access data for the Afterbuy Shop API can be stored here.
| Field name | Description |
|---|---|
| Partner ID | The Afterbuy partner ID you received from Afterbuy |
| Partner password | The Afterbuy password for the interface |
| Username | Enter here the username you chose when registering |
| with Afterbuy |
Access data XML API
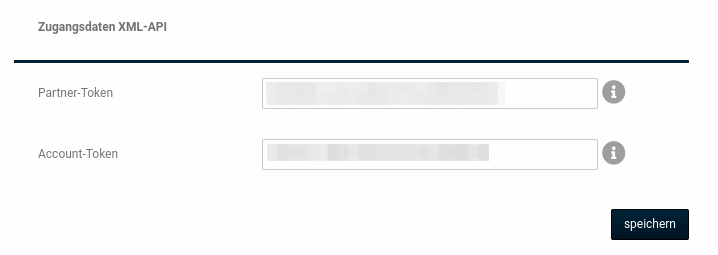
The tokens for the stock synchronization are entered here. You will receive all necessary tokens from Afterbuy.
| Field name | Description |
|---|---|
| Partner token | Your partner token for the XML interface |
| Account token | The account token |
Order export
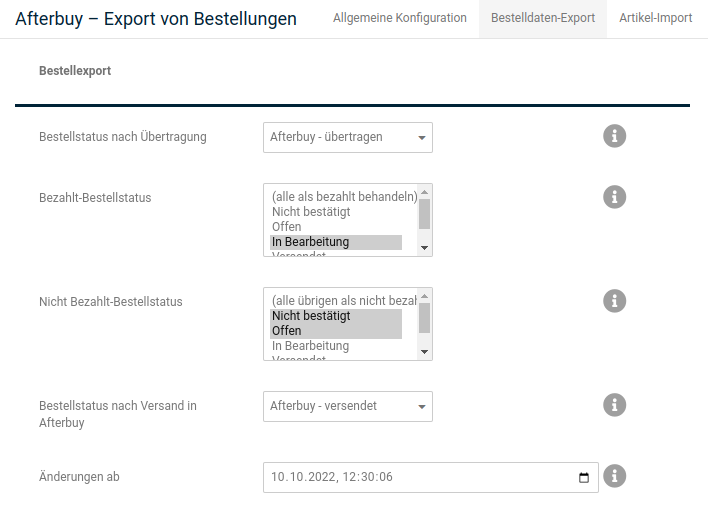
Here you can select which order status orders must have in order to be exported as paid or not paid, and which order status should be set after the transfer.
Please note that orders with a pending payment status may need to be configured as neither paid nor unpaid, in order to rule out unnecessary blocking of stock.
| Field name | Description |
|---|---|
| Order status after transfer | Select here the order status that should be set after the transfer to Afterbuy. |
| Paid order status | Order is transferred as paid if one of these order statuses appears in the order status history. |
| Multiple selection: hold down CTRL | |
| Not paid order status | Order is transferred as not paid if one of these order statuses appears in the order status history. |
| Multiple selection: hold down CTRL | |
| Order status after shipping in Afterbuy | If a shipping tracking ID is found in an order during the order synchronization, the order in the shop is set to the selected order status. |
| Changes from | During the next stock synchronization, orders that were changed at Afterbuy after this point in time are taken into account. This value is updated automatically by the stock synchronization. |
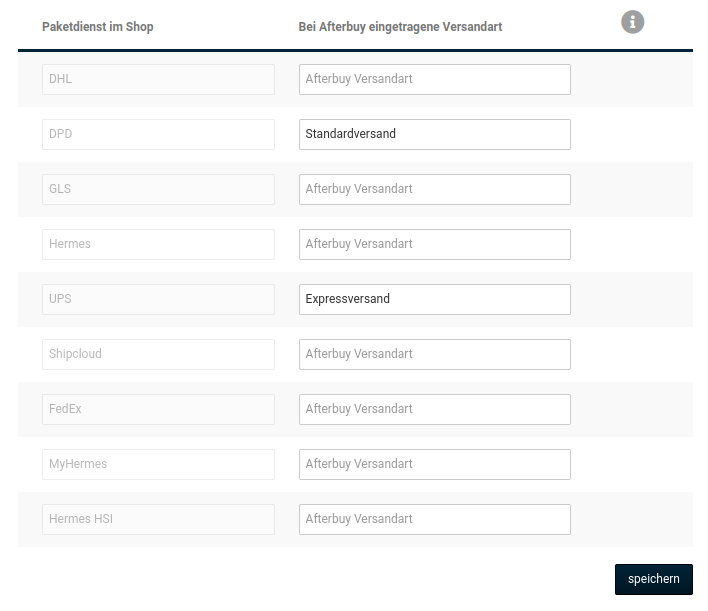
In order to store the tracking number stored at Afterbuy with the correct tracking link, you can match it with the shipping service provider. If, for example, your shipping method at Afterbuy is called "Standardversand" and you always ship it with DPD, enter the exact name used at Afterbuy for the corresponding parcel service. This is possible with several different shipping methods, as the example in the figure above (section Parcel service in the shop) shows.
Product import
Mode for product data import
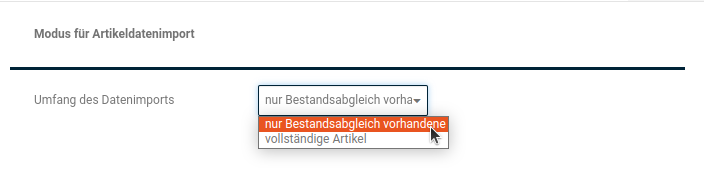
Here you can choose whether only a stock synchronization of products existing on both sides should take place, or whether complete and new products should also be imported from Afterbuy.
Configuration for stock synchronization mode

During the next stock synchronization, products that were changed at Afterbuy after this point in time are taken into account. This value is updated automatically by the stock synchronization.
Configuration for product import mode
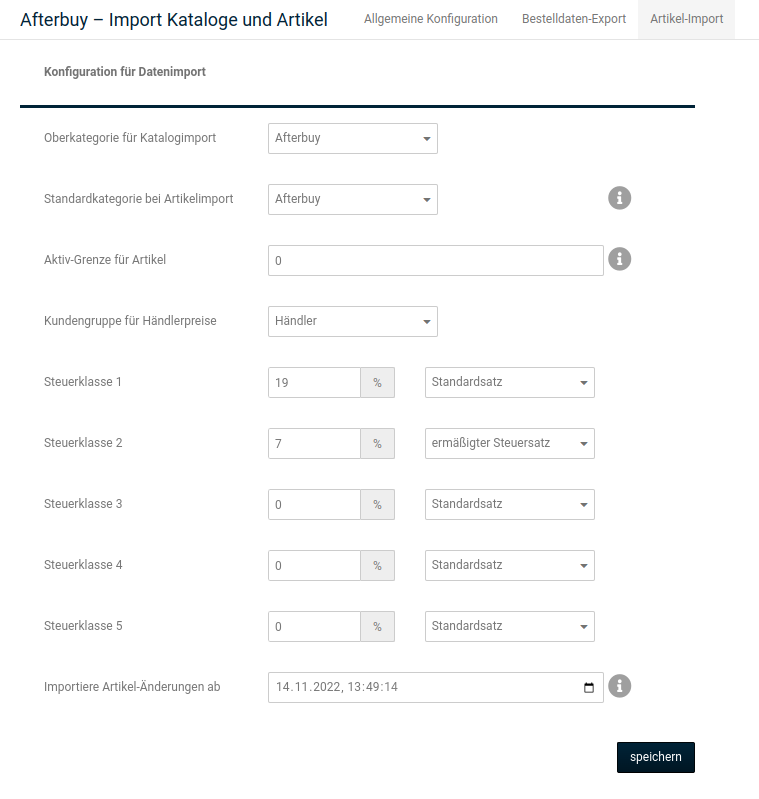
All necessary settings for the data import can be made here. These fields can only be edited if complete products has been selected as the mode for product data import. For the pure stock synchronization, these details are not necessary.
Note
Please note that a scheduled task must be set up for an automatic synchronization of the data; the setup is described in the chapter of the same name in our manual.
| Field name | Description |
|---|---|
| Top category for catalog import | Below this shop category, the catalogs (Afterbuy categories) and the products contained therein are imported from Afterbuy. |
| Default category for product import | Products from Afterbuy that do not belong to any catalog are imported into this category. |
| Active limit for products | Define the minimum access level for the products here. Products that have a higher level at Afterbuy are set to inactive in the shop. |
| Customer group for merchant prices | Select here the customer group in which you manage your merchant customers. |
| Tax class 1-5 | Select here what percentage the respective tax class has in the shop. |
| Import product changes from | The import of products into the shop runs in the background; make sure that the corresponding action is active under Scheduled tasks. By resetting the starting point in time, a complete transfer of all products can be initiated. |
Import actions
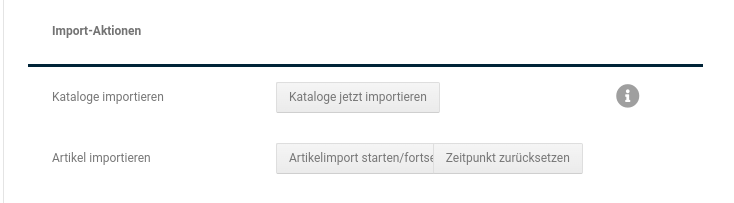
Via these buttons, the import of catalogs and products from Afterbuy can be triggered manually. With many products to synchronize, the product import must be triggered several times, since the number of products transferred per run is limited by technical limits.
Obtaining the data at Afterbuy
To obtain the required data, you must first request a Shop and XML interface at Afterbuy. Proceed as follows:
-
By clicking on the Afterbuy logo at the top left, you get to the Management Center. In the menu on the left, follow the items _**Vertriebskanäle > Eigener Onlineshop
Schnitstelle zu Afterbuy (XML und Shop)**_ (Sales channels > Own online shop > Interface to Afterbuy (XML and Shop)).
-
You will now get to the order form for the interfaces. If you want to synchronize not only orders but also products, you need both interfaces, for Shop and XML.
-
The data is now displayed to you. You can retrieve it again at any time and do not have to write it down immediately.
You can now retrieve the data at any time:
- Go to the Management Center
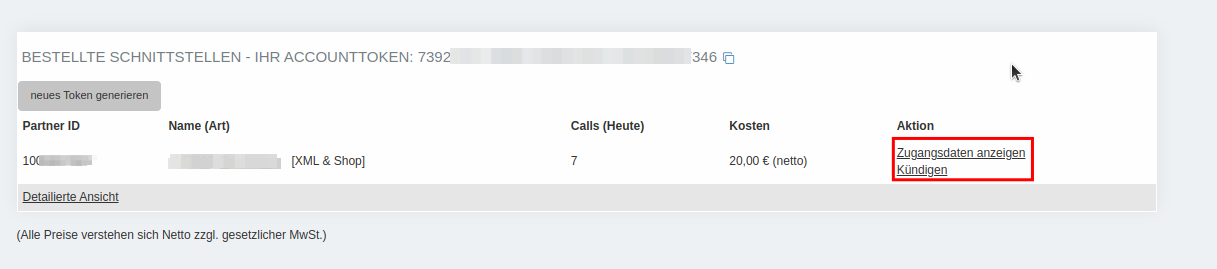
- In the main content area, select the Settings tab and there in the menu Tarif & Rechnungen > Tarifinformationen / Afterbuy-Rechnungen (Tariff & invoices > Tariff information / Afterbuy invoices).
- At the very bottom there is now a block with the title BESTELLTE SCHNITTSTELLEN - IHR ACCOUNTTOKEN: (ORDERED INTERFACES - YOUR ACCOUNT TOKEN:), which also contains your account token
- Here you can now display the access data or also cancel the interfaces if you no longer need them.
Further information
Further information about Afterbuy can be found in the Afterbuy wiki at https://docs.afterbuy.de/Shop_und_XML_Schnittstelle
Operation
In the order overview under Orders > Orders, the entry Transfer to Afterbuy can be selected via the dropdown button of the respective order. In addition, a new order is automatically transferred to Afterbuy upon order completion, provided it has an order status that has been selected as Paid order status or Not paid order status. If this is not the case, no automatic transfer takes place.
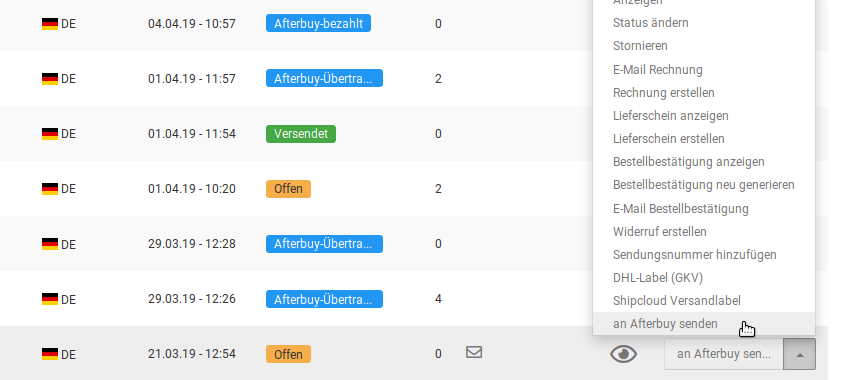
If the order is later transferred via the CronJob, a synchronization of the order data also takes place. Shipping tracking information from Afterbuy is also transferred into the order details in the shop.
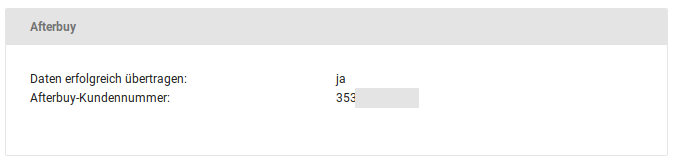
The transfer is confirmed by a corresponding message containing the Afterbuy customer number.
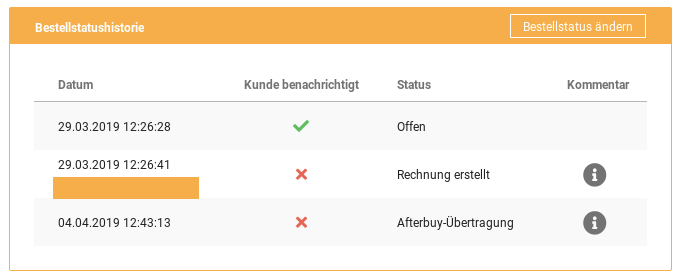
After the transfer to Afterbuy, a corresponding entry is added to the order status history. The history can be viewed via the detail page of the order. You can reach the detail page either via the eye symbol or the entry Show of the respective dropdown button.
DHL Paketshops
Installation
The module can be installed under Modules > Module Center. To do this, select the entry DHL Paketshops from the list and click on the Install button in the bottom right corner of the screen.
Configuration
Once the module has been installed, it can be configured under Modules > Module Center. To do this, select the entry DHL Paketshops from the list and click on the Edit button in the bottom right corner of the screen. The configuration is limited to a few entries.
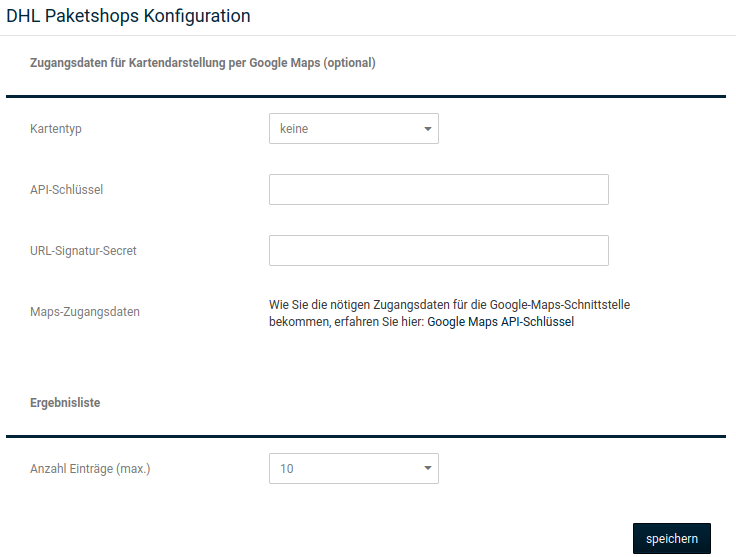
Access data for map display via Google Maps (optional)
| Field name | Description |
|---|---|
| Map type | Here you can select whether a map should be displayed in the shop: |
| none | |
| static | |
| dynamic |
Note
The static map always shows only a fixed map section, while the view of the dynamic map can be moved.
| Field name | Description |
|---|---|
| API key | An API key from Google is required for displaying a map, since the map section is displayed via Google Maps. |
| URL signature secret | The secret is also obtained from Google. However, this entry is optional and not required for using the module. |
Obtaining the necessary access data
Via the link listed under the item Maps access data, you will be taken to the corresponding Google subpage. Follow the instructions displayed by the API Manager to activate the Google Maps JavaScript API and the Google Static Maps API. Afterwards, a new area URL signature secret is displayed, from which the secret can be copied. Further information on this can be obtained from Google support.
Note
Alternatively, the link
https://console.developers.google.com
can also be used.
Result list
Here you can select how many Packstations and parcel shops should be displayed to the customer. The default setting is 10.
Display in the shop
Access in the shop
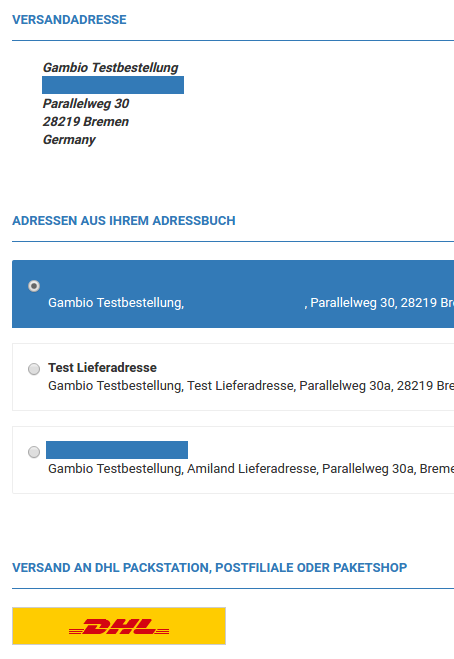
To select a Packstation or a parcel shop, the customer can change the shipping address during the checkout process:
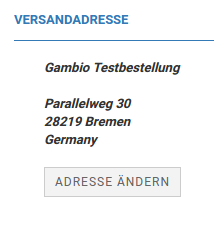
Below the address book, the DHL logo is displayed as a button.
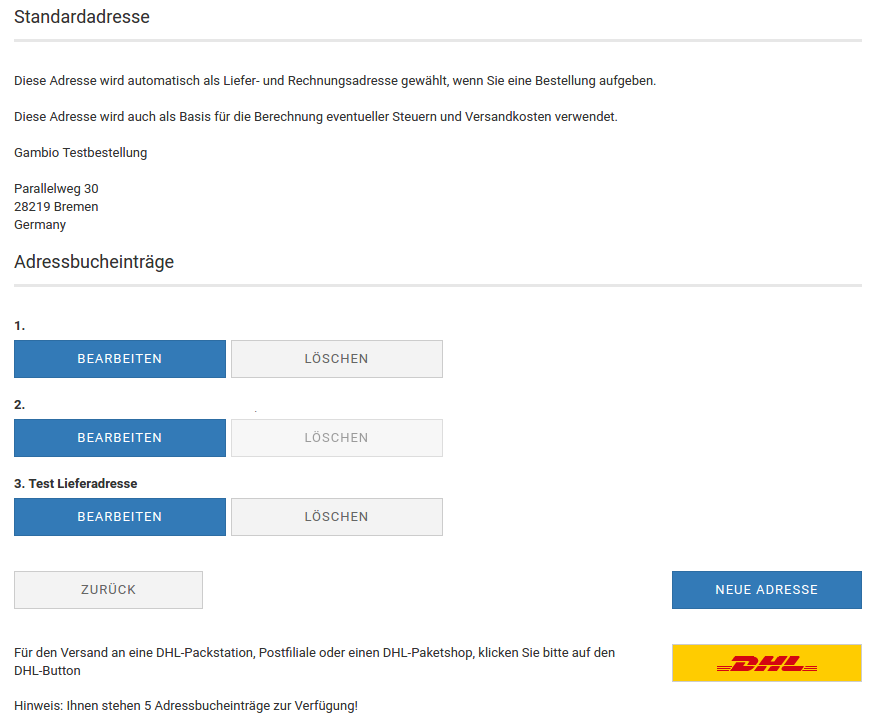
The same button is also available in the address book under Your account.
Selecting a Packstation / a parcel shop
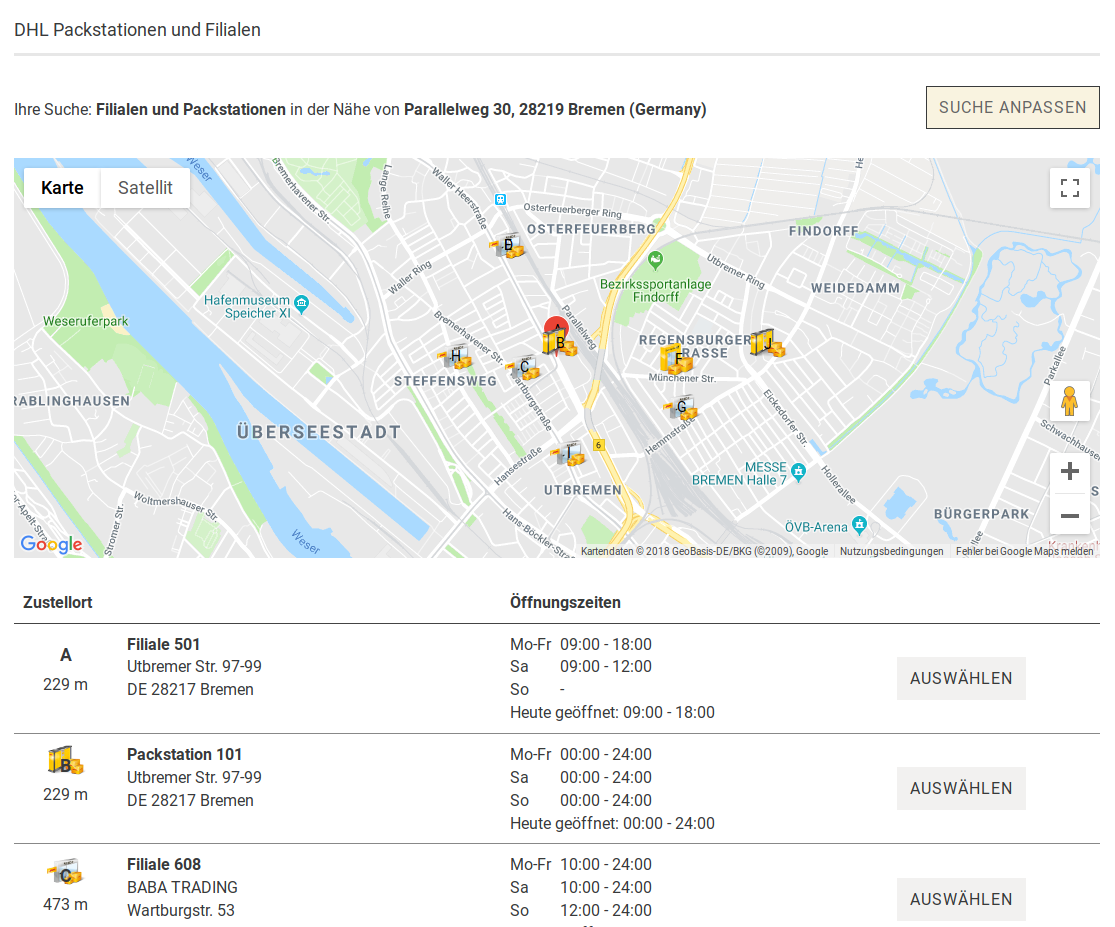
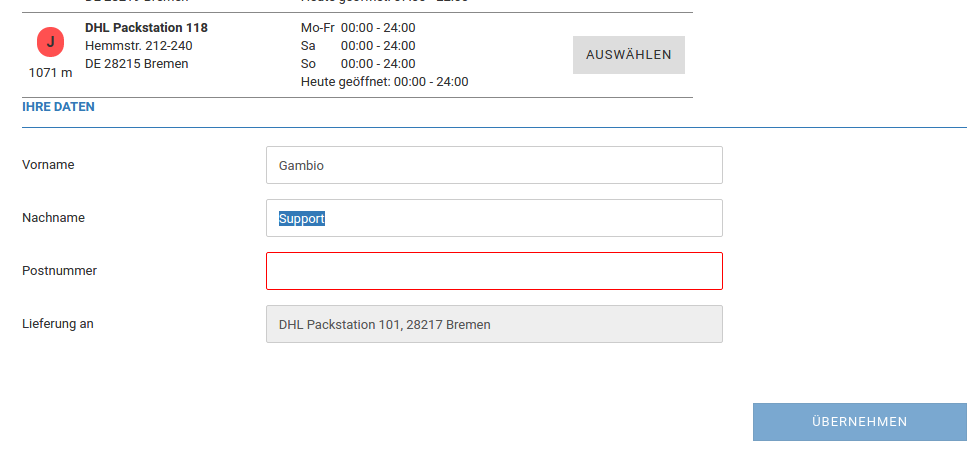
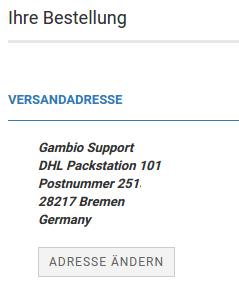
Once the module has been opened, a map showing the position of the nearest Packstations and parcel shops is displayed below the pre-filled delivery address. Below that there is a list, via which the relevant address can be adopted as the delivery address. After the selection, the page jumps to the end so that the customer can enter their post number. The address of the Packstation is transferred into the order.
Shipcloud
Installation
The Shipcloud module can be installed in the Gambio Admin under Modules > Module Center. To do this, select the entry Shipcloud from the list and click on the Install button in the bottom right corner of the screen. After installation, the Edit button is displayed here, via which the configuration of the module can be opened.
Configuration
Access data
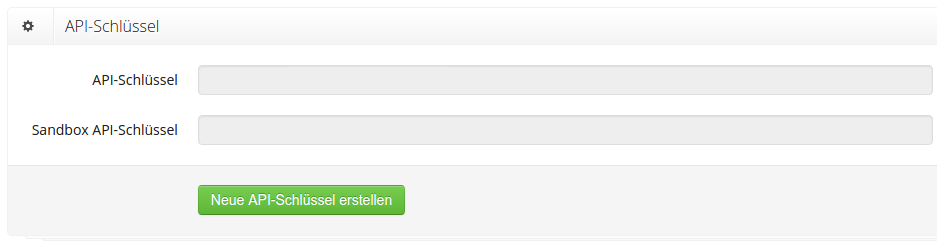
You will receive the necessary access data from Shipcloud. Move the mouse pointer over the info symbol to display the tooltip. It contains a link to Shipcloud.

Log in to Shipcloud and click on your email address at the top right. Select the item API-Key or API key here.
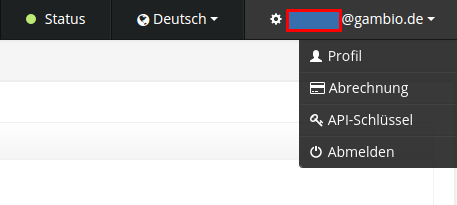
Both the Live and the Sandbox API key are displayed.
Other settings
| Field name | Description |
|---|---|
| API key (Sandbox) | The key for the sandbox can be stored here if the module is to be used in test mode. |
| Live mode | Here you must select in which mode the module is currently operated. |
| Extended logging | Logging can be deactivated here. However, without logging, no analysis can be carried out if a problem occurs, since the detailed information required for this is no longer recorded without logging. This item should therefore generally be activated. |
| API timeout | Limit for timeouts when accessing the Shipcloud interface (seconds). Default: 20 seconds |
Attention
Only increase this value if timeouts occur more frequently when retrieving labels.
| Field name | Description |
|---|---|
| Tracking link template | Under Settings / Delivery / Shipping service providers, after opening the page Parcel services, there are by default some tracking link templates that are used for sending the tracking number. Since the label was created via Shipcloud, we recommend using the template of the same name. |
| Order status after label creation | If the order status is to be changed after the label has been created, it must be selected here. |
| Email notification after order status change | If this item has been activated, customers are automatically informed about the configured change of the order status. |
| Forward the customer's email address to Shipcloud and Forward the customer's telephone number to Shipcloud | If this setting is switched off, the customer's contact details are not forwarded to Shipcloud, even if the customer has agreed to the forwarding during the checkout process. |
| Use shipment notification | DHL, DPD, Hermes and GLS offer their own shipment notification. If the customer allows their contact details to be forwarded to the shipping service providers, this can be used to specify that the provider's own notification should be used. |
| Use DHL: GoGreen and DHL: Premium | To use these, DHL: GoGreen or DHL: Premium must be included in your DHL contract.  |
| Automatically pre-fill declaration of contents | For shipments to other countries, a declaration of contents must be transmitted under certain conditions. This can be filled in automatically if this option has been set. |
| Transfer goods value from and Transfer goods value up to | For shipments via DHL, transfer the goods value (for higher insurance) if it falls within the interval that can be configured here. |
Sender
The sender data must be filled in completely.
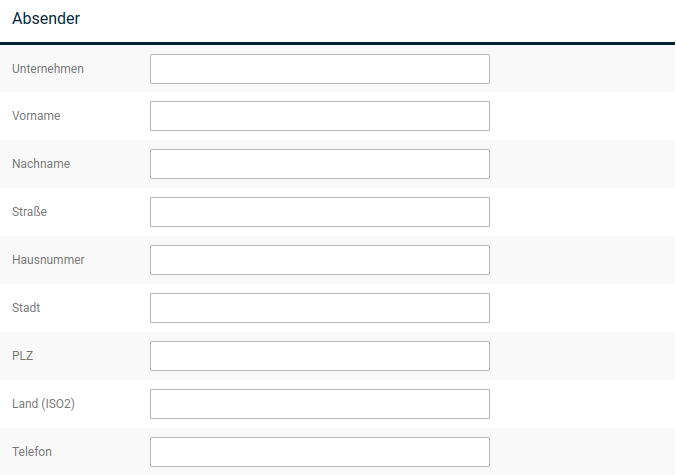
The data is usually obtained directly from the settings under Settings / Shop / Shop operator and can be adjusted subsequently in the configuration of the module.
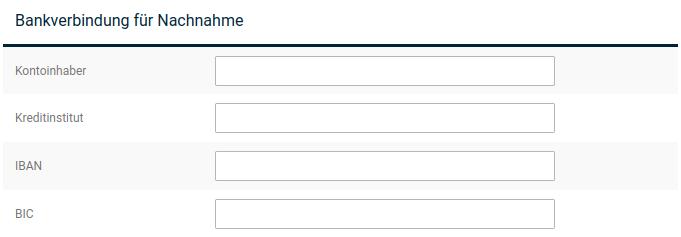
Bank details for cash on delivery
The bank details should also be stored completely. This is particularly important if payment by cash on delivery is offered.
Webhook (automatic status update)
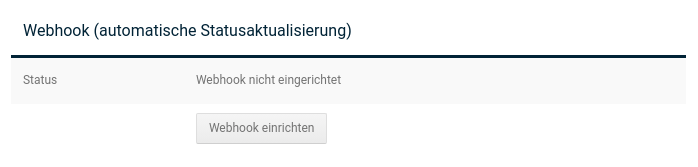
If webhooks have not yet been configured, a button is displayed here via which they can be set up.
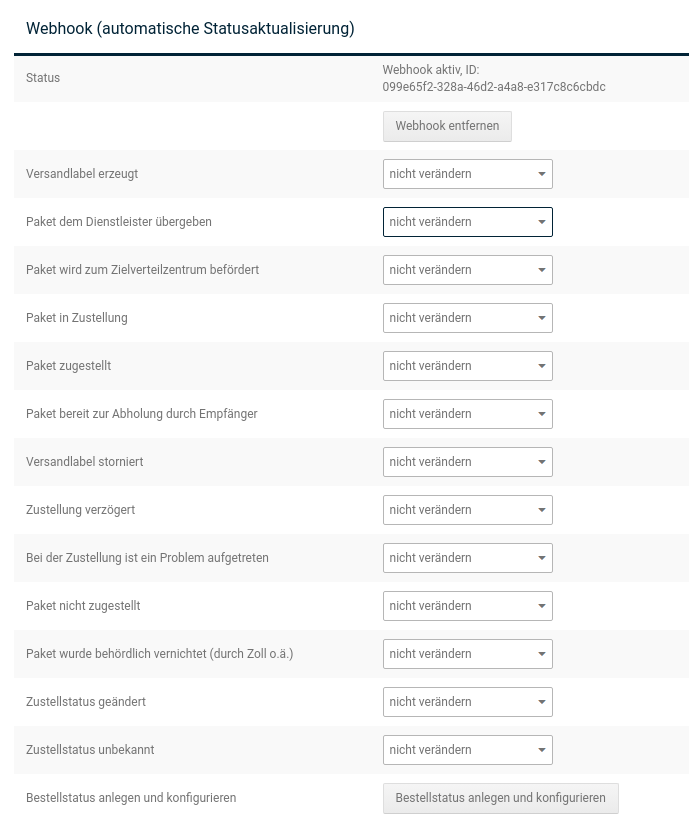
Within the settings, an order status can be assigned for each shipment status.
Service providers
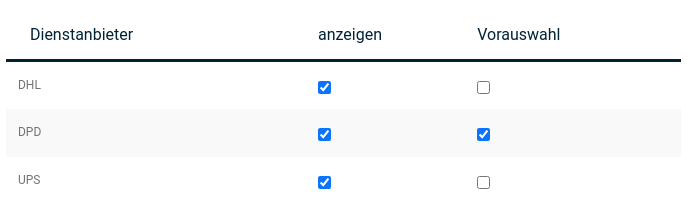
In this area you can define which service providers you want to use for shipping. The selection here depends on which providers you have had activated at Shipcloud. Those service providers for which the check mark Preselection has been set are preselected for the cost determination of the label creation.
It must be noted here that service providers may be added or removed if the cooperations between Shipcloud and the individual service providers change.
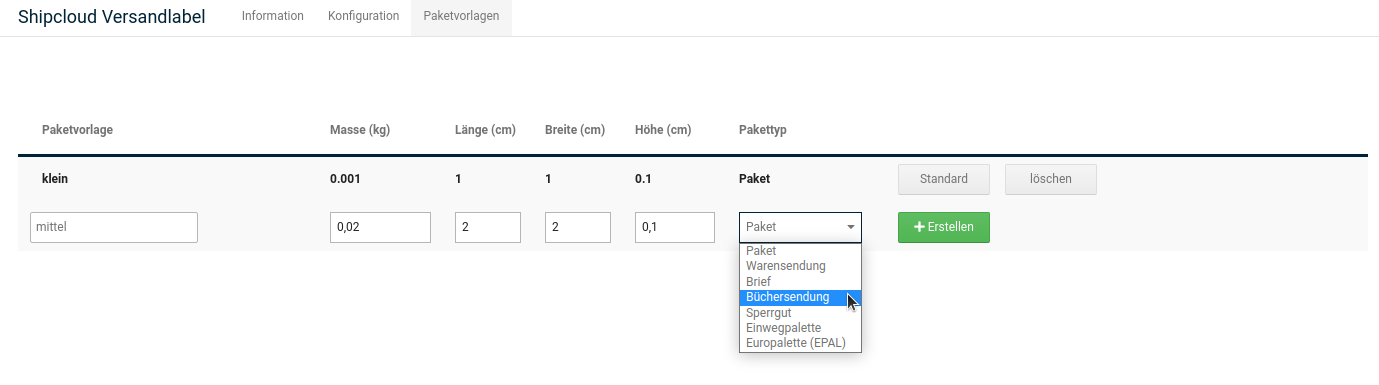
Parcel templates
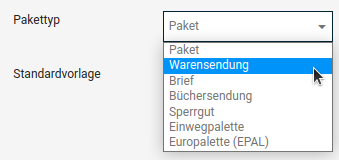
You have the option of specifying templates for your standard parcel sizes. This way, it is not necessary to enter the dimensions individually for each parcel. The respective template can be selected via a dropdown menu when creating the label.
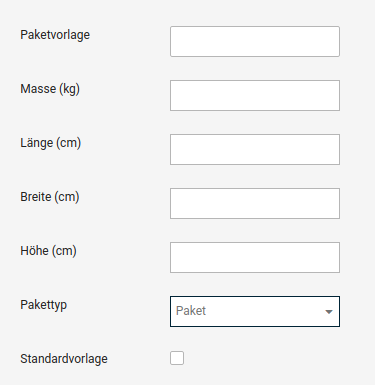
In addition, the Parcel type can be selected. The following types are available:
Label creation
Opening the function
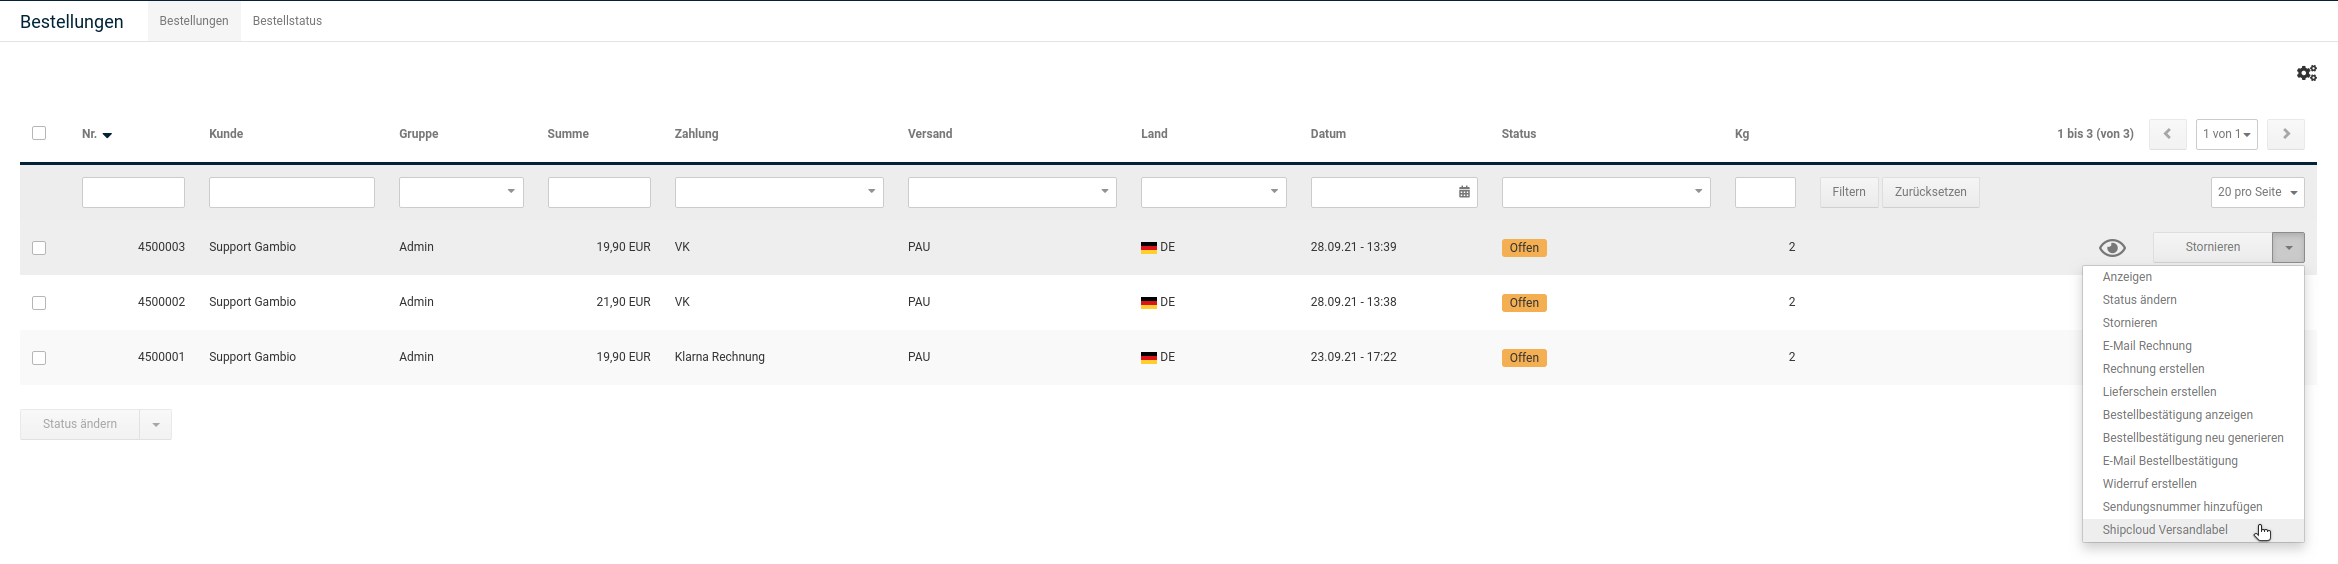
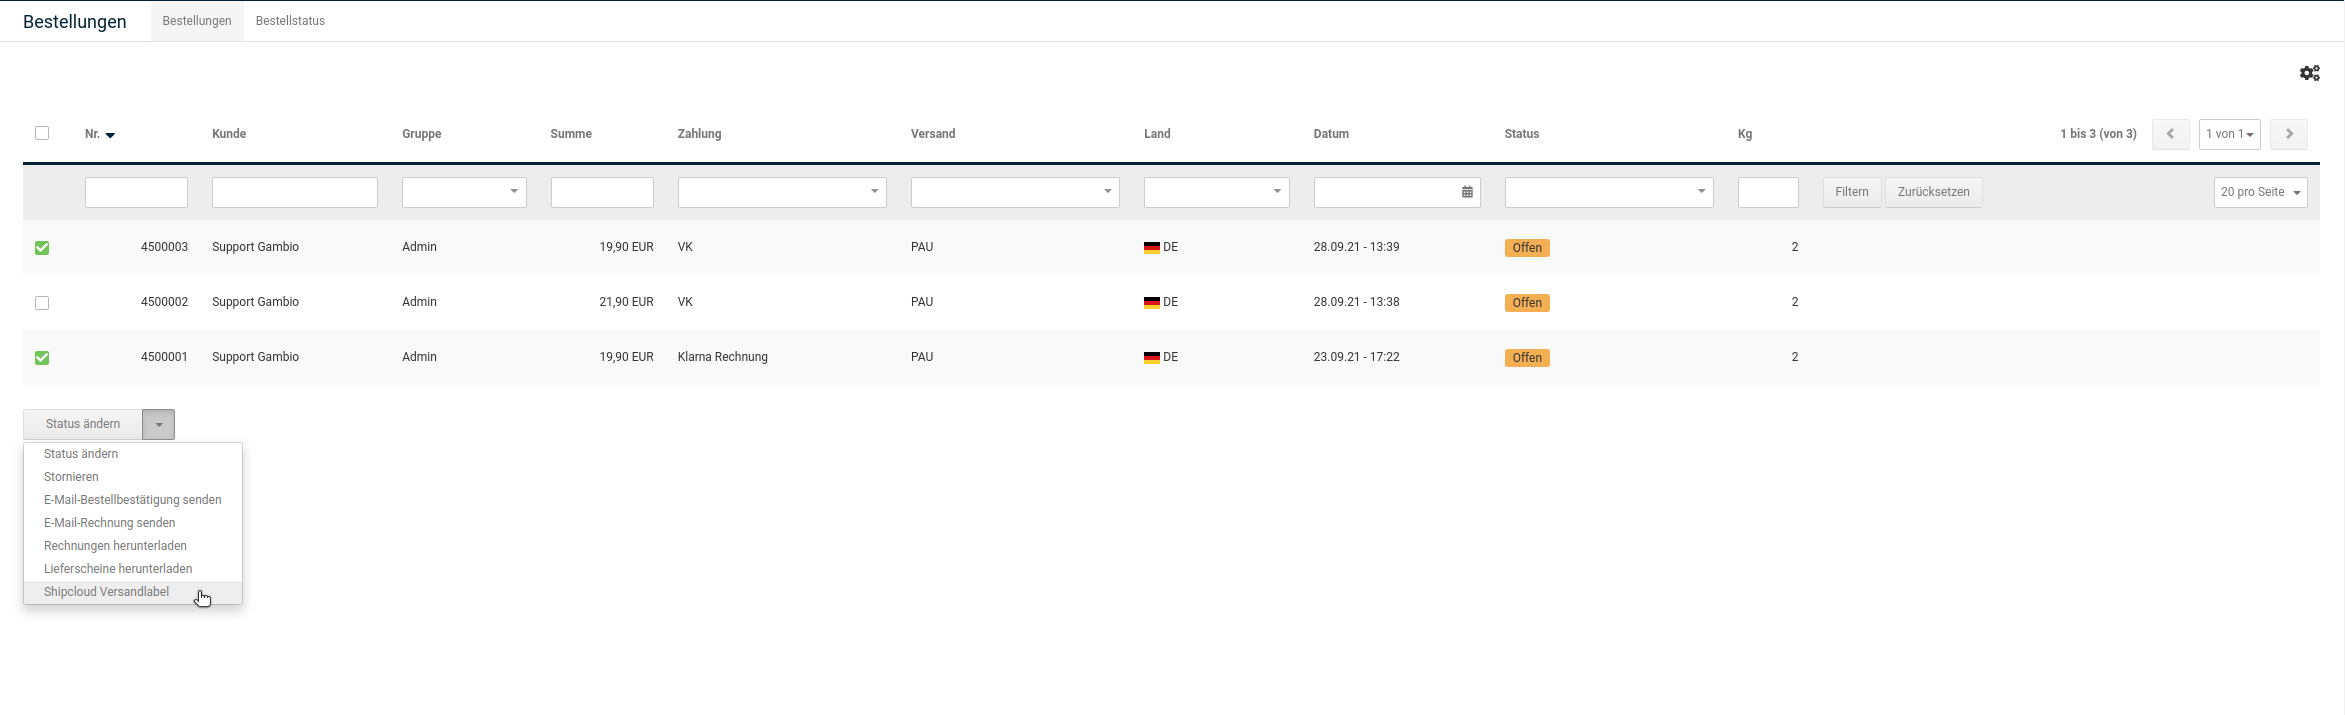
The label creation takes place in the Gambio Admin in the order overview under Orders > Orders. If a label is to be created for only one order, the function can be opened via the dropdown button of the respective order. If orders are checked in the multiple selection, the corresponding dropdown button at the bottom left can be used. A popup with possible settings for the label creation opens.
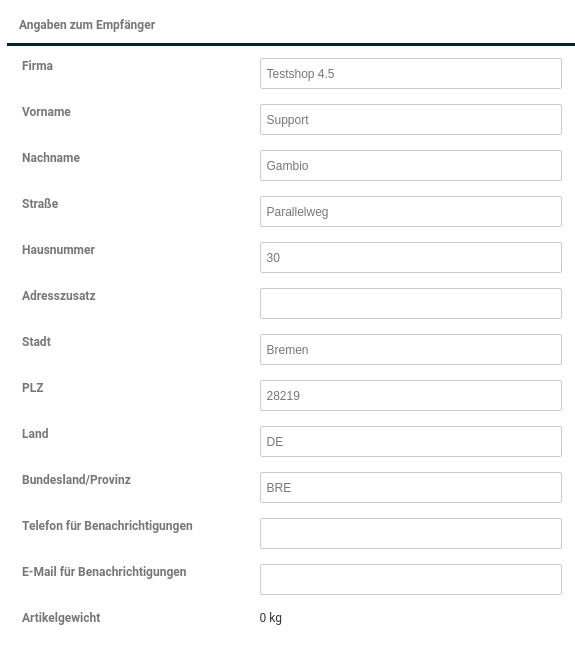
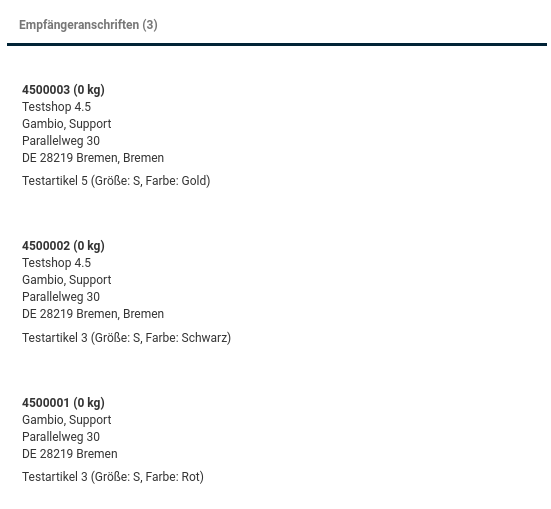
Recipient details
The listed delivery addresses should be checked briefly for correctness. When opened for a single order, a correction of the data is also possible.
Parcel details
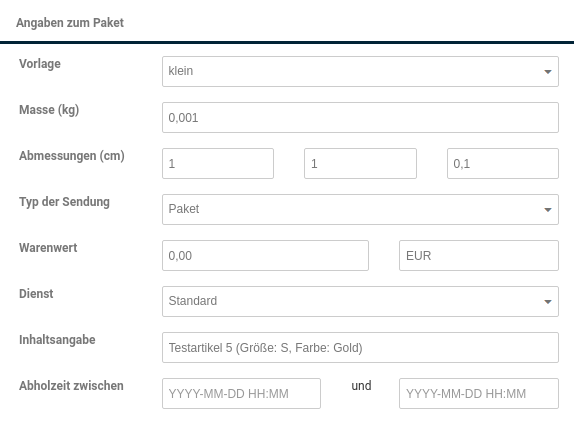
The size and weight details can be entered individually or selected via a parcel template. It should be noted here that the possible sizes and weights may differ depending on the shipping service provider. The same applies to the general offering; for example, not all service providers offer letter shipments.
The field Cash on delivery amount is only displayed for cash on delivery orders. If this is not the case, the customer selected a different payment method when placing the order. It must also be noted that not every parcel service provider offers the handling of cash on delivery shipments.
If the automatic filling of the declaration of contents was selected in the module configuration, the products are now output here separated by commas. Via Pick-up time you can specify when the parcel should be picked up by the service provider. If a contract with Shipcloud/GLS exists that includes the GLS 24-hour delivery, the guaranteed 24-hour delivery can be selected here.
Determining shipping costs
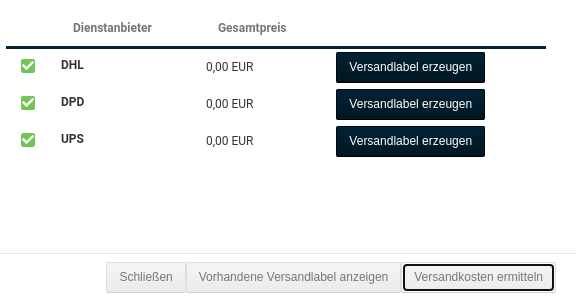
Via the button Determine shipping costs you can have various prices displayed. The indication not possible or the absence of prices in the figures can be attributed to the fact that the transport of shipments in the specified dimensions is not offered by the respective service provider.
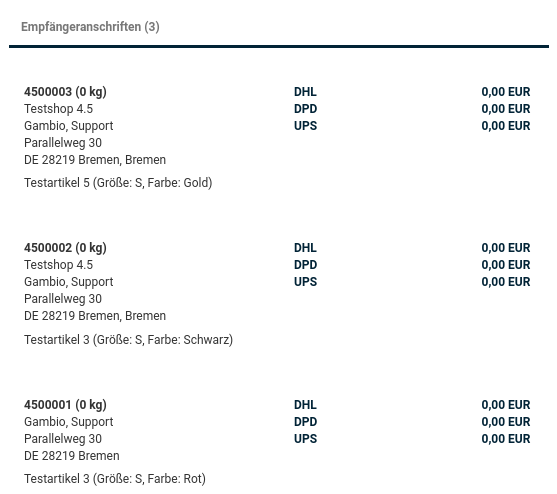
Creating and deleting shipping labels
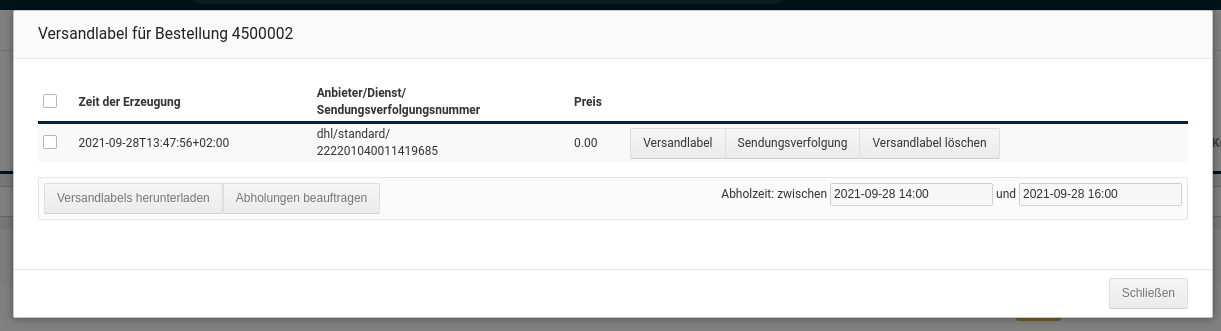
By clicking on Create shipping label, the required labels can be created; a new dialog window opens. There, the time of creation is logged and the tracking number and the price are displayed. The shipping label can be opened or deleted here.
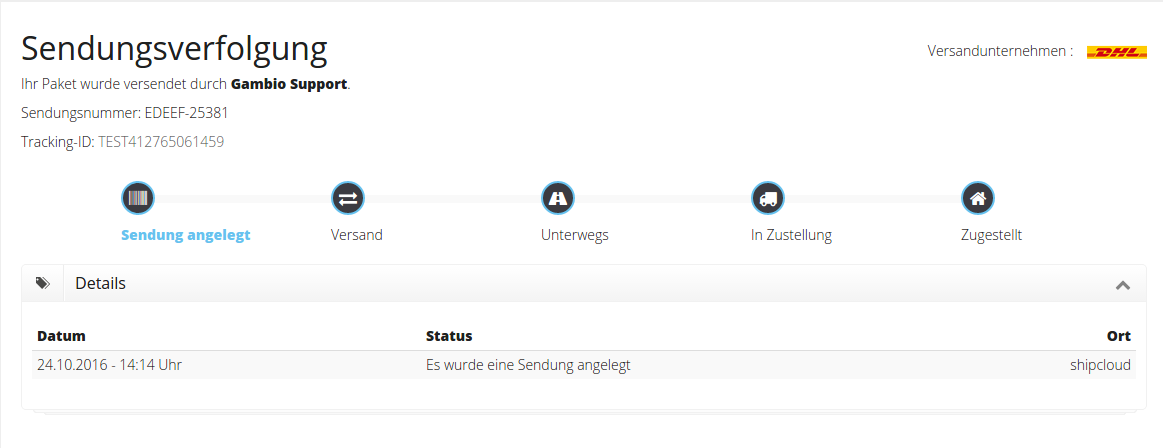
Via the button Shipment tracking you are redirected to the shipment tracking page.
Sending the tracking link
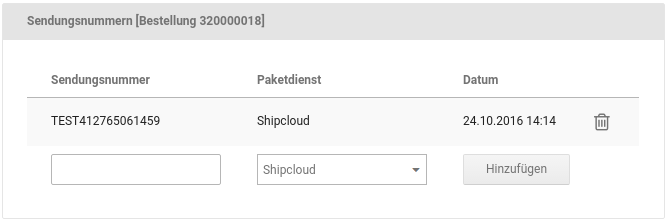
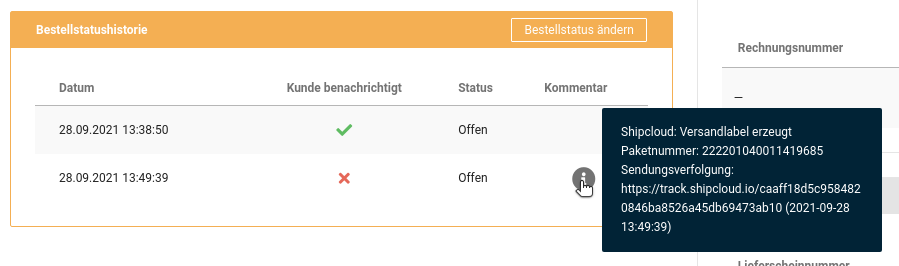
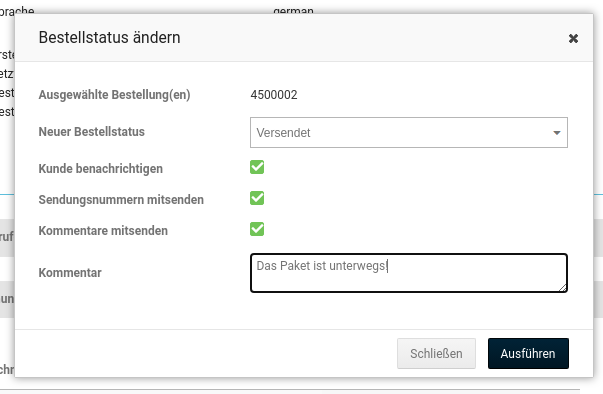
When the shipping label is created, the tracking number is automatically entered in the order details. A corresponding note is also stored in the order status history. From here, the order status can now be changed and, at the same time, information containing the tracking link can be sent to the customer, provided this has been selected.
Exceptions
Creating the tracking link and sending the tracking link is not possible when shipping via GLS. In contrast to other service providers, the tracking number at GLS is only created when the shipments are picked up and is therefore not yet known at the time of label creation in the shop. Consequently, this number cannot be stored in the order and sent to the customer. For shipments via GLS, it is therefore necessary to store the tracking number manually in the order.
Commissioning a pick-up
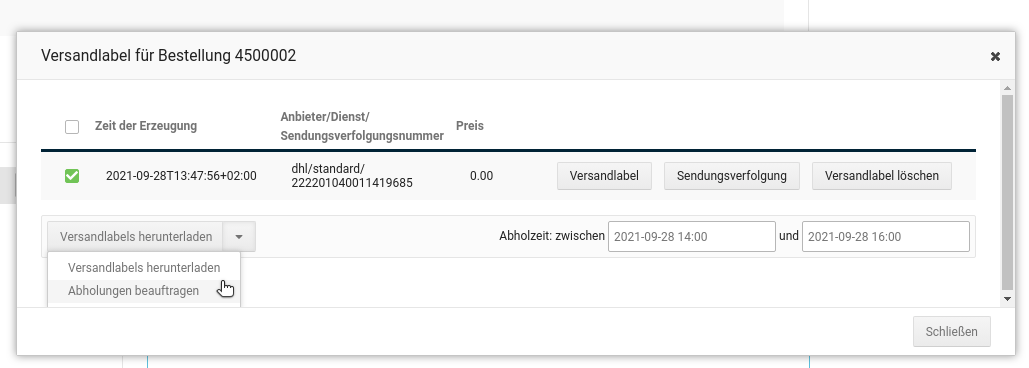
If you open the already existing labels for one or more orders, you can select the desired pick-up period there and click on Commission pick-ups. In this way, pick-ups can also be commissioned for several parcels at the same time.
Findologic
The Findologic module implements an alternative search in the shop. Details on the Findologic offering can be found at the following link:
https://www.findologic.com/solutions/
Installation
To install the Findologic module, open the menu item Modules > Module Center in the Gambio Admin. Select the entry Findologic in the list and click on the Install button in the bottom right corner of the screen.
Configuration
After installation, the Findologic module can be configured. To do this, open the entry Findologic under Modules > Module Center and click on the Edit button in the bottom right corner of the screen.
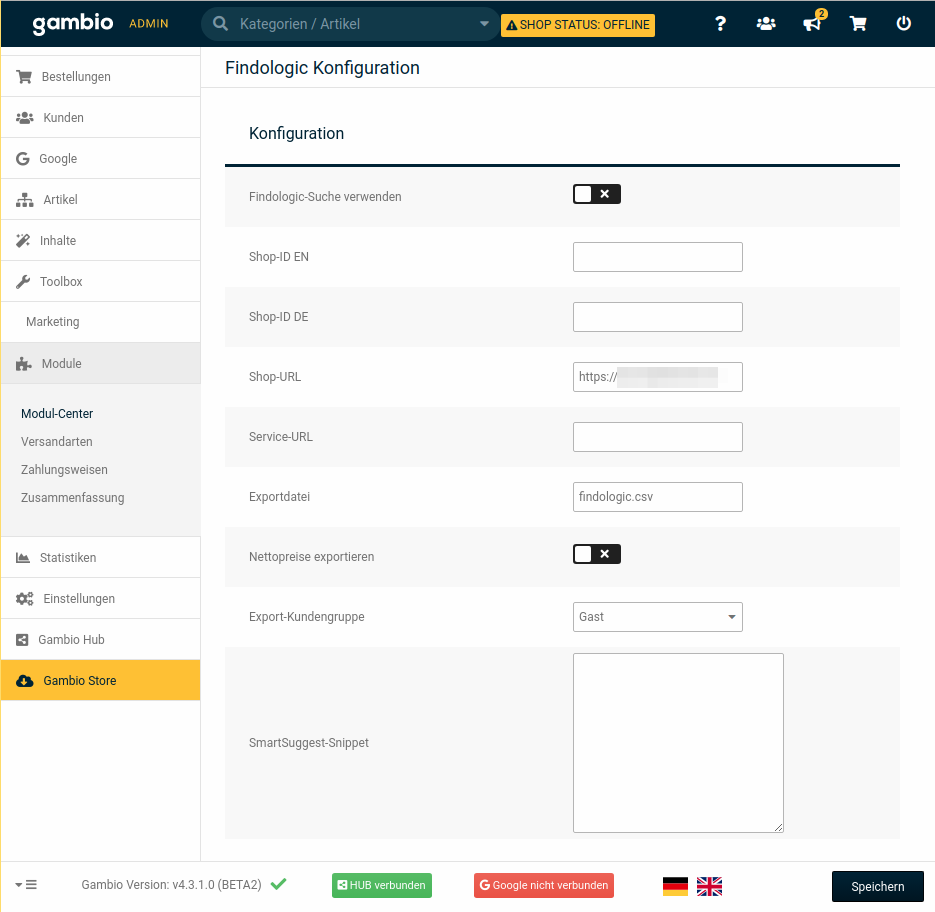
| Field name | Description |
|---|---|
| Use Findologic search | Set the check mark if you want to use the Findologic search. |
| Shop ID EN / Shop ID DE | You will receive the shop IDs for English and German directly from Findologic. |
| Shop URL | The shop URL is already pre-entered by default and corresponds to the URL of the current shop. |
| Service URL | The Findologic service URL should be entered here. You will receive it from Findologic. |
| Export file | File name that the export file should have. It is stored in the /export directory. |
| Export net prices | Here you can select whether the prices should be exported net. |
| Export customer group | If graduated prices or customer group prices have been stored in the shop, the customer group whose prices should be exported should be selected here. |
| SmartSuggest snippet | The snippet is available from Findologic and can be copied into this field. This then means that the shop's own search suggestions are no longer shown in the direct search in the shop, but rather the search suggestions from Findologic. |
Note
The export file can be retrieved by default at
https://www.shop.de/export/findologic.csv
whereby www.shop.de must be replaced by your actual shop address.
The following data is exported:
- Product*ID
- Product name
- Description
- Price (current)
- Regular price
- Link to the product
- Link to the main product image
- Attributes
- Additional terms for search
- Customer groups
- Number sold
- Date of creation (Unix timestamp)
- Delivery time
Usage
Upon saving, a CSV file is created, which must be imported at Findologic so that the search in the shop can draw on the Findologic results. The import of the CSV file can also take place via a CronJob; the Findologic support can inform you in more detail about this.
The Findologic search in the shop does not differ significantly from the standard search in terms of usage and display. The Findologic logo appears on the search results page:
Hermes
Attention
The module is no longer functional, as the corresponding interface has been shut down by Hermes. It will be removed from the shop with version 4.5.1.0. Please use the module Hermes HSI instead.
Installation
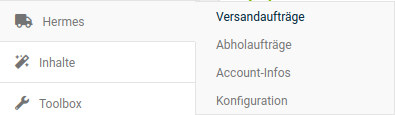
The Hermes module is installed in the Gambio Admin under Modules > Module Center. To do this, select the entry Hermes-Versand and click on the Install button in the bottom right corner of the screen. After installation, additional entries appear in the menu on the left.
Configuration
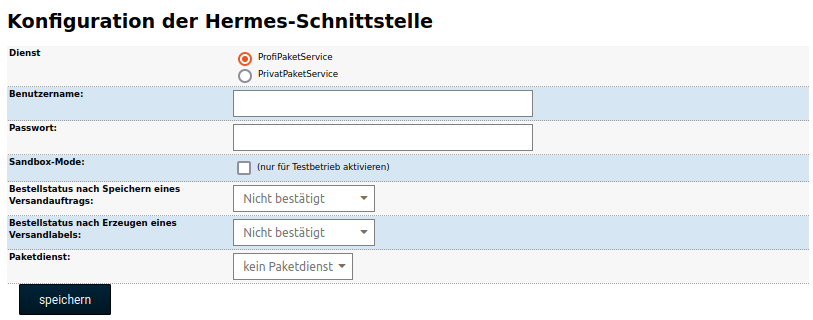
You can reach the configuration page either under Modules > Module Center by selecting the entry Hermes-Versand and clicking on Edit, or by opening the new menu entry Hermes > Configuration.
| Field name | Description |
|---|---|
| Service | You can choose between PrivatPaketService (short: PriPS) for private customers and ProfiPaketService (short: ProPS) for business customers. The PrivatPaketService can be used without login data, but it offers a smaller range of services than the service for business customers. |
| Username & password | Username and password only need to be specified for ProPS. You will receive this data directly from Hermes. |
| Sandbox mode | The sandbox mode can be activated if you want to test the function of the module. Please note that this setting must be switched off again before creating labels in business operation. |
| Select order status | You can define whether the status of the order should be changed after saving a shipping order or creating a label. By changing the status, orders can be assigned more easily in the overview. |
| Parcel service | If ProPS is used, the parcel service is Hermes; for PriPS, MyHermes must be selected here. This determines the tracking link that is sent to the customer in the status notification. Shipments whose labels were created via PriPS cannot be tracked via the link for ProPS and vice versa. |
Creating and canceling labels
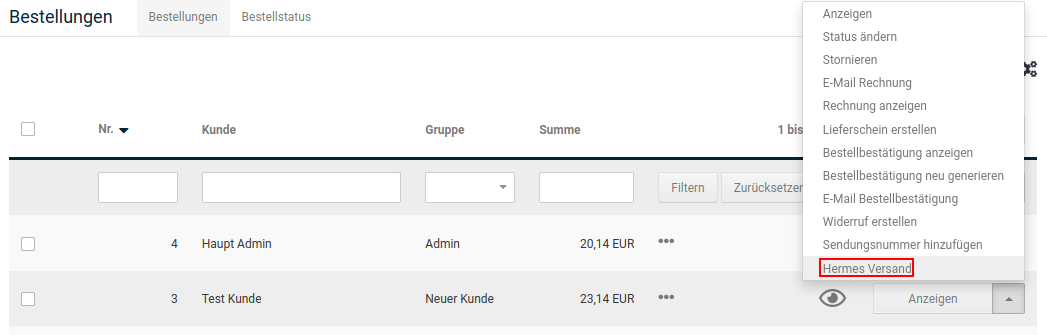
The label creation is opened from the order overview under Orders > Orders, regardless of the selected service. To do this, select the entry Hermes Versand via the dropdown button of the order. Creating labels for multiple orders at the same time is not possible.
ProfiPaketService
If you use ProPS, the address data is pre-filled. The shop operator address, as stored at Hermes in the business customer account, is used as the sender address. Click on Save + send order to create the label.
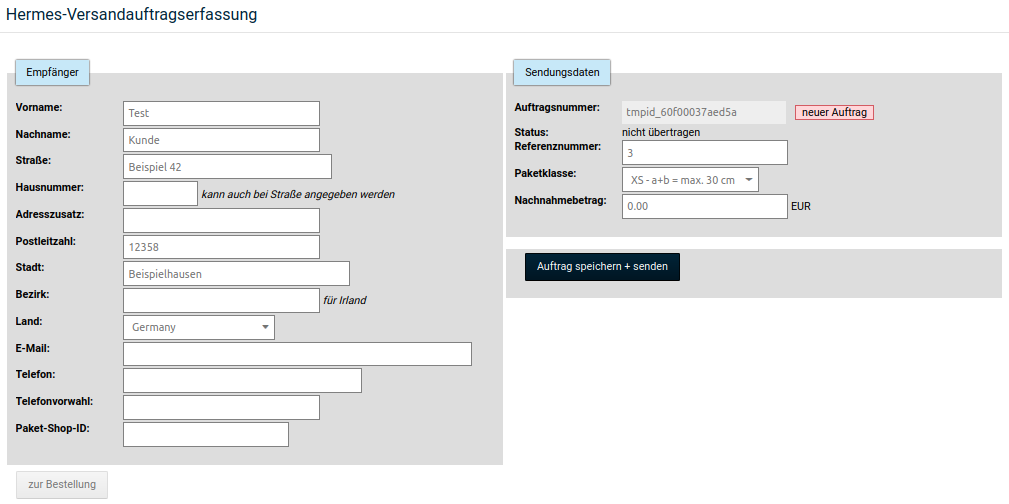
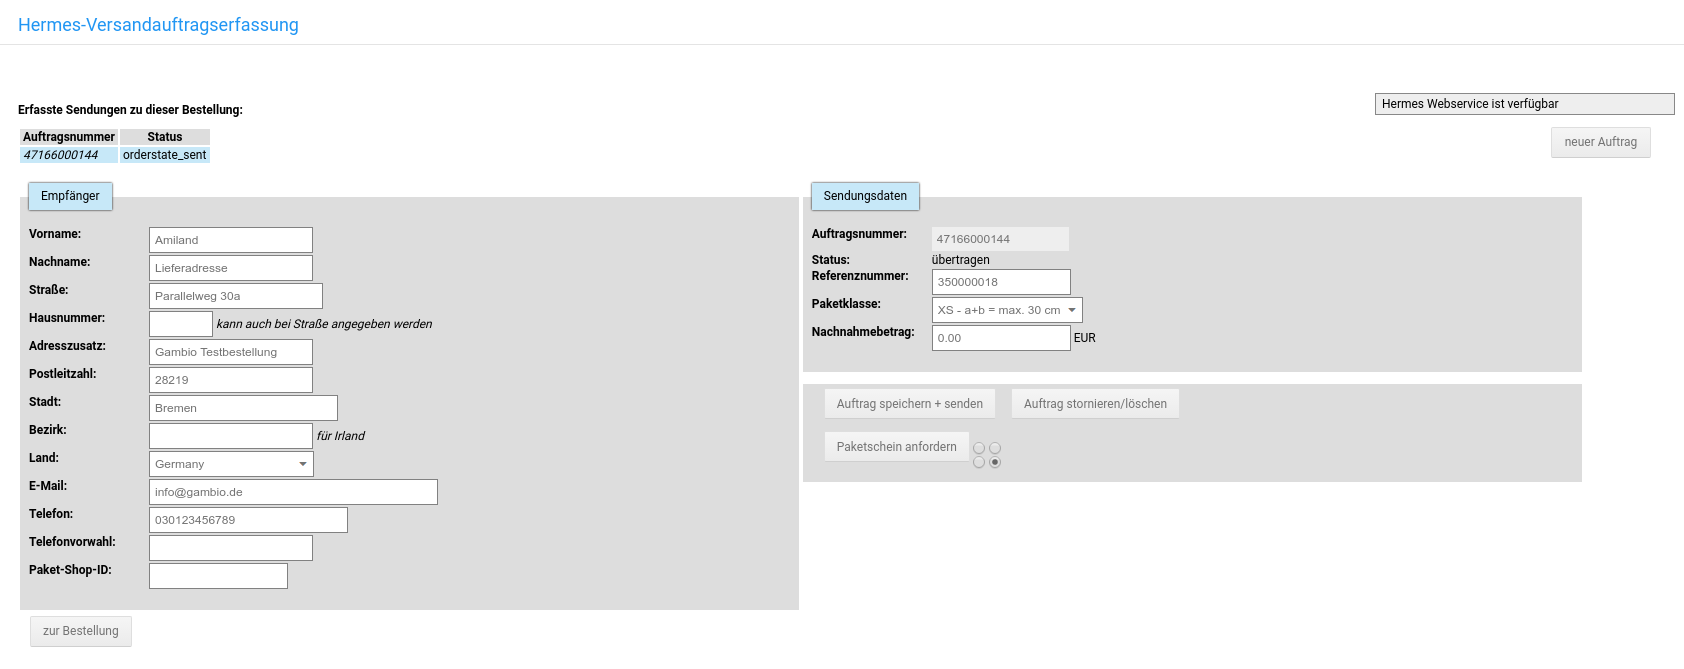
After the label has been created, the view of the Hermes shipping order entry changes. You have the option of canceling the order or printing out the label.
Note
The tracking number is only entered in the order once the label has been printed.
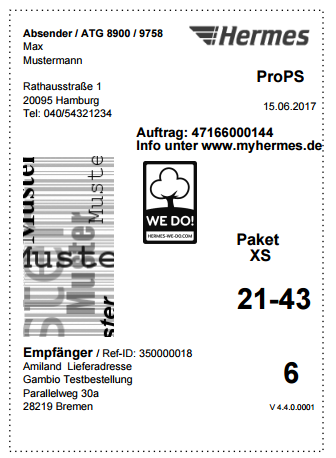
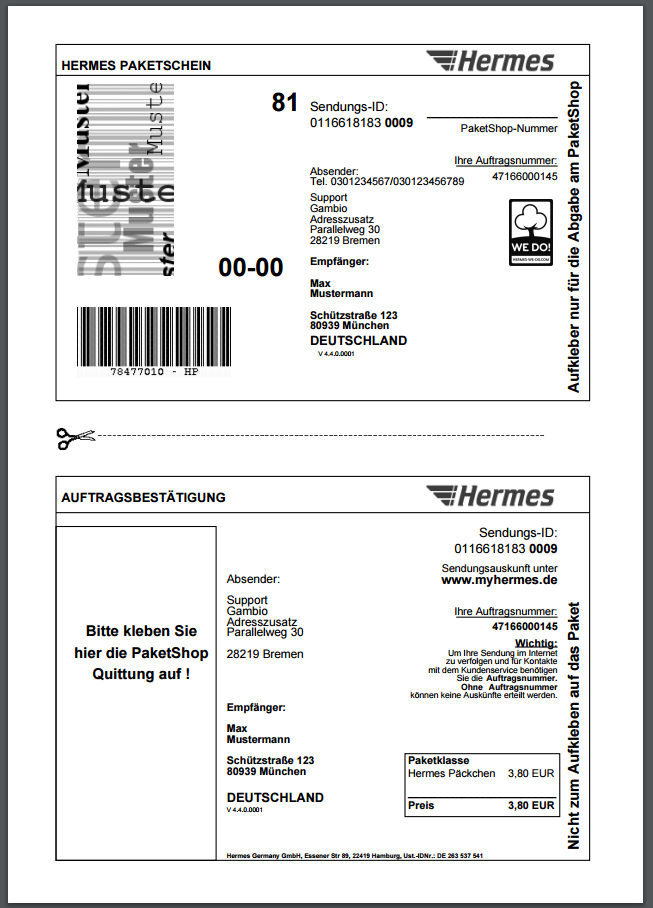
Below you can see an example of a label created with ProPS, even though it incorrectly refers to myhermes.de. The content and appearance of the label cannot be influenced from the shop side, since it is created via the Hermes server.
PrivatPaketService
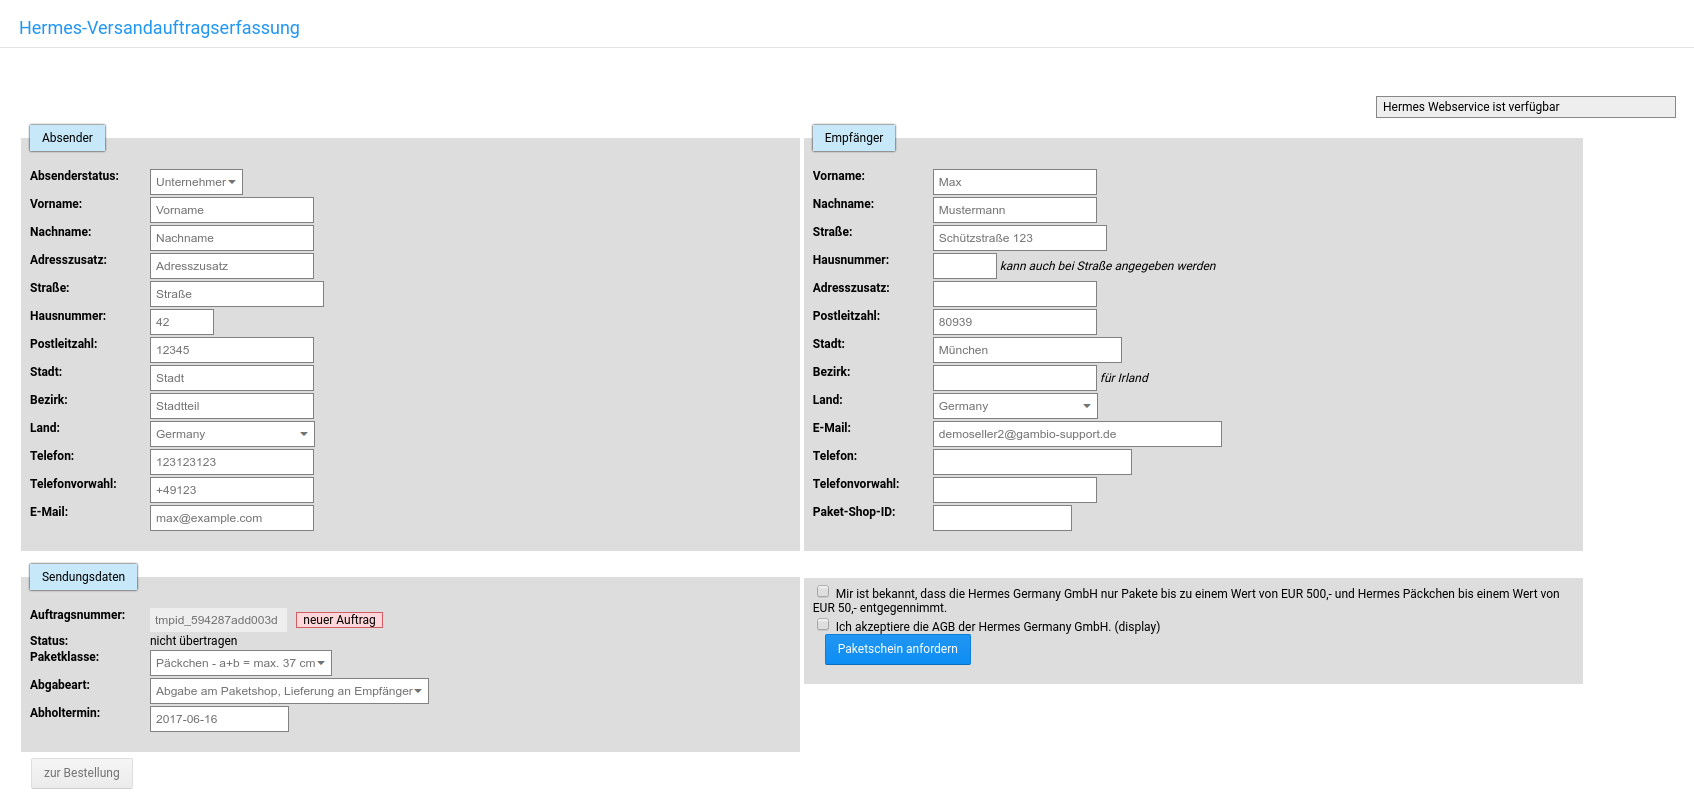
Creating a label via PriPS differs in a few points from using ProPS. For one thing, the sender data is not pre-filled but must be entered by hand. For another, it is necessary to agree to the Hermes terms and conditions each time a label is created. At the bottom left there is a selection for the size of the parcel. In addition, you can specify whether the delivery should be picked up and set an appointment for this.
The label contains a section for the order confirmation.
Managing orders
Shipping orders
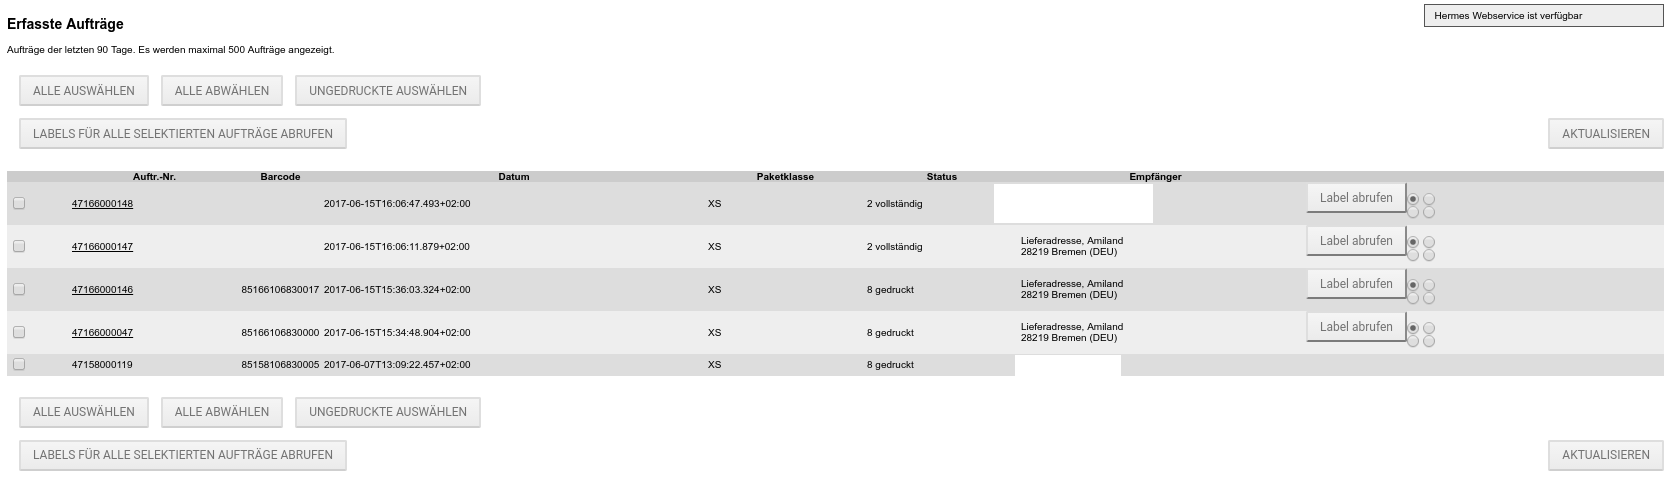
| Field name | Description |
|---|---|
| Select all | Select all displayed orders. |
| Deselect all | Deselect all displayed orders. |
| Select unprinted | This can be used to automatically select all shipments for which no label has been printed yet. |
| Retrieve labels for all selected orders | This retrieves the missing labels as a PDF file. The labels are collected in one file, with 4 labels always placed on one page. For shops with several shipments per day, the labels should therefore be printed via this function, as this saves paper. |
| Refresh | This can be used to refresh the page contents. After printing labels, this is advisable in order to bring the list up to date. |
| Retrieve label | The labels can be retrieved individually via this. |
| Determine position | Via the setting on the right side next to Retrieve label, the position of the label on the DIN A4 page can be determined. |
Pick-up orders
Here, the pick-up orders for the parcels to the customers can be set up. With ProPS, this can conveniently be done as a collective order; it is sufficient to select the date and the number of parcels of the various parcel sizes.
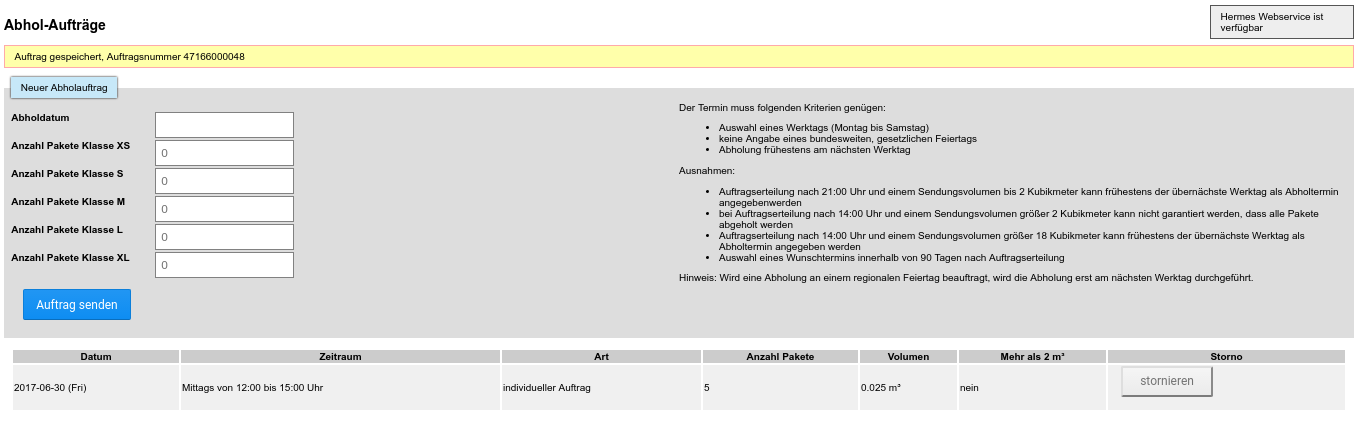
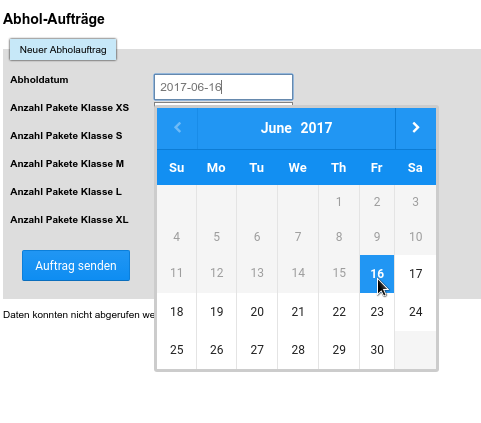
The appropriate date is selected via the Pick-up date field. The cancel button can be used to cancel the order.
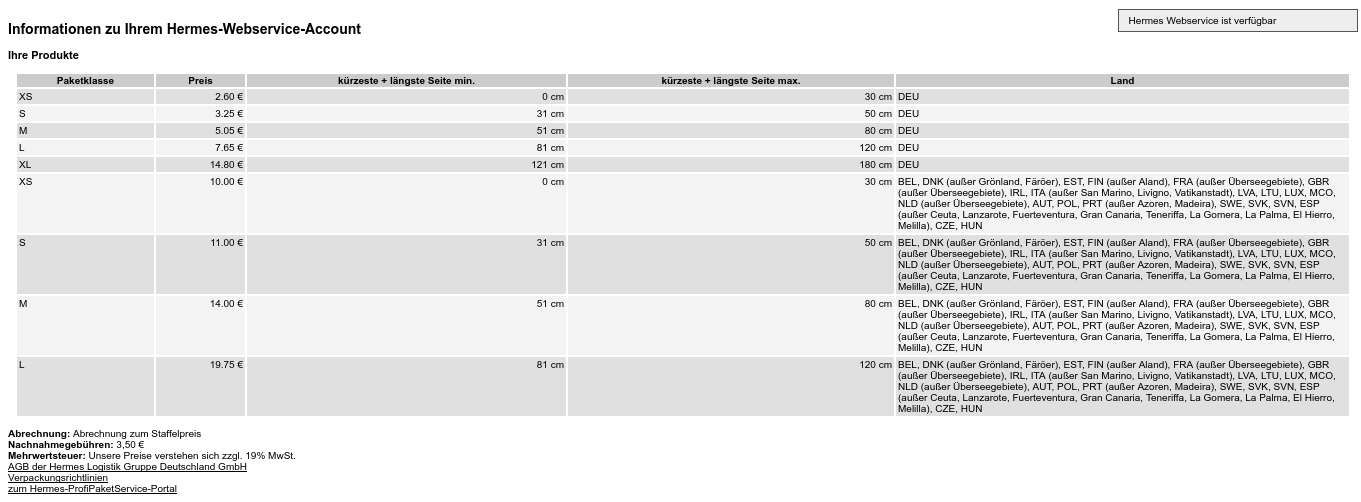
Account info
The account info lists the customer information of the ProfiPaketService. The costs for the various parcels can be viewed, listed by size and shipping zones.
Note
Since the conditions depend on the respective contract, the listed prices and services may differ from those in your shop.
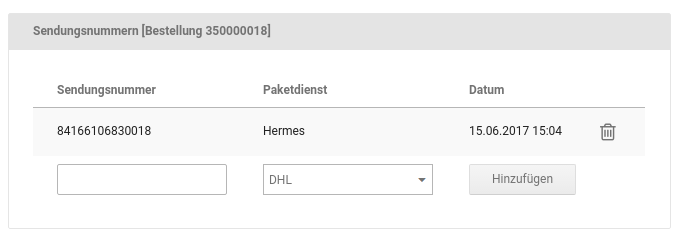
Sending the tracking link
When the Hermes label is printed, the tracking number is automatically entered in the respective order. Depending on the selected service (PriPS or ProPS), the tracking link is composed of the link under Settings / Delivery / Shipping service providers, after opening the page Parcel services, and the tracking number.
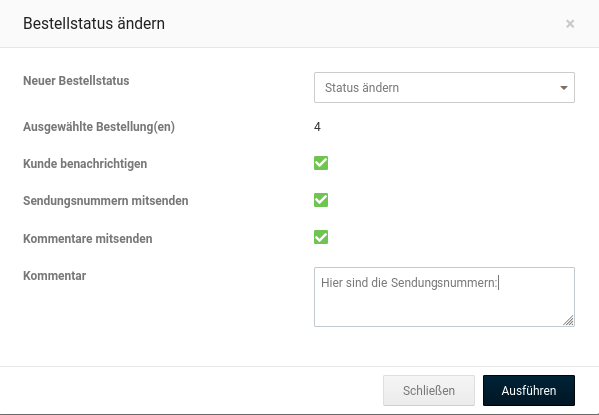
The tracking link can be sent to the customer by email under Orders > Orders. To do this, change the order status either from the order overview or from the detail view of the order and set the check marks Notify customer and Send tracking number.
Trusted Shops
Installation
The Trusted Shops module can be installed in the Gambio Admin under Modules > Module Center. To do this, select the entry Trusted Shops from the list and click on the Install button in the bottom right corner of the screen.
Setup
After installation, the module can be set up. To do this, select it under Modules > Module Center and click on the Edit button in the bottom right corner of the screen.
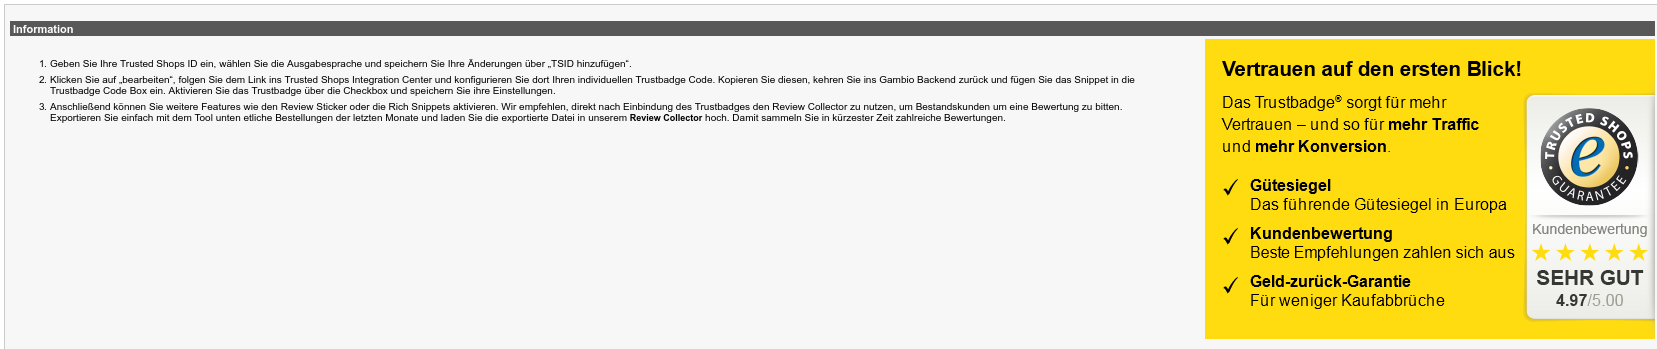
Information
The Information section contains details on the general operation of the module; it can be collapsed by clicking on the heading.
Configuration
Add TSID

| Field name | Description |
|---|---|
| Add TSID | The Trusted Shops ID must be inserted here; you will receive it directly from Trusted Shops. The ID consists of capital letters and numbers and is normally 33 characters long. |
| Language | Defines the language that is chosen for the texts in the module. |
| Activate Excellence buyer protection | If your contract with Trusted Shops includes the Excellence buyer protection, this can be selected here. If Excellence is chosen, the module Trusted Shops Käuferschutz Excellence (ot_tsexcellence) must also be installed and activated under Modules > Order totals, since otherwise the buyer protection fee cannot be displayed in the order summary. |
| Username | If Excellence buyer protection has been activated, the username must be entered here. You will receive it from Trusted Shops. |
| Password | If Excellence buyer protection has been activated, the password must also be entered. You will also receive this from Trusted Shops. |
After successful activation, the following box is displayed:

| Field name | Description |
|---|---|
| Trusted Shops ID | Shows the specified Trusted Shops ID, redacted in the figure |
| Type | Shows which account type was chosen - in the module these are displayed by default as Classic and Excellence - which include a different range of services. |
| Language | Shows which language was selected. |
Below that, the access data can be checked and corrected if necessary.
Settings for the Trusted Shops ID
To the right of the Trusted Shops ID is the edit button, via which further settings can be opened.
Trustbadge
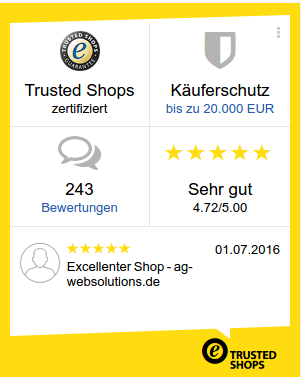
The Trusted Shops badge is displayed by default at the bottom right in the shop. Clicking on it opens an info popup.
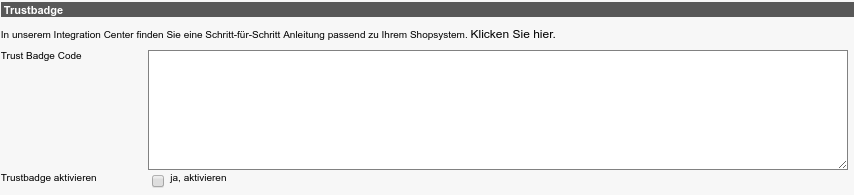
In order for the badge to be displayed, the Trust Badge Code must be inserted. This is generated on the Trusted Shops website. To do this, click on Klicken Sie hier (Click here); you will then be taken to the Trusted Shops website and can copy the badge code there.
Note
Alternatively, the Trusted Badge Code can also be generated at the following link:
http://www.trustedshops.de/shopbetreiber/integration/trustbadge/trustbadge-custom/
| Code | Possible changes |
|---|---|
| yOffset | The distance from the bottom edge of the shop can be set here. This is useful, for example, if the Page Up button is activated in the shop and would otherwise be covered by the badge. |
| variant | Here you can enter which of the various available variants of the badge should be used. You can choose between reviews, default, custom and custom_reviews. The latter two must be customized via your own styles; available without further customization are  |
| customElementId | This ID must be specified if the variants custom and custom_reviews are to be used. |
| trustcardDirection | Here you can set the alignment of the badge to one of the four corners. In the Honeygrid, only the display in the bottom right corner currently works. |
| customBadgeWidth | The width of the badge is set here. |
| customBadgeHeight | The height of the badge is set here. |
| disableResponsive | This can be used to switch off the responsive display; the badge would then not adapt to the display when viewed on mobile devices. |
| disableTrustbadge | Setting this item to true deactivates the display of the badge. |
Review Sticker
The Review Sticker is displayed below the footer and contains the latest customer reviews. Even if the Review Sticker is not active, the line 4.34 / 5.00 of 11 Testzertifikat für Shopsystempartner Excellence Kundenbewertungen is always displayed.

Here, the code for the Review Sticker is displayed in a text field. The code is already entered when the module is installed. If the reviews are to be displayed in the shop, the check mark for Activate Review Sticker must be set.
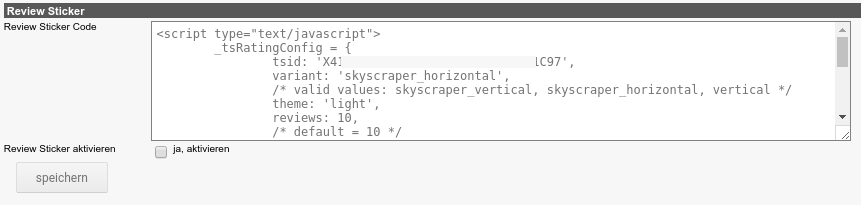
The code of the Review Sticker can be customized by experienced users:
| Code | Possible changes |
|---|---|
| variant | By default, the "horizontal" variant is stored. We recommend keeping this when using the Honeygrid theme. |
| reviews | The number of reviews to be displayed can be selected here. With more than 10 reviews, they are divided up differently, so the section below the footer can be displayed very tall. |
| borderColor | Here, the color of the border of the box as well as the background color behind 298 Bewertungen (298 reviews) is changed. |
| colorclassName | It is also possible to specify your own CSS classes for the output of the Review Sticker. The name of the class can be entered here. |
| introtext | The heading can be changed to any text. However, the heading is not used in the skyscraper variants. |
General integration options
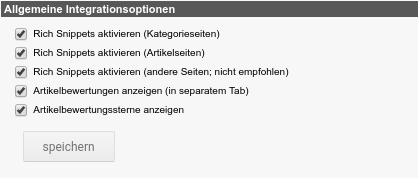
| Field name | Description |
|---|---|
| Activate Rich Snippets (category pages) | If activated, the key data of the categories is passed to Google. |
| Activate Rich Snippets (product pages) | If activated, the product reviews and other product key data (price, name) are passed to Google. |
| Activate Rich Snippets (other pages; not recommended) | Passing the Rich Snippets from other pages of the shop to Google (not recommended). |
| Show product reviews (in separate tab) | Shows the product reviews by Trusted Shops in a separate tab on the product details page. |
| Show product review stars | On the product details page, the review stars from Trusted Shops can be displayed in addition to the stars of the shop's normal product review function.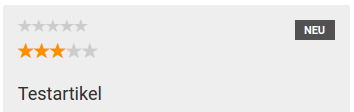 |
Data export for Review Collector
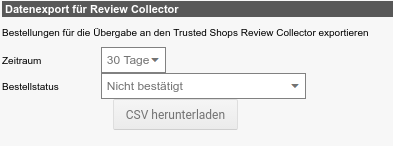
With the Review Collector you can export the orders and import them at Trusted Shops, who then in turn trigger the dispatch of the review emails. This function has replaced the review buttons. In the current shop version, however, it is no longer necessary. If the badge is displayed, the review request takes place automatically.
Trusted Shops buyer protection Excellence
Attention
Currently, the Excellence buyer protection cannot yet be used together with the payment methods from the Gambio Payment Hub.
Installation
The module for the surcharge of the buyer protection fee can be installed under Modules > Order totals and causes the fee for the Trusted Shops buyer protection to be displayed in the order summary. To do this, select the entry Trusted Shops Käuferschutz Excellence (ot_tsexcellence) from the list and click on the Install button in the bottom right corner of the screen. After the module has been installed, it can be configured by clicking on Edit.
| Field name | Description |
|---|---|
| Show buyer protection fee | The module can be activated or deactivated via this. |
| Sort order | The sort order affects the position of the output as well as the calculation. If possible, no changes should therefore be made to it. If changes are necessary, it should be checked whether the calculation is still correct. |
| Tax class | When a tax class is selected, the invoice fee is regarded as a net value and the tax is added in the order summary. If no tax rate is selected, the stored invoice fee applies gross as net. |
Display of buyer protection Excellence in the checkout process
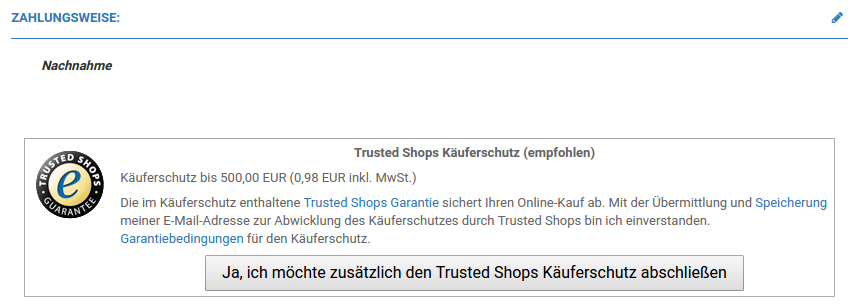
On the order confirmation page, the customer can decide whether they want to add the buyer protection.
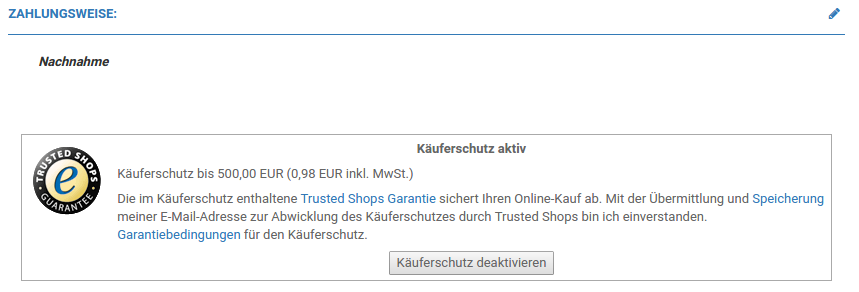
If required, the customer can also undo their selection.
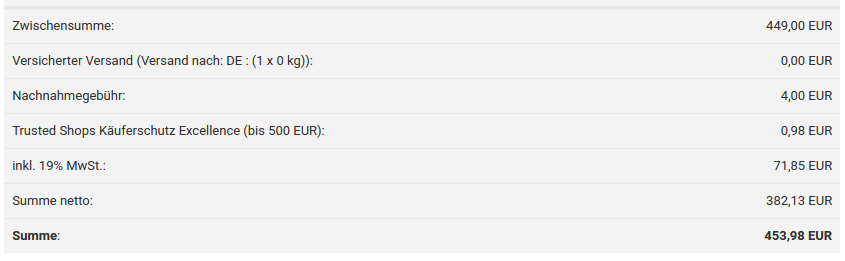
When the buyer protection is activated, a line with the costs is added to the totals block.
Checkout Loading Spinner
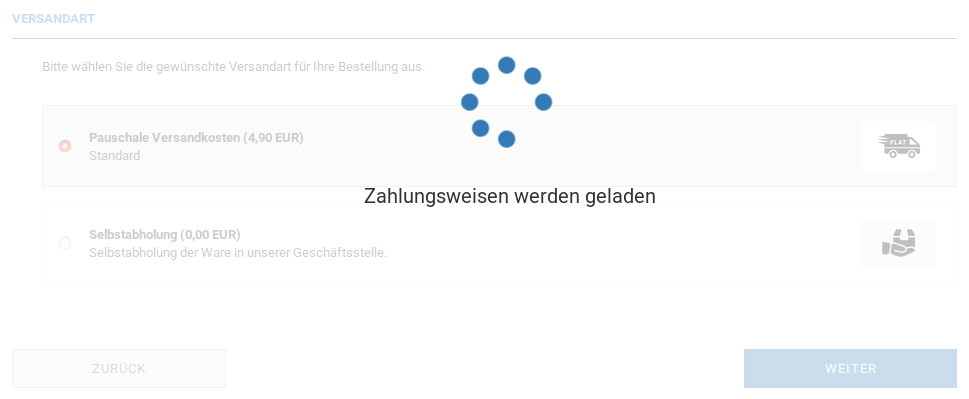
The Checkout Loading Spinner is intended to display an animated graphic during longer loading processes in the checkout process, making it clear to the customer that their input is being processed. This is intended to prevent customers from assuming that the shop is not responding and possibly abandoning the purchase.
Installation
The module can be installed under Modules > Module Center. To do this, select the entry Checkout Loading-Spinner and click on the Install button in the bottom right corner of the screen.
Configuration
After installation, the module can be configured. To do this, select the entry Checkout Loading-Spinner and click on the Edit button in the bottom right corner of the screen.
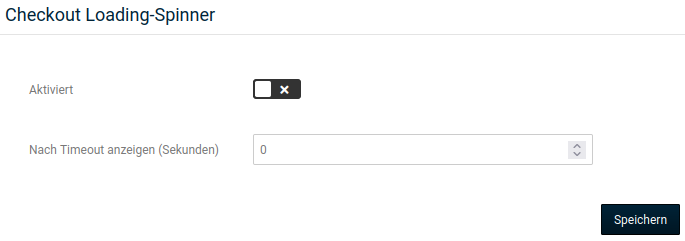
Set the check mark for Activated to use the Checkout Loading Spinner. Via the field Show after timeout (seconds) you can define the time after which the Checkout Loading Spinner is displayed during the loading process. The default setting here is 0, so that the spinner is always displayed when it has been activated. If you set a number of seconds here, the animation is only displayed if the loading of the payment method page is actually delayed by the specified period of time.
Direct help
Via the direct help, the corresponding manual chapter for the respective subpage of the Gambio Admin can be opened. If there is no chapter assignment for the opened page, the beginning of the manual is loaded. To load the page, click on the light bulb symbol at the bottom of the screen.

Installation
The installation can be carried out in the Gambio Admin under Modules > Module Center. To do this, select the entry Direkthilfe from the list and click on the Install button in the bottom right corner of the screen.
Configuration
The configuration of the module is limited to switching the direct help on and off. To do this, select the entry Direkthilfe under Modules > Module Center and click on the Edit button in the bottom right corner of the screen. Set or remove the check mark for Active to activate or deactivate the module, respectively.
MyDPD / Iloxx
Installation
The installation can be carried out in the Gambio Admin under Modules > Module Center. To do this, select the entry MyDPD Business / iloxx from the list and click on the Install button.
Configuration
After installation, the module can be configured. To do this, select the entry MyDPD Business / iloxx under Modules > Module Center and click on the Edit button in the bottom right corner of the screen.
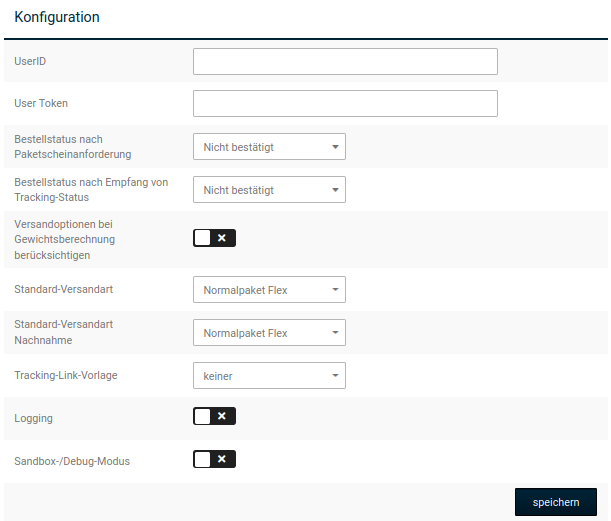
| Field name | Description |
|---|---|
| UserID | You will receive the UserID directly from DPD |
| User Token | You will receive the user token directly from DPD |
| Order status after parcel label request | Here you can set which order status should be assigned directly with the label creation. |
| Order status after receiving tracking status | Here you can select the order status that should be set when DPD has received the parcel. |
| Consider shipping options in weight calculation | When creating the label, the shipment weight must be entered. This can be pre-filled with the product weight. If the packaging weight is also to be added to this value, as configured under Modules > Shipping methods > Shipping options, this item must be activated. |
| Default shipping method | Preset to Normalpaket Flex, which corresponds to DPD Predict. A different shipping method can also be selected. |
| Default shipping method cash on delivery | Preset to Normalpaket Flex, which corresponds to DPD Predict. A different shipping method can also be selected. |
| Tracking link template | Under Settings / Delivery / Shipping service providers, after opening the page Parcel services, various tracking links for some parcel service providers are pre-created, from which a corresponding template can be selected. We recommend using DPD so that the tracking number can be combined with the correct link to the DPD shipment tracking. |
| Logging | Activates logging. |
| Sandbox/debug mode | Activates test operation. |
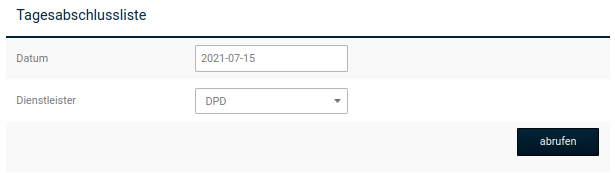
End-of-day list
This can be used to generate a list of the labels created on the selected day.
Label creation
Opening the menu item
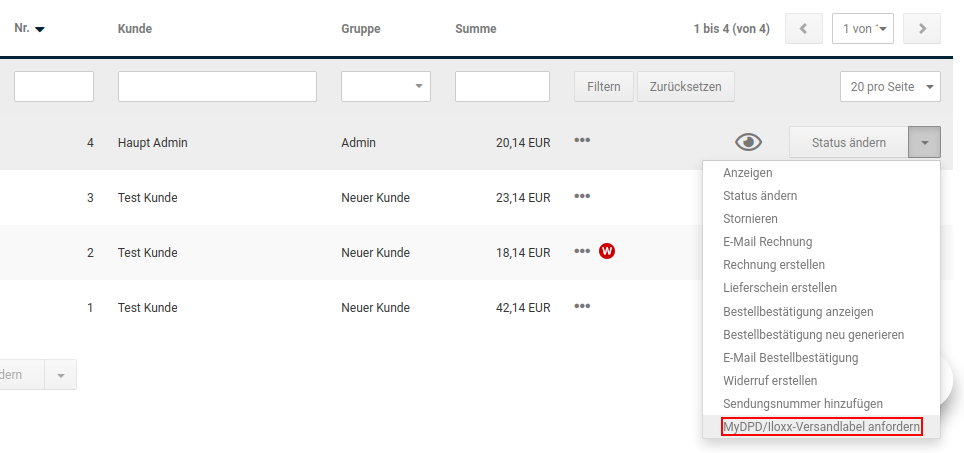
The labels are created from the order overview. To do this, either use the dropdown button of the individual order (see figure) and click on Request MyDPD/Iloxx shipping label, or check the order(s) and select the entry via the dropdown of the multiple selection at the bottom left below the order overview.
Iloxx order preparation
Via the menu item, the order preparation is opened automatically, in which the selected orders are listed one below the other. The list contains details on the order number, customer and shipping address, contents, DPD shipping method, goods value, shipment weight and the parcel number, if available. Changes can also be made to the shipping method, the goods value and the shipping weight.
Pressing the buttons Check addresses, Retrieve shipping labels and Remove selected below the list of orders only affects the orders that have been selected in the list. To select an order, set the check mark in the box in front of the corresponding order number.
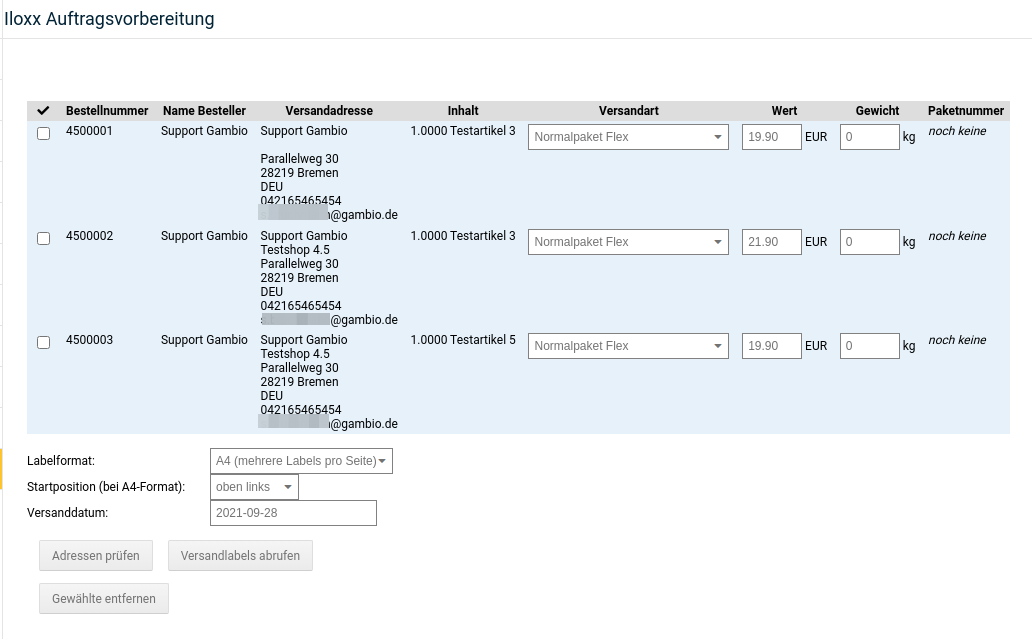
| Field name | Description |
|---|---|
| Label format | The output format of the labels can be selected here. With DIN A4, four labels are output on one page. |
| Start position | This option only affects printing on DIN A4 and defines where printing should begin. |
| Shipping date | The shipping date can be set manually and selected after clicking in the input field. The date must not be in the past and must be a working day (Mon-Fri) within the next 7 working days. This date is not printed on the label. |
| Check addresses | Before the label creation, the addresses of the orders can be checked automatically. This option only affects the previously selected orders. |
| Retrieve shipping labels | Creates the shipping labels. This option only affects the previously selected orders. |
| Remove selected | Removes the selected orders from the list in the Iloxx order preparation. The order itself is not deleted by this. |
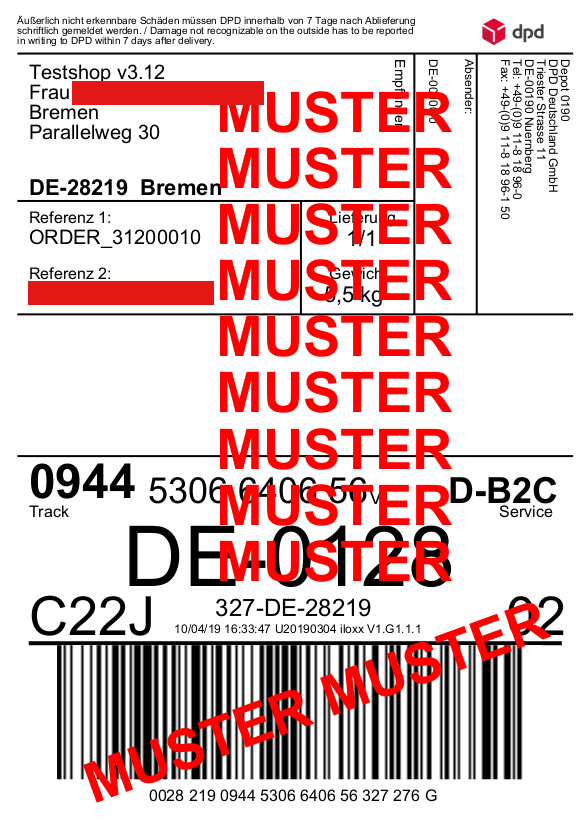
Label (sample)
A sample label in DIN A6 format is shown below.
Mailbeez
Basic information
Mailbeez is a third-party module that is part of the basic scope but was not developed by Gambio. This chapter therefore only contains a general overview and does not describe the module in its entirety.
Support for the module is provided by Mailbeez. More detailed information can be found at the following link:
https://www.mailbeez.de/dokumentation
Installation
The Mailbeez module can be installed in the Gambio Admin under Modules > Module Center. To do this, select the entry MailBeez from the list and click on the Install button in the bottom right corner of the screen.
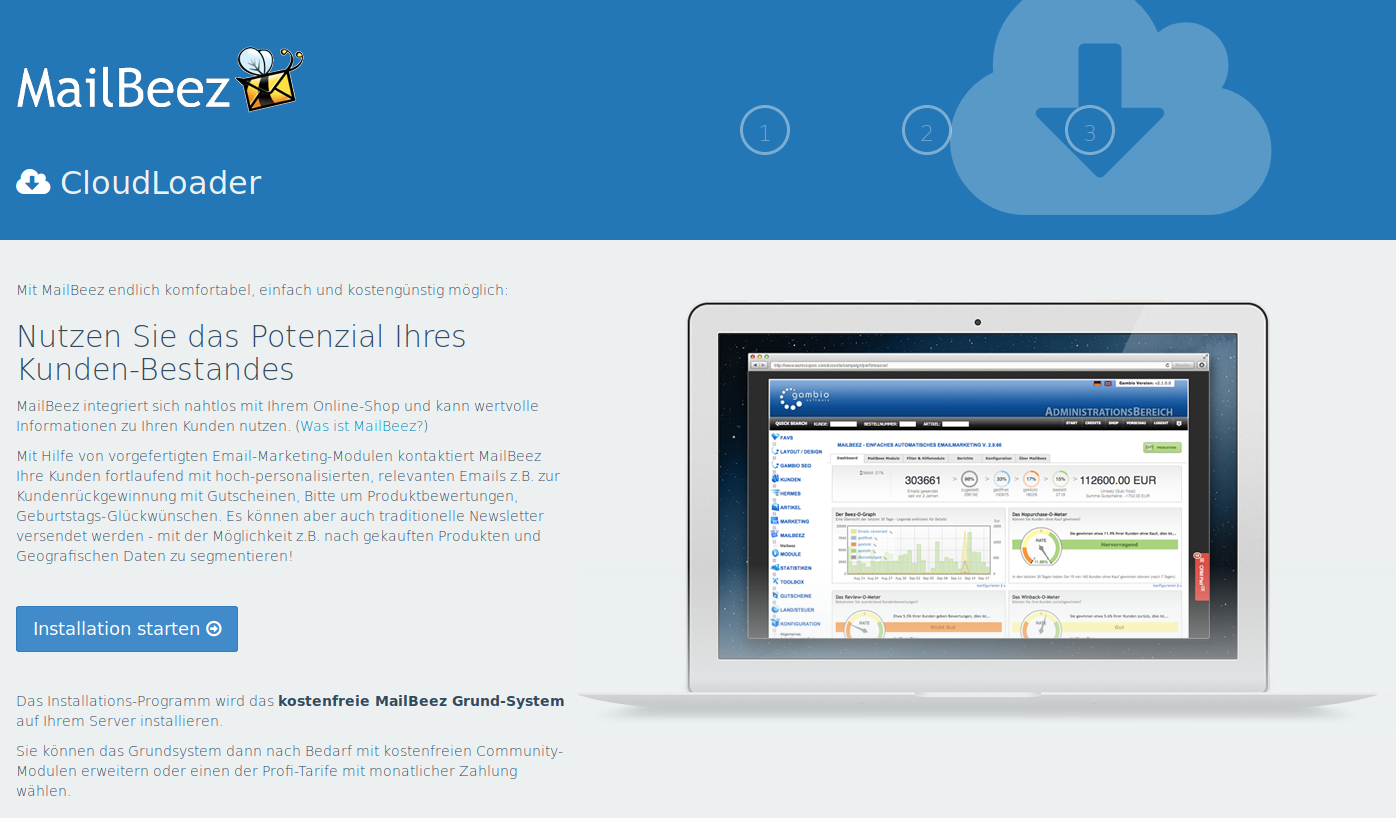
The CloudLoader from MailBeez opens. Click here on Start installation to import the necessary files from MailBeez into the shop.
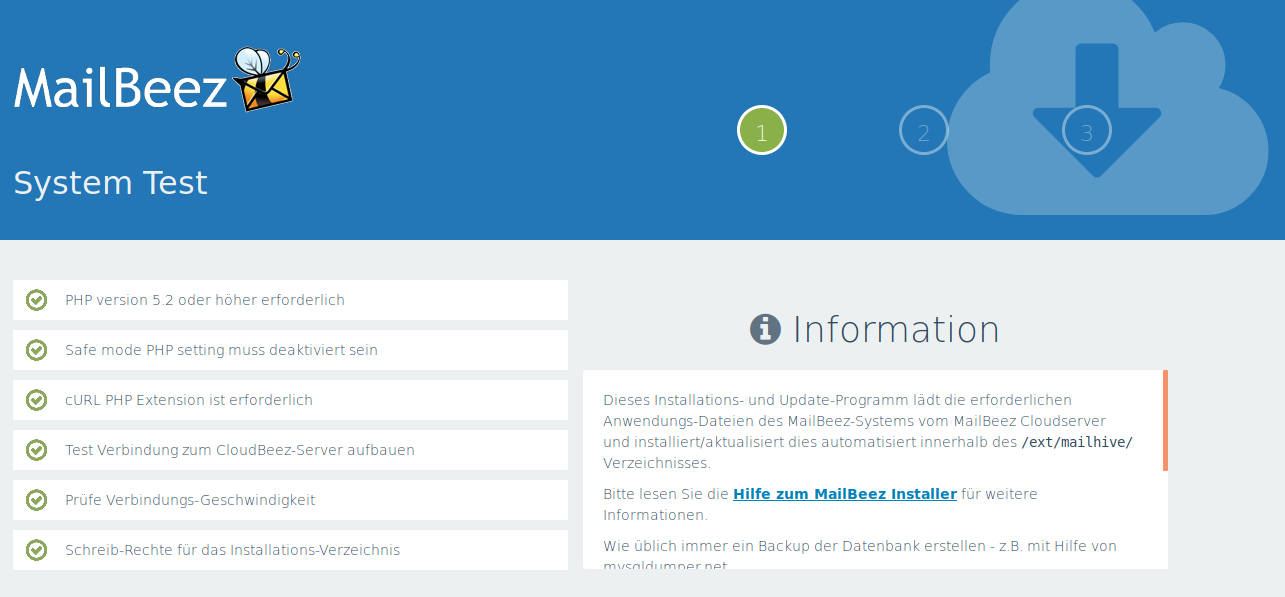
In the next step, a system test is performed.
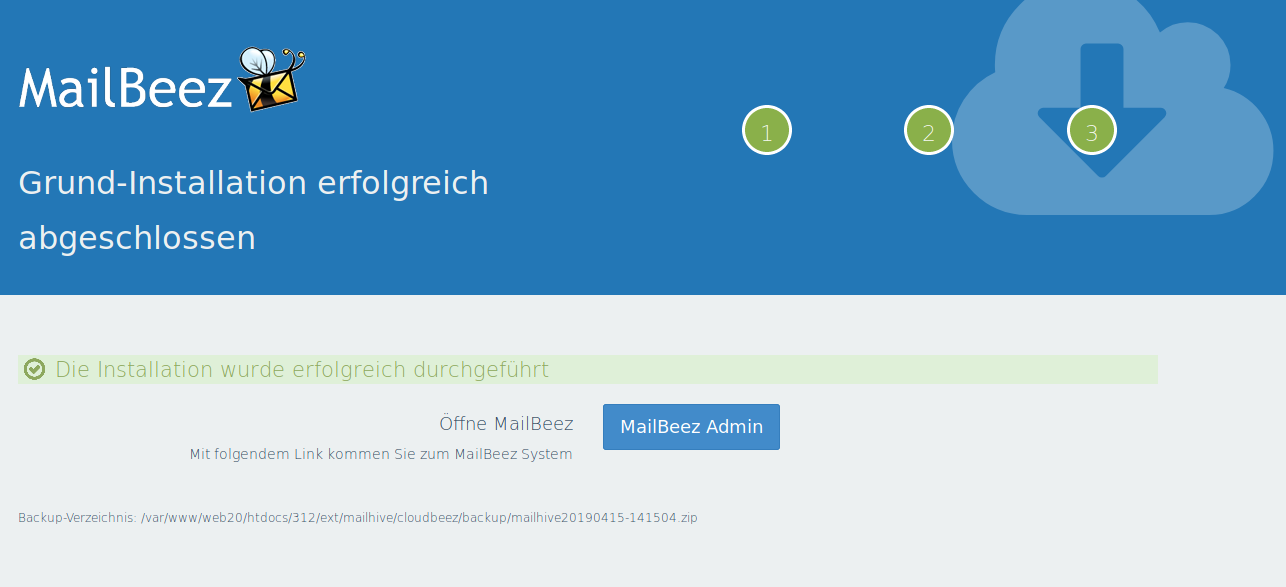
After successful installation, MailBeez gives corresponding feedback.
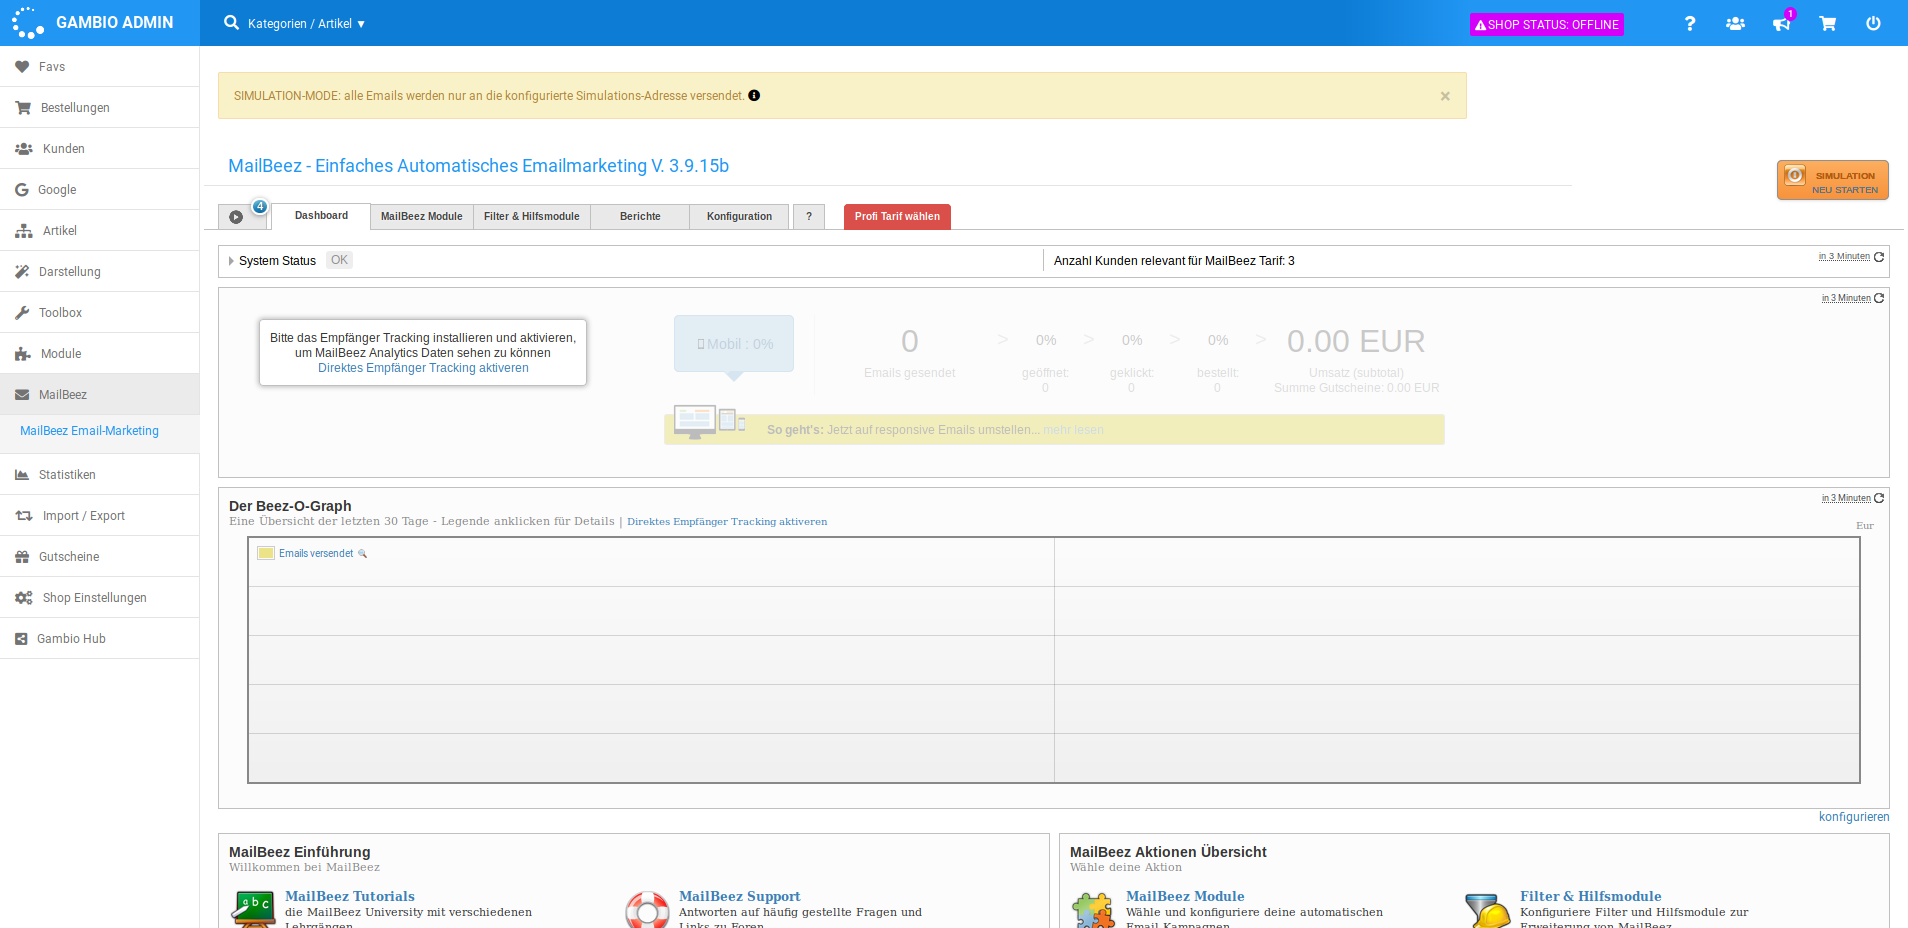
Afterwards, the MailBeez page can be opened in the shop.
Overview of the tabs
1. Tab
In the first tab, various tours through the module are available, which are intended to serve as assistance during the configuration.
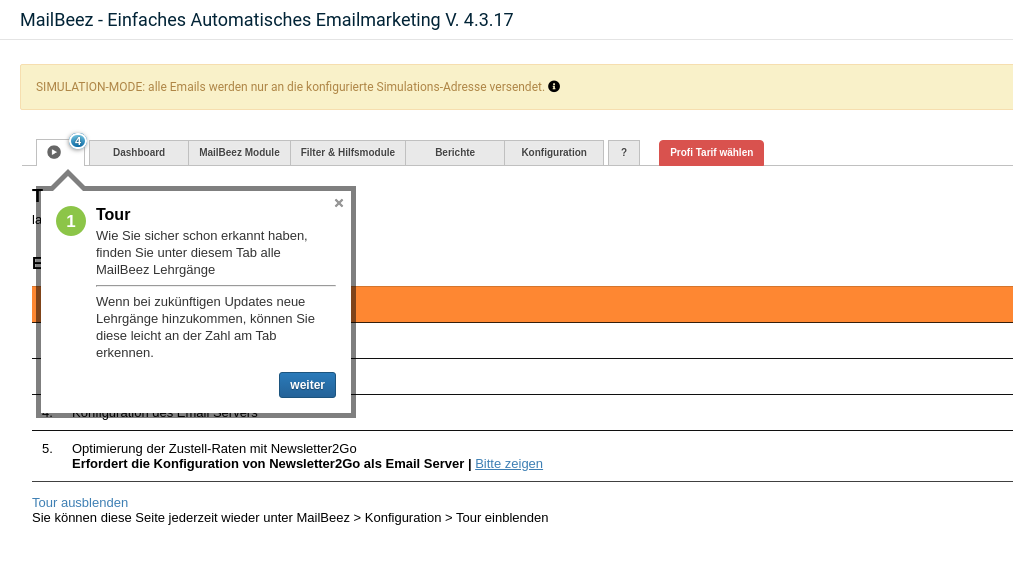
2. Dashboard
The Dashboard contains the most important statistics, which provide information, for example, about customer recovery values and the like. The tabs can be deactivated individually if required. The first statistic acts as the 'start page' of MailBeez and is also displayed in the dashboard of the shop.
3. Mailbeez modules
The second tab groups all MailBeez modules. Modules of various kinds are available, from email dispatch to the handling of service tasks. More details can be found in the MailBeez documentation.
4. Filters & auxiliary modules
Filters and auxiliary modules are grouped in the third tab. These modules typically have no independent function, but fundamentally extend the MailBeez system. This can be, for example, the customer group filter, with which you can configure which MailBeez modules should be active for which customer groups.
5. Reports
The Reports tab groups modules for generating various reports. However, many report functions are also directly accessible via the dashboard.
6. Configuration
The Configuration tab groups configuration settings. These settings influence the basic function of the MailBeez system, e.g. whether the emails generated by MailBeez are sent via the mail function of the shop, via the certified servers of Newsletter2Go or via your own SMTP server.
7. ?
Some system information is displayed here, such as the Mailbeez version and the domain for which the Mailbeez license key is valid.
Ampify
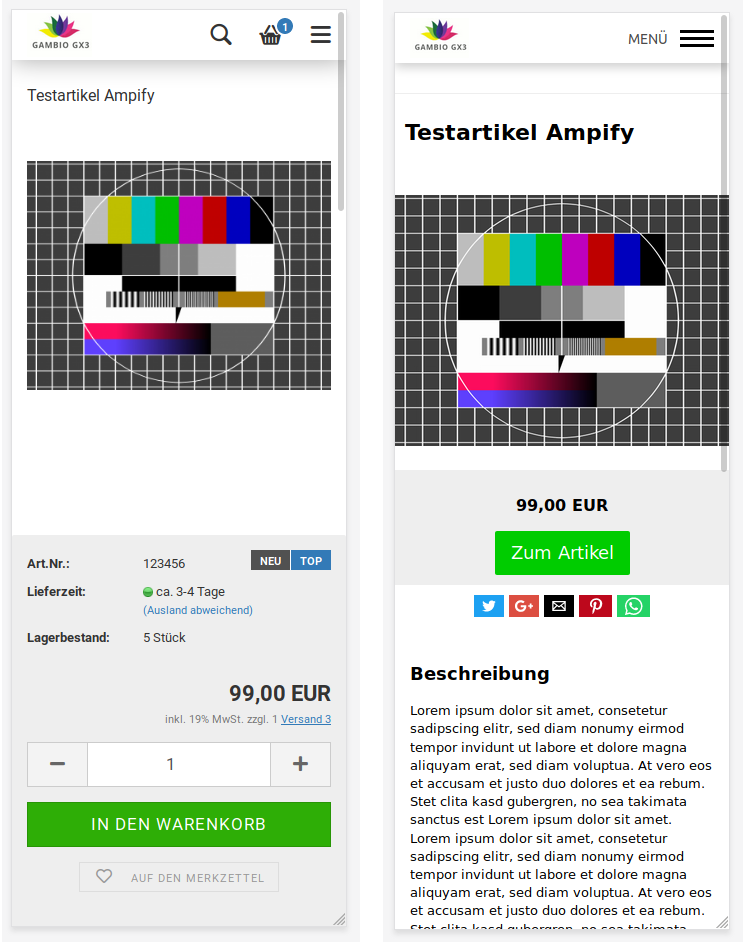
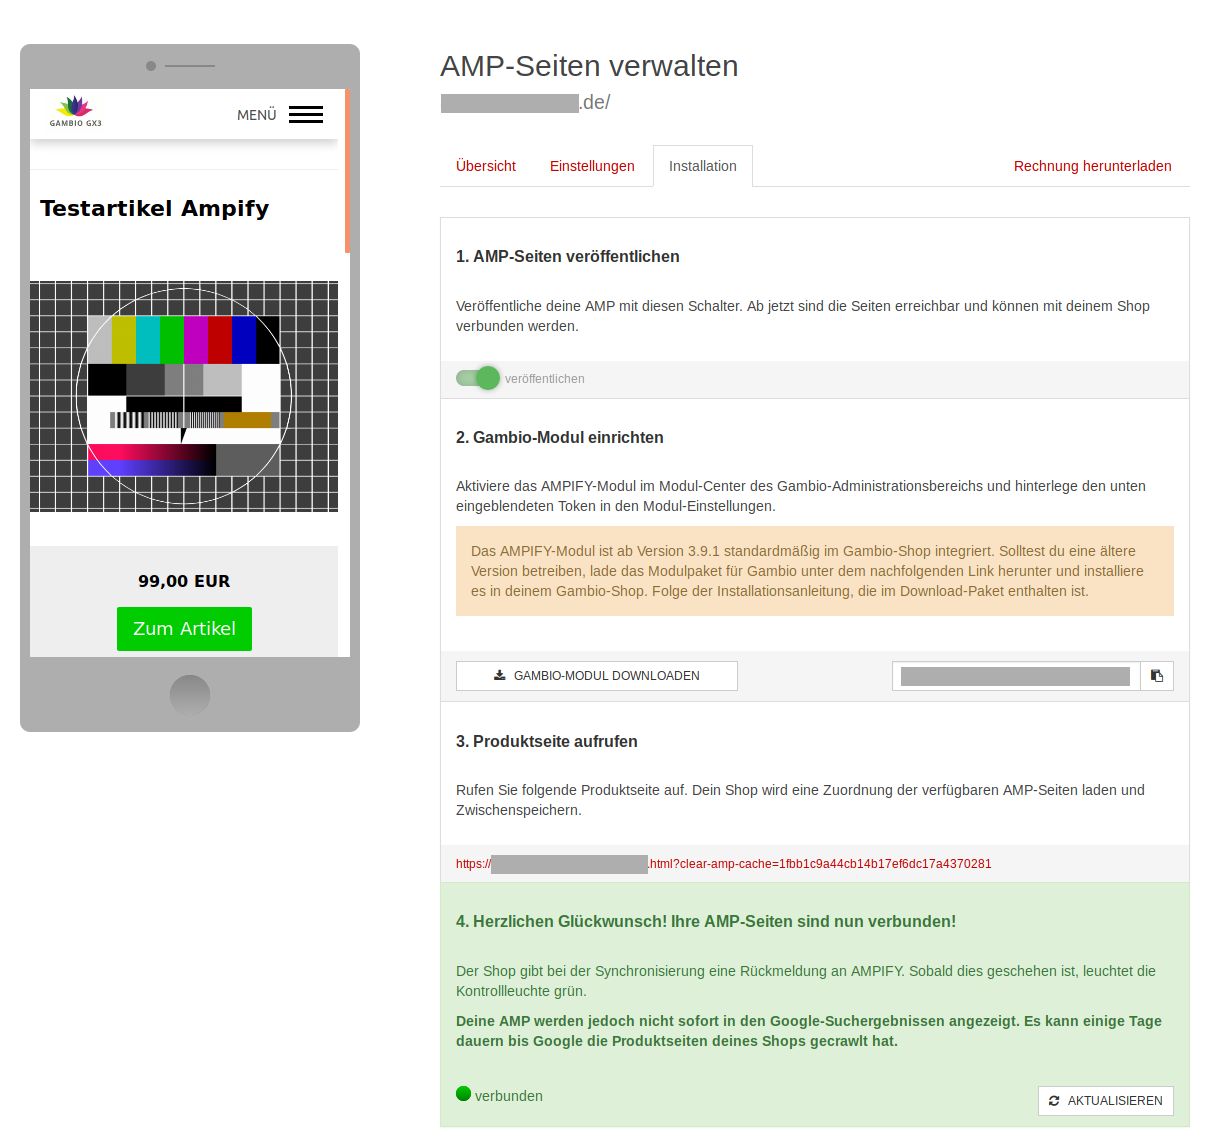
The task of Ampify is to provide reduced versions of the product details pages in the shop, which can then be loaded faster on mobile devices. These pages are reduced to product images and description and contain a link to the shop.
For comparison, here is a conventional product page (left) compared to an Ampify page (right):
Installation
The Ampify module can be installed in the Gambio Admin under Modules > Module Center. To do this, select the entry AMPIFY from the list and click on the Install button in the bottom right corner of the screen.
Getting started
Several steps must be completed to get started.
Creating the CSV export
First, the Ampify export must be created in the Gambio Admin under Products > Import/Export in the Price portal tab. Details on editing the CSV profiles can be found in the chapter Import/Export of the manual. The following steps are necessary here:
- Edit the export
- copy the export URL in the Settings tab
- select the categories to be exported in the Categories tab
- save the settings
- run the export
Registration with Ampify
Now the registration with Ampify must take place at https://ampify.it. Proceed as follows:
- open https://ampify.it in the browser
- paste the previously copied export URL into the field URL der CSV-Datei (URL of the CSV file)
- enter the email address
- click on AMP-Seiten erzeugen (Generate AMP pages)
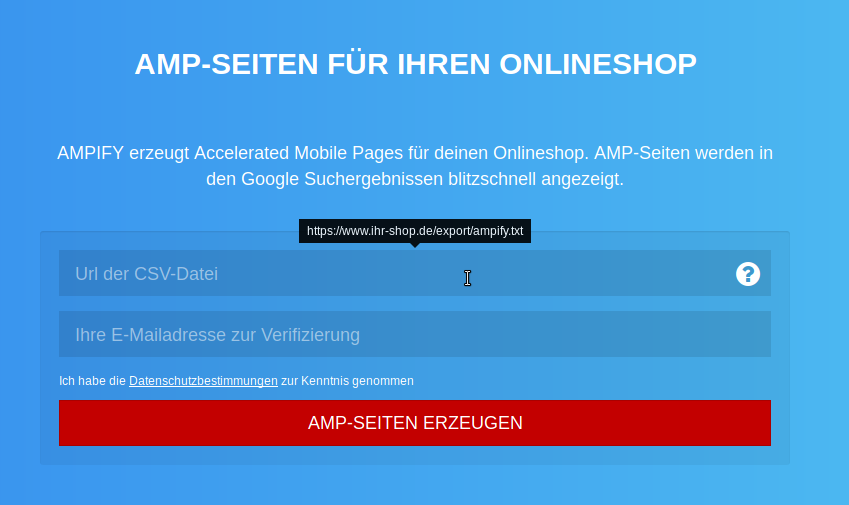
An email has now been sent to the stored email address, in which you are asked to confirm the email address. This is done by clicking the link received in the email. Ampify.it then starts reading in the products of the shop directly.
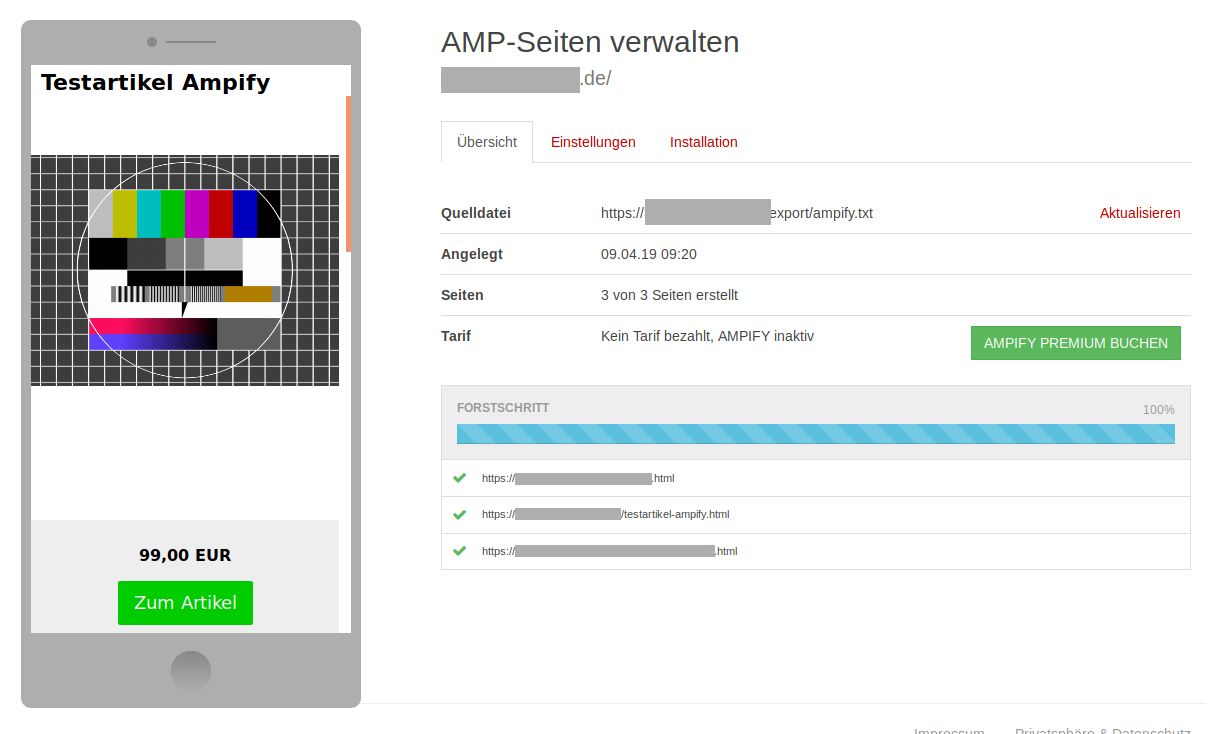
After the import, a list of the listed products as well as some basic information (shop URL, creation date, tariff, etc.) are displayed.
Settings at Ampify
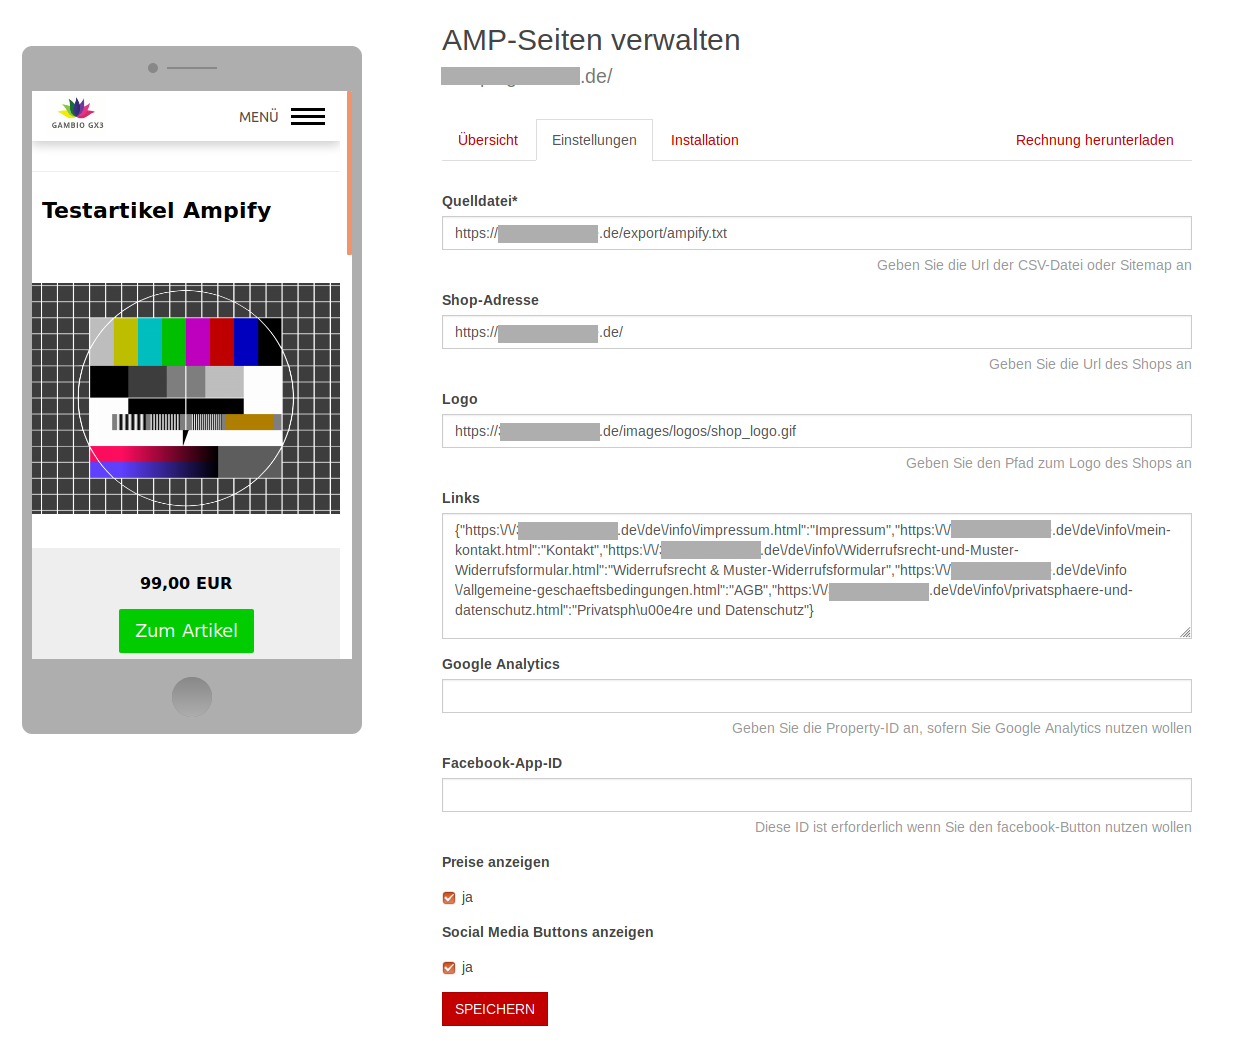
| Setting | Explanation |
|---|---|
| Source file | The link to the export file can be adjusted here, for example if the file name has been changed. |
| Shop address | If the shop address changes, it can be updated here. |
| Logo | If a different shop logo is to be displayed on the Ampify pages, the link to the logo file can be entered here. |
| Links | This field contains the links to the legal texts found by Ampify in the shop, which can be changed or supplemented if required. |
| Google Analytics | If Google Analytics is also to be applied to the Ampify pages, the property ID of the shop can be entered here. |
| Facebook App ID | If the Facebook button is to be used, the Facebook App ID can be stored here. |
| Show prices | Selection of whether prices should be displayed |
| Show social media buttons | Selection of whether the buttons for sharing the product should be displayed. |
Installation at Ampify
After booking Ampify Premium, further settings are available in the Installation tab.
- Publish AMP pages: If the AMP pages are to be used, this must be activated here.
- Set up Gambio module: In shop versions from 3.9.1, Ampify is already included; here it is sufficient to copy the token.
- Open product page: Here you must click on the link once in order to load an assignment of the available AMP pages
- Verification: In the last step, you must click once on Refresh. The status then changes from not connected to connected.
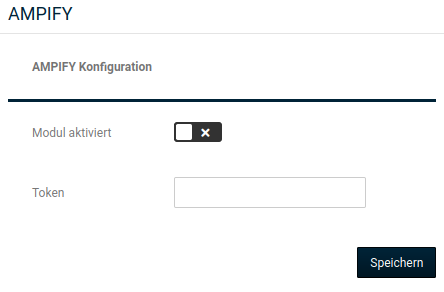
Settings in the shop
In the last step, the token copied from Ampify is now stored in the module and the module is activated.
Mediafinanz
In this chapter, we give a brief overview of the shop-side setting options of the Mediafinanz module. However, since this module was not developed by Gambio, we cannot describe its use in detail. If you have any questions about this or problems with its use, please contact the Mediafinanz support directly (http://www.mediafinanz.de).
Installation
The module can be installed under Modules > Module Center. To do this, select the entry Mediafinanz from the list and click on the Install button in the bottom right corner of the screen. Finally, click on Edit.
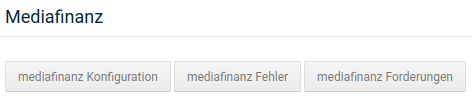
mediafinanz configuration
General options
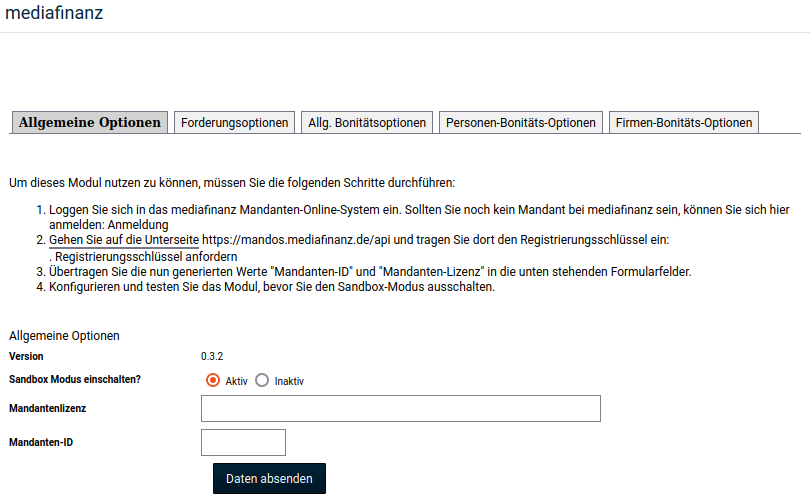
Here you can configure the module by entering your client license and the ID that you received from Mediafinanz. Via the link Request registration key, a combination of numbers is displayed, which you in turn can enter on a Mediafinanz page. This is required to generate the client license and the ID, which must then be entered into the module.
Claim options
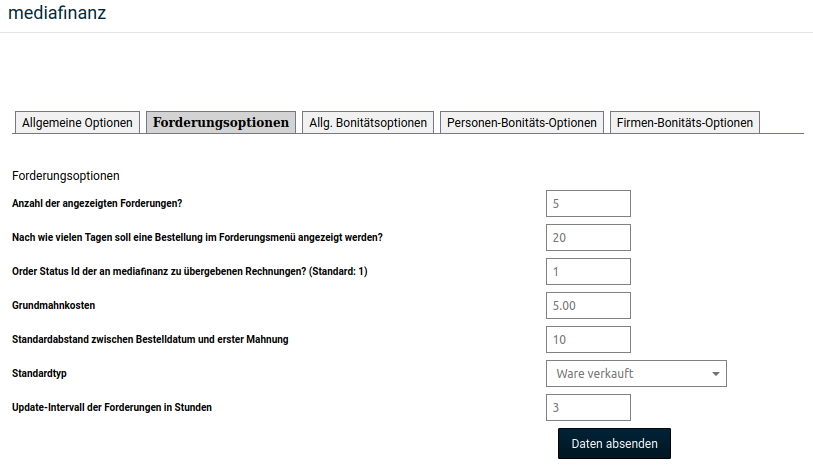
General settings for the claims can be made here. This ranges from the update intervals to basic reminder costs to the number of claims displayed.
General credit check options
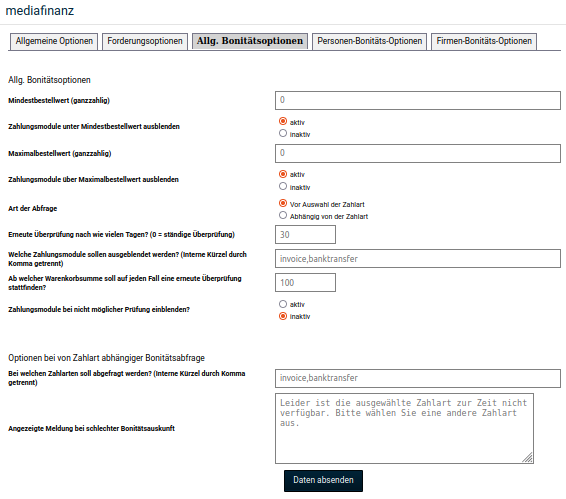
Here, settings regarding the order and the payment methods are made. This includes, for example, from which goods value the check should take effect, for which payment modules this should take place and which message the customer should receive if creditworthiness is not given.
Personal credit check options
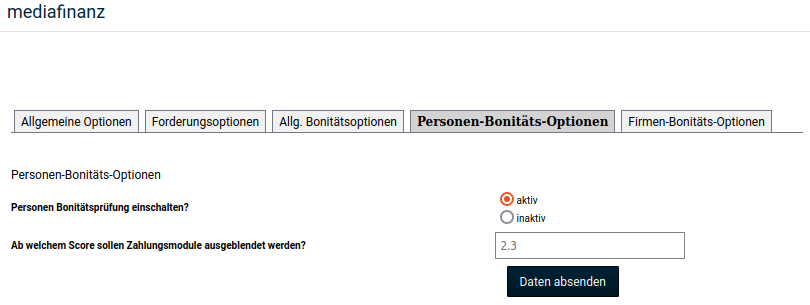
The credit check for individuals can be activated here.
Company credit check options
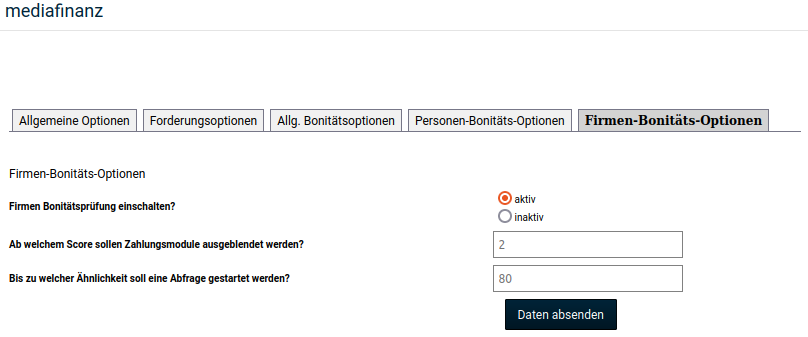
The credit check for company customers can be activated here.
mediafinanz errors
Under mediafinanz errors, according to our latest information, entries for failed checks and general errors are listed in the sense of a log. Please request details on this directly from Mediafinanz.
mediafinanz claims
Directly after installation, this menu item refers to the sub-item Claim options. According to our current understanding, we assume that a client account with Mediafinanz is required to open the claims overview.
Share shopping cart
Via the module Warenkorb teilen (Share shopping cart), it is possible to send the contents of the shopping cart to another person via a link.
Installing / uninstalling Share shopping cart
To install the module, go in the Gambio Admin to Modules > Module Center and select the entry Warenkorb teilen from the list. Then click on the Install button in the bottom right corner of the screen. Once the module has been installed, it can be switched off again there by clicking on Uninstall. Settings previously made in the module are retained in the process.
Editing Share shopping cart
Once the module has been installed, it can be edited under Modules > Module Center. To do this, select the entry Warenkorb teilen and click on the Edit button in the bottom right corner of the screen. In this form, you can define how long a link to a shopping cart shared in this way is valid. To do this, set the desired number of days via the dropdown Lifetime in days and confirm the change by clicking on Save. If 0 is set, the link can be used without any time restriction.
Sharing a shopping cart via the storefront
Within the shopping cart, after installing the module, the link Share shopping cart is displayed below the Checkout button.
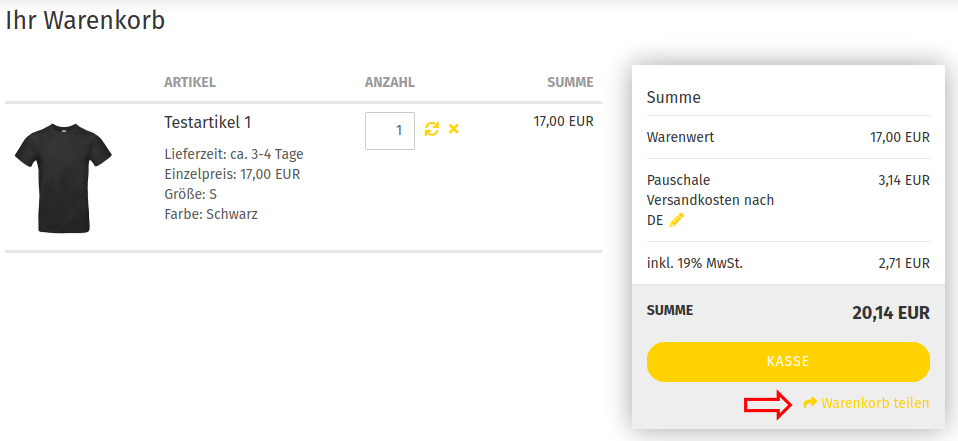
Clicking on the link opens a new dialog window, which displays the generated shopping cart link.
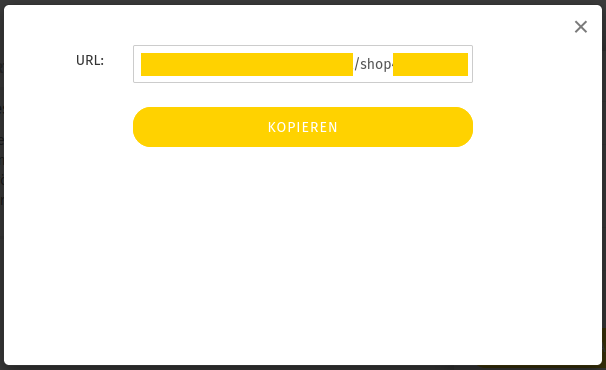
By clicking on the Copy button, the link can be transferred to the clipboard.
Janolaw
The Janolaw module is used for obtaining and integrating legal texts. It is delivered as part of the basic scope of the shop system, but Janolaw provides support and development of the module. The Janolaw support can be contacted at support@janolaw.de or at 06196 / 77 22 777.
Installation
The Janolaw module can be installed under Modules > Module Center. Select the entry janolaw AGB Hosting-Service here and click on the Install button in the bottom right corner of the screen.
Configuration
The module settings can be opened via the Edit button. The content of the first tab AGB Hosting Service is displayed, which provides information about registering with Janolaw. The configuration of the module itself takes place in the second tab.
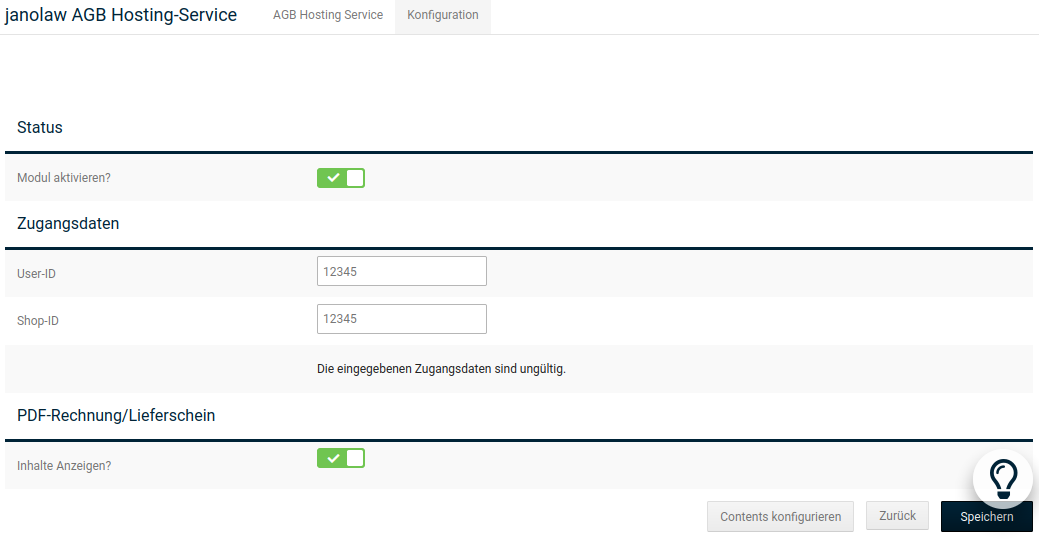
Status
The module can be activated or deactivated with the option Activate module.
Access data
You will receive the User ID and Shop ID from Janolaw. After entering the data, a note on the content of the booked package as well as the contact details of the Janolaw support are displayed under Information.
PDF invoice/delivery note
Here you can select whether the Janolaw legal texts for terms and conditions and withdrawal should be automatically included in the PDF invoice or in the PDF delivery note.
Configuring content pages
By clicking on the button Configure contents, the Janolaw legal texts are automatically integrated into the content pages and can thus be accessed in the shop.
Error reports
The module Fehlerberichte senden (Send error reports) serves to transmit detailed information to Gambio when an error message occurs. Based on the transmitted data, we can evaluate not only the message itself but also the conditions that existed at the time of the message, and incorporate the results of this evaluation into the development of future versions.
Error reports contain:
- Server information (e.g. PHP and mySQL versions, settings, loaded modules)
- Runtime information (e.g. script name/URL, language, IP, timestamp, browser, used parameters)
- Error details (e.g. error message, affected code section)
Attention
Error reports may under certain circumstances also contain personal data, e.g. if errors occur during the processing of order data. Please check whether it is necessary to inform your customers, for example within the framework of the privacy policy. You can deactivate the sending of error reports at any time in the Module Center by uninstalling the module.
Installing / uninstalling
The module can be installed under Modules > Module Center. To do this, select the entry Fehlerberichte senden from the overview and click on the Install button in the bottom right corner of the screen.
Once the module has been installed, you can select it in the list and switch it off again by clicking on the Uninstall button.
Two-factor authentication
The two-factor authentication can be used to additionally secure the login to the shop. There are various apps for this, e.g. the Google Authenticator or the app Authenticator from the company Pixplicity.
Installation and setup
The module can be installed under Modules > Module Center. To do this, select the entry Zwei-Faktor-Authentifizierung from the list and click on the Install button in the bottom right corner of the screen.
After installation, the module can be set up by clicking on Edit.
First page of the setup
The first page describes in general what the two-factor authentication is for. Click on Set up to continue the process. Clicking on Next takes you to the next page of the setup.
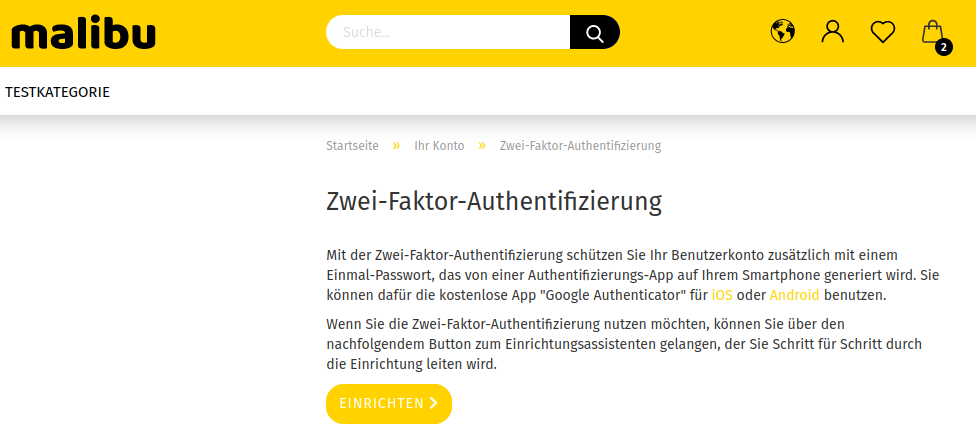
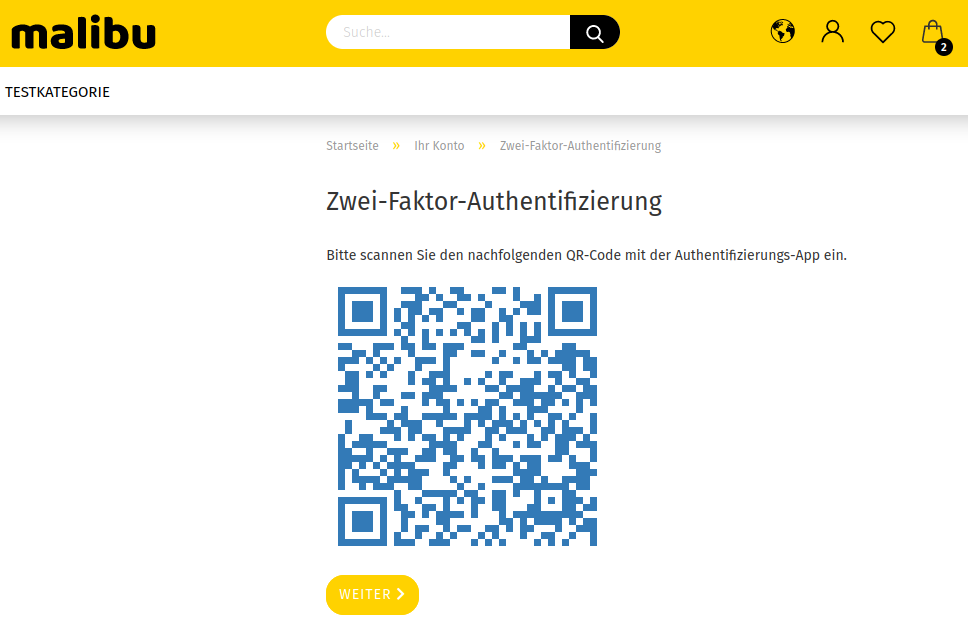
QR code
The displayed QR code must be scanned via the respective installed mobile phone app.
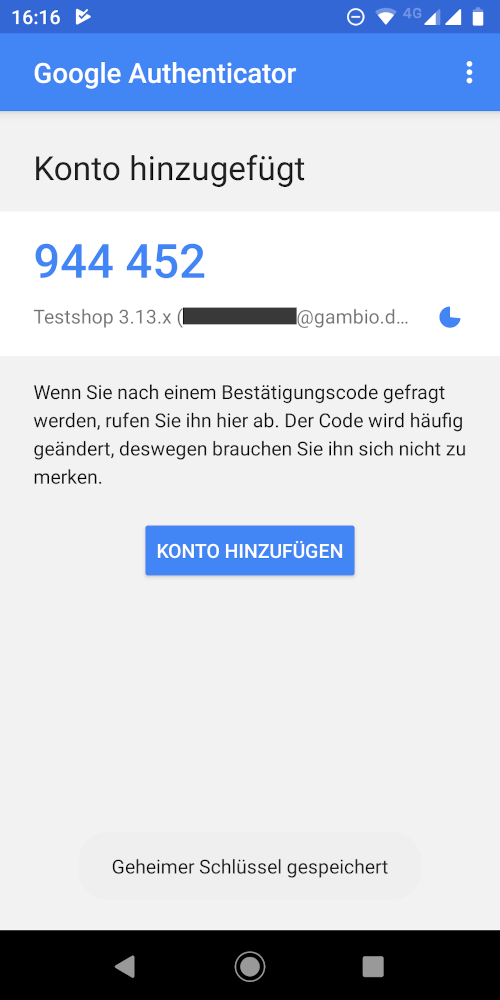
Display in the app
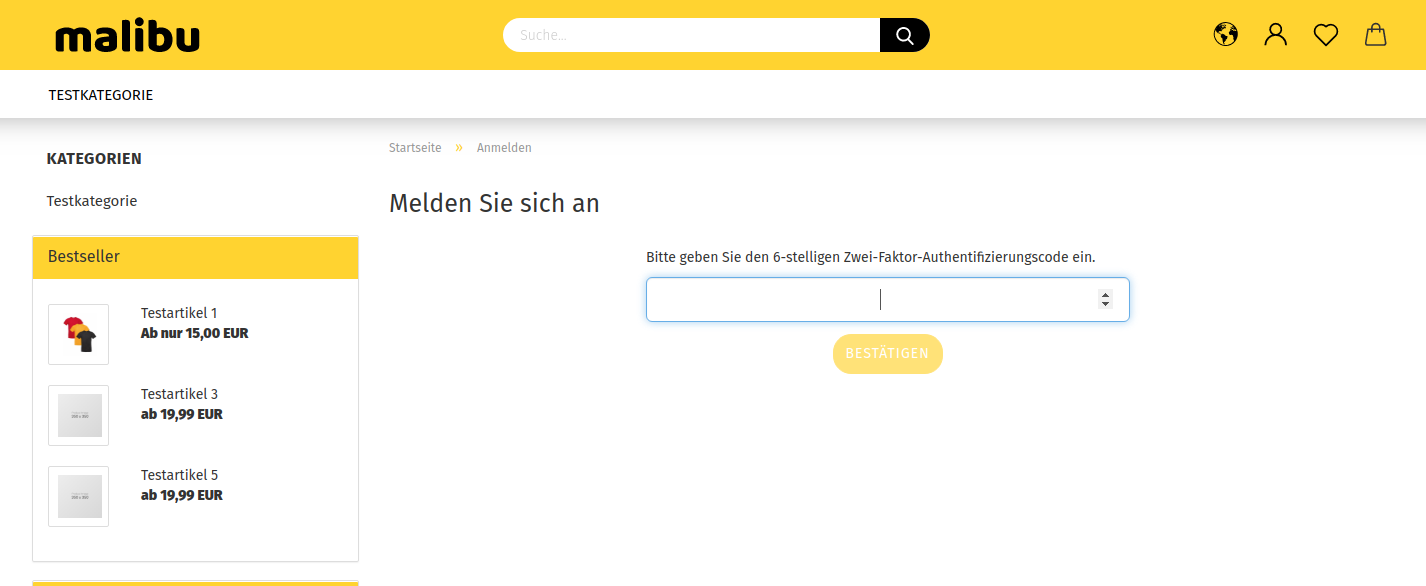
The app displays a 6-digit code.
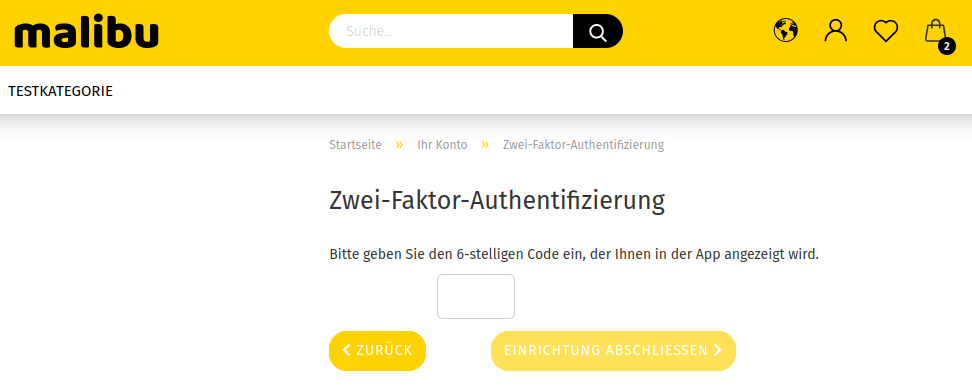
Entering the code
The code from the app must then be entered in the shop.
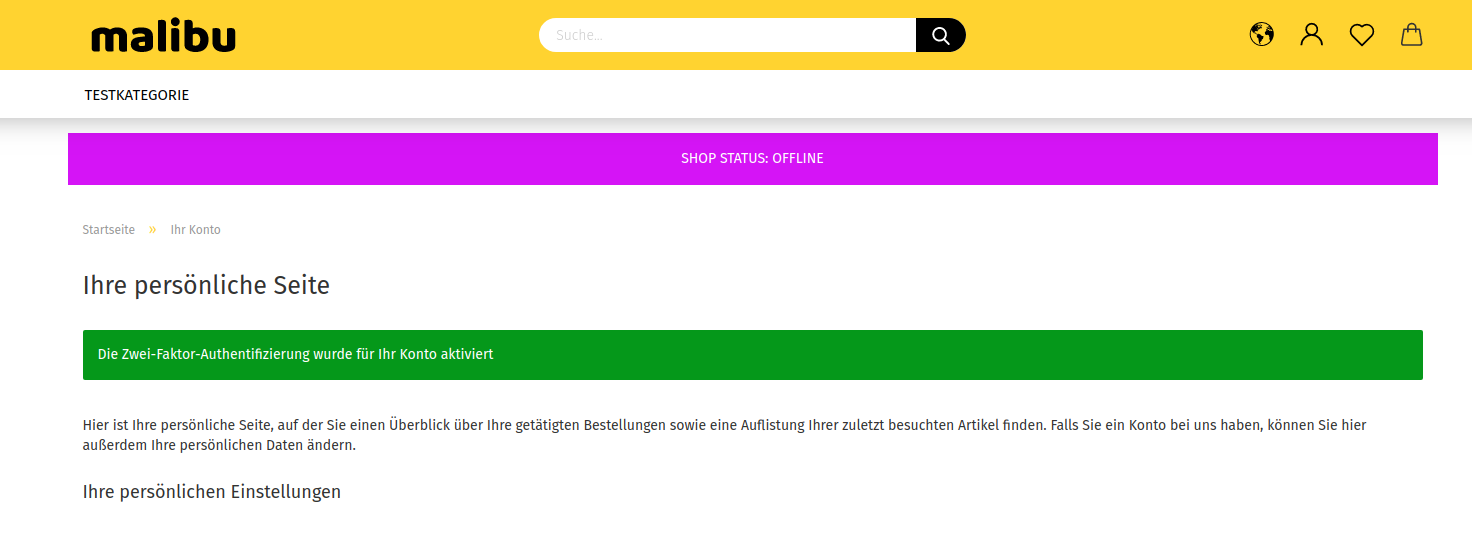
Confirmation
If the authentication was successful, a confirmation is displayed and the customer account is opened.
Code not correct
If you receive the feedback that the entered code is not correct, there are three known reasons for this.
- The code was actually typed in incorrectly
- The code was only typed in minutes after it was created and is therefore no longer valid
- The server time deviates from the actual time, which in effect corresponds to the previous case. Please contact your hosting provider here so that they can correct the server time.
Effect on the login
In future, the customer will additionally be asked for the 6-digit code, which they can read from their app, each time they log in.
Sunnycash
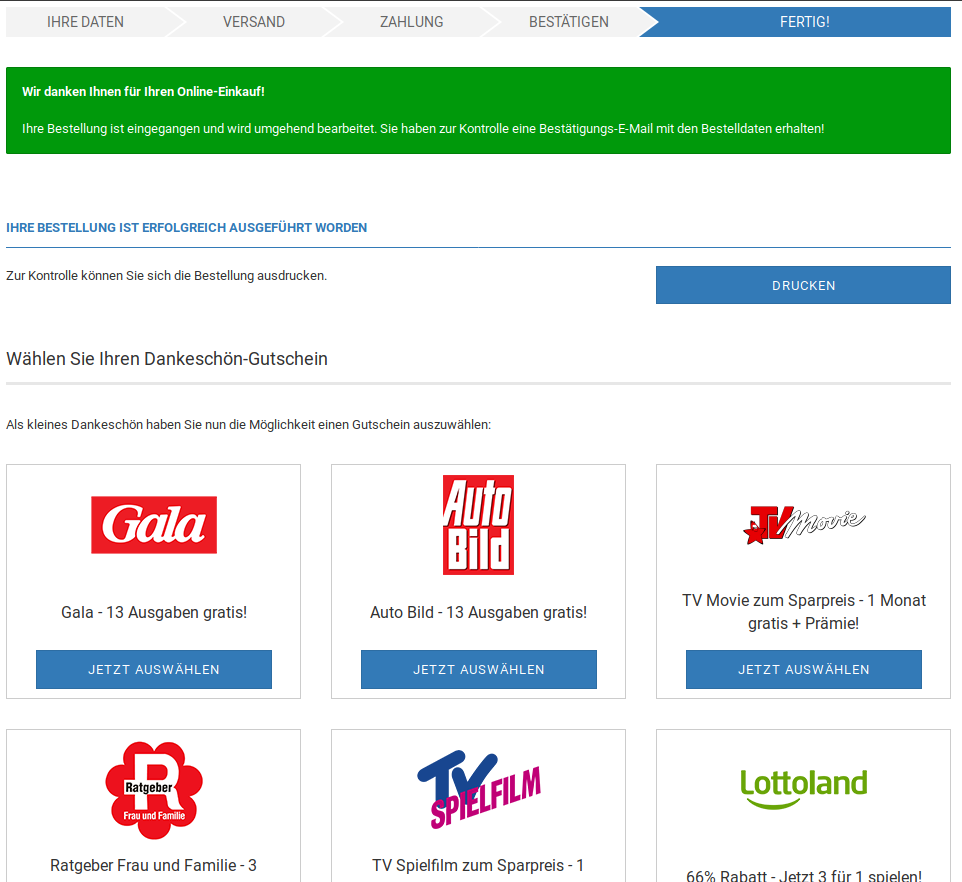
The SunnyCash module (formerly Ovisto) displays vouchers for the customer after the checkout process, which they can redeem as a thank-you for the order. Currently (2019-07-16) these are vouchers from other shops, but extensions are planned for the future so that the composition of the vouchers can be set more specifically.
Installation
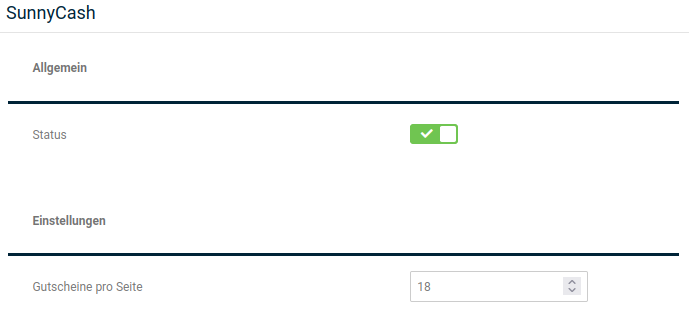
The module can be installed under Modules > Module Center. To do this, select the entry SunnyCash from the list and click on Install in the bottom right corner of the screen. After installation, the number of vouchers can be set by clicking on the Edit button. In addition, the module can be deactivated or activated here if required.
Cookie Consent Panel
Via the Cookie Consent Panel, your customers can inform themselves about the cookies used in the shop and agree to or reject their use.
Structure of the Cookie Consent Panel in the shop
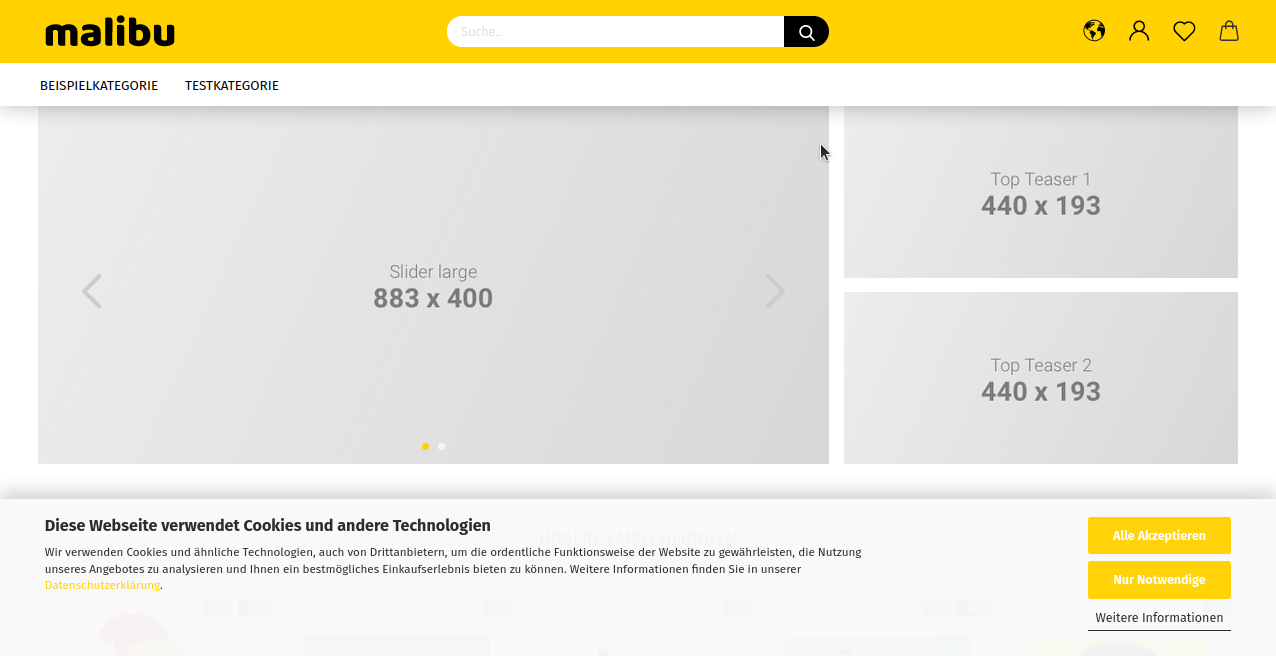
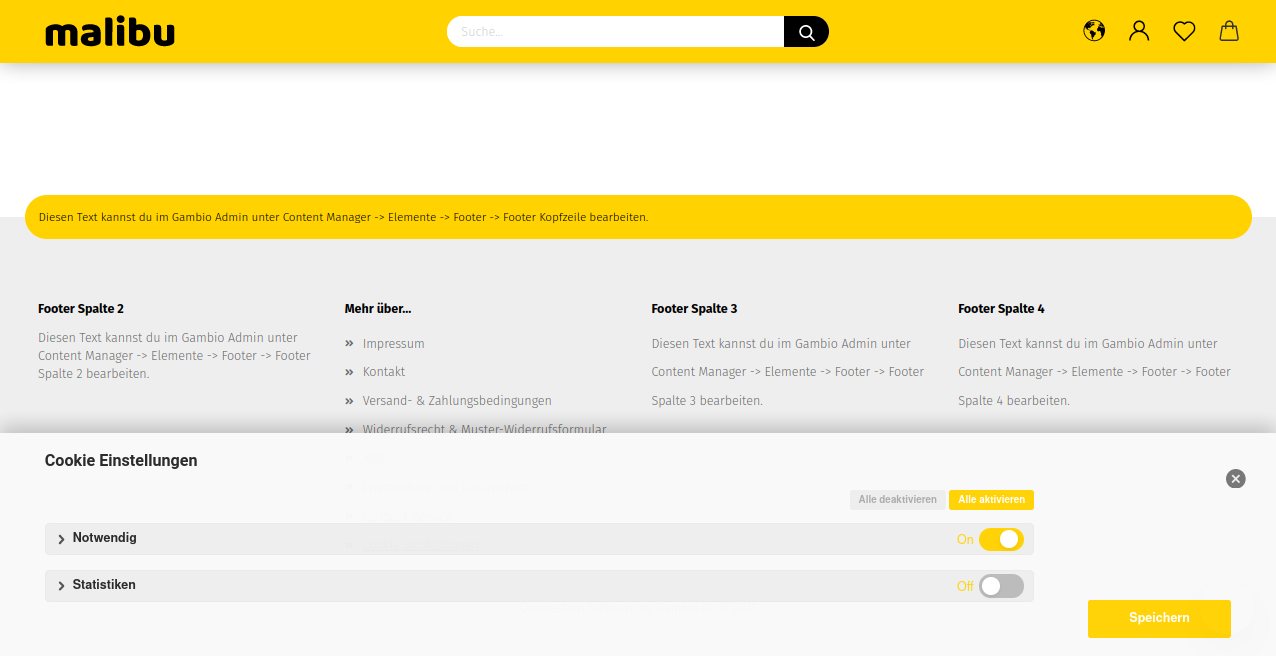
In the basic view, the Cookie Consent Panel informs the visitor in general about the use of cookies. They can immediately consent to all, agree only to the use of necessary cookies (if activated) or call up the cookie settings via the link below the corresponding button.
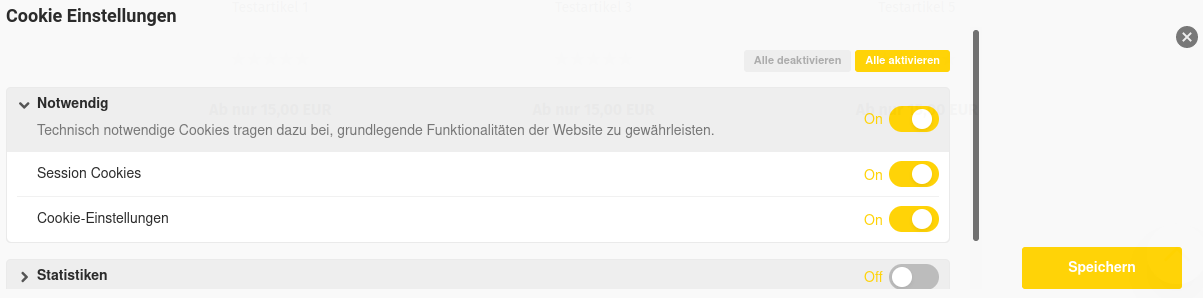
Via the cookie settings, the use of individual cookies can be selected and deselected. The cookies are listed here under their respective categories, which can be expanded and collapsed. Via the x, the visitor returns to the general consent panel.
Note
The cookies under Necessary, which include session cookies and cookie settings, cannot be switched off by default, as they are required for the operation of the shop or the Cookie Consent Panel. No consent from the visitor is required for technically absolutely necessary cookies.
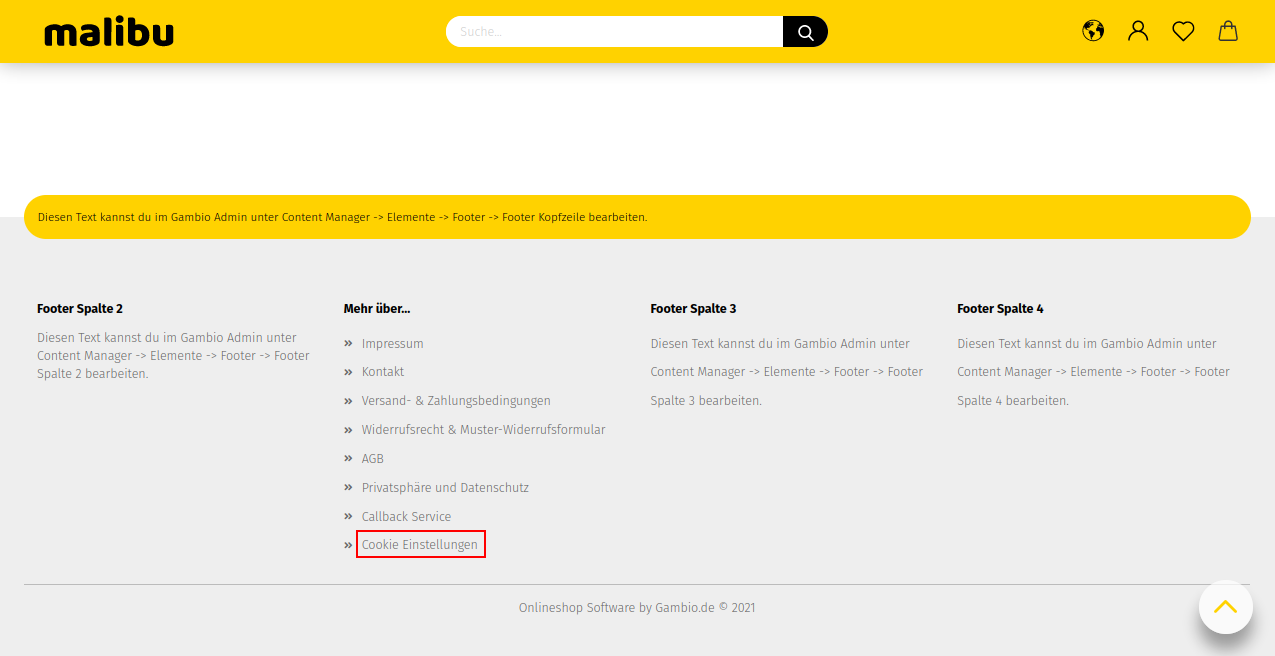
Via the link Cookie settings in the first column (More about) of the footer, the cookie settings can be accessed and adjusted at any time.
Note
The text of the link in the footer can be changed if required via Content > Customize texts.
Install / Uninstall
The module can be installed under Modules > Module Center. To do this, select the entry Cookie Consent and click on the Install button in the bottom right corner of the screen. The installation can be undone again via Uninstall.
Editing
The module can be set up by clicking on Edit. The tabs General, Categories and Purposes are available for this.
General
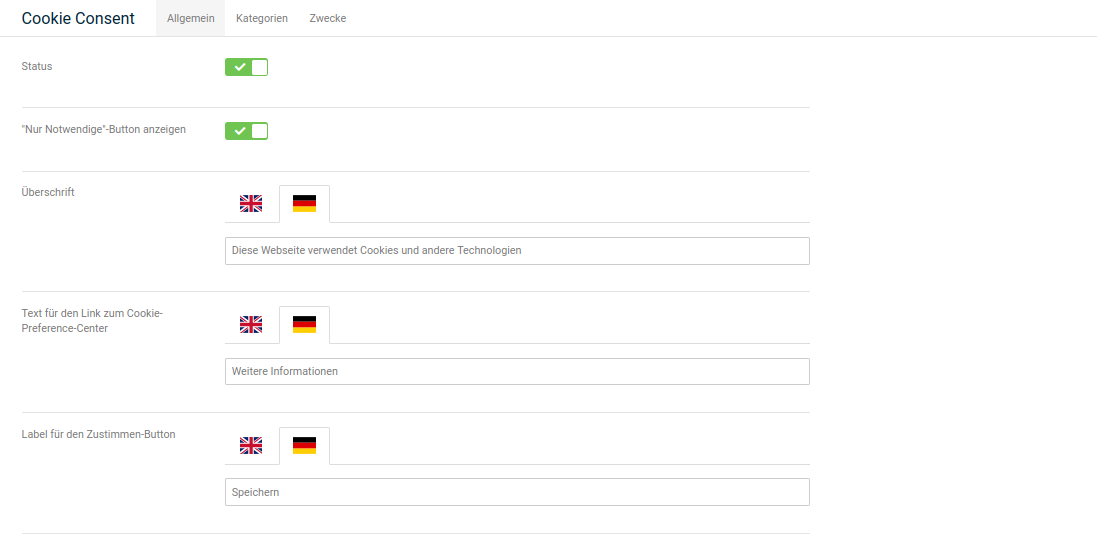
In the General area, the module can be switched on and off via the Status setting. In addition, the Only Essentials button, via which only necessary cookies can be accepted with one click, can be shown or hidden via Show "Only Essentials" button. To do this, set or remove the respective checkmark and confirm this by clicking on the Save button at the bottom of the page.
In addition, the texts used in the Cookie Consent Panel can be set for the languages activated in the backend (Settings / Languages, Countries, Taxes / Languages, after calling up the page). This includes the following settings:

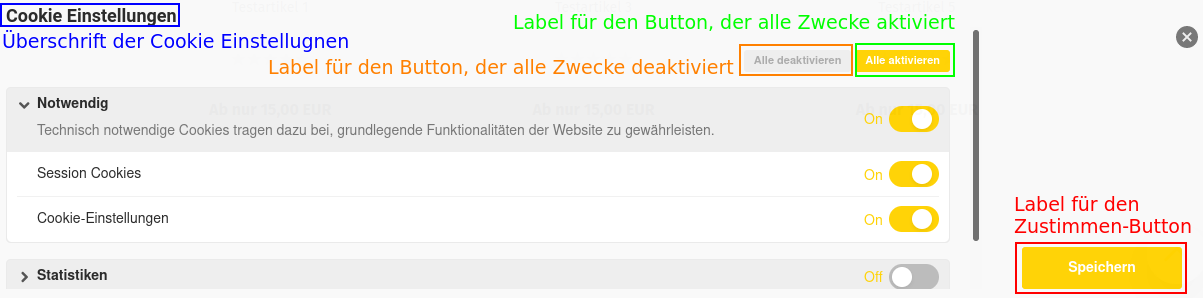
| Field name | preset with (de) | preset with (en) |
|---|---|---|
| Heading | Diese Webseite verwendet Cookies und andere Technologien | This website uses Cookies and other technologies. |
| Text for the link to the Cookie Preference Center | Weitere Informationen | More information |
| Label for the Agree button | Speichern | Save |
| Label for the Agree-to-all button | Alle Akzeptieren | Accept all |
| Label for the Only-Essentials button | Nur Notwendige | Only Essentials |
| Label for the button that activates all purposes | Alle aktivieren | Activate all |
| Label for the button that deactivates all purposes | Alle deaktivieren | Deactivate all |
| Heading of the Cookie Preference Center | Cookie Einstellungen | Cookie settings |
| Text | Wir verwenden Cookies und ähnliche Technologien, auch von Drittanbietern, um die ordentliche Funktionsweise der Website zu gewährleisten, die Nutzung unseres Angebotes zu analysieren und Ihnen ein bestmögliches Einkaufserlebnis bieten zu können. Weitere Informationen finden Sie in unserer <a href='shop_content.php?coID=2'>Datenschutzerklärung</a>. | We use Cookies and other technologies, also from third-party suppliers, to ensure the basic functionalities and analyze the usage of our website in order to provide you with the best shopping experience possible. You can find more information in our <a href='shop_content.php?coID=2'>Privacy Notice</a>. |
| Heading when all cookies are not allowed | Keine Cookies erlaubt. | No Cookies allowed. |
| Text when all cookies are not allowed | Bitte aktivieren Sie Cookies in den Einstellungen Ihres Browsers. | Please activate Cookies in the settings of your browser. |
Click on the respective flag to be able to adjust the content for the associated language.
Categories
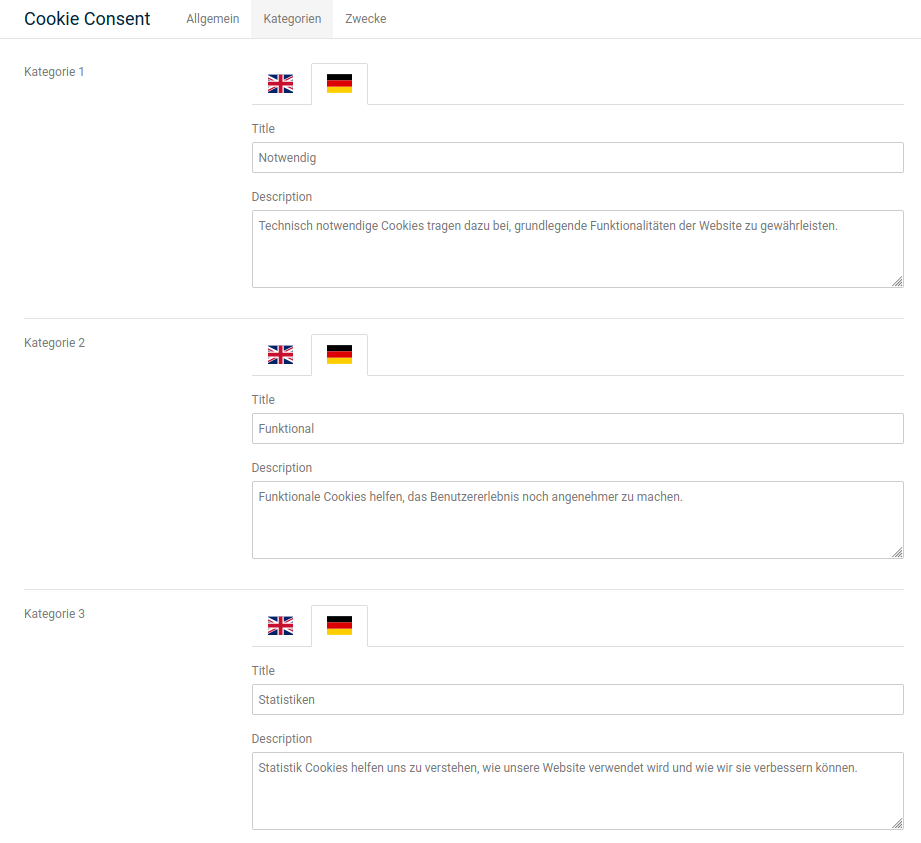
There are different types of cookies that fulfill different functions depending on their purpose. In the Cookie Consent Panel, the individual cookies are divided into different categories for a better overview, which correspond to their intended use. By default, these are
- Necessary
- Functional
- Statistics
- Marketing
- Other
In the Categories tab, the names and description texts of these categories can be adjusted per active language. To do this, click on the respective country flag, make the changes as required and confirm by clicking on Save at the bottom of the page.
Purposes
Via the Purposes tab, the individual cookies for the notice can be added and maintained.
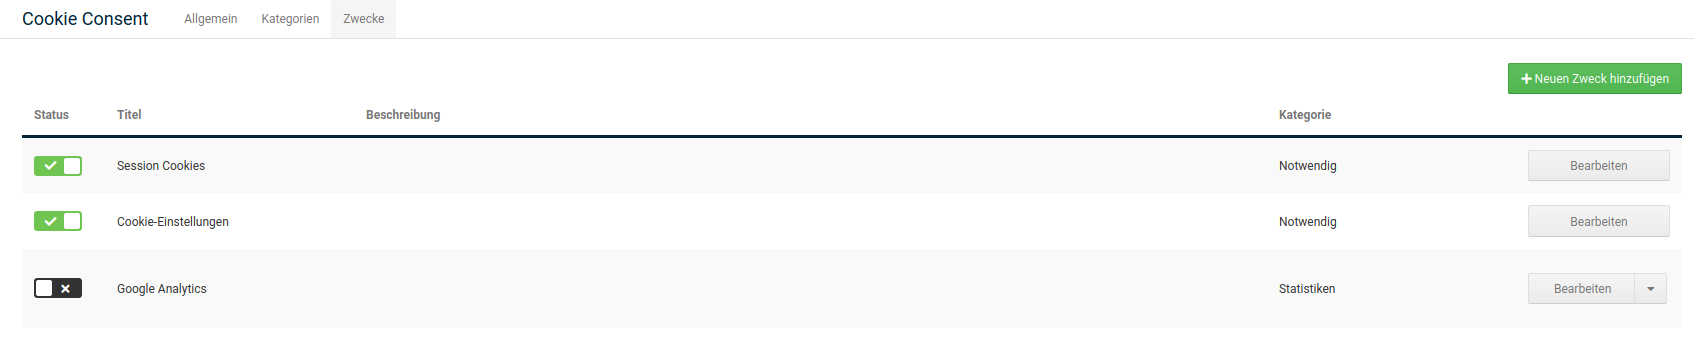
The checkmarks in the Status column each determine whether a defined cookie notice is included in the Cookie Consent Panel. Included cookies are displayed in the cookie settings and can be set after being accepted by the customer or visitor.
Add new purpose
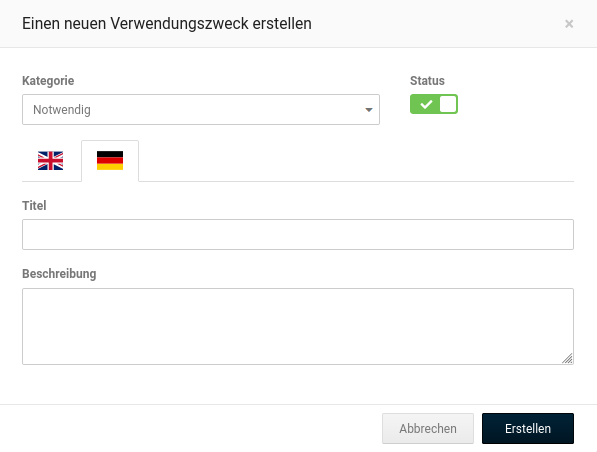
Via the green button Add new purpose, a new entry for a cookie can be created. In sequence, the Category (see Categories), the Status and, for the individual languages, Title (the name under which the cookie is displayed in the cookie settings) as well as Description can be defined.

Edit purpose
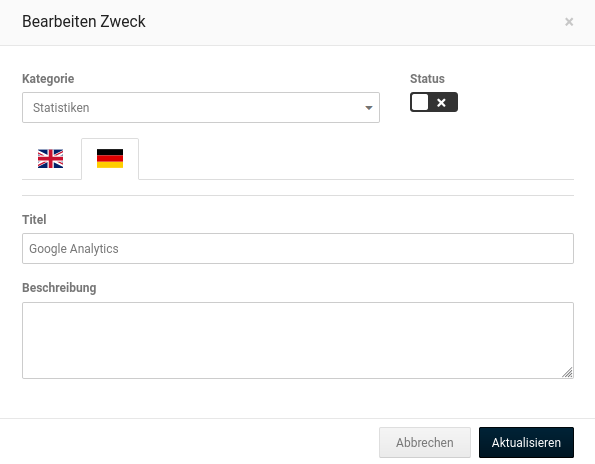
When editing a purpose, the same settings are available as when creating it.
Delete purpose

Purposes you have created yourself can be deleted again. To do this, open the dropdown and select the entry Delete.
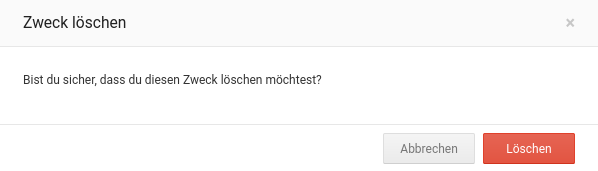
Confirm the security prompt by clicking on the red Delete button.
Show integration
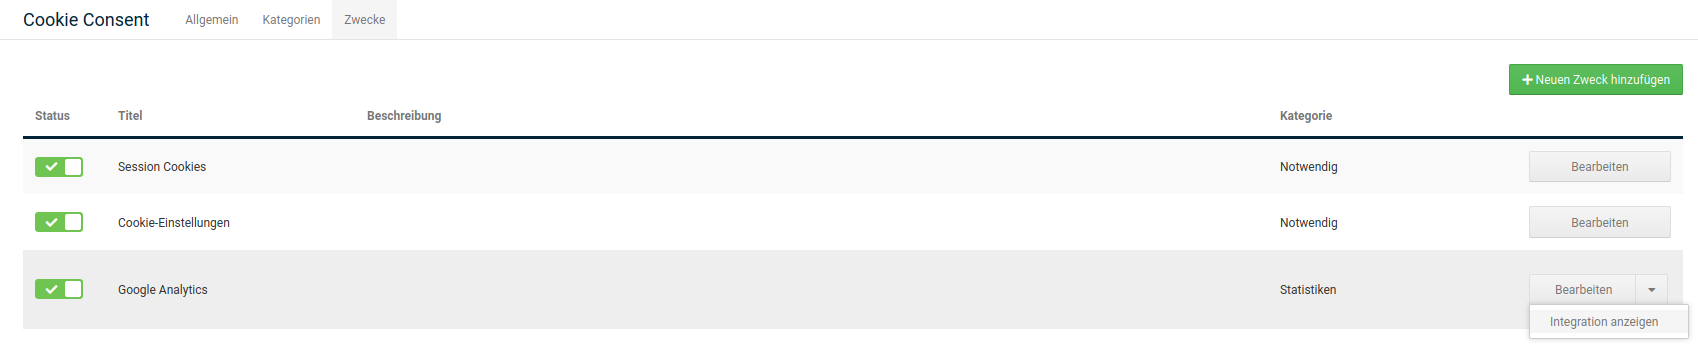
Via Show integration, a new window with two text fields is opened; these show how you have to encapsulate externally inserted content yourself so that the setting of the cookie panel takes effect accordingly.
Note
The input field Integration of directly loaded code is intended for inline JavaScript.
Attention
The displayed fields only serve to copy out the code. Tracking codes or similar that are inserted at this point have no function.
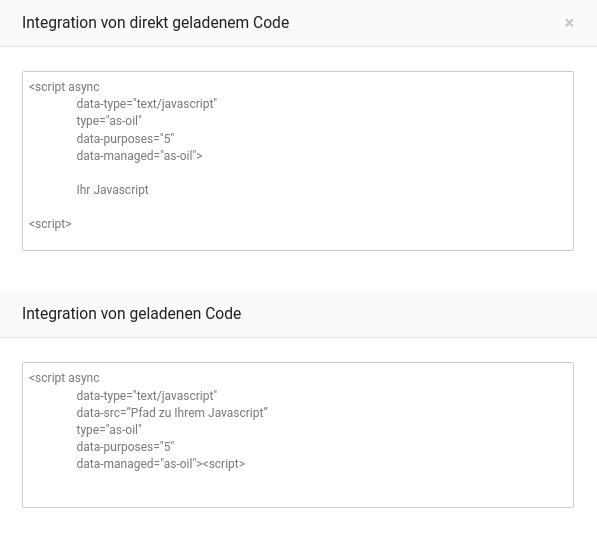
Embed integration code
Integration codes serve to embed other codes, such as tracking codes, so that their execution can be controlled via the Cookie Consent module. Codes that have been embedded in this way are only executed once approval has been granted for this via the Cookie Consent Panel.
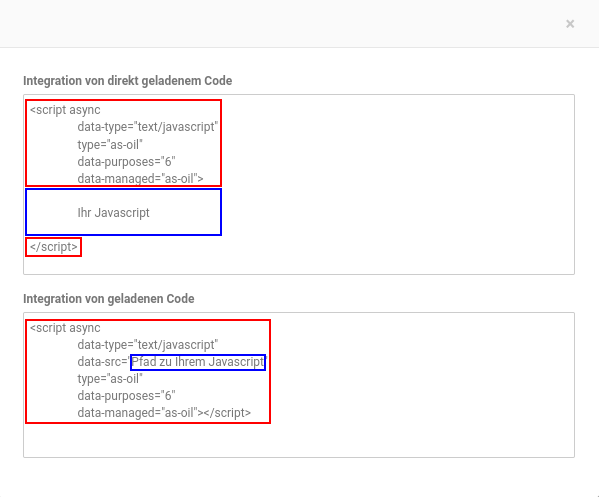
If you call up the Show integration function for a purpose via the dropdown button, a code like the following is displayed:
Attention
No changes should be made in this window. It only serves to copy the code.
The part marked red in the illustration is the actual embedding code. The part marked blue is a placeholder for the code that is to be embedded.
There are two different types of codes here:
- directly loaded code: Here, the associated code is inserted directly into the shop. It usually consists of an opening and closing script tag with corresponding content.
- loaded code: Here, the associated code is loaded from an external file. A file path or a file name, typically with the ending .js, is therefore specified.
Integration of directly loaded code
- select the content from the upper field
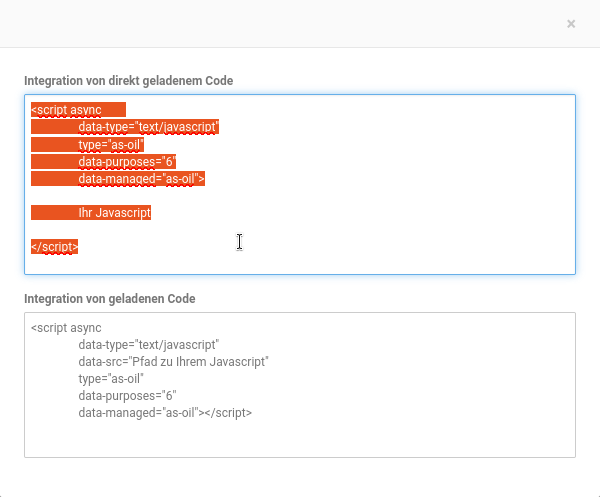
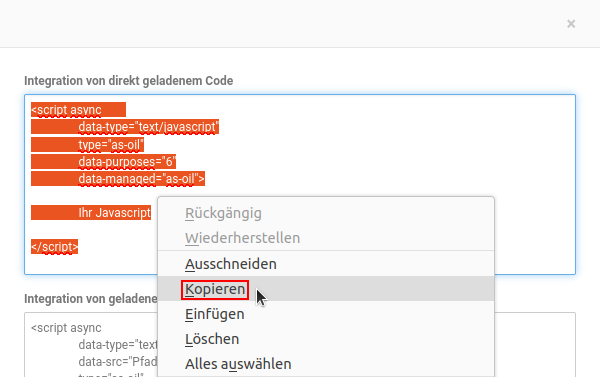
- copy the selected text via the key combination Ctrl + C or use the context menu by right-clicking in the text window
- insert the copied code where you want to place your tracking code (either via the key combination Ctrl + V or the context menu), e.g. on the Tracking codes page of the Gambio Admin (Settings / Search engine optimization / Tracking codes)
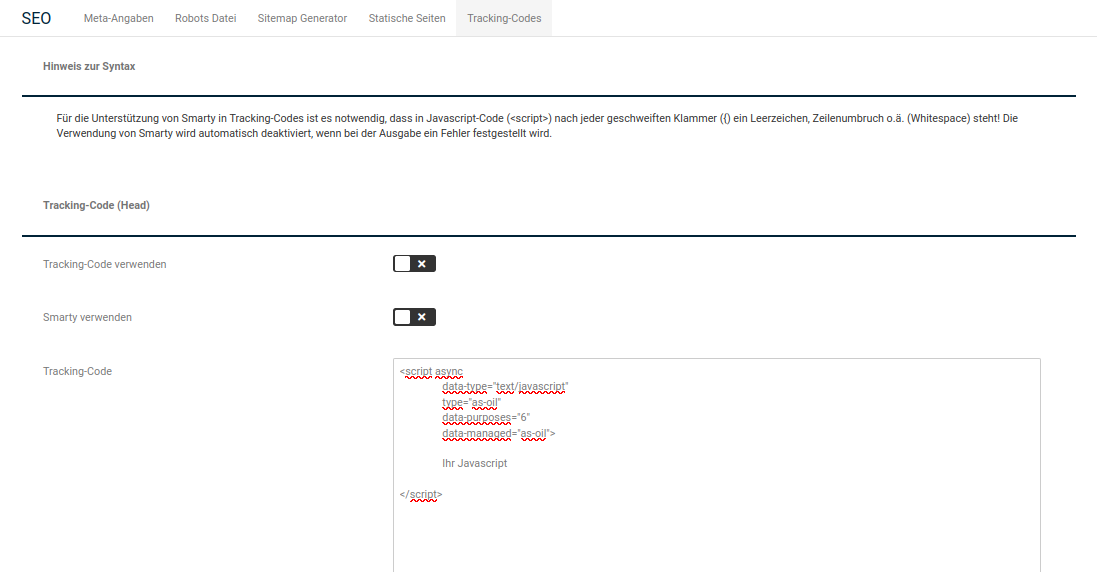
- insert the tracking code in place of the placeholder Your JavaScript
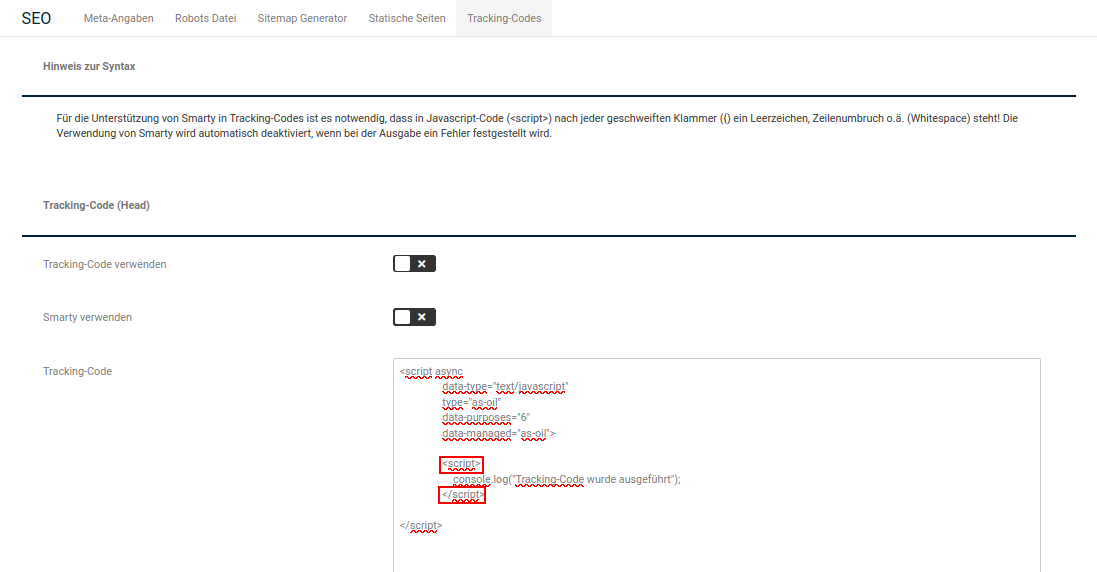
- remove the opening and closing script tag (marked red in the illustration)
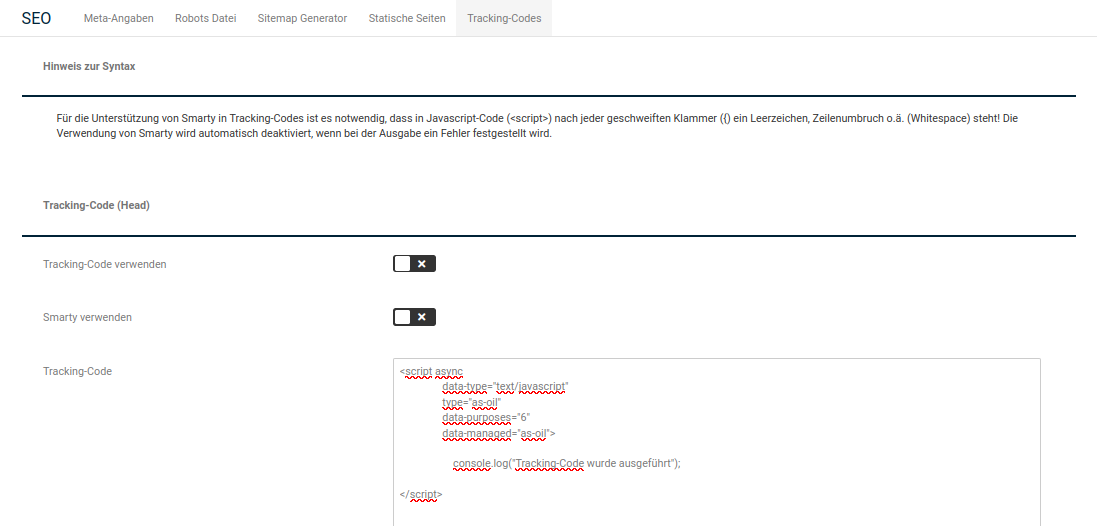
Note
The code shown in the illustration is not a real tracking code, but only serves as an example of a directly loaded script code.
Integration of loaded code
- select the content from the lower field
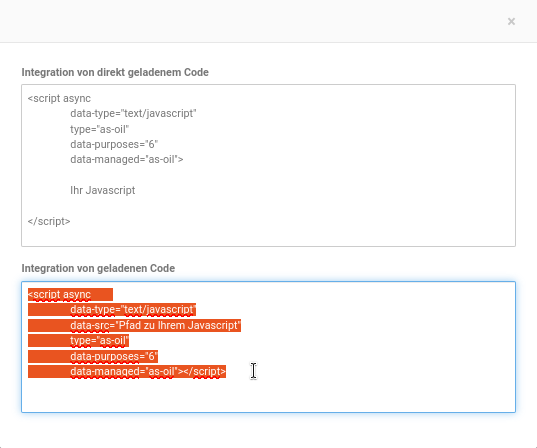
- copy the selected text via the key combination Ctrl + C or use the context menu by right-clicking in the text window
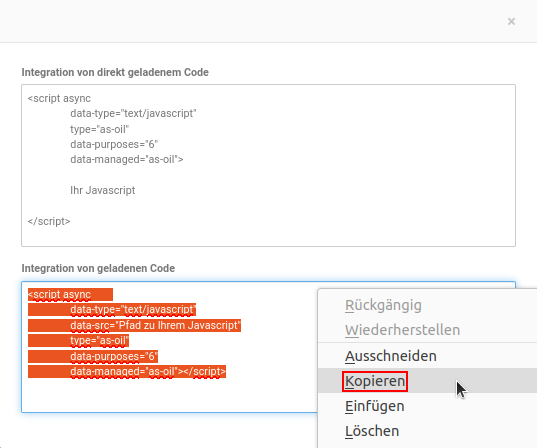
- insert the copied code where you want to place your tracking code (either via the key combination Ctrl + V or the context menu), e.g. on the Tracking codes page of the Gambio Admin (Settings / Search engine optimization / Tracking codes)
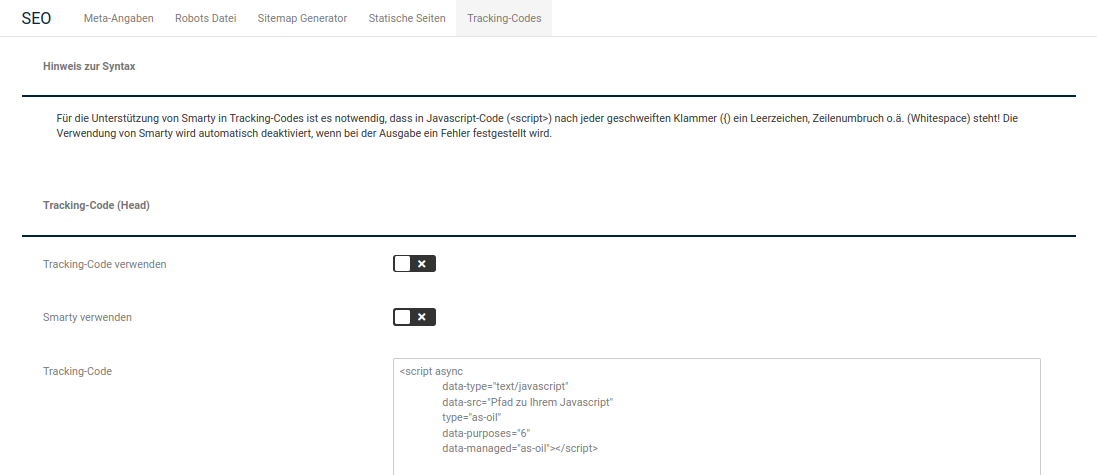
- insert the path to the JavaScript file in place of the placeholder Path to your JavaScript
Protected Shops
Installation
The Protected Shops module can be installed in the Gambio Admin under Modules > Module Center. To do this, select the entry Protected Shops and click on the Install button in the bottom right corner of the screen. This step can be undone if required by clicking on Uninstall.
Setup
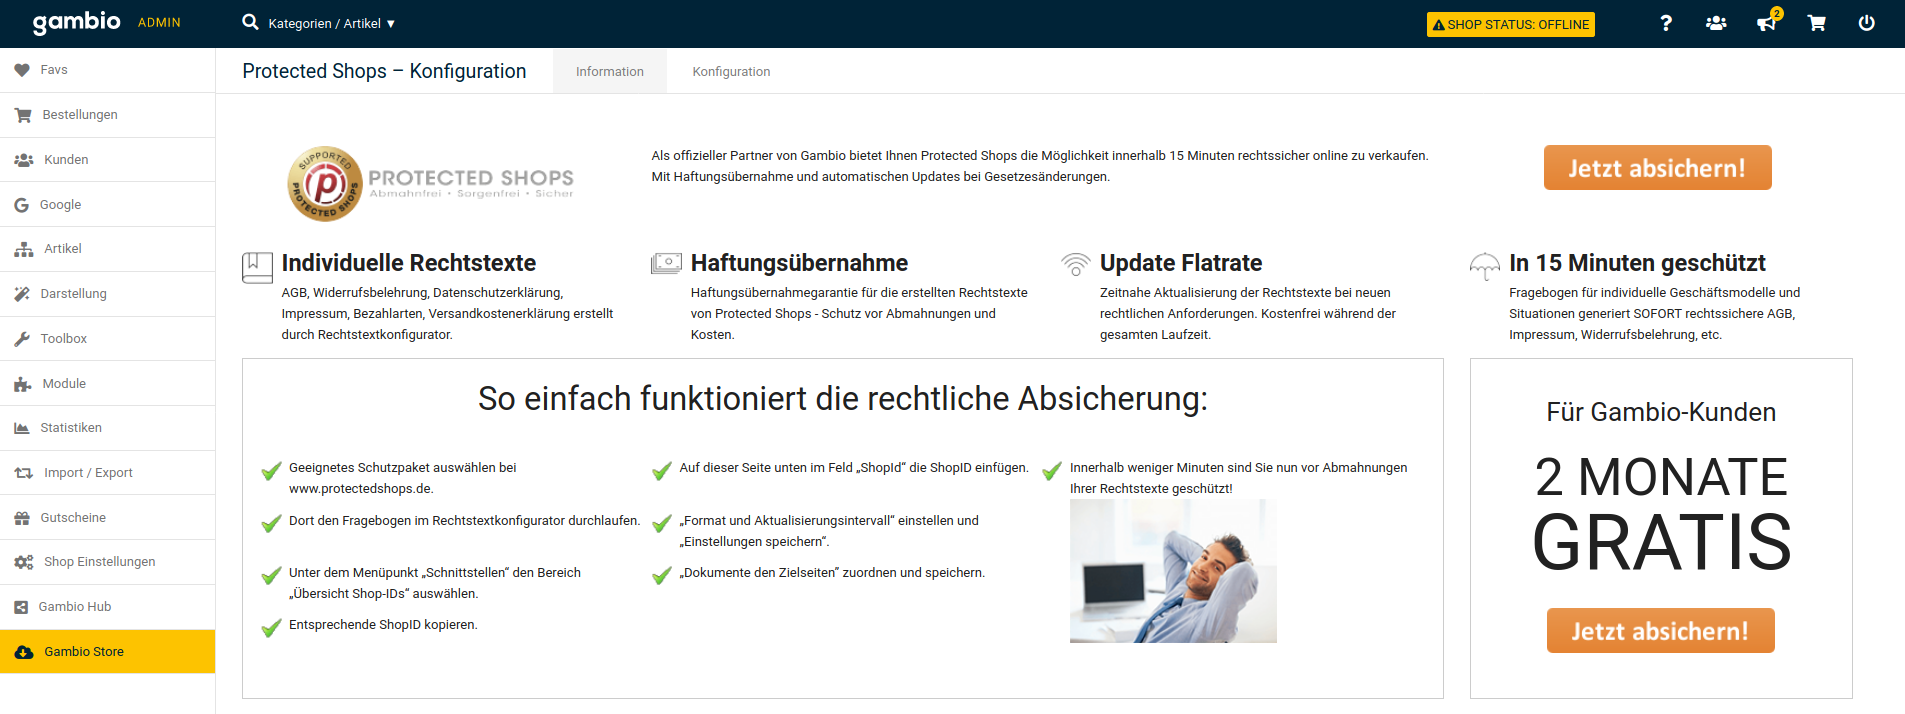
After the installation, you get to the configuration page by clicking on Edit. The first tab displays general information about Protected Shops, the note about an offer for Gambio customers as well as a short guide for registering with Protected Shops.
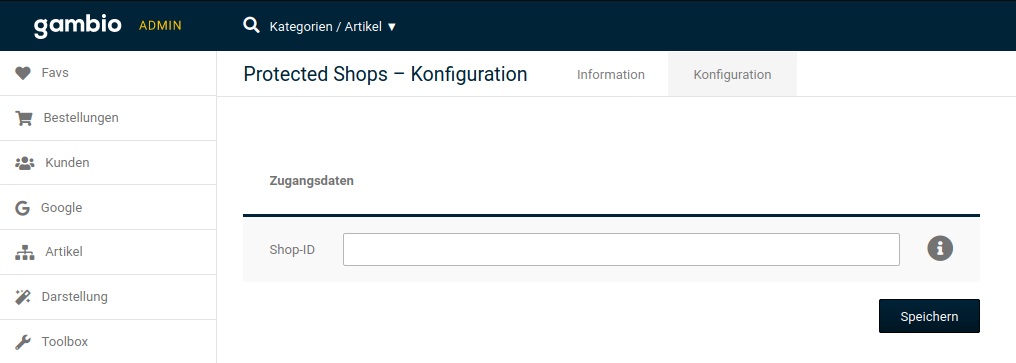
Configuration
The actual setup takes place in the Configuration tab and at this point only consists of an input field for the Shop ID, which you receive from Protected Shops. After entering the Shop ID, further fields are displayed.
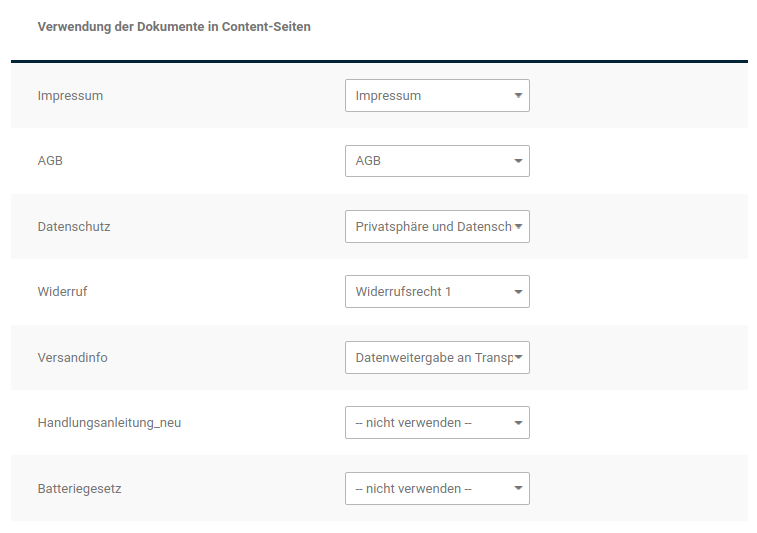
Use of the documents in content pages
Here you select which legal text is to be output in which content. We recommend selecting the pre-created contents here, if available.
Attention
Important for the right of withdrawal: here you must not select the content Right of withdrawal & sample withdrawal form (ID 3889895), but only one of the withdrawal contents Withdrawal 1-4 (IDs 3889896 to 3889899) included above it.
For the instructions for action and the battery law, there are no pre-created contents in the shop; you must create these yourself beforehand under Content > Content Manager and then select them in the Protected Shops module.
Use in invoice/delivery note (PDF)
If the legal texts are to be attached to the invoice and delivery note, this can be activated here.
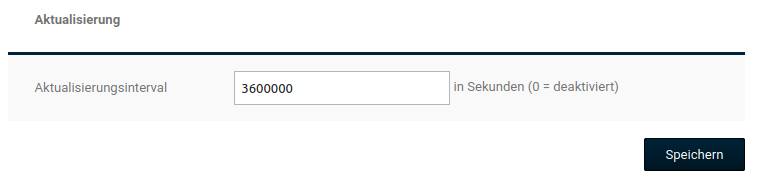
Update
Defines the period in which the texts are to be updated automatically. The period is specified here in seconds; a period that is too short will have a negative effect on the loading times in the shop. One update per day is completely sufficient, so this would be 86400 seconds.
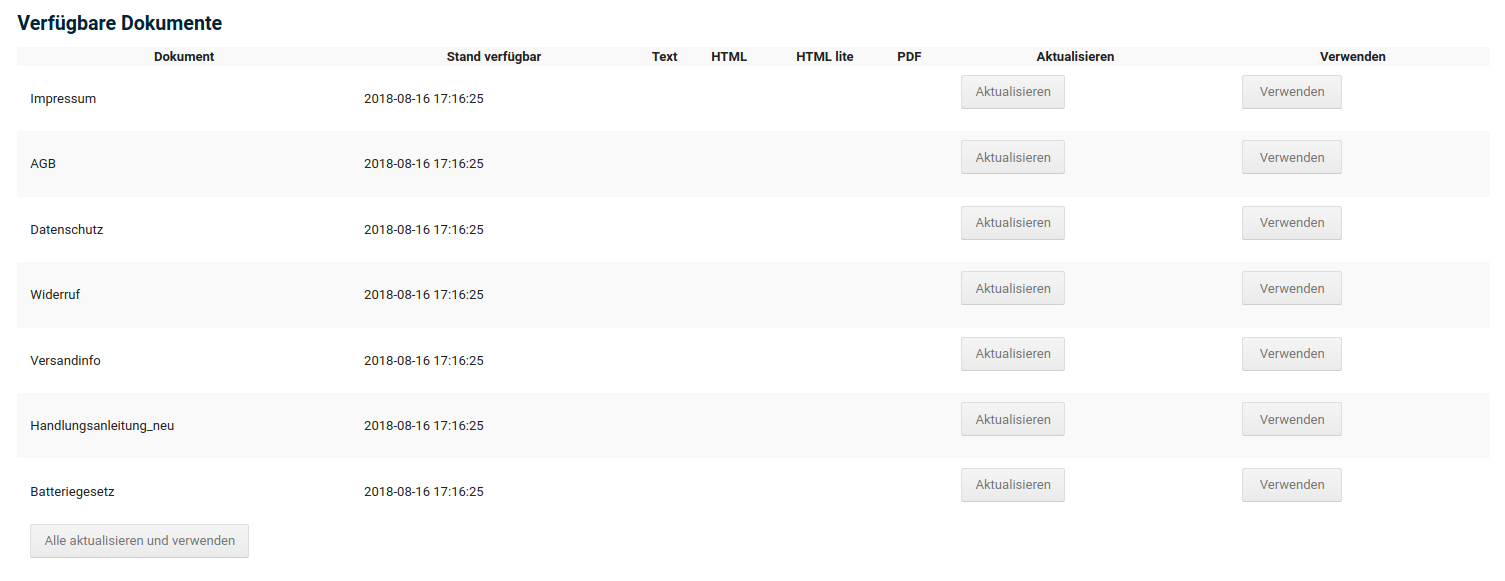
Available documents
Here the documents can be updated manually and marked for use.
Note
During the initial setup, it may be necessary under certain circumstances to switch the Page type of the respective contents manually to Script file and to select the respective file from Protected Shops via the file manager.
Hermes HSI
General
Hermes (HSI) is the module for the new Hermes interface and replaces the previous module Hermes shipping, as the interface required for this is expected to be shut down by Hermes at the end of March 2020. A key difference is that this module no longer supports the creation of shipping labels without a contract with Hermes (formerly PriPS - PrivatPaketService, also usable for private customers).
Hermes (HSI) is included in the scope of the shop software and is not available as a separate module.
Installation
The module can be installed in the Gambio Admin under Modules > Module Center. To do this, select the entry Hermes (HSI) and click on the Install button in the bottom right corner of the screen. This step can be undone again via the Uninstall button.
Configuration
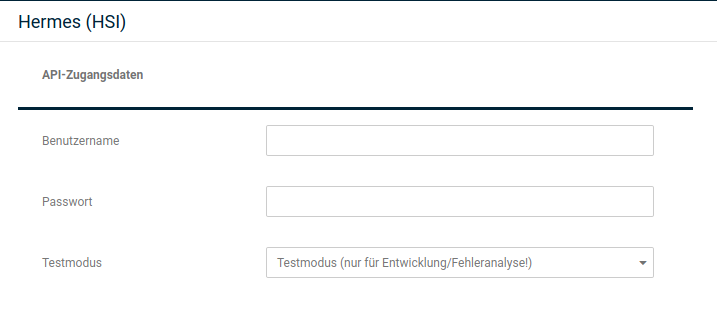
API access data
In the first step, the configuration only allows the entry of the API data. You receive this data from your contractual partner Hermes. In addition, you can choose between live and test operation.
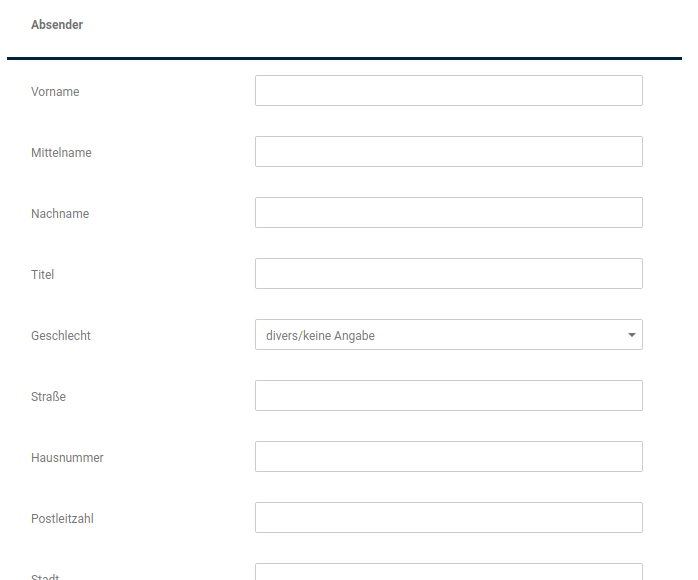
Sender
So that the labels can be created with the necessary information, you must store your address data here.
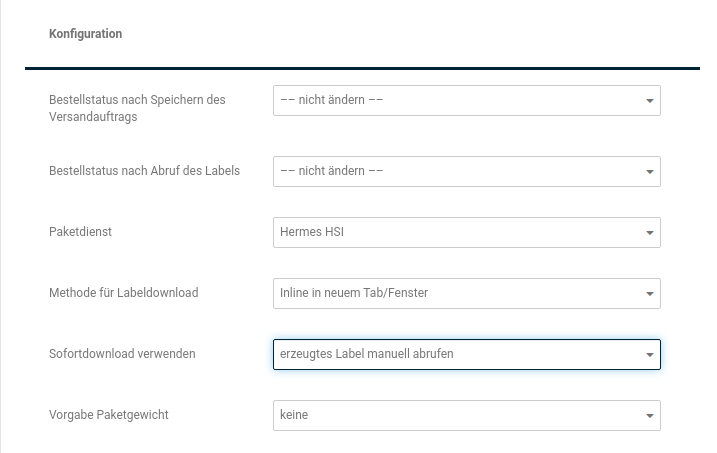
Configuration
| Field name | Description |
|---|---|
| Order status after saving the shipping order | If desired, a different order status can be set directly after creating the label. Which one this is can be selected here. |
| Order status after retrieving the label | The order status can also be changed after retrieving the label; a selection is possible here via the dropdown menu. |
| Parcel service | Here the desired parcel service can be selected, which can be configured under Settings / Delivery / Parcel services, after calling up the page, and in which you can set up which tracking link is used for shipment tracking. Hermes should be selected here as the standard. The parcel service_ MyHermes_ only concerned shipments that were created with PriPS (PrivatPaketService), which is currently still possible via the Hermes website. |
| Method for label download | Here you can choose whether the label is to be opened directly in the browser window when retrieved or downloaded first. As there have been problems opening and printing PDF files in the browser in some browser versions in the past, this option can help to avoid precisely these problems. |
| Use instant download | Here you can choose whether the created label is retrieved immediately in the shop or whether this is to be done manually later, e.g. via the interface in the Hermes business customer account. |
| Default parcel weight | The shipment weight can be calculated, provided that a product weight has been stored in the products. At this point, you can choose whether the calculation only includes the product weight or additionally the packaging weight. |
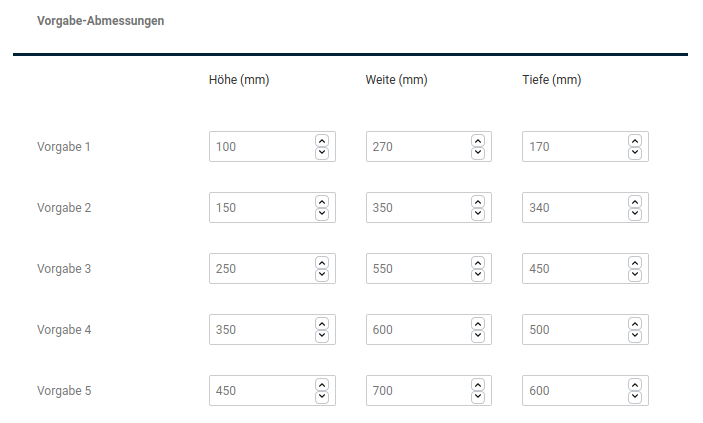
Default dimensions
If you frequently use certain box sizes, you can enter the dimensions for them here. This means that when creating a label, it then only needs to be selected instead of having to enter the dimensions manually.
Note
The pre-filled values are for illustration purposes only.
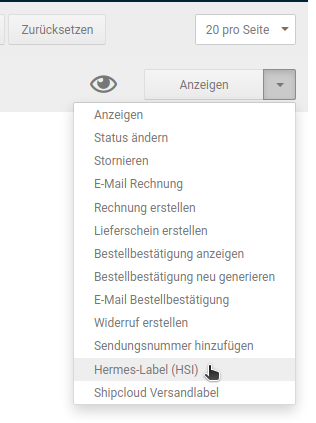
Use
In the order overview, Hermes (HSI) can be selected via the dropdown button to the right of the order. This option is also available from the order detail page.
A modal dialog window now appears, in which various details about the shipment can be entered.
Recipient
The address data of the recipient is taken from the delivery address of the order; changes are only necessary here if an address addition is still to be added or a correction is to be made.
Attention
For deliveries to some countries (e.g. Denmark or Sweden), the specification of a contact option such as telephone number or e-mail address is necessary. This can be stored in special fields below the address data.
Parcel
Here the size of the parcel is specified. You can either choose from the Hermes sizes S to XXL or alternatively choose a calculation from the parcel sizes previously specified in the module.
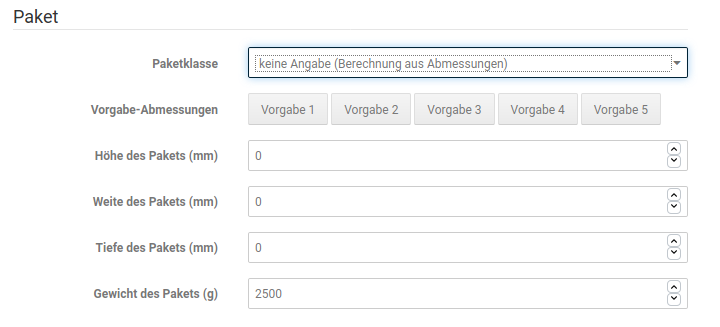
Options
Here the cash-on-delivery amount can be set manually. For orders via cash on delivery, this is not necessary; here the total order value including the cash-on-delivery fee is stored, as it is also recorded in the order.

Sender
The sender details are automatically filled with the values that were previously entered in the module itself. Changes are, however, possible.
Retrieve label
Manual retrieval
The success of the label creation is made visible by the message Hermes shipping order created. Below this you will then find details about the label and a button for retrieval. The status here is Order created - the label has therefore been created but not yet retrieved, and no shipment number is displayed yet.

After retrieval, the display changes, the status changes to Label created and a shipment number is added.

Immediate retrieval
The label opens directly in the same tab; if you call up the page with the label creation, the success message looks like this:
Label
The retrieved label shows the recipient, sender and the returns address. The shipping weight and the date of label creation are also displayed.
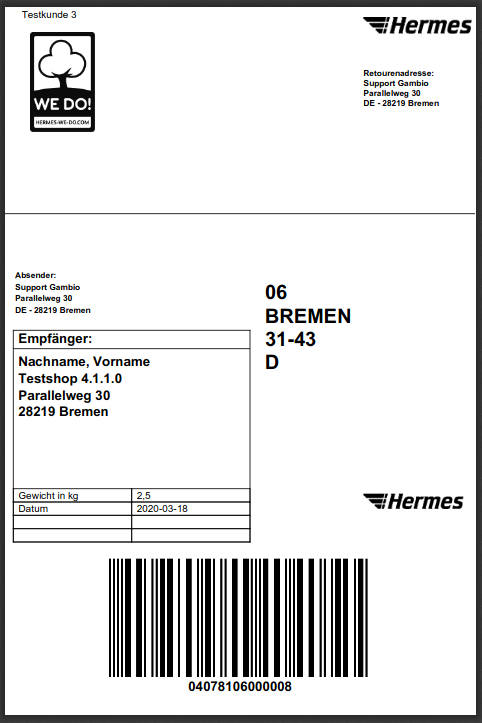
Display in order
With the retrieval of the label, the shipment number is automatically stored in the order details and can now be sent along to the customer as part of a manual status notification.
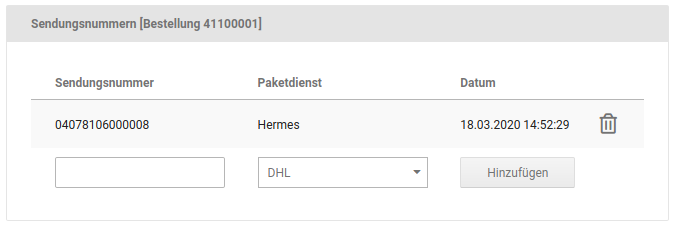
releva.nz
General
Releva.nz is a service via which automatic retargeting can be carried out. Numerous pieces of information can be found on the releva.nz website (https://releva.nz/gambio-plugin/); basics such as dynamic retargeting (https://releva.nz/dynamisches-retargeting/) and the function of ad networks (https://releva.nz/ad-netzwerke/) are also explained here.
Availability
The releva.nz module is included by default in all cloud shops. For users of self-hosted shops, the module is available for download at https://releva.nz/gambio-plugin/.
Installation
File upload in self-hosted shops
Before uploading the module, the downloaded package must be unpacked.
Note for Windows users
Due to the path length limitation under Windows, we recommend unpacking the package in a location that is as high up in the directory tree as possible. This can be, for example, a folder such as C:\Gambio.
Switch to the unpacked folder. Here you should find another folder Releva. This folder must be uploaded to the GXModules directory of your shop installation. To do this, you can use a so-called FTP client, such as the free program FileZilla.
Note
If you are not sure in which folder on your server your shop directory is located, you can call up the Gambio Admin. Switch here to the menu item Toolbox > Database backup. On the right side you will find the entry Backup directory. Mentally remove the two subfolders /admin/backups/ here and you have the path to the shop directory on the server.
Installation in the Module Center in cloud and self-hosted shops
The releva.nz module can now be found under Modules > Module Center and can be installed here with a few mouse clicks. To do this, select the entry from the list and click on the Install button in the bottom right corner of the screen. This step can be undone again by clicking on Uninstall.
Setup
Directly after the installation, the configuration page of the module only consists of the input field for the API key, which you receive from releva.nz after you have opened an account there.

After successfully entering the API key, two further fields are displayed, the Customer ID and the Export URL.
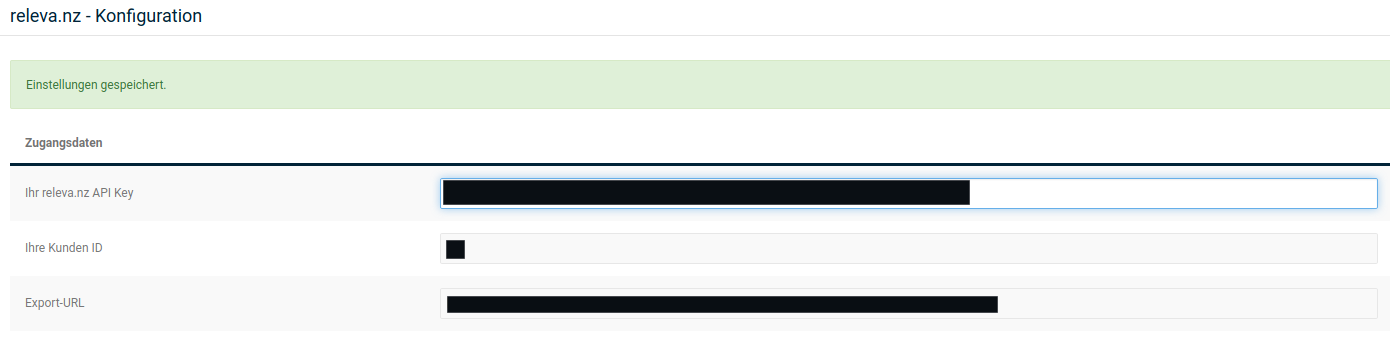
New entries are also displayed in the left menu of the Gambio Admin.
Statistics
There are three new areas in the statistics:
Statistics
At the very top there is a clear summary of the impressions, sales, costs and revenues. Below this, daily statistics can be selected and a rough monthly statistic can be viewed.
Tariff information
Here details about the selected tariff are displayed; in addition, you can also cancel directly via this item if you no longer wish to use this service.
Advertising settings
Here the daily budget can be set. So - although the module carries out the retargeting completely automatically - you have the option of largely setting the costs yourself.
CleverReach
Availability
- Currently (24.09.2020) the module for CleverReach is not included in self-hosted shops and is only available as a separate module for shop versions up to 4.3.x.
- In cloud shops, the CleverReach module is included by default.
- A prerequisite for use is the use of the Honeygrid theme; this also includes the current Malibu theme, which is based on Honeygrid.
Installation
Installation in self-hosted shops
Note
The following steps are only necessary in self-hosted shops when using the manually installed module. In cloud shops, the module can be installed directly under Modules > Module Center.
- First, the module files must be loaded onto the FTP server into the shop directory.
- Now, in the Gambio Admin under Toolbox > Clear cache, the text, module and page output caches are cleared. The order must be observed here. It may also be necessary to clear the caches several times.
The module can now be installed in the Gambio Admin under Modules > Module Center. To do this, select the module entry and click on Install.
Registration with CleverReach
Anyone who wants to use CleverReach can create an account at https://www.cleverreach.com/de/ via the button Try now for free.
| Illustration | Explanation |
|---|---|
 |
For the registration it is sufficient to enter the e-mail address and to confirm the account creation. |
 |
Afterwards you receive an e-mail via which the account creation must be confirmed once more. A new browser tab opens with the CleverReach user account. At the same time, an e-mail with the user data is sent. |
Configuration
Grant access
If the module has been installed under Modules > Module Center, you can call up the module configuration by clicking on Edit.
| Illustration | Explanation |
|---|---|
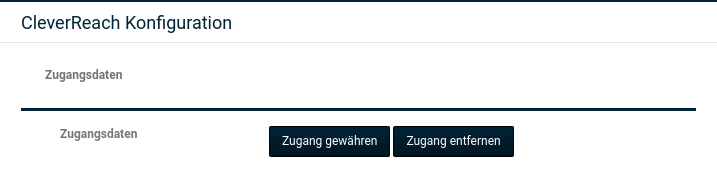 |
By clicking on Grant access, you are forwarded to CleverReach. |
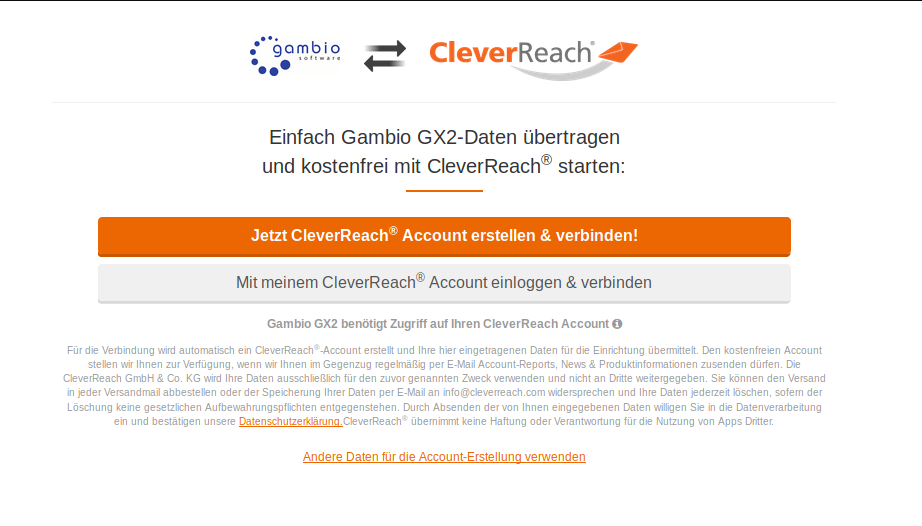 |
Here you can now create a new account or log in to an existing account. |
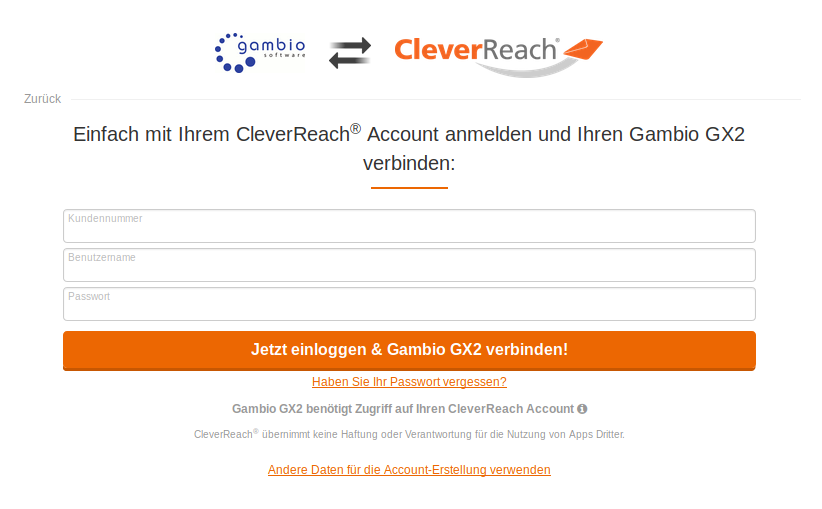 |
Here you now have to enter the login data so that the module gets access to the CleverReach account. You received the data by e-mail during registration. |
Configuration page
| Illustration | Explanation |
|---|---|
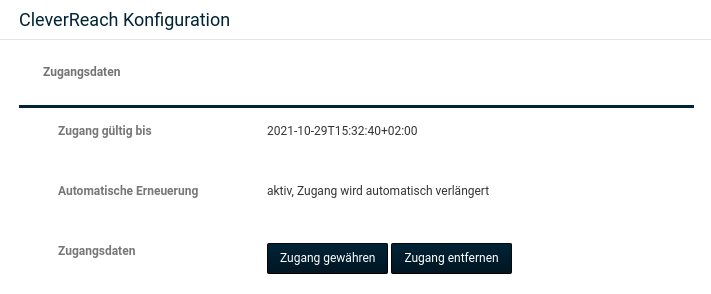 |
The access is not valid indefinitely, but is initially limited to a few years. By clicking on Grant access, the login data can be updated; by clicking on Remove access, the connection to the CleverReach account is removed. |
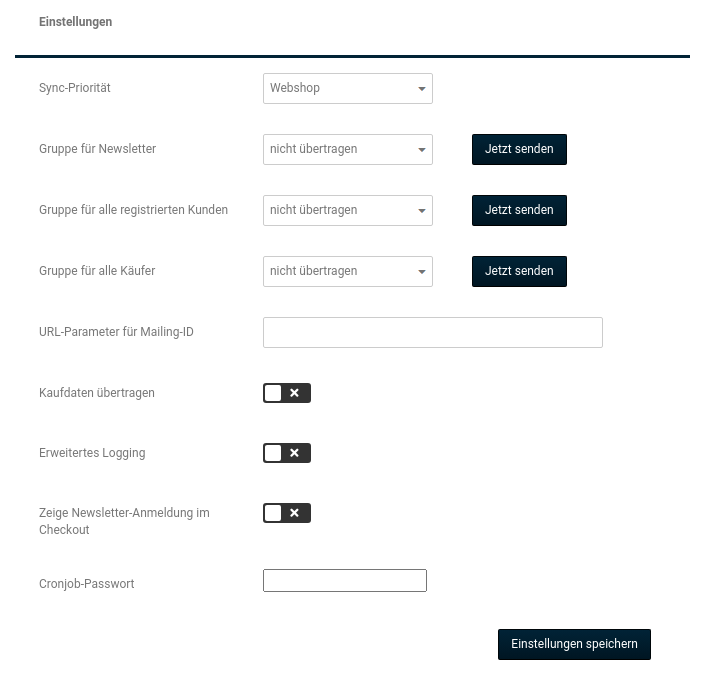 |
Here various settings regarding recipients, automation and data to be transferred can be made. |
Sync priority
Determines which data is to have priority. If a customer has been activated as a recipient at CleverReach, but not in the shop, you can determine here which setting is to have the higher priority. You can therefore choose between Webshop and CleverReach.
Groups
Here you can assign which type of customers is to be assigned to which group at CleverReach. To do this, groups must first be created at CleverReach. For the purpose of explanation, we have created three groups at CleverReach, which for the sake of simplicity correspond to the menu items on the configuration page.
Attention
The 3 possible sources in the shop (customer data, orders, newsletter registrations) must each be transferred to different groups at CleverReach!
If the groups cannot be selected here, the address data must first be completed at CleverReach. To do this, the CleverReach account must be called up and the address data entered in the Account area.
| Group | Explanation |
|---|---|
| Group for newsletter | This refers to customers who have registered for newsletter receipt in the shop. |
| Group for all registered customers | This refers to all customers with a customer account. |
| Group for all buyers | This group will contain all customers who have placed an order at some point, regardless of whether a customer account still exists for the customer or not. |
URL parameter for mailing ID
Here a name for a URL parameter can be defined. This is interesting if a mailing contains links to special-offer products. If you specify, for example, crmailing as the name, the URL would look like this:
http://www.dein-shop.de/tolles-produkt.html?crmailing=dez2016
The URL therefore begins with the link to the product, followed by the URL parameter crmailing. The value dez2016 represents, in our example, a value that is automatically created and assigned by CleverReach for each mailing. This then makes it possible to precisely evaluate responses to the individual mailings.
Transfer purchase data
If this setting is activated, shopping cart contents are transferred to CleverReach after purchase completion. This is interesting for success tracking of advertising mailings, which then also use the tracking parameter mentioned above for links to the shop.
Extended logging
The extended logging enables a detailed analysis if problems occur when using the module. By default, this item is off.
Show newsletter registration in the checkout
Via this, a checkbox can be displayed on the summary page in the order process, via which the customer can register for the newsletter in the shop.
CronJob password
The groups can be synchronized automatically via a CronJob. If a CronJob password is stored and saved, the CronJob URL appears below the settings, which can be entered at the provider. The CronJob then carries out the synchronization of the customer groups in the interval that was defined when creating the CronJob at the provider. You can set the CronJob password yourself.
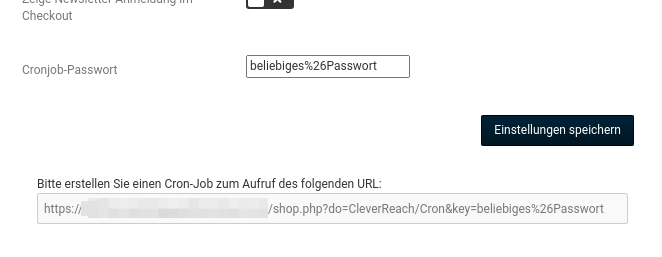
Use
The functions of the module are limited to the assignment of the groups and to the other settings mentioned above. The creation of mailings and their dispatch takes place via the customer account at CleverReach.
Under http://support.cleverreach.de/hc/de, the CleverReach help center can be called up; there you will find detailed explanations of all functions.
ShopVote
Basic information
The ShopVote module is included in the scope of the cloud shops. For self-hosted shops with version 3.14.x to 3.15.x, the module is available for download at ShopVote under https://plugins.shopvote.de/shopvote-integrationsanleitung-fuer-gambio-gx3/.
Note
The module for shop versions from 3.0.x to 3.12.x does not come from Gambio; the guide on the ShopVote website refers to the module from ShopVote.
Attention
The following information refers exclusively to the module from Gambio!
Installation
Note
Steps 1 and 2 are only required for shops with their own hosting. If you operate a cloud shop, you can start directly with step 3 to install the module.
-
Upload directories from the download package
-
Clear the text, module and page output cache of the shop in this order; to do this, go to Toolbox > Cache in the Gambio Admin and press the corresponding buttons.
- Now the module can be installed under Modules > Module Center and configured via the Edit button.
Configuration
Shop data
The Shop ID and the API key that must be entered in the module can be found in the ShopVote account under the item VotesAPI
JavaScript code for your RatingStars widget
The JavaScript code for the RatingStars widget can be found in the ShopVote account by going to Graphics & seals at the very bottom of the left menu. Here the desired display can be selected and the code for it displayed. This must then be copied and stored in the module.
Internetmarke
Installation
The current Internetmarke module is installed by loading the files onto the FTP server and into the shop directory. Running the Gambio Updater is not necessary. Afterwards, under Toolbox > Cache, the cache for the texts, the module and the page output cache must be cleared in this order.
Afterwards it can be selected under Modules > Module Center and the process completed by clicking on Install.
In cloud shops, the module is already included and can be installed directly under Modules > Module Center.
Configuration
To configure the module, it is selected under Modules > Module Center. Then click on Edit.
Login to the Portokasse
Here the login data for the Portokasse is required.
Attention
The services Portokasse and efiliale are not identical! The module cannot be used with the data of the efiliale!
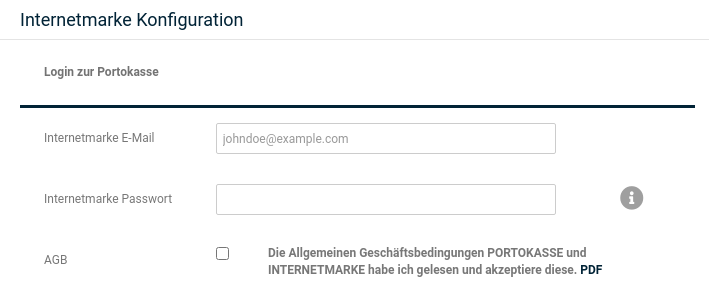
Sender
These fields are automatically pre-filled, but can be adjusted afterwards. These are the sender details of the shop operator, which should be available in full and can be edited under Settings > Shop as well as in this form.
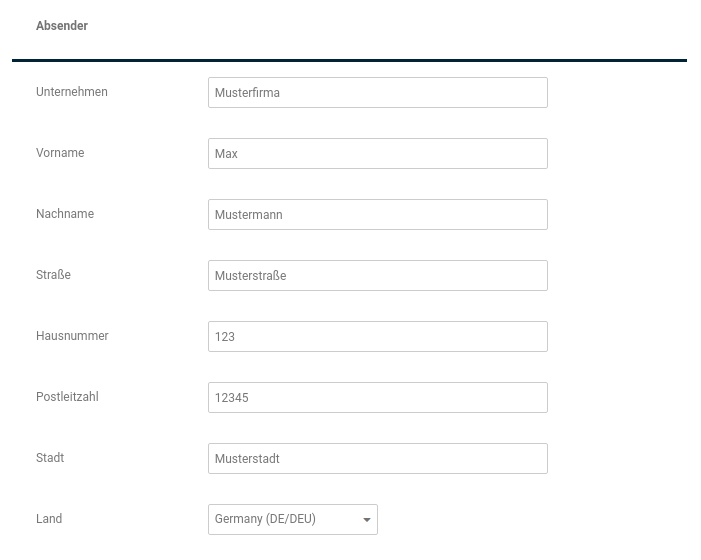
Preferred settings
- Product: Here the desired type of shipping (envelope size, merchandise shipment, book shipment, etc) can be selected.
- Print format: With/without address; indicates whether the customer and sender address are also printed on the stamp
- Page format: Here the format of the paper/envelope to be printed can be selected. Various envelope sizes are available
- Tracking link template: If you want to offer a tracking link (probably not possible with all products), a self-created template can be selected here. Under Settings / Delivery / Shipping service providers, after calling up the Parcel services page, further templates can be created. However, a tracking link is already created and sent via the option E-mail notification after order status change, so the selection of the template is only interesting if a special tracking link is to be used.
- Order status after label creation: If the order status is to be changed after creating the label, this can be selected here.
- E-mail notification after order status change: Sends a message to the customer that contains a tracking link.
- Take low balance into account: If activated, only products are displayed that can be purchased with the current balance of your Portokasse. When using Portokasse on account (balance can be negative), please deactivate.
- Show only contract products: If activated, only the products explicitly enabled in the contract are available for selection when creating the stamp
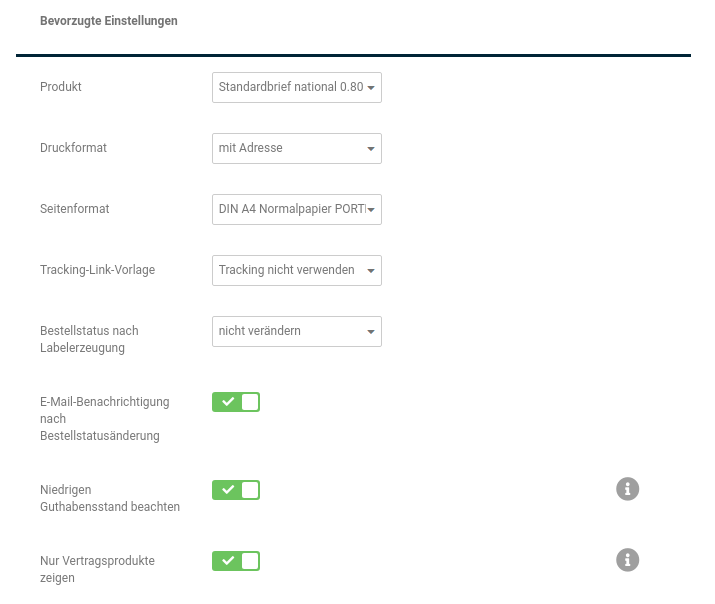
Motif
Here a motif can be selected that can be printed on the stamp if the customer address is not also output. This can be selected directly when creating the label
Product price list (PPL)
You can have the current prices displayed here. There is the option to update the prices via the button Update products and prices, as these change from time to time.
Create stamp
An Internetmarke can be created by selecting the item Create Internetmarke in the Gambio Admin under Orders > Orders in the dropdown to the right of the order. This is also possible from the order details.
In this dialog, changes to the recipient address can be made if required. If you leave these out, the selected motif is output instead. The Product, the Print format or the Page format can also be changed, so exceptions to the general settings that were made in the module configuration are possible at any time.
With Column and Row, you can specify where on the paper/envelope to be printed the address is to be printed. For spatial orientation, there is a small graphic to the right of the details that makes the position of the address clear.
Via the button Show printed stamps, you can have the stamps created so far for this order displayed.
Gift voucher system
Install / Uninstall
The Gift voucher system module makes it possible in the shop to redeem gift vouchers and discount coupons and to send the associated codes as a welcome gift when registering a customer account. It also controls the automatic dispatch of the codes of gift voucher products.
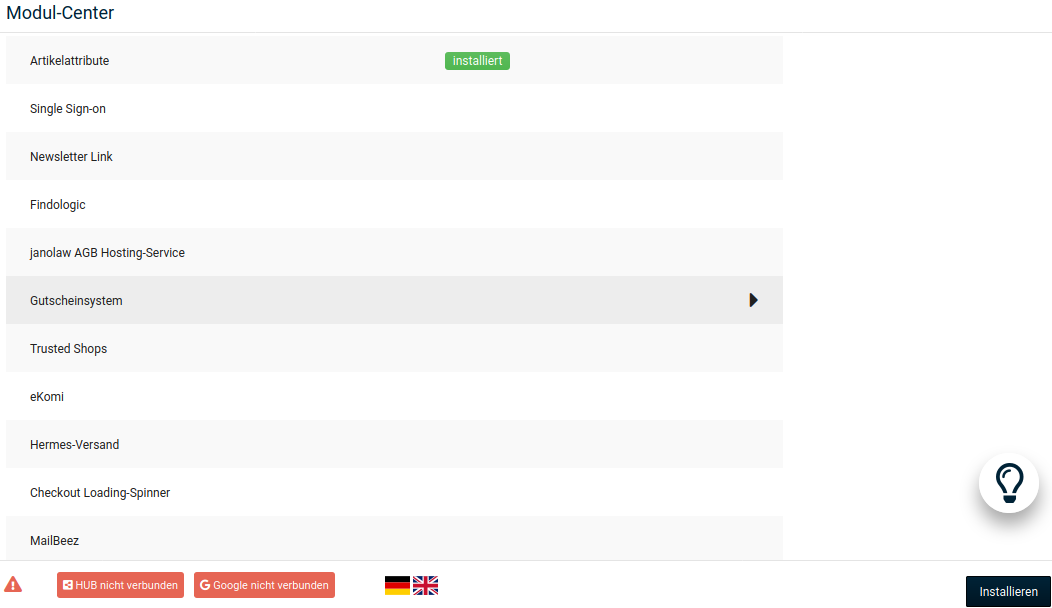
The Gift voucher system module can be installed under Modules > Module Center. To do this, select the entry Gift voucher system and click on the Install button at the bottom right.
The gift voucher system is activated after the installation and the Gift vouchers menu is available in the Gambio Admin.
By clicking on Uninstall, the module can be uninstalled again and the gift voucher system deactivated.
Editing
If the module is installed, it can be configured via the Edit button. The following settings are available:
| Field name | Description |
|---|---|
| Length of the gift voucher codes | Length of the codes generated by the shop for gift vouchers (max. 16 characters) |
| Field name | Description |
|---|---|
| Welcome gift voucher value | Value of the welcome gift voucher. Specify with a dot as the decimal separator and without currency. Enter 0 as the value if no welcome gift voucher is to be sent. |
| Welcome discount coupon code | Code of the welcome discount coupon. The coupon must have been created beforehand under Gift vouchers > Discount coupons. Leave the field empty if you do not want to send a welcome discount coupon. |
Note
Welcome gift vouchers and welcome discount coupons are automatically sent with the confirmation e-mail when registering a customer account, if the respective function is activated.
| Field name | Description |
|---|---|
| Order status for automatic dispatch of gift voucher codes | Dispatch of the codes of gift voucher products at this order status. |
Single Sign-on
Single Sign-on allows logging in to the shop via accounts with the supported providers. For example, your customers can log in to your shop with their Facebook account.
Installation
Single Sign-on is included by default in the scope of the shop software. The installation takes place in the Gambio Admin under Modules > Module Center > Single Sign-on.
Configuration
After installing the module, it can be configured by clicking on Edit. The required access data must be stored for each of the various providers.
Google
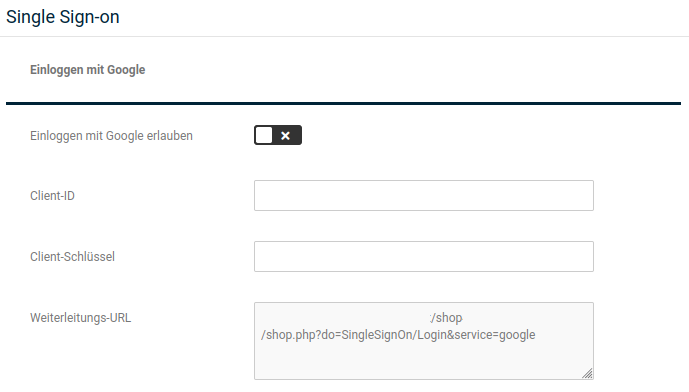
You receive the Client ID and Client key directly from Google at the following URL:
https://console.developers.google.com/apis/credentials
If you have not yet created a project at Google, which must be understood as a collection for settings, you will be prompted to do so. Choose any name (for your own recognition) and click on Create project.
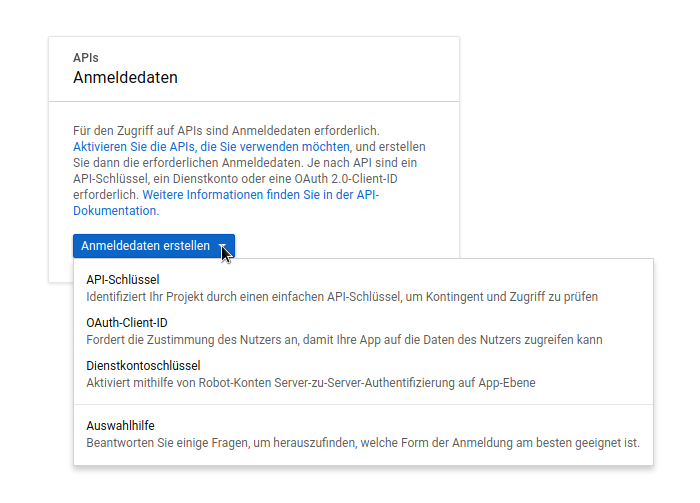
Via the dropdown button Create credentials, select the entry OAuth client ID. On the page that now opens, click on Configure consent screen.
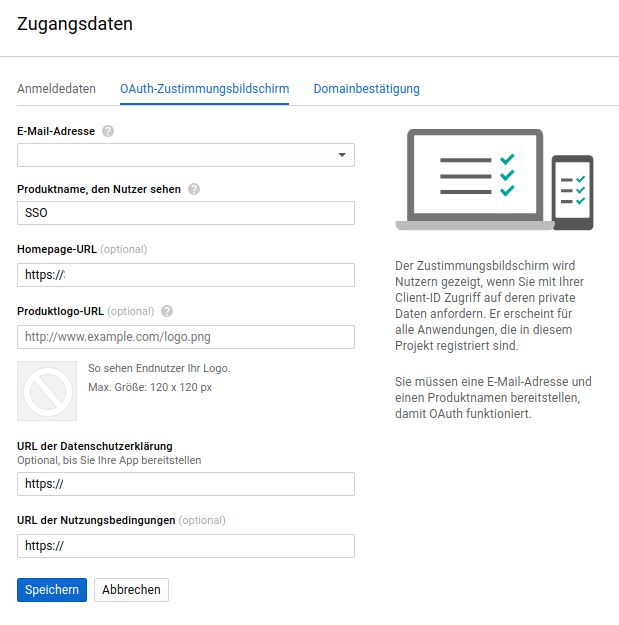
There, select your e-mail address and assign a product name, for example your shop name. Also enter the URL of your shop, the URL of the privacy policy and the terms and conditions. Finally, save the details.
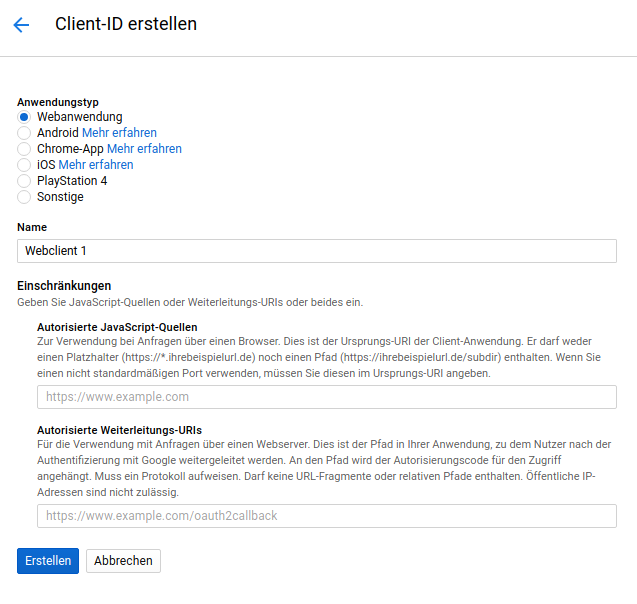
On the following screen, select Web application as the application type and enter the redirect URL at the bottom, which you find in the module configuration. When you have saved your data, you receive a popup with the Client ID and client key. Copy and store these in the module. Your Single Sign-on for Google is thus fully set up.
Facebook
Here the Client ID and key are required. Open the following link in your browser:
https://developers.facebook.com/
and log in with your Facebook account. If you have not yet registered as a Facebook Developer, click on Get started at the top right and follow the steps of the wizard, which creates a new app. If you have already registered as a developer, the appropriate app for the shop or a new app for the shop should be created via the item at the top right.
The product Facebook Login must now be set up within the app. Click on Set up at Facebook Login.
On the following screen, click on Settings in the menu on the left. In the product configuration, Client OAuth login and Web OAuth login are to be activated; all other options can remain switched off. The redirect URL displayed in the module configuration is to be stored under Valid OAuth redirect URIs.
At Facebook, the Client ID and secret are referred to as App ID and app secret. To find the App ID and secret, now click once more on the item Settings at the very top left of the menu. Here you find the App ID, can have the app secret displayed and transfer these to the module configuration.
PayPal
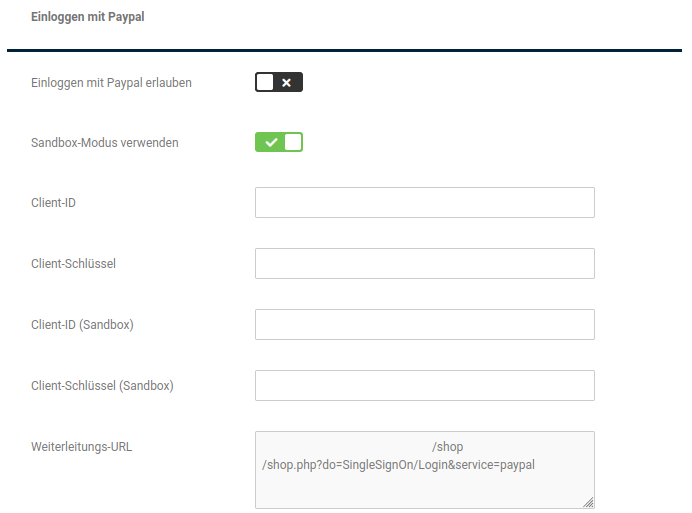
Client and secret are identical to the data of the PayPal & PayPal PLUS module and are adopted automatically, provided that the payment module has already been configured. We assume here that the configuration of the payment module has already been carried out and that a suitable "REST app" is therefore already available on the page https://developer.paypal.com/, but still needs to be configured further appropriately.
After logging in, click once on My Apps & Credentials in the left bar. There you find the section REST API apps. Click there on the app that you created for your shop. Here you then continue with the Sandbox App Settings:
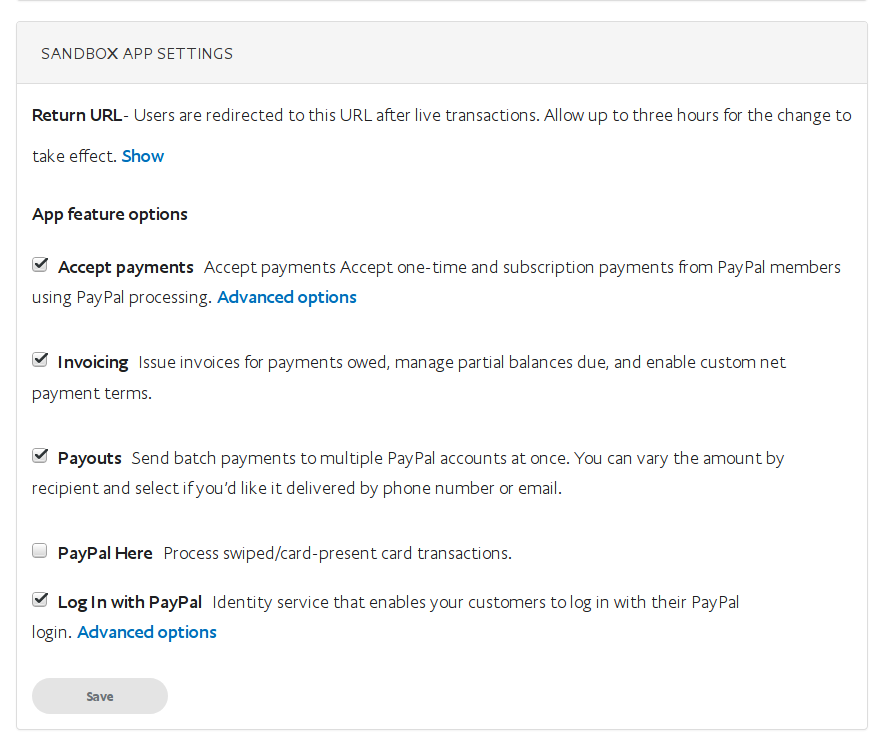
Under the top item Return URL, click on the link Show. Fill the field now offered with the content of the redirect URL field from the module configuration.
Activate the checkmark for Log In with PayPal and then click on Advanced Options. Set the following checkmarks here: Basic authentication, Personal Information, Address Information and Account Information, in order to receive as much data as possible from your customers, so that they only have to fill in a few fields.
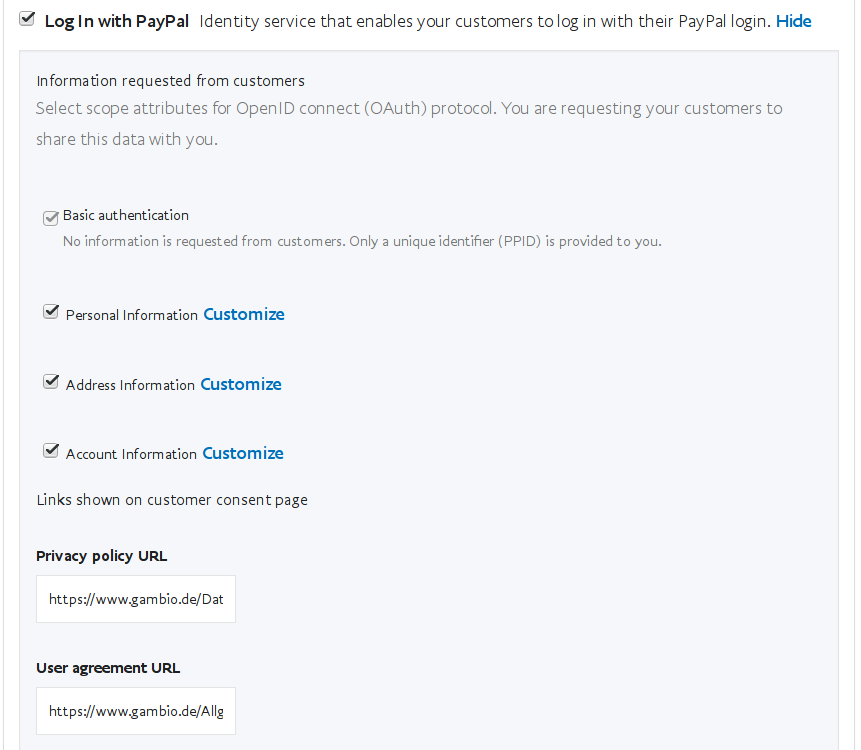
In the field Privacy policy URL, the link to your privacy policy should be stored.
Make sure that the item Enable customers who have not yet confirmed their email address with PayPal to log in to your app is not activated, as the Single Sign-on module generally trusts that the user data received is secured.
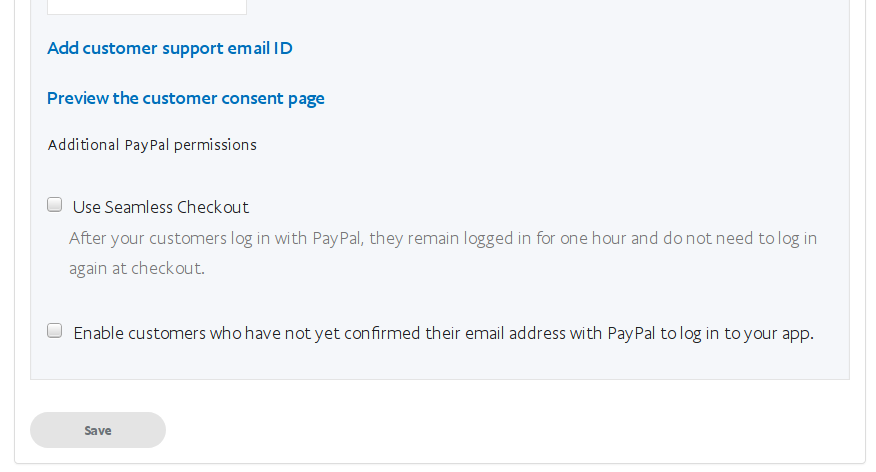
Amazon
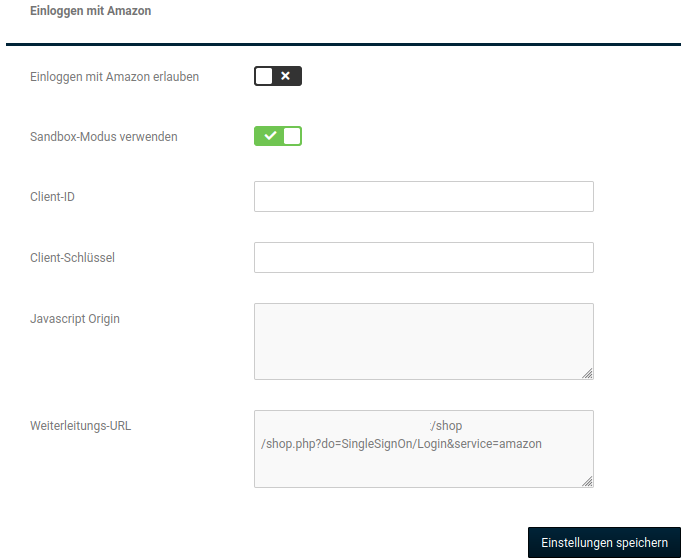
With the introduction of the Single Sign-on module, the previously available AmazonPay module receives an additional operating mode. Provided that Single Sign-on is configured via Amazon, this is automatically operated in Single Sign-on mode. In this mode, the previously necessary Amazon guest accounts in particular are no longer required, as Single Sign-on always creates regular customer accounts.
To configure the associated payment modules and login modules, settings must be made in the Seller Central under
https://sellercentral-europe.amazon.com
After logging in on the Amazon page, you can switch to an overview via Integration > Integration resources > Retrieve access keys. With the button_ Copy access data_, a JSON block can be retrieved, which is to be copied into the configuration of the AmazonPay payment module. The payment module alone then already allows payments, but is not yet in Single Sign-on mode.
Further access data must then be configured in the Single Sign-on module in the Gambio Admin. To do this, switch in the Seller Central via the dropdown at the very top to Login with Amazon. There you can then copy out the Client ID and secret in order to transfer them to the shop into the configuration of the Single Sign-on module. The return URL, as displayed in the shop, must be stored at Amazon; you can configure this via Return URLs and Javascript Origins.
DHL Business Customer Shipping
The module DHL Business Customer Shipping (GKV2) is included in the scope of the shop. It serves to create shipping labels.
Installation
The module can be installed under Modules > Module Center. To do this, select the entry DHL Business Customer Shipping and click on Install at the bottom right.
Configuration
To configure the module, select it under Modules > Module Center and click on Edit. Settings for the following areas are available:
Access data
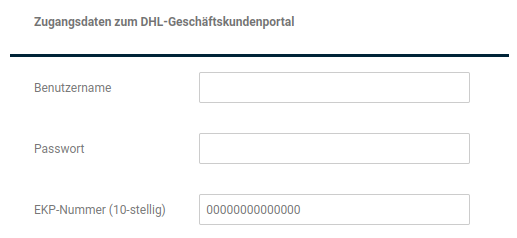
| Field name | Description |
|---|---|
| Username & password | You receive the username and password from your contractual partner DHL. The access data for the business customer portal is entered as login data, whereby the username here must, however, be written completely in lower case. The password, on the other hand, is to be specified exactly as with the business customer portal. |
| EKP | Here the DHL customer number must be entered. The EKP consists of the first 10 digits of the 14-digit DHL account number. No more than 10 digits may be entered. |
Sender and returns recipient
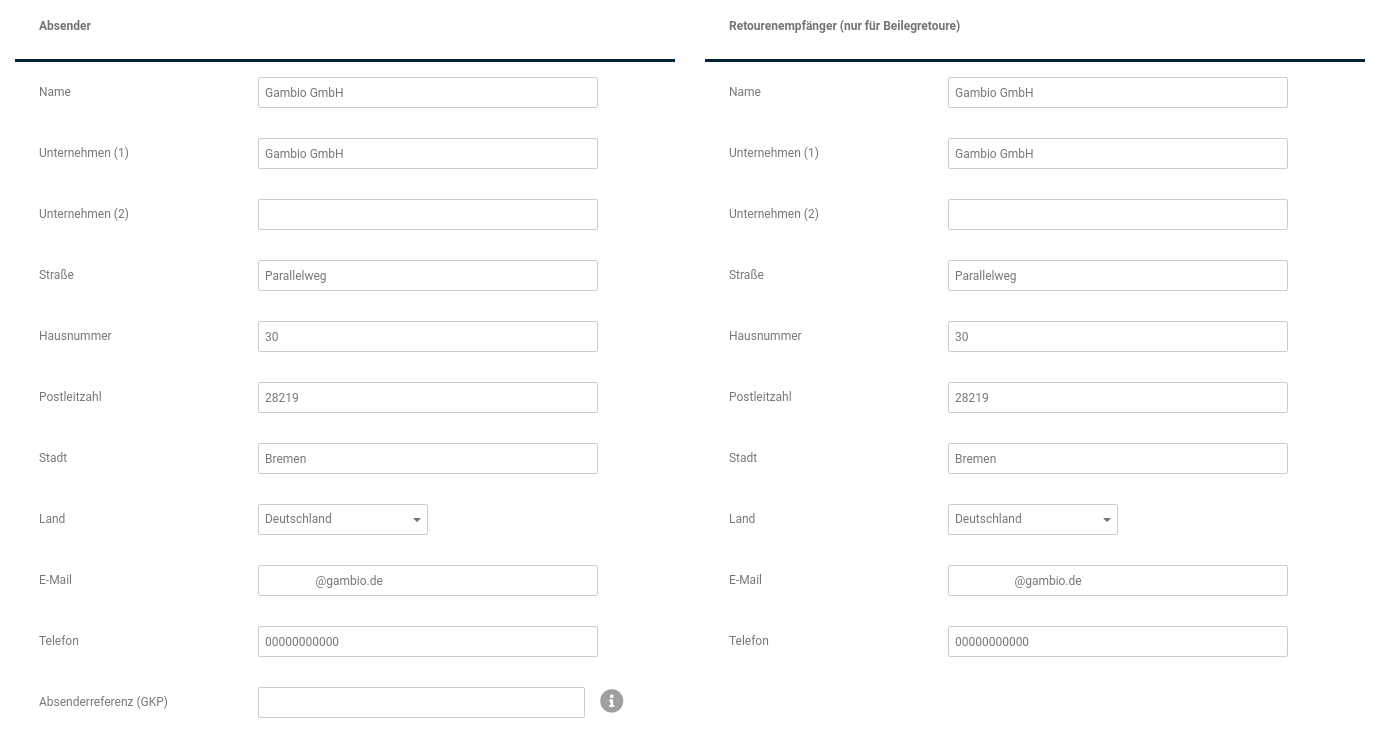
In this area, the address data of your company must be stored. A different returns address can be specified.
Attention
The field Name must be filled in, otherwise there will be problems with the label creation.
Bank details for cash-on-delivery shipments
If orders by cash on delivery are possible in the shop, these bank details must be stored
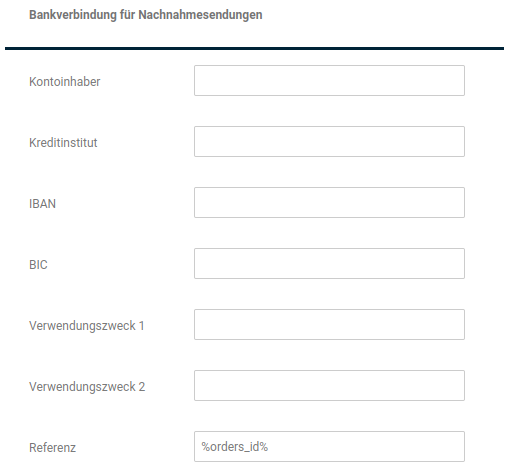
Reference
The variable %orders_id% for the order number is stored as the reference. This means that the order number is specified as the reference on the parcel slip and an assignment of a payment to an order is possible. Currently, no other variables can be used yet. However, it is possible to supplement the variable with a note or similar via the input field or to change it completely if required.
Settings
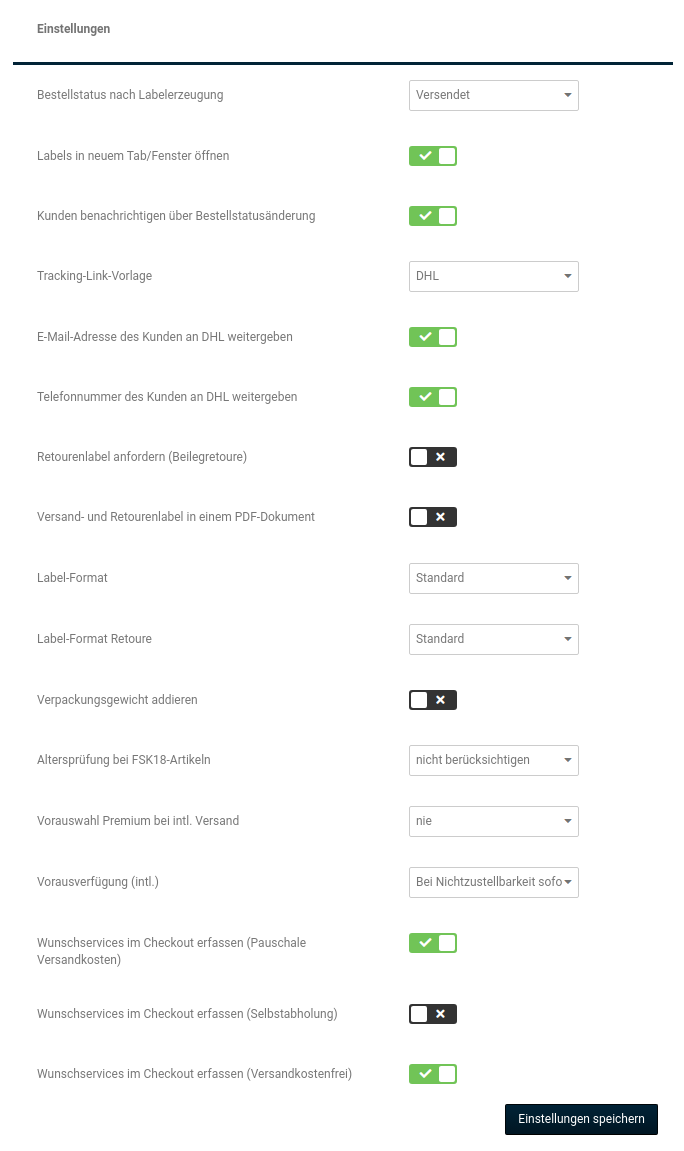
| Field name | Description |
|---|---|
| Order status after label creation | After the label creation, an order status can be set automatically, e.g. Label created, or similar. This helps you to recognize the orders with an already created label in the order overview based on the status. |
| Open labels in a new tab/window | Here it can be set whether the label is to be opened directly in a new tab. |
| Notify customer about order status change | If the status was changed automatically, the shop can also automatically send a notification about it to the customer. |
| Tracking link template | DHL should be set as the tracking link template. It is selected from the templates that can be viewed and edited under Settings / Delivery / Shipping service providers, after calling up the Parcel services page. The template is supplemented with the shipment number of the created label and thus forms the link to the shipment tracking that can be sent to the customer. The selection Do not use shipment tracking is also possible if no tracking link is to be offered. |
Note
If, for example, Hermes were selected as the tracking link template, a link to Hermes with the shipment number from DHL would be created as the tracking link in the order. A different template should therefore not be set.
| Field name | Description |
|---|---|
| Pass on customer's e-mail address / telephone number to DHL | Here it can generally be defined whether the customers' contact data is to be passed on to DHL. However, if the customer has objected to the passing on during the order process, the data is not transmitted. Under Settings / Legal, a corresponding query can be activated in the order process. |
| Request returns label (enclosed return) | If you have booked this option with DHL, a returns label is also created with each label creation, which can be enclosed with the parcel straight away. Attention: This option may only be active if returns labels are also included in your contract. If this is not the case, there will be problems with the label creation. |
| Shipping and returns label in one PDF document | Determines whether the shipping and the returns label (enclosed return) are to be created in one PDF document. |
| Label format / Label format return | Here the label format for the shipping and the returns label can be selected based on some known printers. If your own printer is not among them, the selection Standard is recommended. |
| Add packaging weight | This adds the packaging weight to the product weight. |
| Age verification for FSK18 products | Here the type of age verification for FSK18 products can be selected. |
| Preselect Premium for intl. shipping | If this option is active, Premium is preselected during label creation. |
| Advance instruction (intl.) | For international shipments, it must be specified what is to happen with undeliverable parcels. |
| Record preferred services in checkout | Here it can be selected for each shipping method whether the customer can make specifications regarding the desired delivery (preferred neighbor, delivery day, drop-off location) in the order process. Which neighbor, which delivery day and which drop-off location this would be, the customer must define in their account at DHL. |
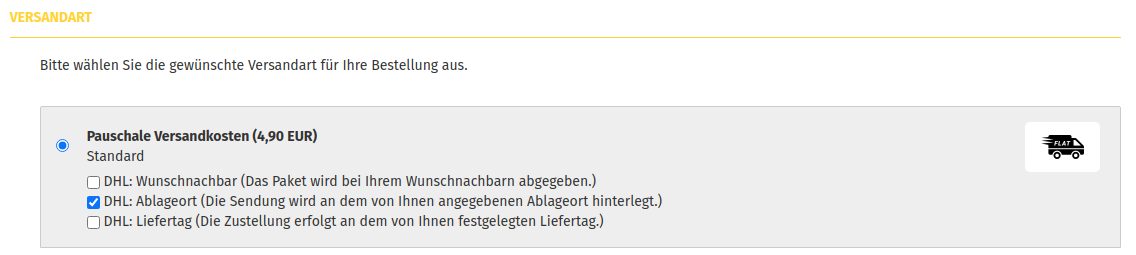
Products
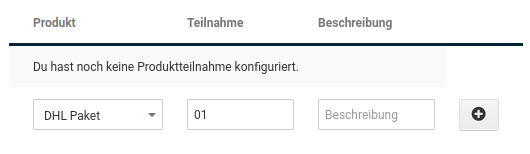
You can select from the various products via the dropdown menu and add them. Only products that you have also booked should be selected. Which products have been booked and which participation number belongs to the respective product, you can find out in your account at DHL Versenden or from DHL support.
Returns interface
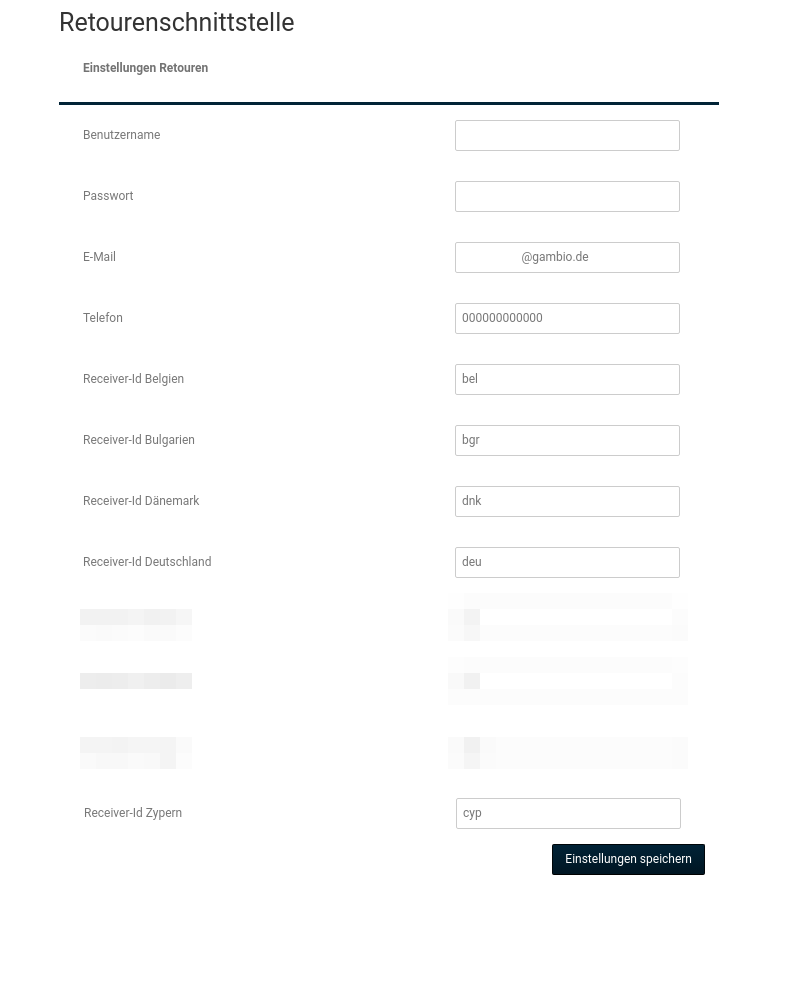
The Receiver ID is a mandatory entry. You can find the ID in the DHL business customer portal.
Use
Use
Under Orders > Orders, the dialog for the label creation can be called up in the dropdown to the right of the order via DHL label (GKV).
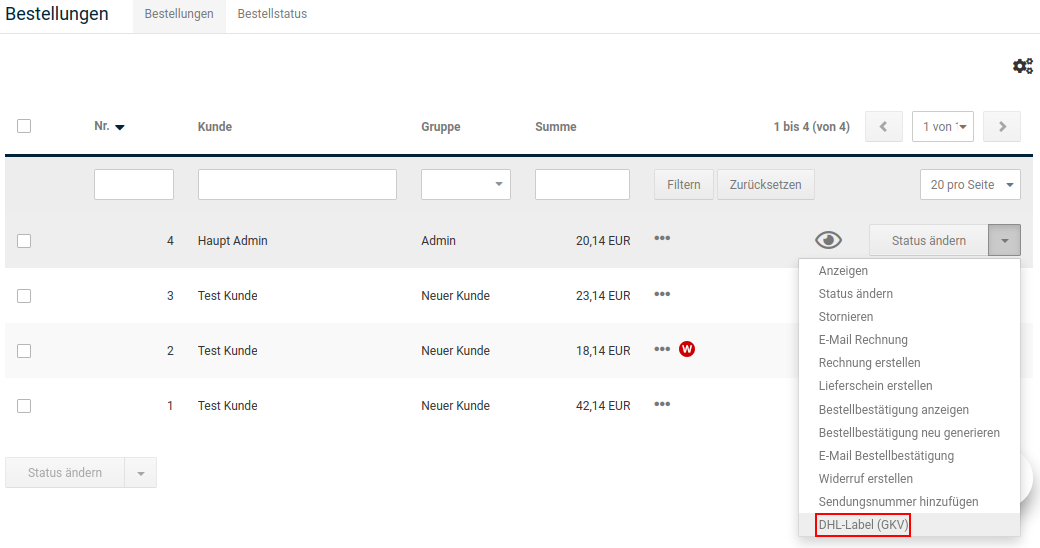
Label creation
Simple view
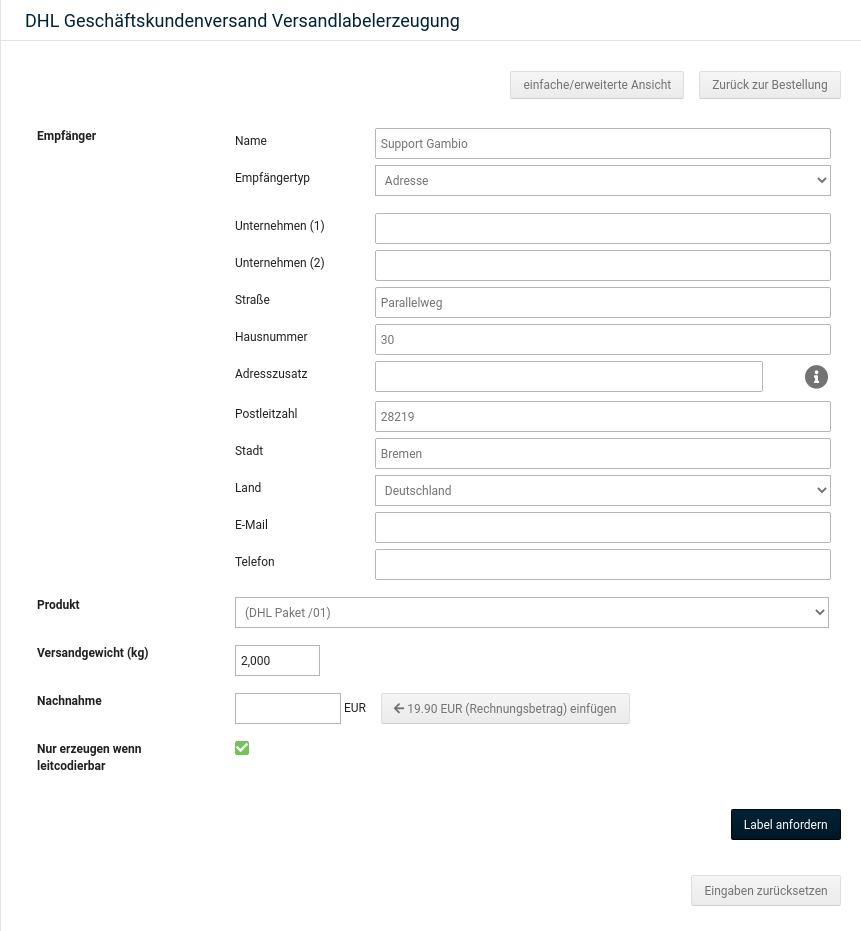
| Field name | Description |
|---|---|
| Name, address data | Here the customer's address can be checked once more. |
| Recipient type | Here it must be selected whether the delivery address is a normal home address or, for example, a Packstation, post office branch or a parcel shop. The available address fields change according to the required information. |
| Product | Here it must be selected via which product the label is to be created. Which products are available here depends on the products selected in the configuration and the services booked with DHL. |
| Shipping weight (kg) | Via this field, the shipping weight can be adjusted in kilograms. By default, only the pure product weight is adopted here; the shipping weight is not yet taken into account here. |
| Cash on delivery | Here the invoice total is entered, which is filled in automatically for orders on cash on delivery. |
| Only create if routing-codable | If the address is not routing-codable, i.e. not correct, the label is not created if this option is selected. A message with a corresponding note then appears. |

Extended view
In the extended view there are numerous further options.
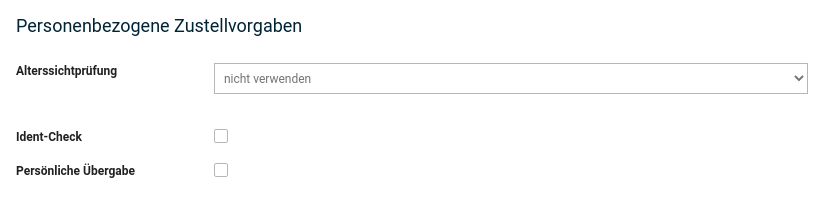
| Field name | Description |
|---|---|
| Sender, returns recipient, recipient | Here the various addresses can be checked and corrected once more. |
| Preferred location | If the customer has stored a preferred location, this can be specified here. |
| Preferred neighbor | A preferred neighbor is also possible; this is entered here. |
| E-mail for notification (shipping confirmation) | Here the customer's e-mail address can be entered or changed. The address from the order is pre-filled here, provided that the customer has agreed to the transmission of the contact data to the transport companies. |
| Visual age verification | Via this, the visual age verification can be activated. The delivery person then checks whether the recipient has the necessary minimum age |
| Ident check | If this option is selected, an area with further input fields opens. Here the name of the recipient as well as their date of birth or the minimum age can be stored. This note for the delivery person then appears on the label: |
| Personal handover | Is activated if the goods are to be handed over personally. |
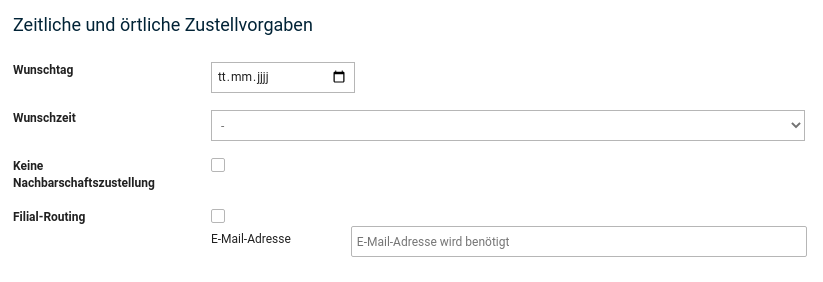
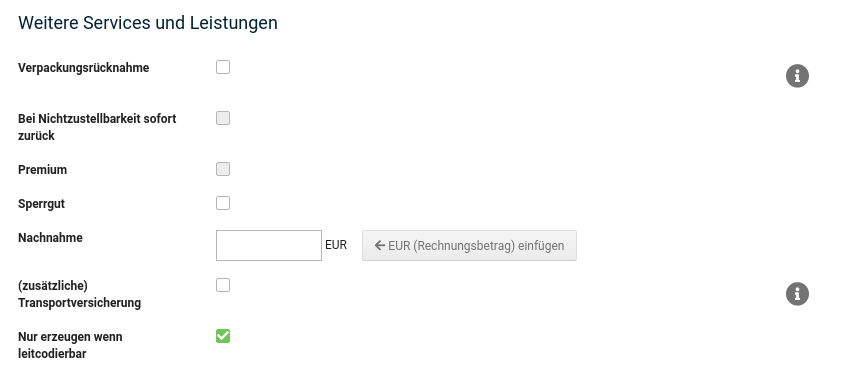
| Field name | Description |
|---|---|
| Preferred day, preferred time | Here a preferred day as well as a preferred time for the delivery can be specified. |
| No neighborhood delivery | Via this option, delivery to neighbors can be prevented. |
| Packaging return | It is possible to have the shipping packaging taken back straight away by the courier. However, this is not available in all products. |
| Return immediately if undeliverable | For sensitive goods, you can specify that the parcel is to be returned immediately if delivery was not possible. However, this is only possible with the product DHL Paket Taggleich. |
| Premium | This option can be activated in the module configuration itself and is therefore not available at this point. |
| Bulky goods | Shipments that are heavier than 31.5 kg or exceed certain dimensions can be shipped as bulky goods. |
| (additional) transport insurance | For particularly valuable shipments, the shipment can additionally be insured up to a certain value. You can get more detailed information about this from DHL. |
Create label for countries outside the EU
For shipments to countries outside the EU, it is important to make the export details correctly during the label creation.
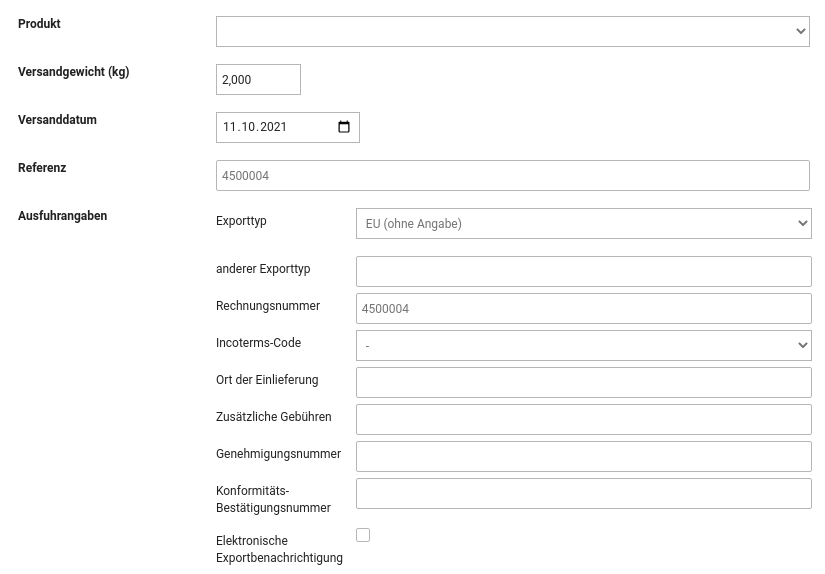
| Field name | Description |
|---|---|
| Product | For shipments to countries outside the EU, the correct product is set automatically. To do this, a product for international shipments must first be stored in the module configuration. You receive the product and participation number directly from DHL, provided that this is covered by your contract. |
| Shipping weight | The shipping weight is pre-filled in current shop versions and may not be less than 0.1, as this is the assumed minimum packaging weight. If a shipping weight has been stored in the products, these are added up and automatically entered in the shipping weight field. |
| Export detail Export type | Preset here is EU (no specification). For shipments to countries outside the EU, however, a different export type must be selected. In addition to the export types Gift, Sample, Document and Goods return, there is also the type other. |
| Export detail other export type | If the export type other is selected, a note about it must be left in the field other export type, such as a note about the content. |
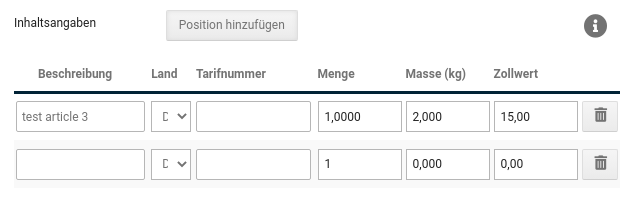
Further down in the export details, the products of the order are listed. If the shipping weight has been stored in the products, this is already pre-filled here. Otherwise, the weight for a product must be stored in the respective row in the field Mass. From the quantity of the products and the respective weights, the total weight must then be calculated and entered further up in the field Shipping weight.
Possible messages

For shipments abroad, the message The specified type of shipment is not valid usually means that no export type or an invalid export type was specified, or that no product for international shipping is stored.
Please check the stored products and create the label again with all details.

The message The weight specification is smaller than in the CN23 form states that the shipping weight is lower than the total weight of the products entered in the export details.
Please check and correct the specified weights.
The message Shipping label was created is a success message. Below this you find the shipment number as well as a link to the shipping label and a link to the export label in the Label column.
View / cancel label
Existing labels can be called up if DHL label (GKV2) is selected again in the dropdown of the order overview. Above the dialog for the label creation, the already created labels are listed with the specification of date and time and can be called up or also deleted via this.
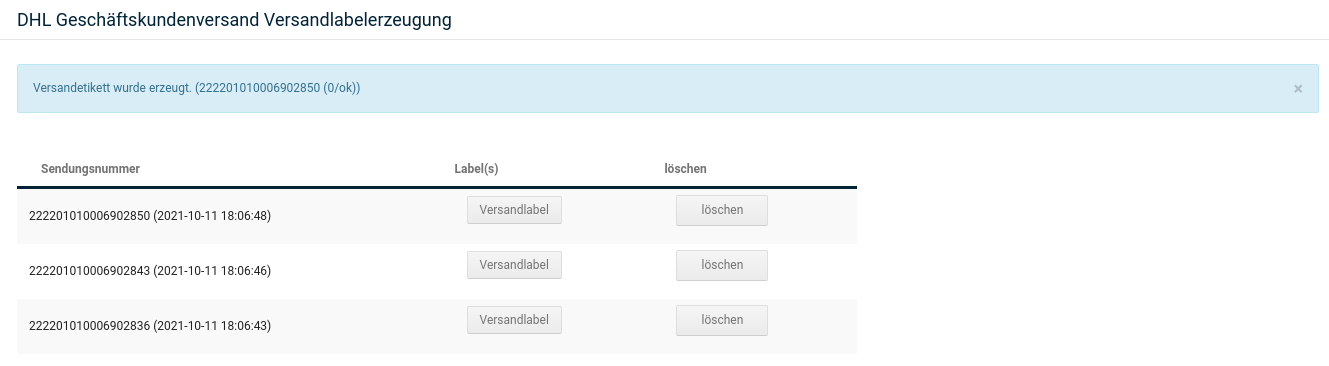
Samples of shipping labels as well as export labels
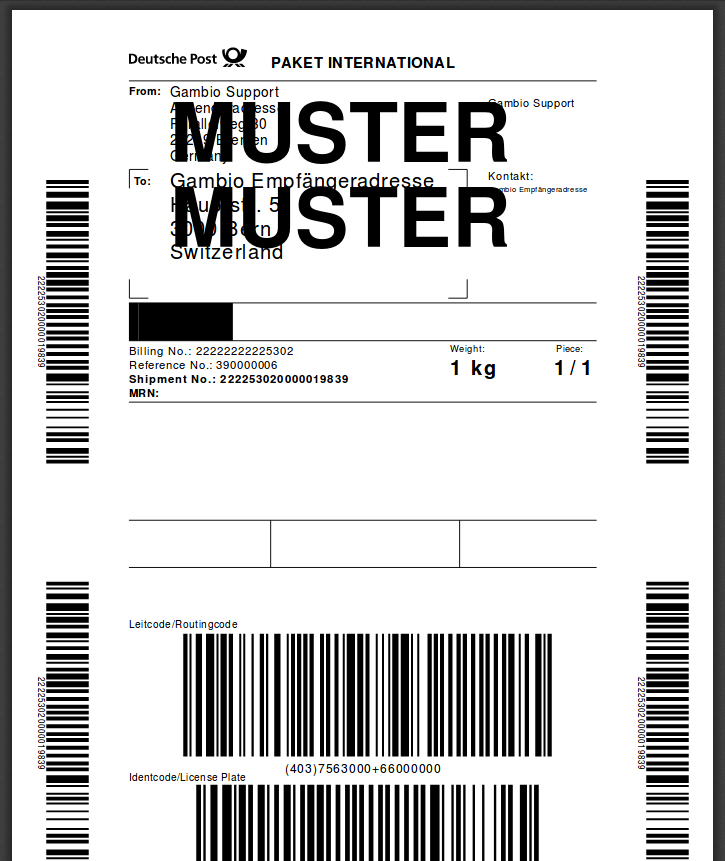
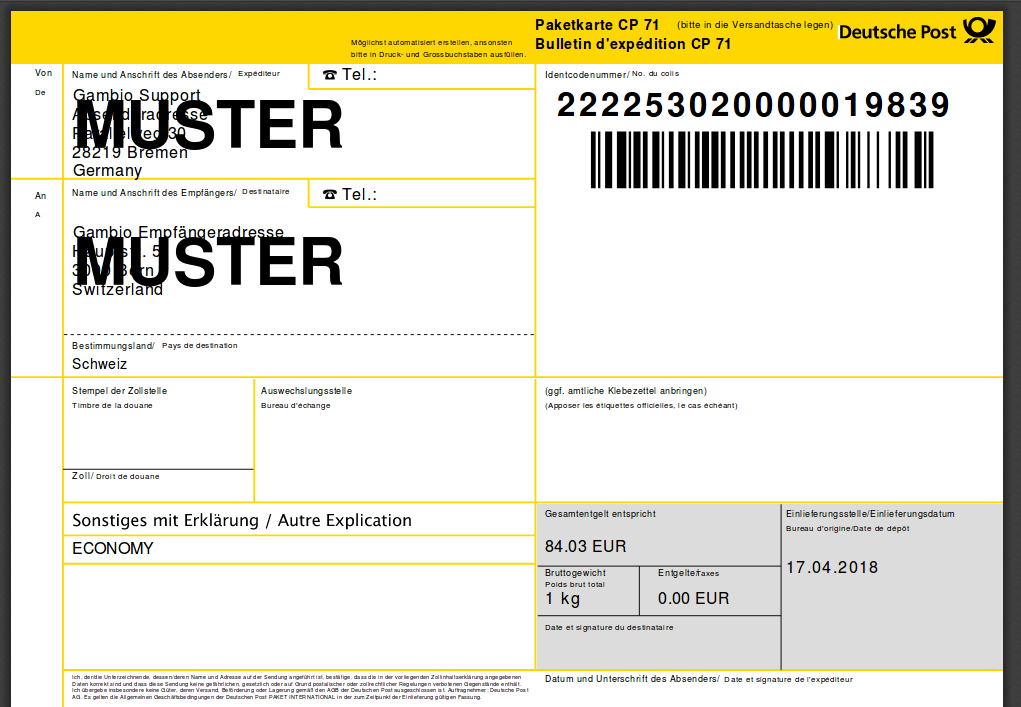
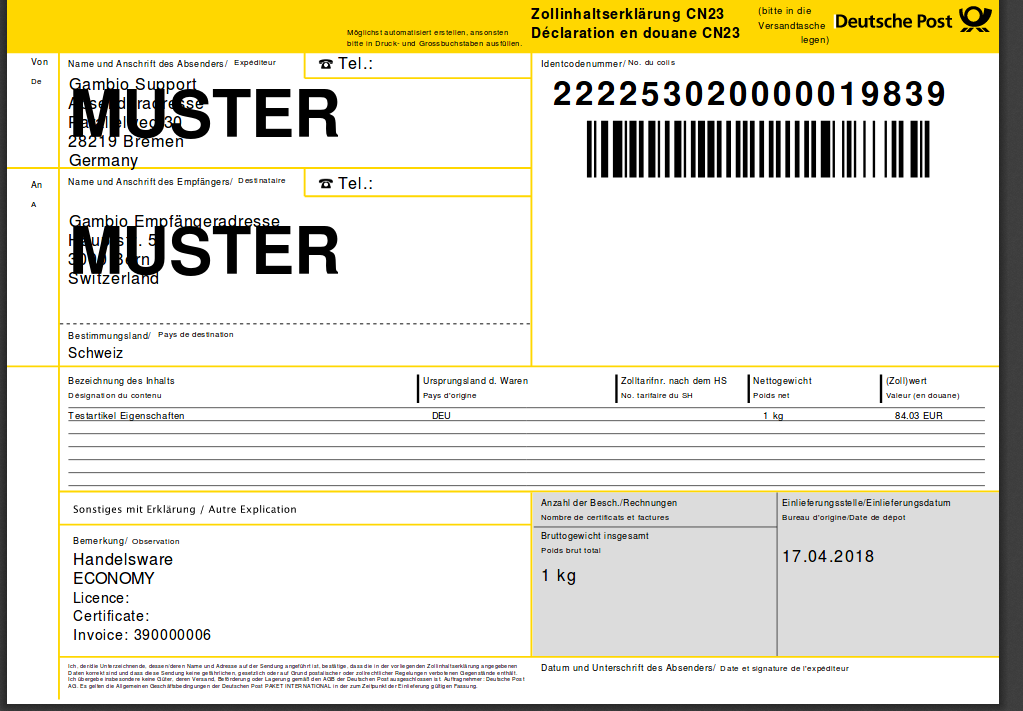
Tracking link
With the creation of the label, the shipment number is automatically added to the order. This can then be seen in the order details under Orders > Orders and can be sent to the customer via a status change e-mail. Depending on the setting in the module configuration, this e-mail may also have already been sent automatically.
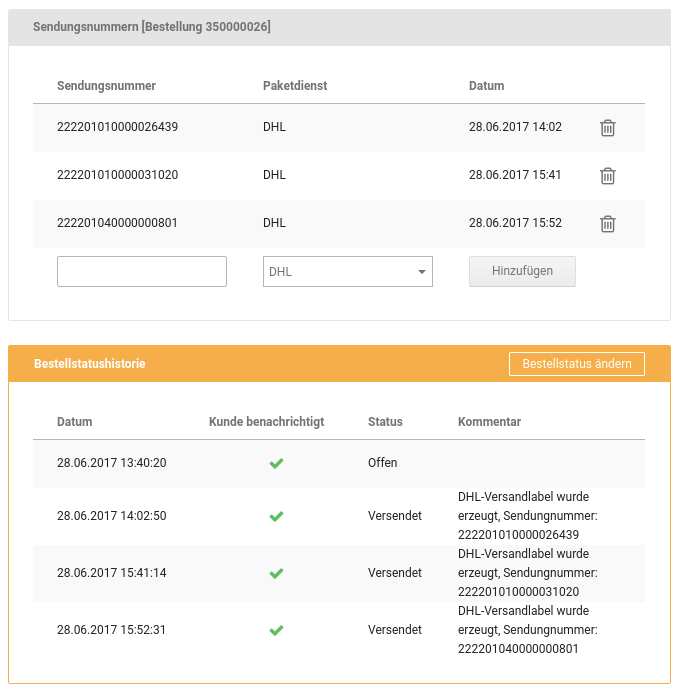
DHL Services
At the following link you can inform yourself at DHL about the various services:
https://www.dhl.de/services
Sandbox mode
The sandbox mode cannot simply be set for this module. If you want to test the module, it makes the most sense to create a label in live operation and cancel it again directly afterwards in order to avoid incurring costs.
Magnalister
Note
Although the Magnalister module is delivered in the basic scope of the shop system, development and support take place through Magnalister.
Availability and installation
The Magnalister module is included in the standard scope of the shop software and can be installed under Modules > Module Center. To do this, select the entry magnalister and click on the Install button at the bottom right. After the installation, a further menu item Marketing with several sub-items is displayed in the menu of the Gambio Admin.
Configuration
When called up for the first time, the global configuration is displayed. Here the passphrase must first be entered before you can open the other items in the module. You receive the passphrase once the shop has been entered in the account at Magnalister.
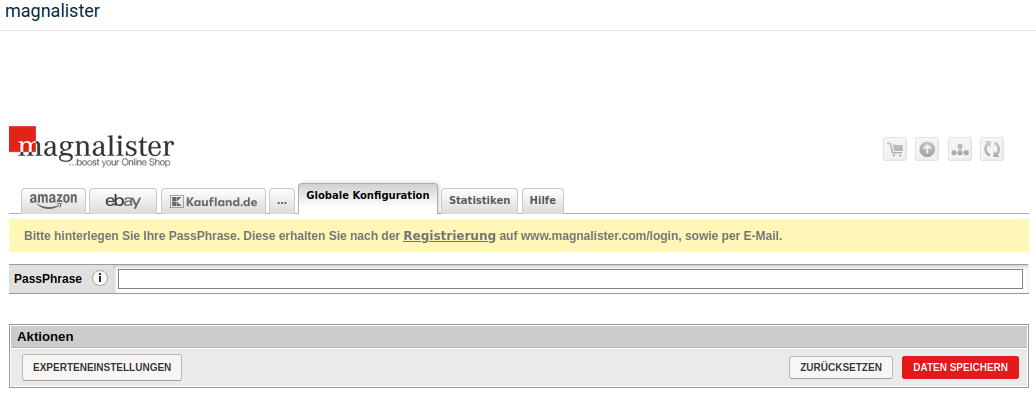
After entering the passphrase, the configuration page presents itself as follows (expert settings have been activated):
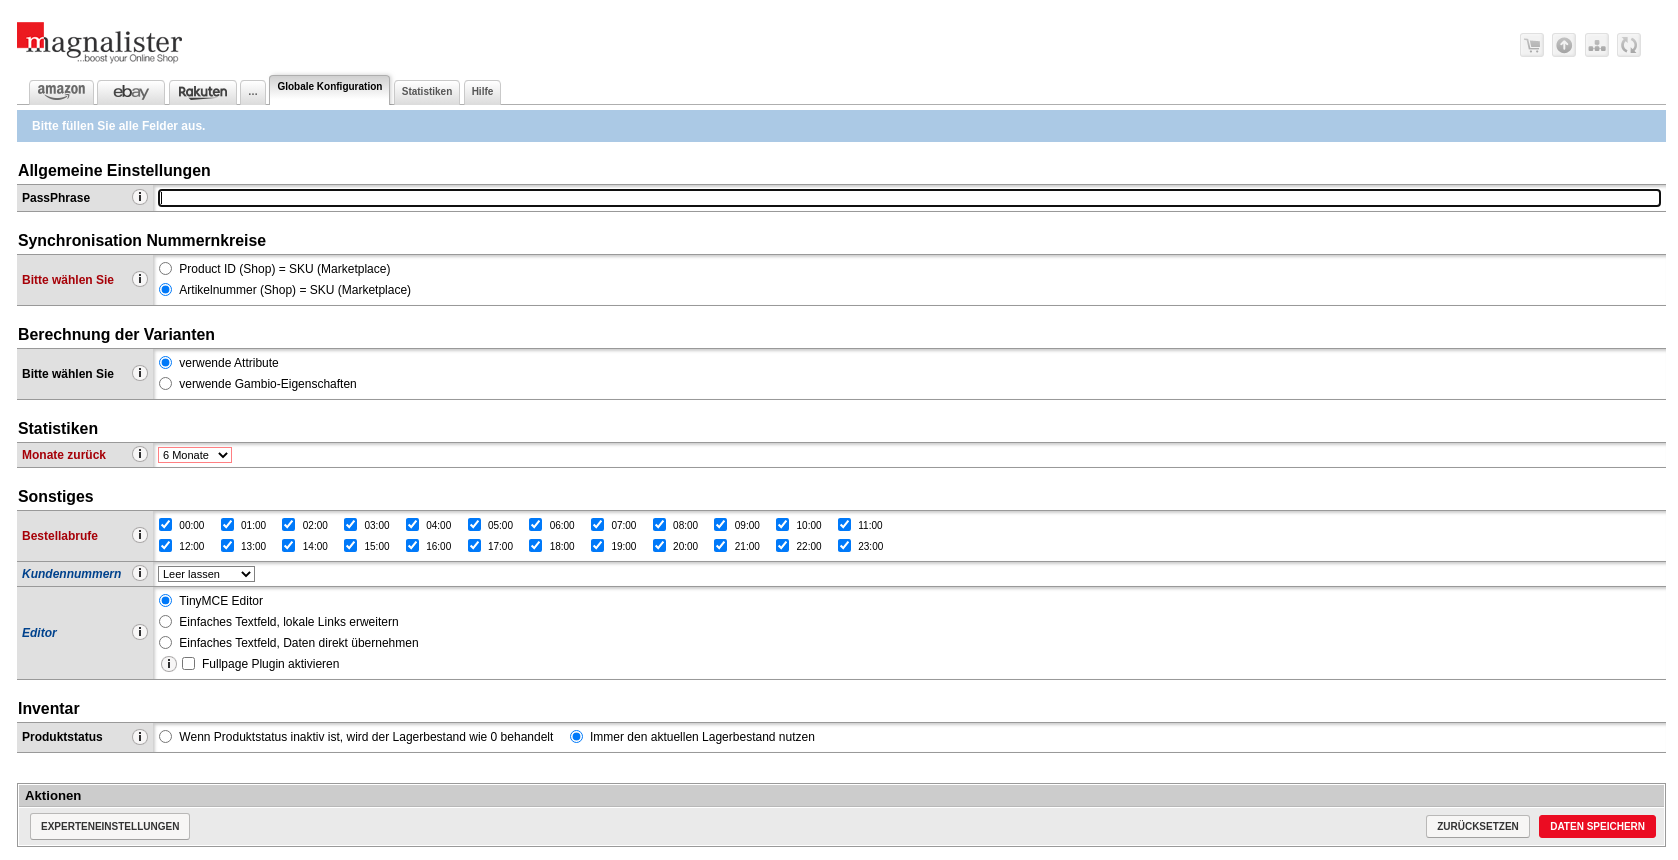
Guide
For more detailed questions about the configuration, please contact the colleagues from Magnalister. You can find the Magnalister FAQ at the following link:
https://otrs.magnalister.com/otrs/public.pl?Action=PublicFAQExplorer;CategoryID=5
Händlerbund module from Gambio
Availability
The Händlerbund module is part of the scope of the shop software from shop version 4.5.x as well as in the cloud.
Note
Currently, the module is not available separately for installation in older shop versions.
Installation
The module can be found in the Module Center (Modules > Module Center) under the name Händlerbund legal texts and can be selected there and installed by clicking on Install.
Configuration
After the installation, the configuration page of the module can be called up via the Edit button.
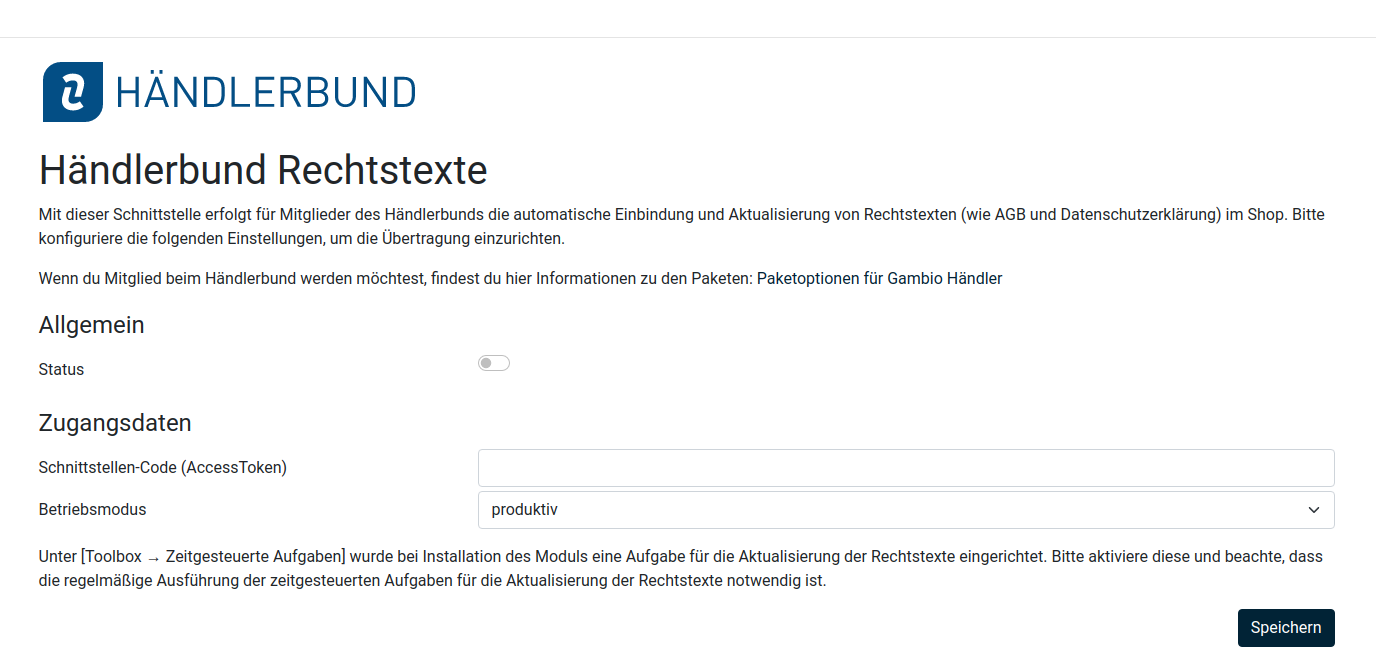
After entering the access token from the Händlerbund and saving the data, the display of the page changes and you can configure further items. How you receive the token from the Händlerbund, we explain further below.
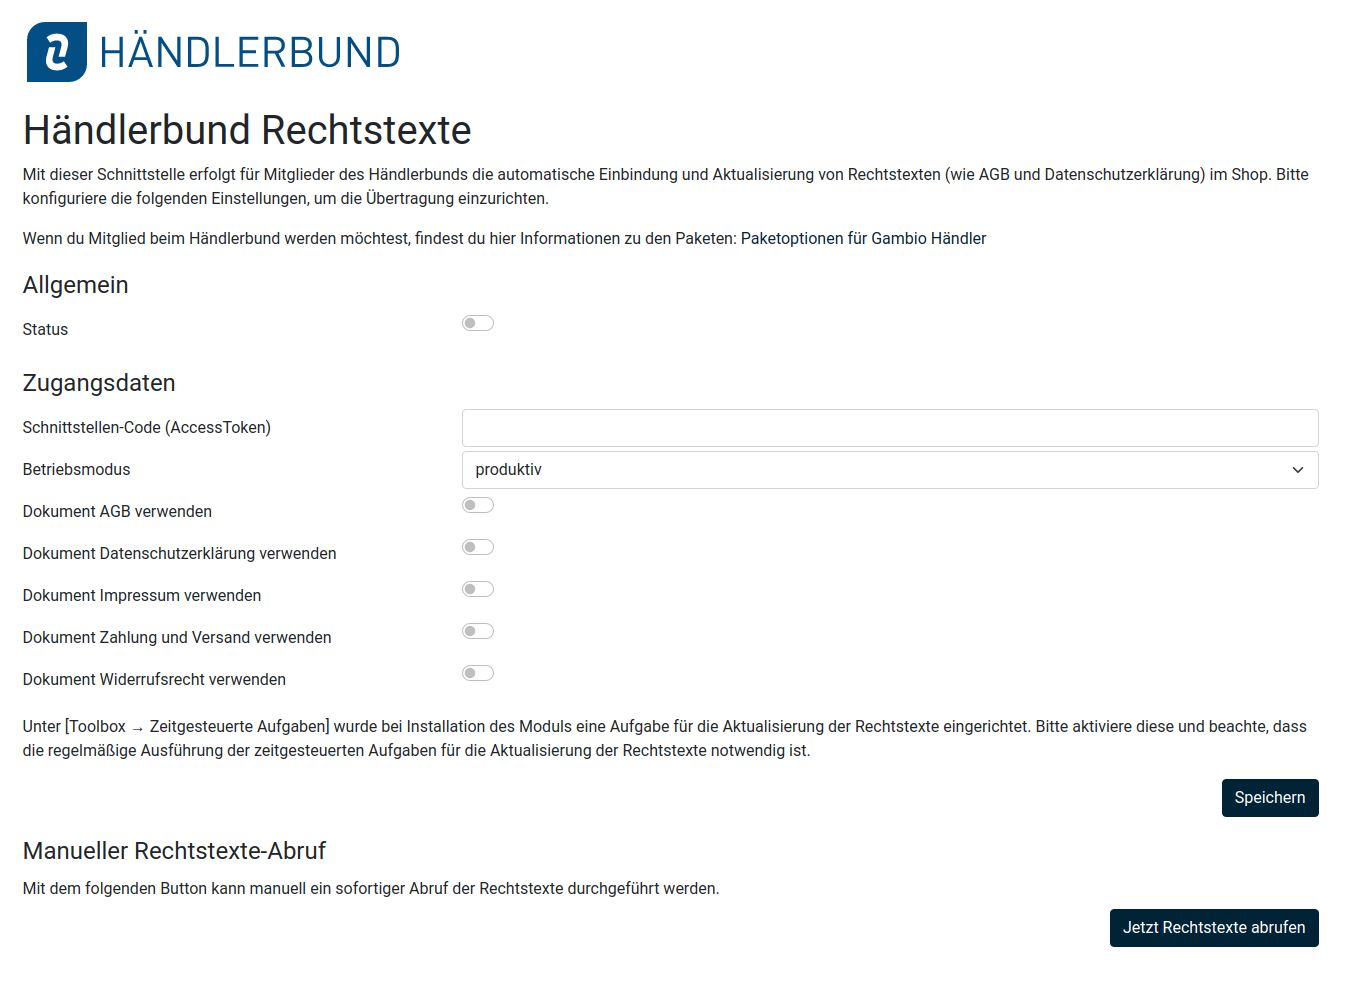
| Designation | Explanation |
|---|---|
| Status | Activates or deactivates the module |
| Operating mode | Allows the choice between productive and test operation. Note that test operation is only possible if a .dev-environment file has been placed in the shop directory on the server |
| Use document terms and conditions/privacy policy/imprint etc. | Allows the selection between the individual available legal texts |
Retrieval of the legal texts
Manual retrieval
The legal texts can be retrieved manually on the configuration page of the module via the button Retrieve legal texts now.
Automatic retrieval
An automatic retrieval can be set up via the scheduled tasks. For this, a further task was added during the installation of the Händlerbund module:
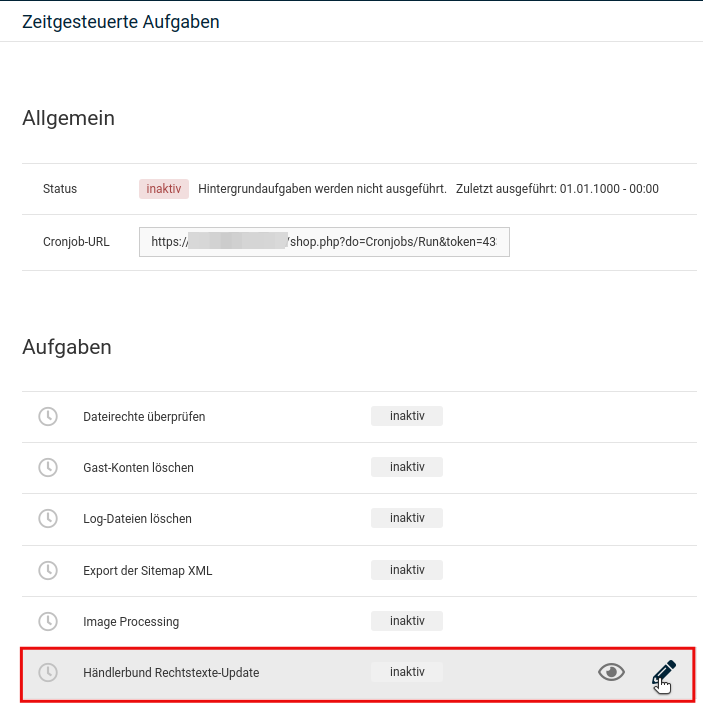
You can find further information about this in the chapter Scheduled tasks of this manual.
We recommend a retrieval interval of 24 hours here.
Configuration in the Händlerbund account
After logging in to your account at the Händlerbund, you first see the dashboard. Here you select Legal security > Legal texts in the menu on the left and then create a new shop. In the first row of the table, you see an example entry and the symbols for the shop overview, the editing of the shop properties as well as the configuration of the download of the legal texts. These icons will become important for you later.
This is the first section when creating a new shop in the Händlerbund account. Select Online shop as the sales channel and Gambio as the shop software. Now enter your URL and your e-mail address and make the desired specifications. The fields Login/username and Password are only displayed if you have previously clicked on the link above. This is only necessary if your shop is behind a directory protection. If this is not the case, the fields remain empty.
You are now shown an important note about the correct display of links, which you confirm after reading. Now you select the shop for which you want to create the legal texts and then click on the right on Interface - Integrate legal texts into the shop via interface.
You now have to fill in some forms that concern the products you sell and other questions. Go through the various sections on the imprint, terms and conditions, right of withdrawal, etc. and answer everything as precisely as possible. If you have questions or uncertainties, the colleagues from the Händlerbund will also be happy to help you here.
When you have answered all questions, you get to this page, where you can see the access token for the module at the very bottom. Copy this token and enter it in the module as described above. You don't have to do anything else here except to click on Next.
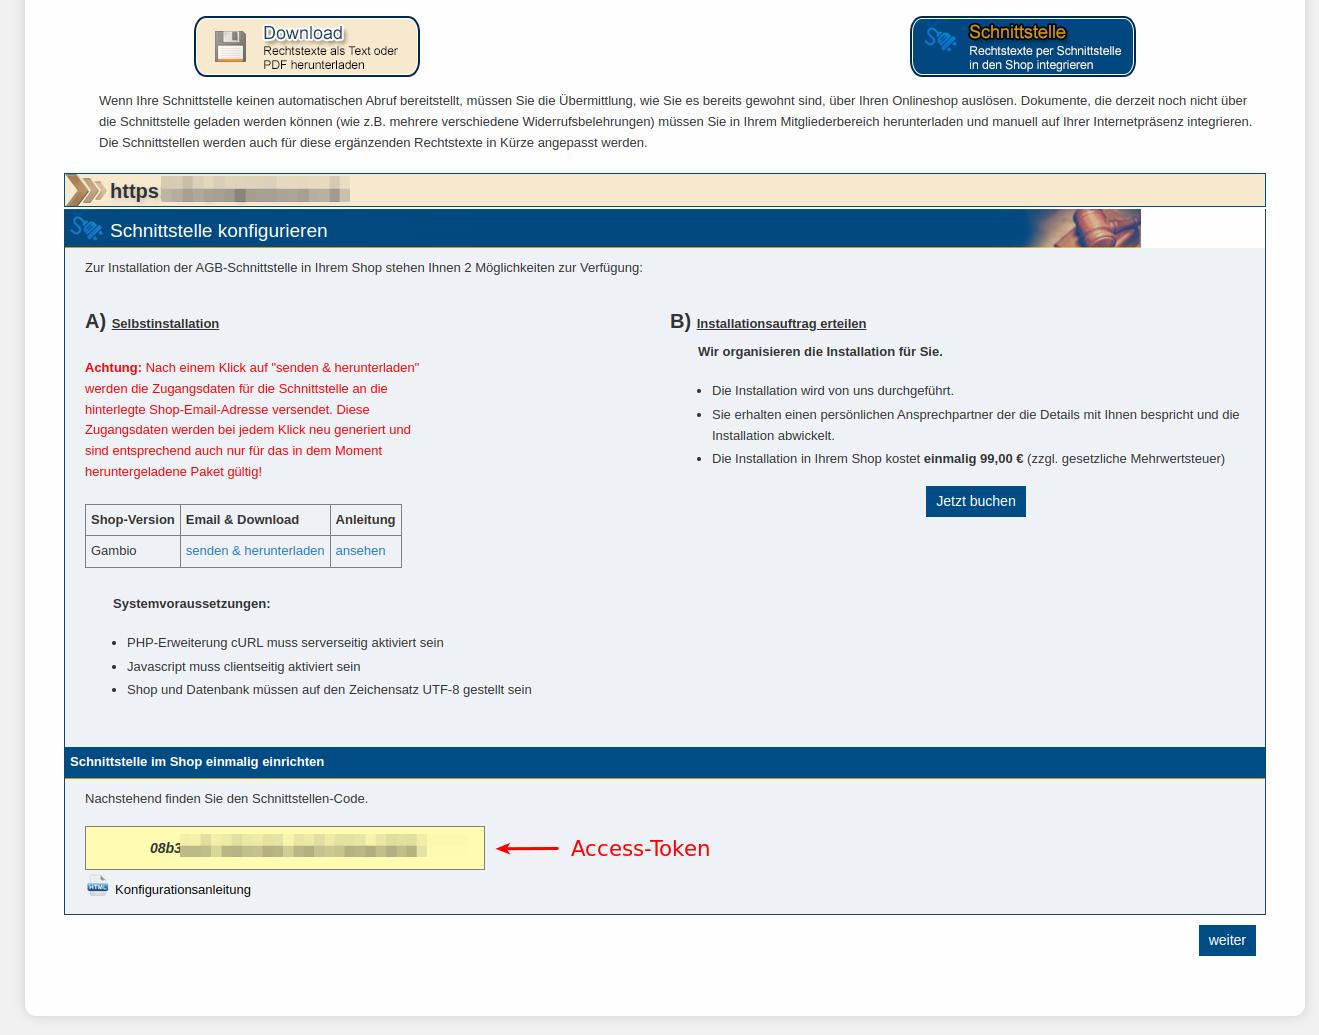
On the last page you then also have the option of booking an in-depth check if you wish.
Klarna On Site Messaging
Availability
The Klarna On-Site Messaging module is available for shop version 3.13.x and newer and is delivered as part of the Gambio Hub Connector. The module is included from Hub Connector 1.22.x and newer.
Note
The Klarna On-Site Messaging module is only compatible with Themes (Honeygrid and Malibu).
Installation
The module can be found under Modules > Module Center under Klarna On-Site Messaging. Select the entry with the left mouse button and click on Install to install the module.
Configuration
After the installation of the Klarna On-Site Messaging module, the configuration page can be called up via the Edit button.

Activate module
You activate the module by setting the checkmark at Active and saving this setting.
Cookie consent purpose
In order to query a consent of the page visitor in the shop's own Cookie Consent Tool, a purpose created in the Cookie Consent module is to be selected here. You can therefore choose here from use without consent and the purposes already created in the Cookie Consent module.
Code for JavaScript library
This embeds the JavaScript library that fills placements in the page. The module adjusts this code automatically if a control by the Cookie Consent module is configured. You find the necessary code for this in your Klarna account under On-site Messaging -> Installation.
First select the desired merchant ID:

Now the necessary code for the first field in the module is displayed:

Code for various placements
In your Klarna account you find various examples for placements under On-site Messaging -> Placements. Select your country of origin and your language, after which you can select from the placements.

You copy the code into the module in order to have the placement displayed at predefined positions in the shop:
| Code for | Position |
|---|---|
| Product price box top | Is displayed on the product page in the upper area of the price box. |
| Product price box bottom | Is displayed on the product page in the lower area of the price box, in the area where, for example, the banners of PayPal and EasyCredit are also located. |
| Shopping cart top | Display in the upper area of the shopping cart page, between the heading and the shopping cart contents. |
| Shopping cart below summary | Placement below the summary block in the area where other banners and alternative checkout buttons are also located. |
| Footer bottom | Display below the footer contents, above the copyright line. |
Note
Code for info page
This is a special placement that cannot be made explicitly in the module configuration. In order to use this placement, a separate page must be created under Content > Content Manager and the placement code entered as HTML content.
Then save the contents. We recommend clearing the cache under Toolbox > Cache afterwards, so that the display in the shop can take place.