First Steps
Note
This chapter contains recommendations for the first steps with your new online shop. These steps should be carried out after installing your shop. These notes refer to the more detailed explanations in the respective chapters.
Logging in to the shop
Before you can administer your new online shop, you must log in to the system. You define the access data for your administrator account during the installation process.
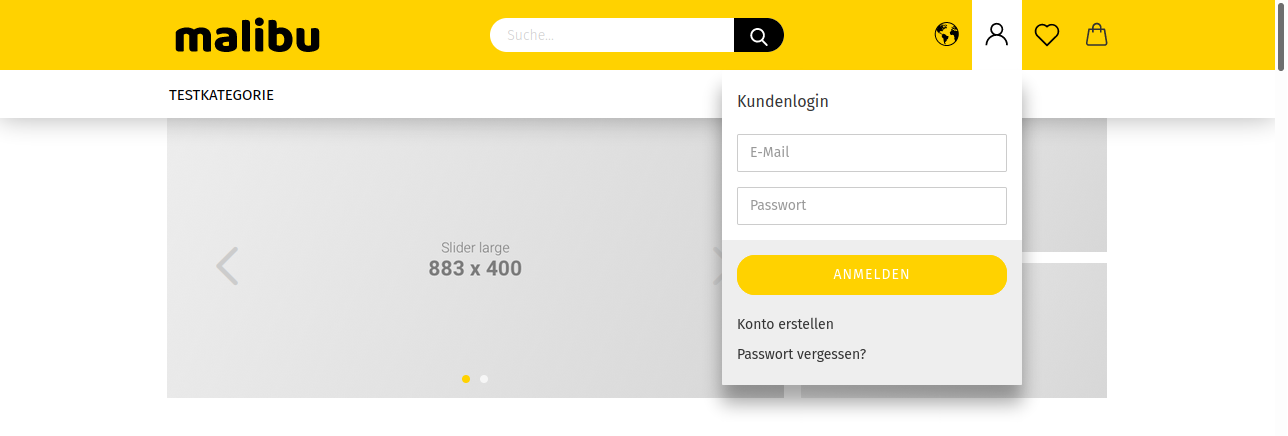
Enter the e-mail address and password defined during installation into the customer login box, which you can reach via the entry in the upper right menu, and click Log in.
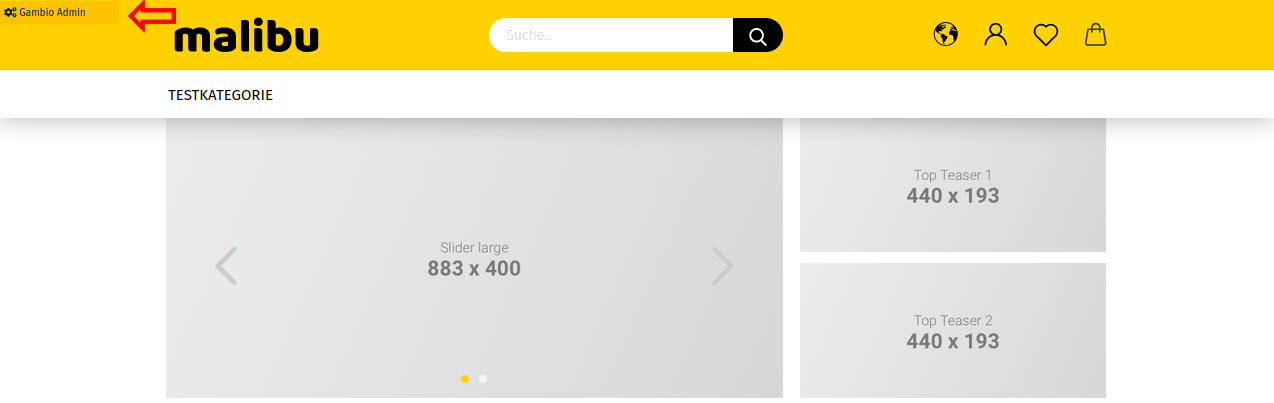
The Gambio Admin button now appears in the upper right menu.
Taking the shop offline
Directly after installation, the shop is not yet suitable for the public. First, the basic configuration must be carried out, the product data inserted and the layout adjusted. Set your shop to offline mode under Content > Shop online/offline. The page displayed in offline mode serves as a placeholder and does not contain a login form. You can call up a special login form for administrators at any time via www.YourShop.de/login_admin.php (replace www.YourShop.de with your actual shop address).
Attention
When working on the shop, it should absolutely be taken offline. If this is not done, the customer is shown, for example, incomplete terms and conditions or test products that are not available for delivery. There is a risk of a warning (Abmahnung) here; a simple note such as This shop is only online for testing purposes. is not sufficient.
Carrying out the basic configuration
Your new online shop must be configured for the first time in various areas after installation. First check all the entries under Settings / Shop. Pay particular attention here to the fields Name of the shop, Owner as well as Country, Region and Business address and telephone number, etc.
Note
After activating the SEO Boost URLs, empty the server caches under Toolbox > Cache. To do this, click the buttons from bottom to top.
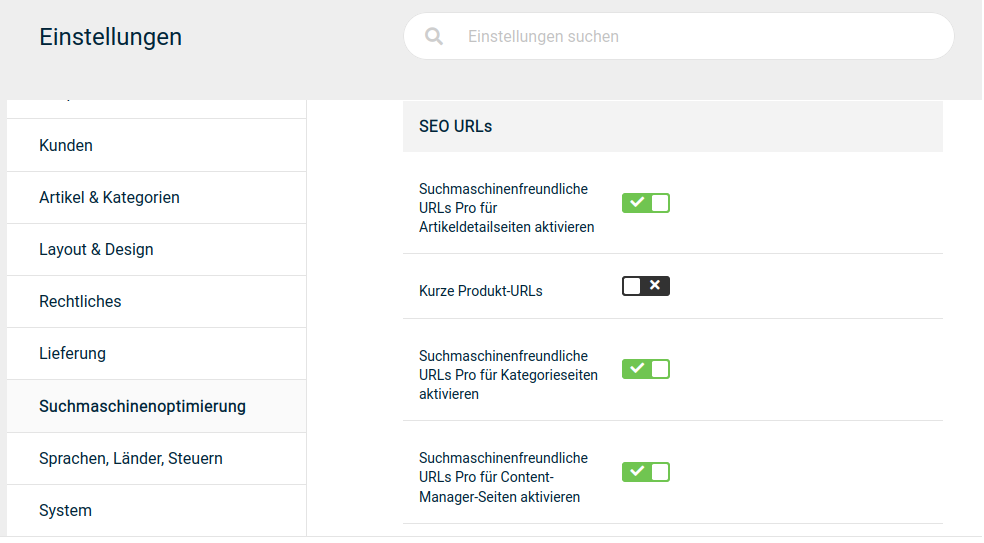
Provided your server allows it, we recommend using the Gambio SEO Boost URLs. Install the SEO Boost under Settings / Search engine optimization / SEO URLs. The SEO Boost URLs simulate static documents from the dynamic shop content and improve the readability of your URLs. The checkboxes cannot be selected as long as the previously mentioned configuration has not been carried out.
Note
When installing the shop system, the basic settings for the tax rates for Germany are created. Shop operators from countries of the European Union (EU) correct the preset tax rates for the tax zone EU. Shop operators from Switzerland and countries outside the EU first create a new tax zone for their country and add new tax rates for this tax zone. You can find more detailed information in the chapter Localization.
Attention
All prices in the online shop must be separated with a decimal point! Therefore always note prices according to the following example: a product is to be sold at 5.95 EUR; in the product entry mask you enter the value 5.95 with a point as the decimal separator in the field Price.
Then install at least one shipping method and one payment module. You can find the payment methods in the Gambio Admin under Modules > Payment methods, the shipping methods under Modules > Shipping methods.
Note
Note for small businesses: Activate the small business regulation before you start entering prices. You activate the small business regulation in the Gambio Admin under Settings / Legal / VAT display as well as under Modules > Summary. Then select the standard tax rate for all price entries.
Note
If you want to offer payment via PayPal, enter the API data you receive from PayPal on the module's configuration page. To do this, go to Modules > Payment methods, select the module PayPal and PayPal Plus and click the buttons Install (if not already done) and Configuration. You can obtain more detailed information about the third-party payment modules from the respective provider.
Entering products
Note
Small businesses should activate the small business regulation before creating products.
If you import your products from an existing shop with the Import Assistant, carry out the import now. If you are installing a shop for the first time, add categories and products via the respective entry masks.
Note
After making changes to the products and categories, empty the respective caches under Toolbox > Cache.
If you want to enter large quantities of products for which you already keep a list, use the CSV import interface to enter products and categories. The CSV import is also suitable for importing product data from your wholesaler. Note that CSV files from third parties usually have to be adapted to the format used by Gambio.
Legal matters and information
Attention
Finally, have the following step checked by your legal and/or tax advisor! Incorrect or faulty texts carry the risk of a warning (Abmahnung)!
Every shop on the internet must fulfill certain information obligations. You can store these texts in the content pages provided for this purpose under Content > Content Manager.
If you want to store additional information, edit one of the existing content pages in the Content Manager or create new content pages. Information pages can automatically be linked in one of the navigations.
Activating SSL in the shop
Attention
This step may only be carried out once an SSL certificate has been set up for your shop domain. If you make the changes before your host has completed the setup, in the worst case your shop will no longer be reachable.
To make the entire shop operable via HTTPS without using a permanent redirection of the domain from HTTP to HTTPS, you must make the following changes.
Please note that a valid SSL certificate for your shop must already be available before SSL activation, as otherwise errors will occur after activation. If you do not have a valid SSL certificate available, please contact your web host directly.
- Connect to your shop via FTP client, for example with FileZilla.
- Change the file permissions (CHMOD) of the two configuration files includes/configure.php and admin/includes/configure.php to 777 so that they become fully writable
-
Open the file includes/configure.php with a simple text editor and edit it as follows:
Before editing:
define('HTTP_SERVER', 'http://www.meinshop.de');
define('HTTPS_SERVER', 'https://www.meinshop.de');
define('ENABLE_SSL', false);
After editing:
define('HTTP_SERVER', 'https://www.meinshop.de');
define('HTTPS_SERVER', 'https://www.meinshop.de');
Note
Please note that http was replaced by https here
define('ENABLE_SSL', true);
Save the change and change the file permissions (CHMOD) back to 444.
-
Open the file admin/includes/configure.php with a simple text editor and edit it as follows:
Before editing:
define('HTTP_SERVER', 'http://www.meinshop.de');
define('HTTP_CATALOG_SERVER', 'http://www.meinshop.de');
define('HTTPS_CATALOG_SERVER', 'https://www.meinshop.de');
define('ENABLE_SSL_CATALOG', 'false');
After editing:
define('HTTP_SERVER', 'https://www.meinshop.de');
Note
Please note that http was replaced by https here
define('HTTP_CATALOG_SERVER', 'https://www.meinshop.de');
Note
Please note that http was replaced by https here
define('HTTPS_CATALOG_SERVER', 'https://www.meinshop.de');
define('ENABLE_SSL_CATALOG', 'true');
Save the change and change the file permissions (CHMOD) back to 444.
-
Empty the entire cache of the shop under Toolbox > Cache.
- The entire shop can now be reached via HTTPS.
Adjusting the layout
Once products and content are created and payment methods and shipping methods are configured, open the shop in edit mode under Content > Edit theme. In edit mode you can adapt the appearance of the supplied theme to your needs.
Testing
Finally, test all relevant functions. Carry out test orders with test customers from each customer group used. Test each shipping method and each payment method for correct functioning. When no more problems and errors occur during testing, the basic configuration of your shop is complete.
Taking the shop online
Once you have completed the basic configuration of the shop and the entering of products and adjusted the layout, your shop is ready to be published on the internet. Put the shop back online under Content > Shop online/offline and register it with the common search engines.
If you have updated an older shop to the current shop version, before going online you should also take the old shop offline and first switch over the shops as described in the instructions for the Import Assistant. Only then switch the new shop online.